


Sherry loves a scorching cup of pour over espresso, however I normally select an iced *one thing* for my each day espresso. And most days it’s a chilly brew that I make at dwelling. For over 2 years now, I’ve relied on this chilly brew maker to maintain a scrumptious batch on the prepared in my fridge. So I’ll shortly stroll you thru precisely how I make selfmade chilly brew, and why it’s my technique of alternative.
As we famous in our pour over espresso information, Sherry and I aren’t professional baristas and even persnickety espresso connoisseurs – however we worth a scrumptious and recent tasting espresso that we are able to make at dwelling. We each prioritize easy & easy brewing strategies that may be profitable with out treating espresso like an intricate science. No shade if in case you have the time & vitality to take espresso making to an olympic stage, however this information is for the typical dwelling espresso drinker who needs some good, dependable chilly brew with out stressing over the small print.
Our Chilly Brew Espresso Provides
The most effective components about making chilly brew is it require only a few provides. In actual fact, aside from espresso grounds & water, this image reveals every little thing we use. And the chilly brew maker itself is lower than $25. We even bought it on sale for $16 – and on the time of penning this, it’s marked right down to beneath $14!
The chilly brew maker itself contains every little thing you want, together with a reusable filter. So it’s additionally a really sustainable system that creates no waste, aside out of your used espresso grounds.
Chilly Brew Espresso – Video Information
This step-by-step video information particulars how Sherry and I every make our most well-liked espresso. The chilly brew maker tutorial begins on the 2:30 mark if you wish to skip forward!
NOTE: You can too watch this video on YouTube.
What Is Chilly Brew Espresso?
Chilly brew is a coffee-making technique that’s typically referred to as chilly water extraction or chilly urgent. Just like the names recommend, the principle distinction from different methods is the water temperature. As a substitute of quickly filtering scorching water via floor espresso, chilly brew includes steeping these grounds in chilly or cool water for an prolonged time interval – normally 12 to 24 hours. And obviouslly, the tip result’s greatest loved chilly or with ice!
Chilly Brew vs. Iced Espresso
Chilly brew is commonly confused with iced espresso, however the two are completely different course of that produce completely different outcomes. Iced espresso is brewed like common espresso (utilizing scorching water) then chilled – both via refrigeration or pouring over ice. This achieves a sooner outcome than chilly brewing, however the melted ice can result in a watery consistency or diluted taste if you happen to’re not cautious.
Chilly brew additionally tends to lead to extra caffeine and bolder, sweeter flavors. The extended brew time cuts down on among the bitter or extra acidic tastes in common espresso, leading to what many describe as a smoother and tastier outcome. And since bigger parts of grounds are sometimes used for chilly brew, the caffeine focus is normally larger. That’s why some folks will dilute chilly brew with water earlier than consuming, so that you get extra on your efforts.
Right here’s why I make common chilly brew for my each day espresso:
- I choose iced espresso drinks vs scorching ones
- It’s straightforward to make (aka: onerous to mess up)
- It may be made in batches
- It’s sweeter & stronger than iced espresso
Steps To Make Chilly Brew At Residence
Making selfmade chilly brew is loopy easy, particularly as a result of I take advantage of this pitcher that may make one huge 52 ounce batch at a time. Simply you should definitely begin your brew 12 to 24 hours earlier than you propose to drink it (just like the evening earlier than).
- Assemble the chilly brew maker
- Add espresso grounds to the filter
- Pour water over the grounds
- Steep for 12 – 24 hours
- Serve over ice
- Add creamer to style
Now let’s take a better take a look at these steps.
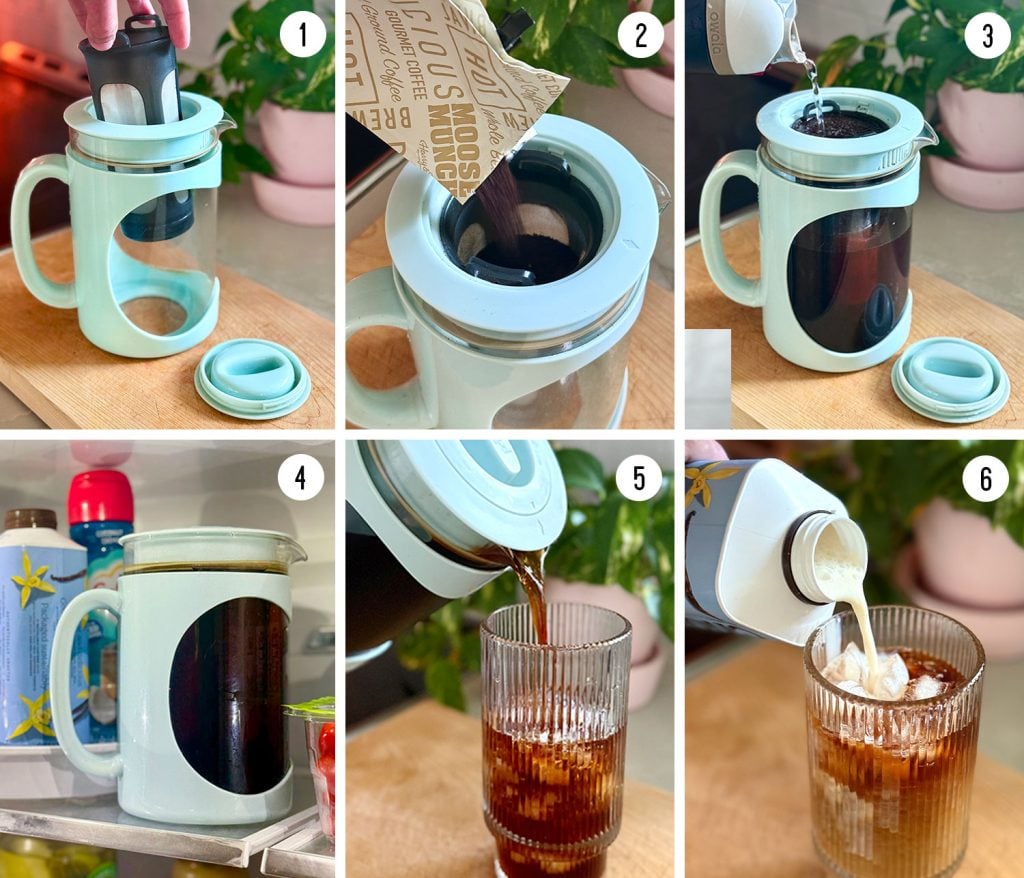
1. Assemble the Chilly Brew Maker
This chilly brew maker has 4 items which simply match collectively (and are available aside for cleansing):
- Dealt with Glass Pitcher
- Reusable Mesh Filter
- Lid
- Twist-On Cap
To start, place the high quality mesh filter via the opening within the lid and snap it into place.
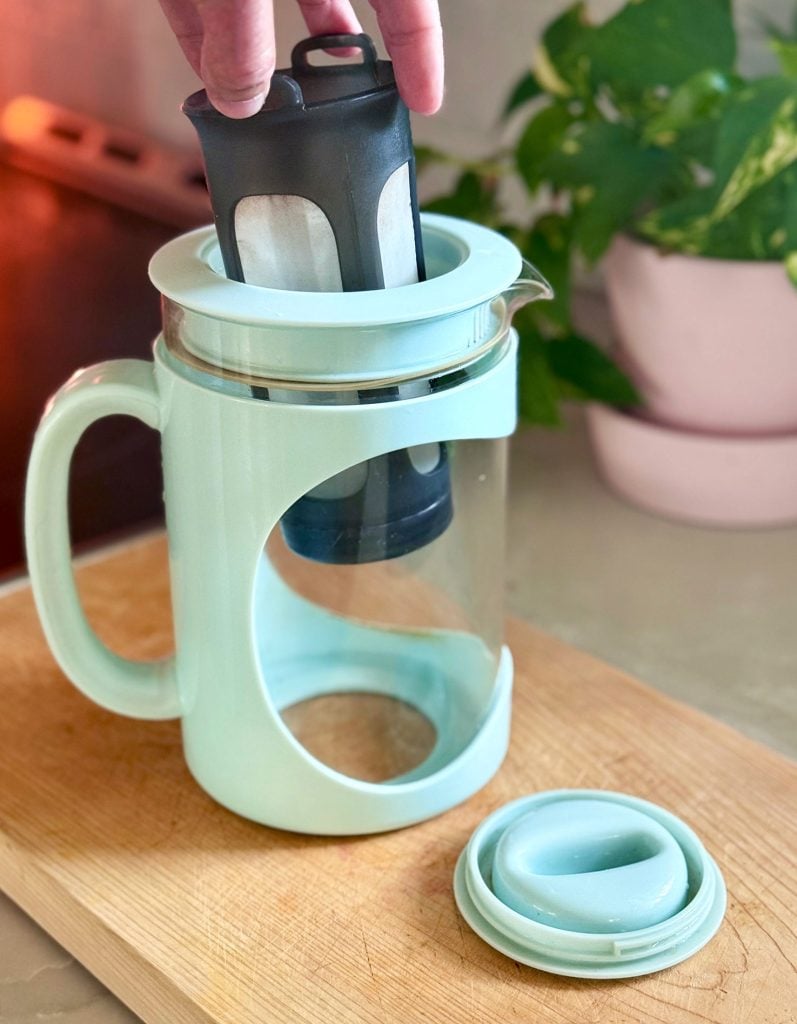
All items are dishwasher secure, so it’s additionally straightforward to dissamble and clear between batches.
2. Add espresso grounds
Now, pour floor espresso beans into the filter. Course floor espresso is usually really useful for chilly brewing. Nevertheless, I normally use pre-ground espresso from the grocery retailer, which usually comes medium floor. Simply keep away from high quality gounds, which can result in overextraction and enhance bitterness. Advantageous grinds might also seep via the mesh filter, ending up in your brew.
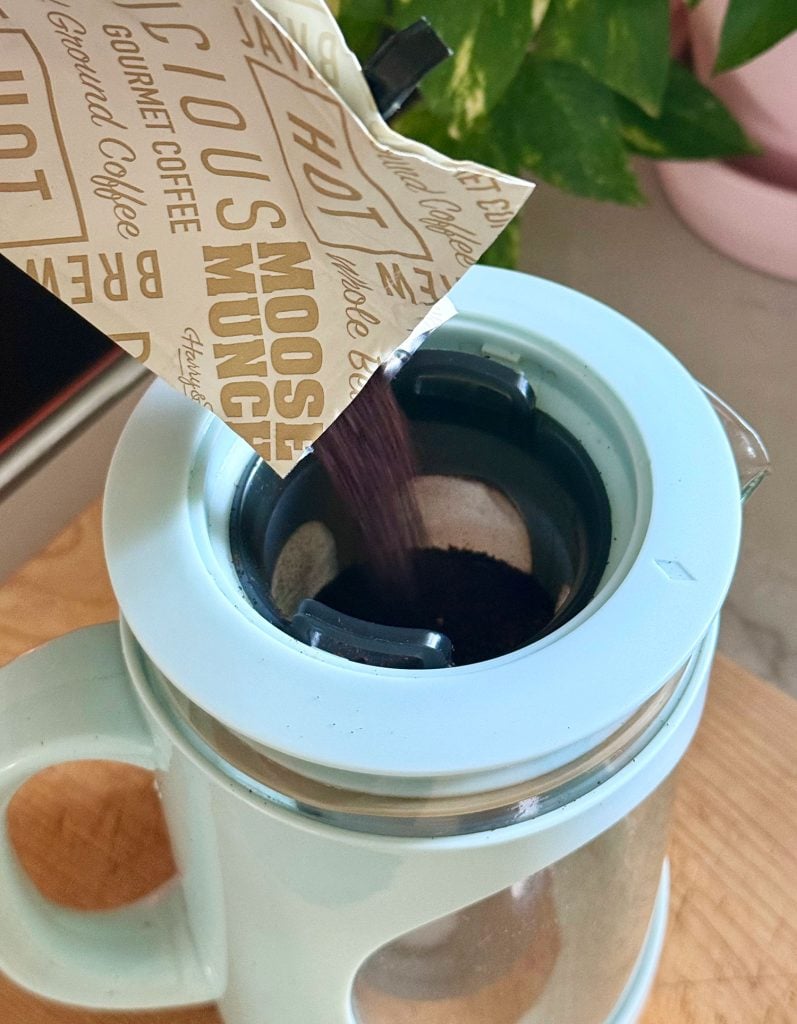
I don’t measure out my grounds. I simply fill the filter about 75% full. You’ll be able to add roughly, relying on how robust you want your espresso. We’ll speak about coffee-to-water ratios extra beneath.
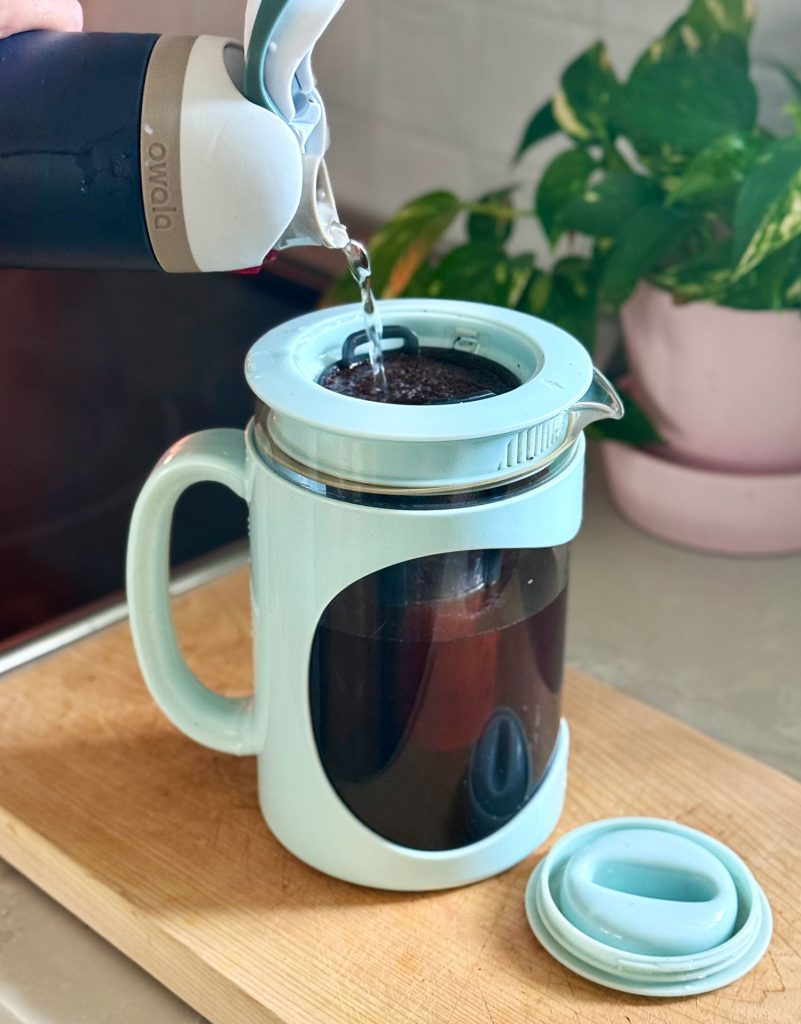
3. Pour water over the grounds
Subsequent, fastidiously pour water into the filter, full saturating the grounds. I take advantage of chilly filtered water from my fridge dispenser, however room temperature water out of your faucet is ok too. I wish to pour from my water bottle for higher management (slower velocity, much less splashing, and so forth). Chances are you’ll have to pause occassionally to let the water filter via earlier than persevering with. Fill till the carafe is full or the grounds are absolutely submerged.
What’s the very best coffee-to-water ratio for chilly brew?
Most chilly brew is made at a ratio between 1:4 and 1:8. This implies 1 half espresso grounds to 4 to eight components water. That is greatest measured by weight (grams) however going by quantity (cups, tbsps, and so forth) works nicely sufficient too. The decrease the second quantity, the stronger your brew will likely be.
However once more, I don’t measure something. Partly as a result of I’m not that choosy and partly as a result of this chilly brew maker does the give you the results you want. The filter holds 1 cup of grounds. The carafe holds 6 cups of liquid. So filling each creates a roughly 1:6 ratio, proper in the course of the really useful ratio vary.
I recommend beginning with this 1:6 ratio (every little thing full) and adjusting as desired with future batches. I’ve discovered I’m pleased solely filling the filter 75% full. The chilly brew continues to be a lot robust and I don’t have to purchase espresso as typically.
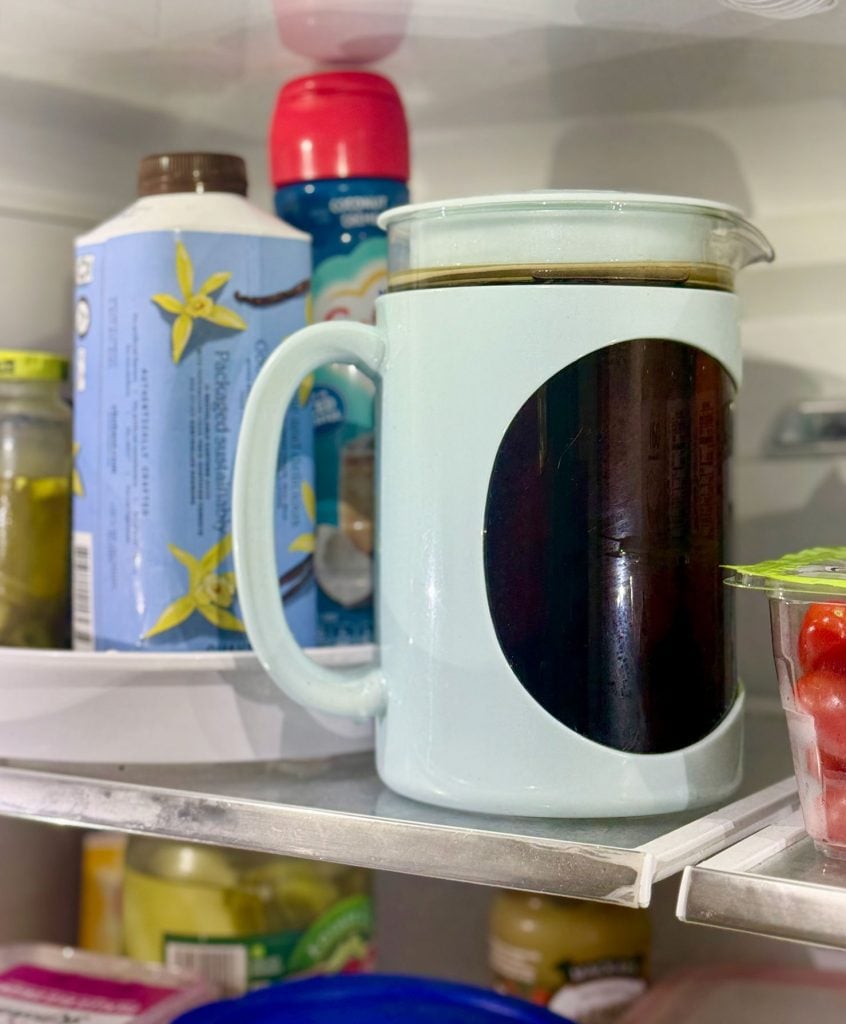
4. Steep for 12 – 24 Hours
Now, steep your brew for 12 to 24 hours, both at room temperature or in your fridge. I wish to put mine within the fridge for comfort (it’s out of the best way & able to drink chilly). Leaving it out at room temperature will velocity up extraction, making it prepared nearer to that 12 hour mark.
Steeping too lengthy can enhance bitterness, so bear in mind – it’s greatest to take away the grounds after 24 hours. To do that, simply carry out the mesh filter and eliminate the grounds. After I end consuming a batch, I normally begin a brand new one straight away so it will likely be prepared the subsequent morning at my regular time. Every batch I make, lasts about 5 days after which I make one other batch (simply bear in mind to take the grounds out on the 12-24 hour mark so that you’re not brewing it for five days – that may not style good).
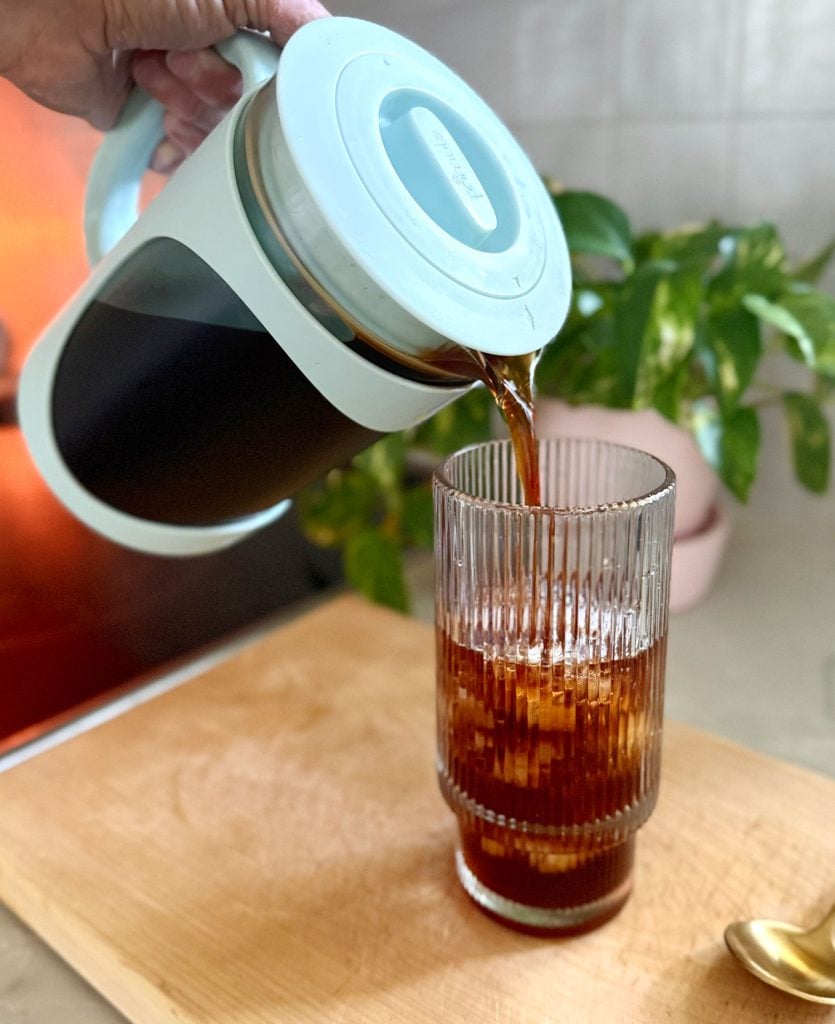
5. Serve Over Ice
Chilly brew is taken into account a focus, so many individuals select to dilute it earlier than consuming. This may be executed with water, ice, milk, cream, or a mixture of these. Some even dilute it as a lot as 1:1 (one half chilly brew, one half water). That is actually simply private choice. I personally select to simply pour it over a glass stuffed midway with ice, leaving room for cream.
Chances are you’ll need to give the chilly brew a fast combine with a spoon earlier than pouring, because the extra concentrated liquid tends to sink the underside.
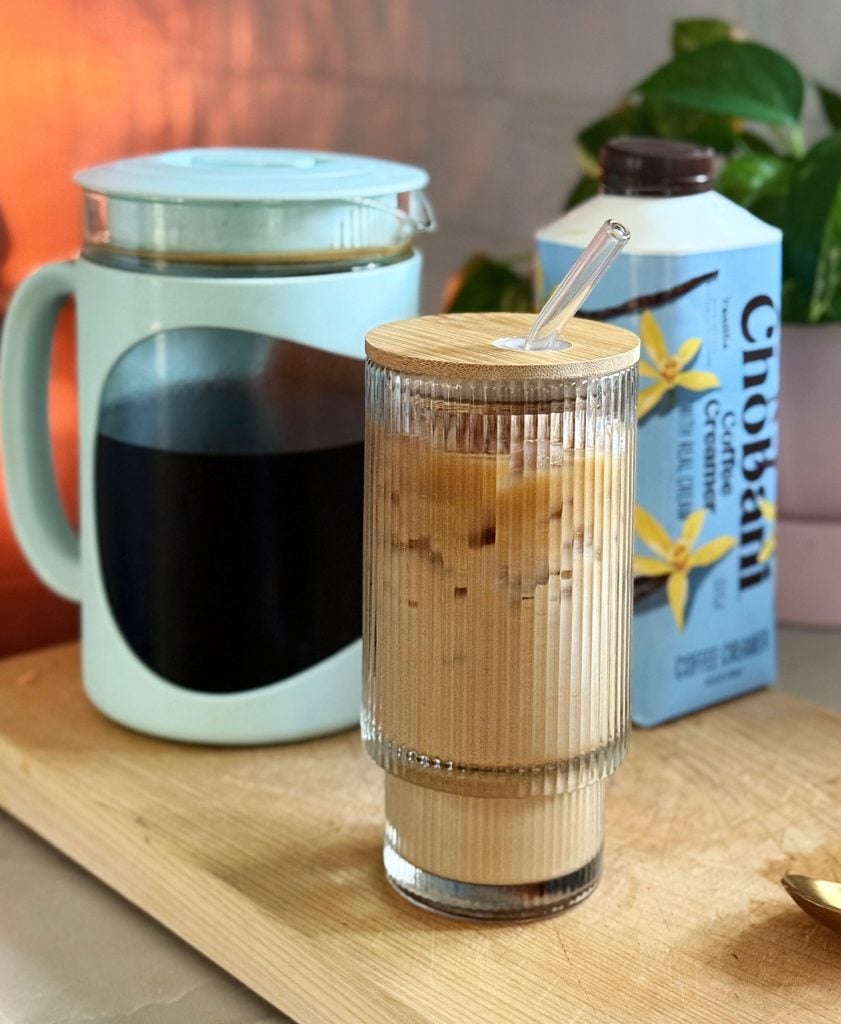
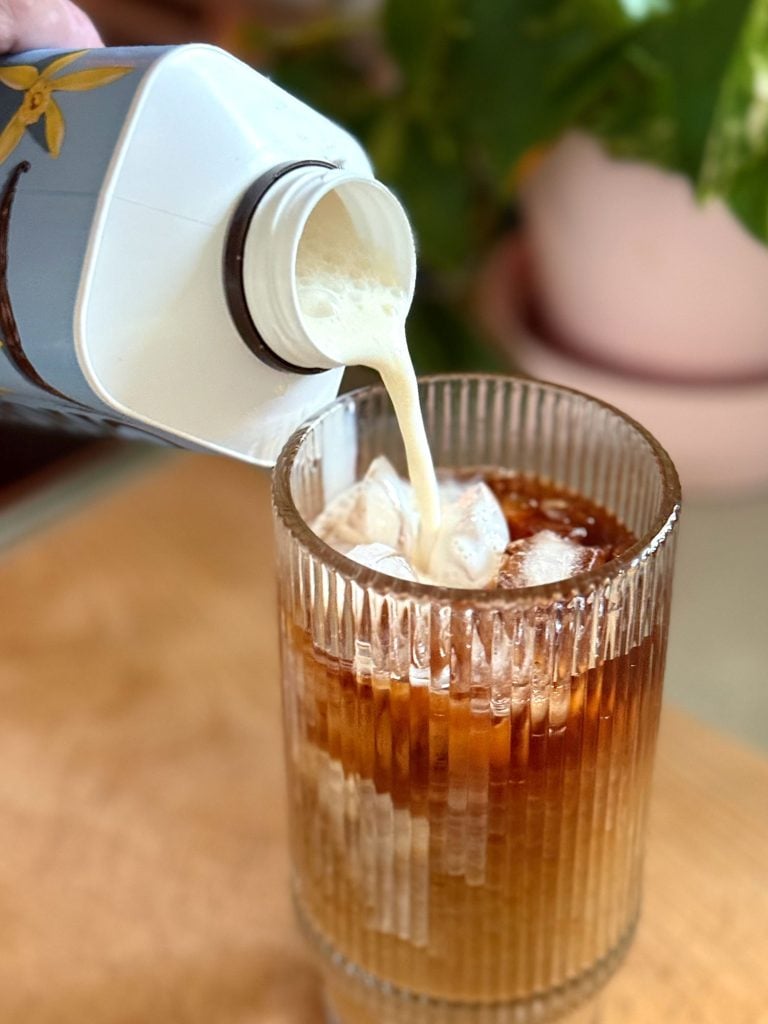
6. Add creamer to style
I like so as to add a few splashes of flavored creamer to my chilly brew. Since syrups and sugars don’t dissolve nicely in chilly liquids, I discover that is one of the best ways so as to add taste & sweetness to chilly brew. I normally purchase Chobani Creamer, and that is my favourite taste.
Extra Chilly Brew FAQs
What number of glasses of chilly brew does it make?
I sometimes get about 5 servings out of 1 batch. Chances are you’ll get roughly relying in your consuming glass & how a lot you dilute the focus. The pitcher holds about 52 fluid ounces of chilly brew. Bear in mind: you don’t BREW it for five days, you simply depart the espresso filter in for the primary 12-24 hours, at which level the chilly brew is able to drink. So that you’ll need to take away the espresso filter from the chilly brew maker, and also you’ll then have about 5 days of chilly brew that’s able to drink within the fridge.
How do you clear the chilly brew maker?
All the items are dishwasher secure, together with the mesh filter. Nevertheless, I sometimes hand wash every little thing as quickly as I end a batch. That method I can begin a brand new brew straight away with out ready to run the dishwasher.
What’s nitro chilly brew?
The time period “nitro” refers to an additional step the place chilly brew is infused with nitrogen fuel. The identical chilly brewing technique is used, however the addition of tiny bubbles give nitro chilly brew a smoother and creamier end. Many examine it to the texture of a draft beer like Guinness (it even has a foamy high layer). That’s why you sometimes see it allotted from a faucet at a espresso store. Nitro chilly brew could be made at dwelling, however it requires a particular dispenser and nitrogren canisters – which could be expensive and complex.
What’s chilly foam?
Chilly foam is a fluffy aerated milk layer added to the highest of chilly drinks like chilly brew. It’s an alternate method of including taste, sweetness, and creamy texture to your drink. I heard somebody joke that chilly foam is simply “rebranded” whipped cream and there’s some reality there – it tastes like a candy marshamallow topping to me.
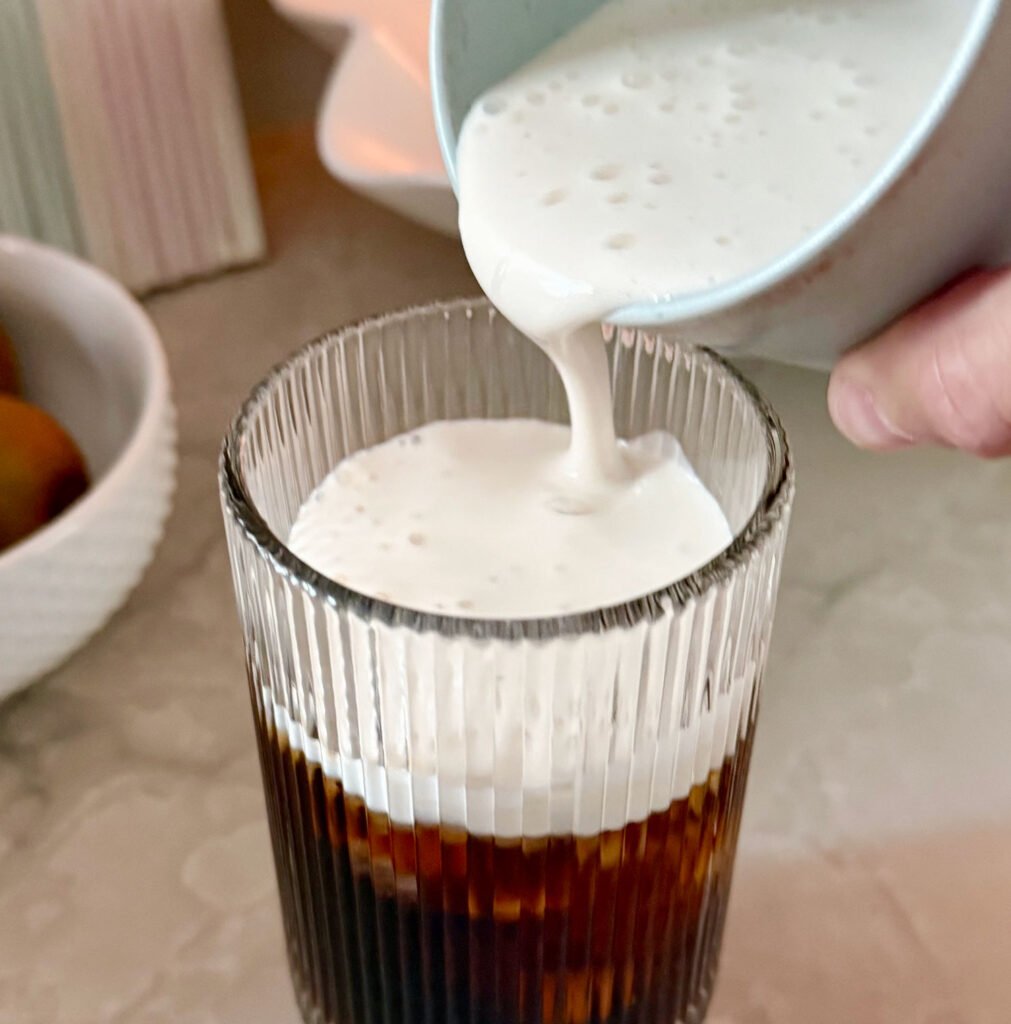
I make chilly foam at dwelling with this $9 milk frother. I simply use my Chobani creamer, however you may also combine 3 tbsps of heavy cream, 2 tbsps of milk, and 1 tbsp of flavored syrup. Then froth it in a separate cup and pour atop your chilly foam. We’ve additionally frothed vanilla oat milk and each Sherry and I feel it’s scrumptious.
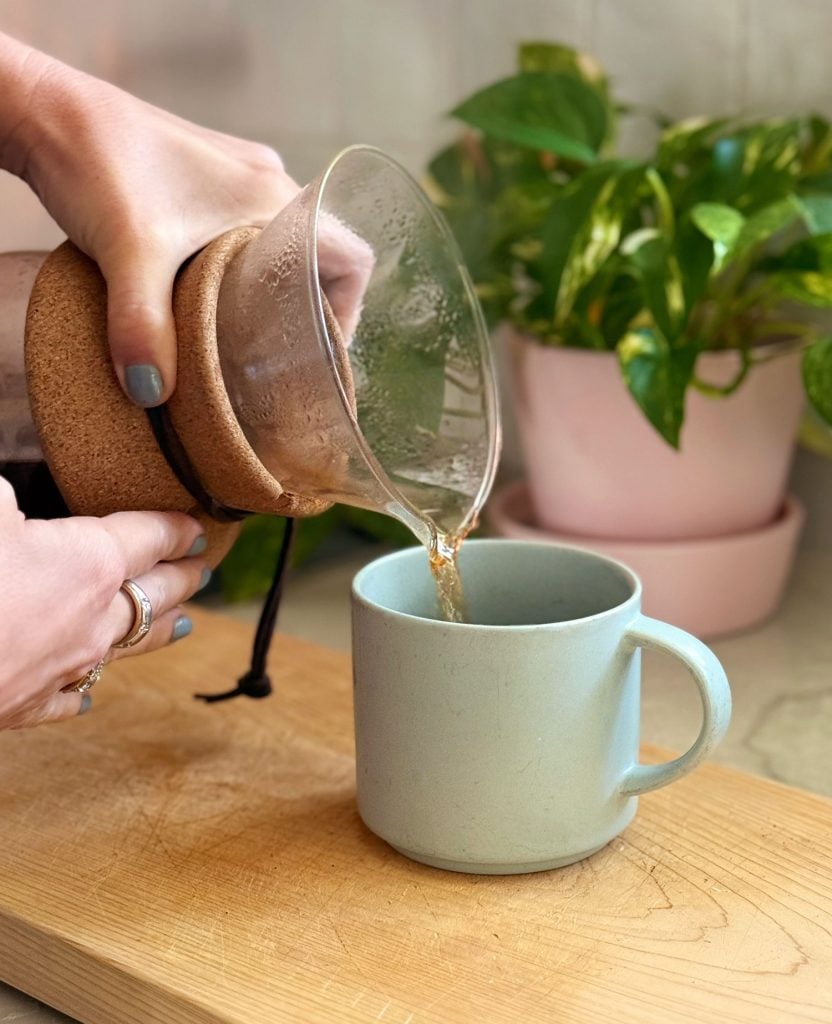
Need Sizzling Espresso As a substitute?
When you’re extra of a scorching espresso individual, you possibly can take a look at our information to creating pour over espresso at dwelling. Pour over can sound intimidating, however it’s tremendous straightforward and specialists agree that it produces a greater tasting cup. We actually love that it’s much less bitter and extra recent tasting than every other selfmade scorching espresso we’ve tried.
*This put up incorporates affiliate hyperlinks, so we might earn a small fee whenever you make a purchase order via hyperlinks on our web site at no further price to you.
")

")


")
