


[Content from FWW #14, p. 66]
See the PDF for higher-quality photographs.
Carving incised lettering is a precious ability within the repertoire of knowledgeable woodworker and likewise an instructive observe for the newbie. Its decorative impact has many purposes, and its visible attraction is common. Incised letters are the other of reduction and are minimize straight into the wooden with out utilizing a router; it’s really a type of chip carving.
These wishing to take up the work want solely a small assortment of chisels, a mallet, a pencil, and a great piece of wooden. The instruments used on the signal proven right here have been a 1/2-in. and 1-in. #1 firmer chisel; a 3/4-in. #3; a 3/4-in. #4; a 3/4-in. #5 and a 1/2-in. #5 fishtail; a 1/2-in. #6; a 3/8-in. #10; and a V-tool. Beginning out, you’ll want a V-tool and several other sizes of flats (firmers). From there, you want two sizes every of #3. 4, 5, and 6., say 3/8 in. or 3/4 in., and one every of #7, 8, 9, and 10, in numerous widths. The faster gouges are usually not a lot referred to as for in incised lettering, but the event will come alongside when they’re simply what is required.
It’s troublesome to suggest a really all function set. I favor shopping for instruments individually proper from the beginning. High quality slightly than amount is important; nothing is worse than the poor metal and terrible handles that are available low-cost units. Studying to carve with a couple of instruments stretches the carver’s creativeness and talent. An excellent assortment of chisels is often constructed up progressively.
Letter design can range extensively, however nearly at all times must be drawn out for every job. Subsequently, good fashions ought to be studied. As reference books, I significantly suggest Writing and Illuminating and Lettering by Edward Johnson, Italic Calligraphy and Handwriting by Lloyd Reynolds, and Historical past and Strategy of Lettering by Alexander Nesbitt. These authors are well-known designers and lecturers; their data is useful for reduction carving in addition to incised carving initiatives. Often, fashionable graphics may be imitated, and draftsman’s switch letters are sometimes good.
Sharp, correct work during will guarantee success in incised carving, even on the primary attempt. Pace and boldness are literally a bonus—one certain hit produces a greater floor than a lot of puttering. The letters within the signal proven took me about ten minutes every to carve.

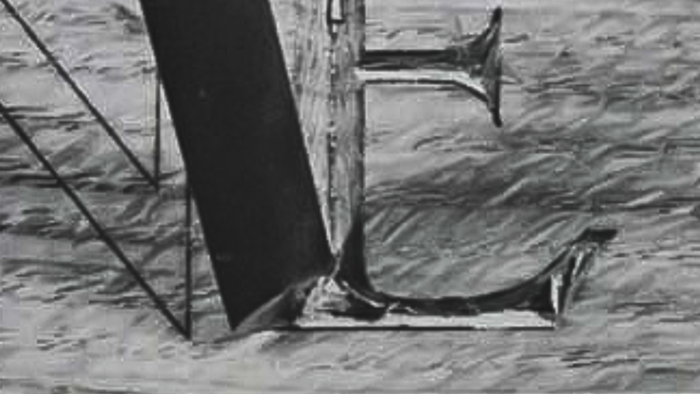
1. For this signal, I used roman capitals and italics. It appears to be like each formal and casual, the correct accent. I began with the board sized up, and sketched in with a broad pencil. This was traced for a greater define, after which in a number of copies on the drawing board, labored up right into a properly proportioned drawing. This was a strategy of fixed, gradual correction. In these tracings, in addition to the laying out on the wooden, sharp, correct strains are important.The wooden to be carved ought to be as straight-grained as doable, in order to be predictable. Radial grain is superb (that is quartersawn crimson oak) and may be relied upon to not warp open air. The board ought to be totally planed and scraped earlier than carving; it shouldn’t be sanded, nevertheless, as a result of the abrasive left within the pores of the wooden will.boring the instruments.

2. The aspect surfaces of incised letters slant down at a uniform angle to satisfy in the course of the letter width. A middle line drawn on the wooden might give the concept.

3. A pointy chisel is held on the road, on an angle, and hit with the mallet. Lower alternate sides, at a relentless angle, till they meet cleanly on the middle. One or two faucets with the mallet might be ample. The minimize chips ought to fall out; prying with the chisel destroys the highest fringe of the letter.

4. On the corners, the chisel should be held out to keep away from damaging the intersecting wall. All sides slant in. Misjudging it is a frequent problem.

5. It is very important grasp the cease minimize. The breakout from the wedging chisel should be anticipated by a minimize on the opposite aspect to keep away from shedding one thing you need. The middle arrow exhibits the place the tip of the wooden contained in the letter has damaged off. This time it was moved by the again of the chisel, as a result of it was weaker than the bottom I used to be lifting. The opposite arrows present different hazard factors. Glue is certainly the woodcarver’s greatest pal.

6. The serifs are dramatic, being curved, and comparatively simple to carve. Right here, a medium #5 device is used upside-down, one nook on the middle of the present V and the opposite close to the specified level of the letter. An identical minimize is made on the opposite aspect utilizing a #6, as dictated by the design. A minimize throughout the tip with a small flat, and many of the work is completed.

7. An E is carved in the identical method. The slant of the letter sides stays fixed all through the alphabet. I invariably set up this angle by eye alone, however right here measured it for the reader’s reference: 38° off horizontal. Utilizing the most important chisel sensible promotes straight surfaces.

8. I discover carving parallel to the grain a lot more durable than throughout. The chisel rapidly runs into the wooden, so it’s particularly necessary to observe grain route and strain.

9. Taking the letter down throughout reveals that the slender areas are usually not as deep because the vast areas. Subsequently the horizontals of this E intersect solely the higher aspect wall of the vertical. The centerlines of the 2 components don’t meet. This makes for some conceptual problem, however is rapidly realized.

10. Carving the underside serif requires the #5. as earlier than. I carve the serif curve towards the grain of the letter out. That is simpler to manage and usually leaves a wonderful floor. I carve the opposite method as properly in troublesome grain, but it surely’s more durable to see the place I’m going.

11. The massive flat cuts out the tip wall. Take care to be out of the wooden on the left whereas on the identical angle as the present backside of the letter. The remainder of the cleanup is completed by hand. Reducing with the mallet has labored the letter nearly to the underside, in order that just a few bits and shavings stay. These may be minimize out with out the mallet, with a easy push on the chisel or an occasional faucet with the open palm. Usually, the hand holding the chisel grasps low on the metal, in an overhand place, leaving the deal with uncovered. There may be extra management this manner, as a result of the information is nearer to the leading edge. This holds true whereas malleting as properly. The wrist and maybe the forearm of the hand holding the device ought to relaxation firmly on the wooden.
One other method that’s helpful in cleansing up, particularly on lengthy, straight sections, is tipping the chisel up onto one nook and pulling it towards you want a knife. In any occasion, take care to maintain the again of the chisel mendacity tightly on the aspect of the letter already carved.

12. Curved letters are carved in the identical method, utilizing curved instruments. Holding the chisel upside-down on the within takes some getting used to, and on the skin, your chisel angle has to have in mind the sharpening bevel.

13. It’s useful to carve pushing with the grain, as indicated by the arrows, significantly when cleansing up the inevitable gouge ridges. The letter sides ought to be flat or barely concave.

14. The edges generally change into a sequence of chisel cuts, or rounded over, slightly than a flat aircraft. This drawback is prevented by conserving the again of the chisel tightly towards the work and overlapping the cuts. This manner, the chisel is self-jigging.

15. It takes 4 cuts to form and clear the serif space. The fragile level may be accentuated, as a result of there might be somewhat loss in sanding. The letters themselves ought to by no means be sanded, as a result of sandpaper would destroy the crispness and fill the grain. Floor sanding of the finished signal sharpens up the letter outlines significantly. Generally, a cupboard scraper can be utilized as properly. I don’t suggest planing, nevertheless, as a result of I believe it takes off an excessive amount of of the wooden and the letters.

16. Troublesome areas just like the facilities of those two letters are merely advanced intersections of flat planes. A lot creativeness is required, but when the fixed angle is maintained, all the things progressively falls into place.

17. On small letters in softwoods, the V-tool can be utilized solely. On this job, I used it only for hairlines, as on this Z. I don’t favor its use in cleansing up large letters as a result of it leaves a barely rounded backside that detracts from the crisp look. In any occasion, it ought to be saved very sharp, as a result of one aspect of the device is at all times chopping towards the grain.

18. The chisels for the italics are chosen fastidiously to carefully match the tracing strains. The edges are labored down within the typical method till they meet within the center.

19. I discover this #5 fishtail very useful on little letters. A brass brush with positive wires can be useful in eradicating the final shavings that grasp within the carving.
Tremendous Woodworking Advisable Merchandise
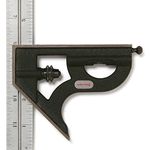
Starrett 12-in. mixture sq.
This correct, sturdy, well-machined, easy-to-read combo sq. is as nice as ever.
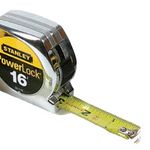
Stanley Powerlock 16-ft. tape measure
With its easy lock, powerful case, compact dimension, and wonderful accuracy, this Stanley tape is ideal for workshop use.
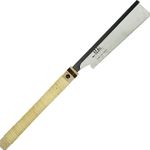
Suizan Japanese Pull Noticed
A flexible noticed that can be utilized for something from kumiko to dovetails. Mike Pekovich recommends them as a woodworker’s first handsaw.
Join eletters as we speak and get the most recent strategies and how-to from Tremendous Woodworking, plus particular presents.
Obtain FREE PDF
if you enter your e mail tackle beneath.
")

")


")
