


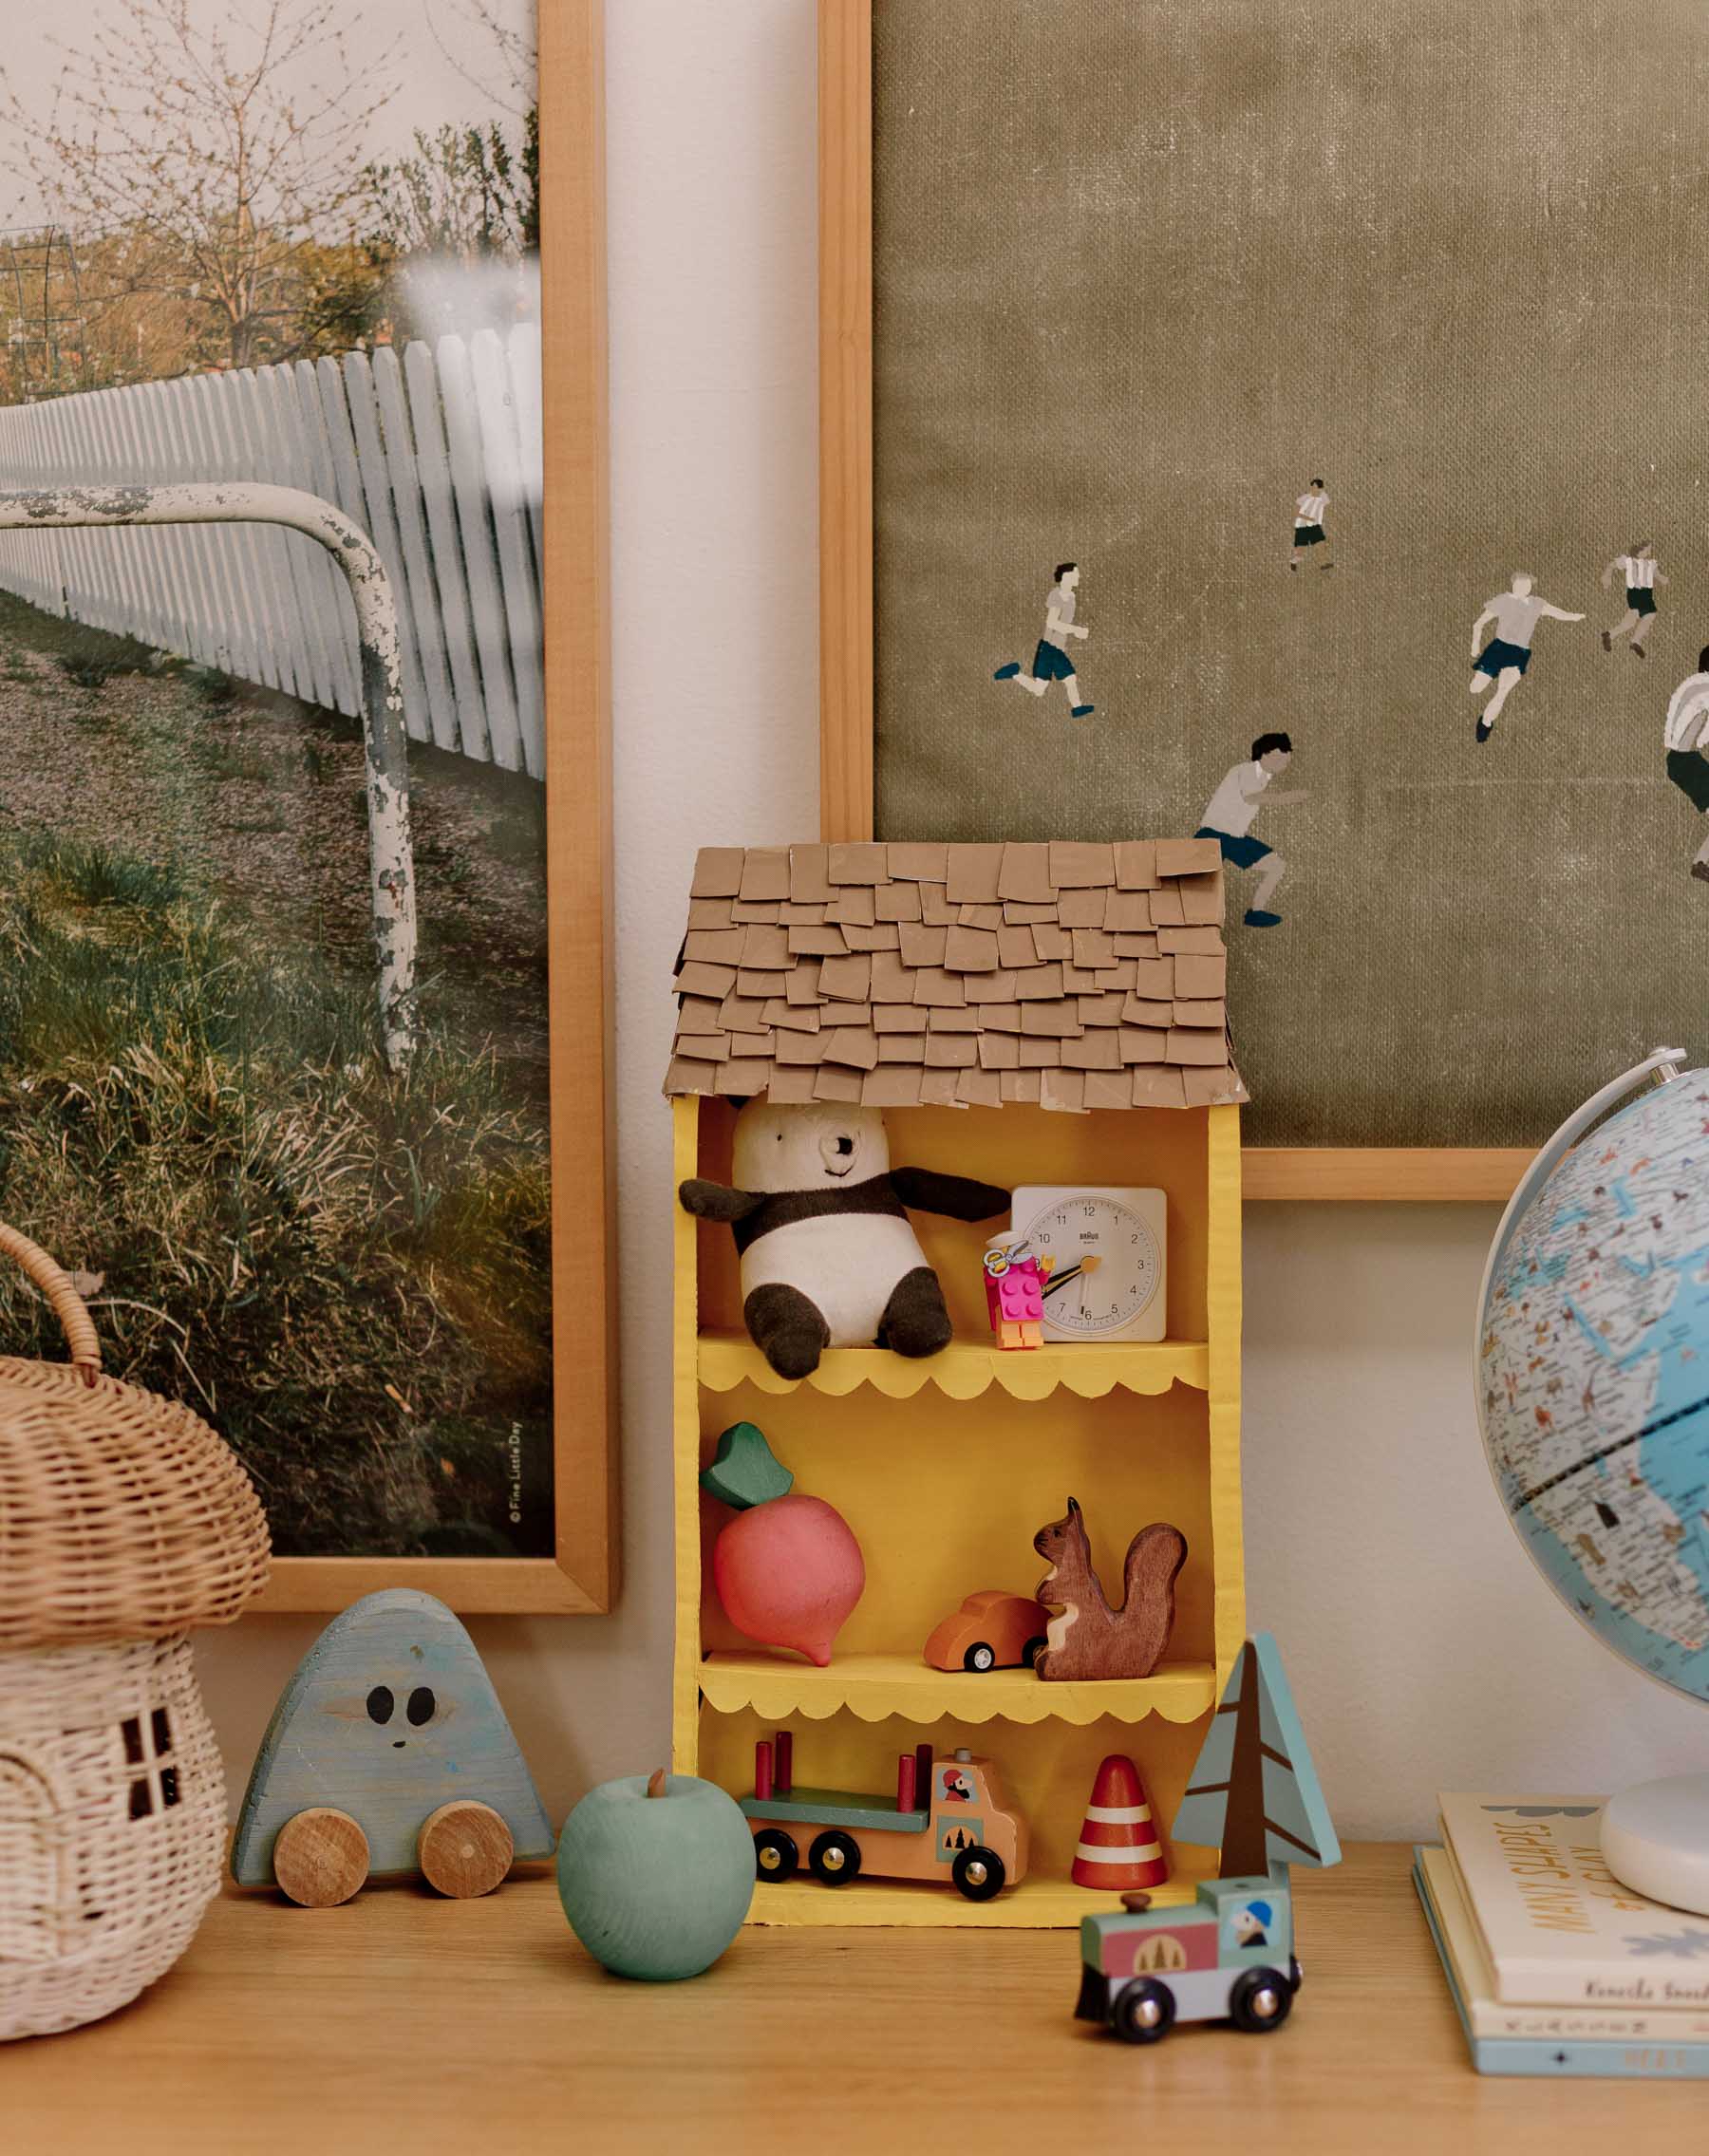
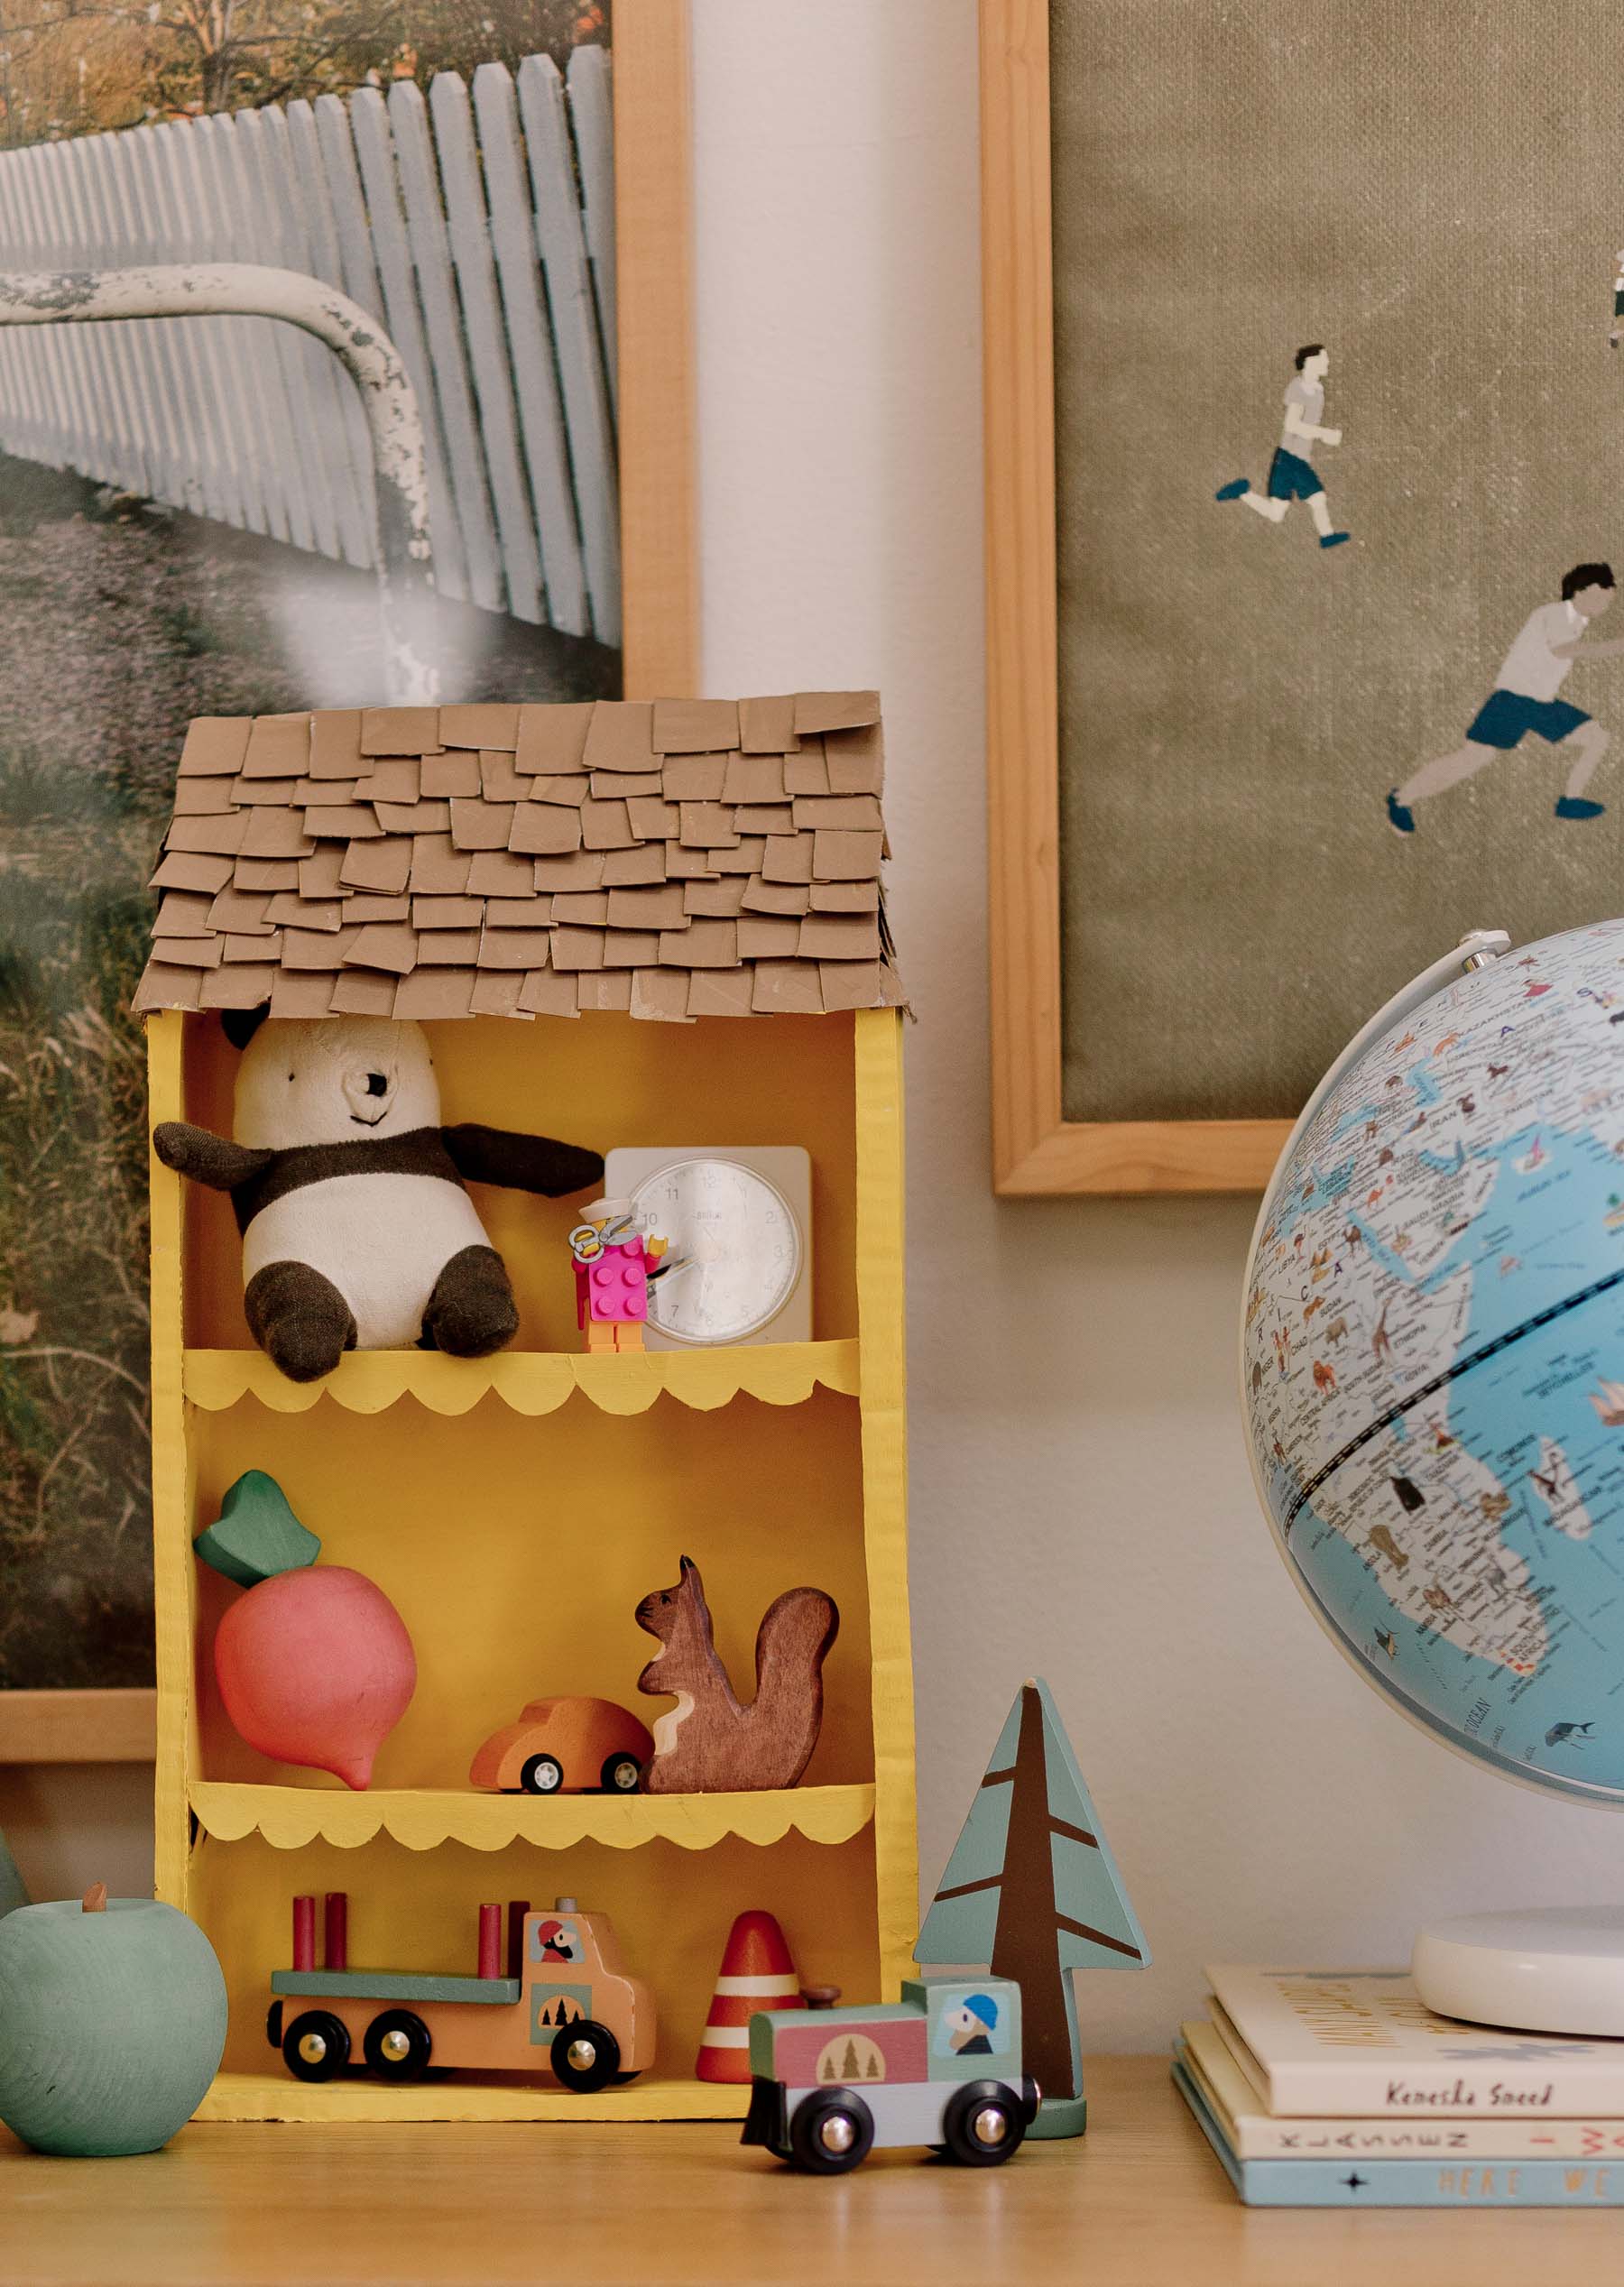
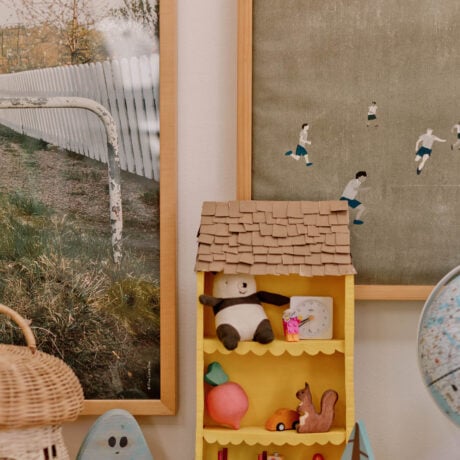
A cereal field turns into a cute cardboard dollhouse / toy storage with just some tweaks.
Flip an empty cereal field into a captivating DIY dollhouse that doubles as toy storage, with just some easy supplies.
I made this mini dollhouse / storage shelf for my son a pair years in the past and I by no means shared the tutorial. However he nonetheless makes use of it 2 years later, so I figured it might be value sharing.
Makes a terrific weekend mission for youths and fogeys to do collectively too!
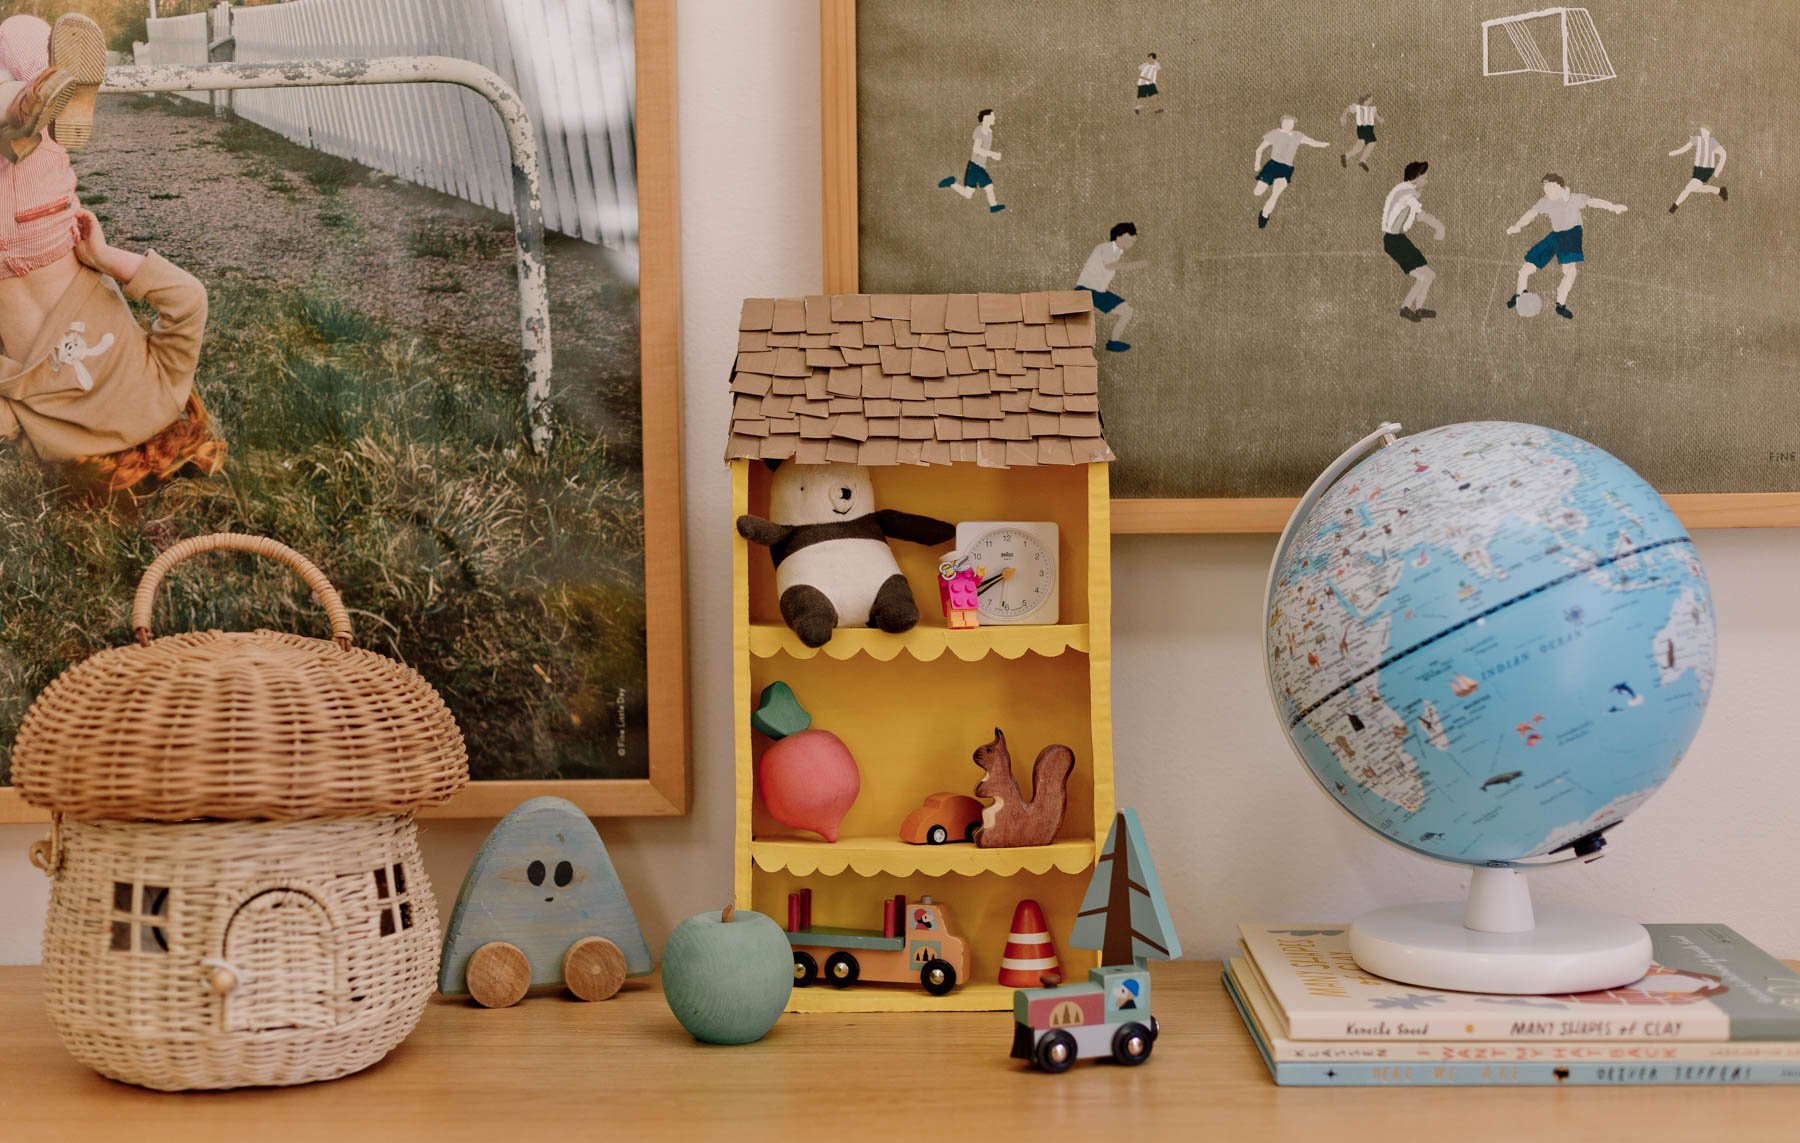
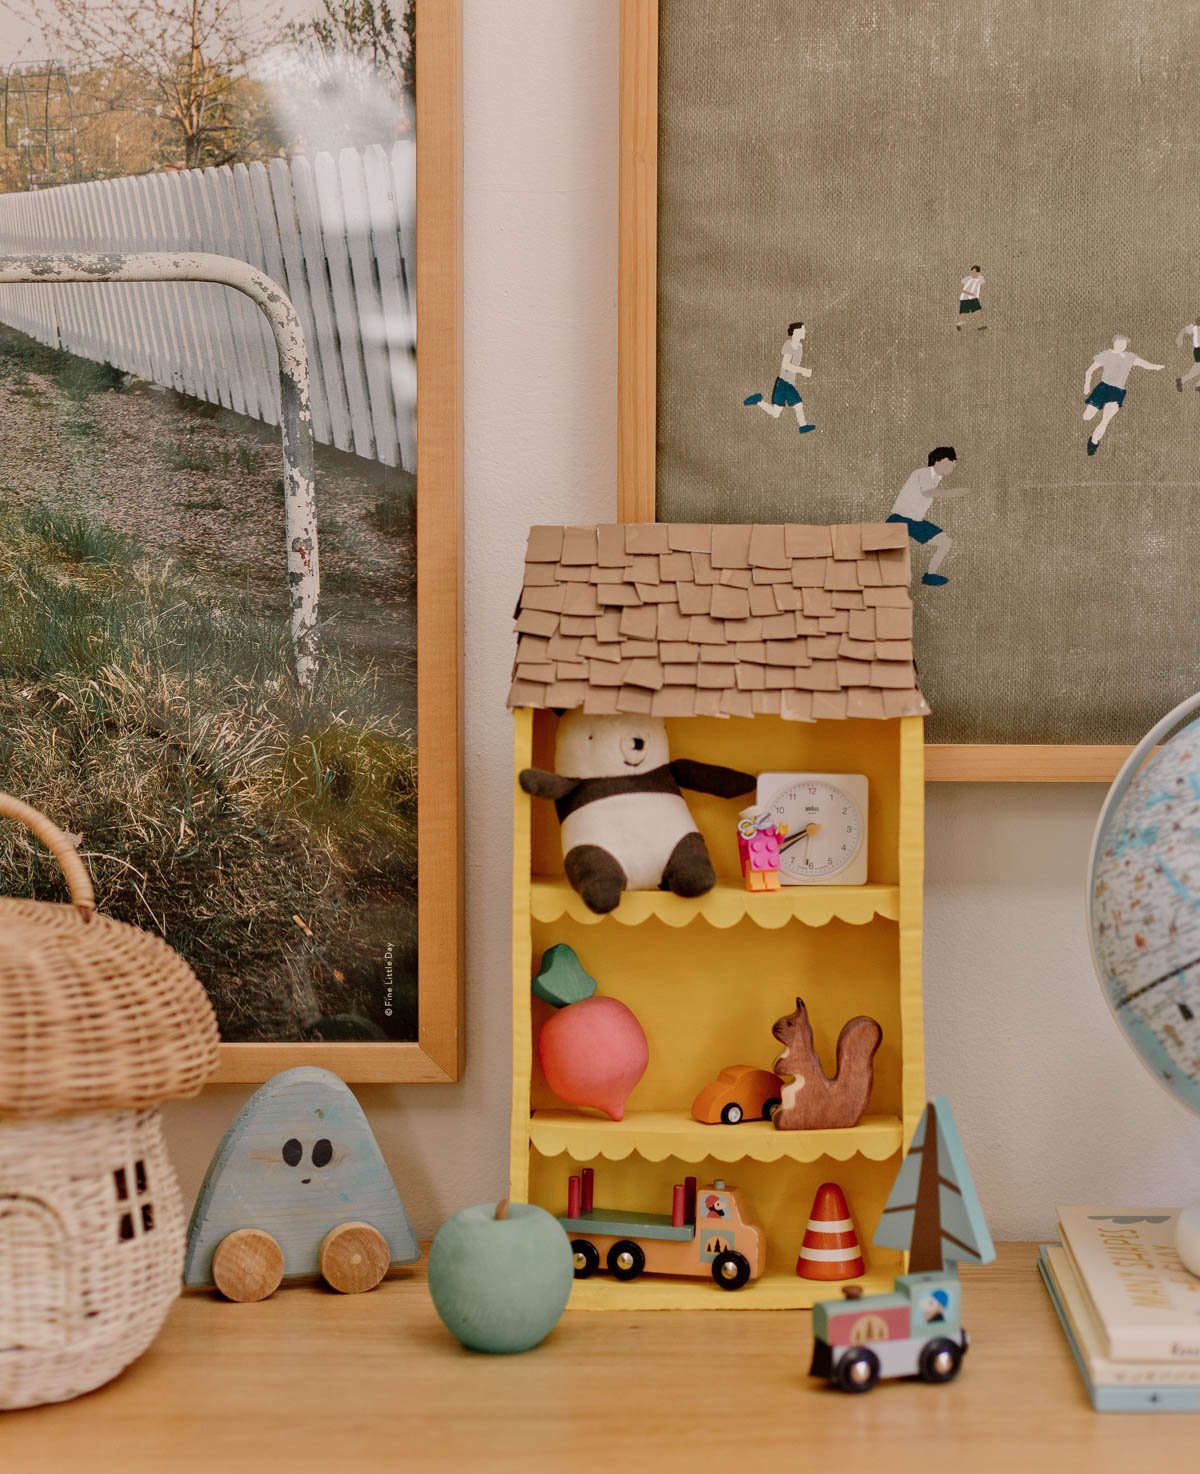
You possibly can mount this DIY dollhouse / shelf on the wall, sit it on the dresser, or stack just a few collectively for a whole neighborhood of storage. It’s an effective way to encourage imaginative play whereas protecting litter at bay. Right here’s tips on how to make your individual cardboard dollhouse…
Provides
- cardboard cereal field
- thicker cardboard (from a delivery field is good)
- scissors
- glue gun
- paint and paint brush
Learn how to make a cardboard dollhouse
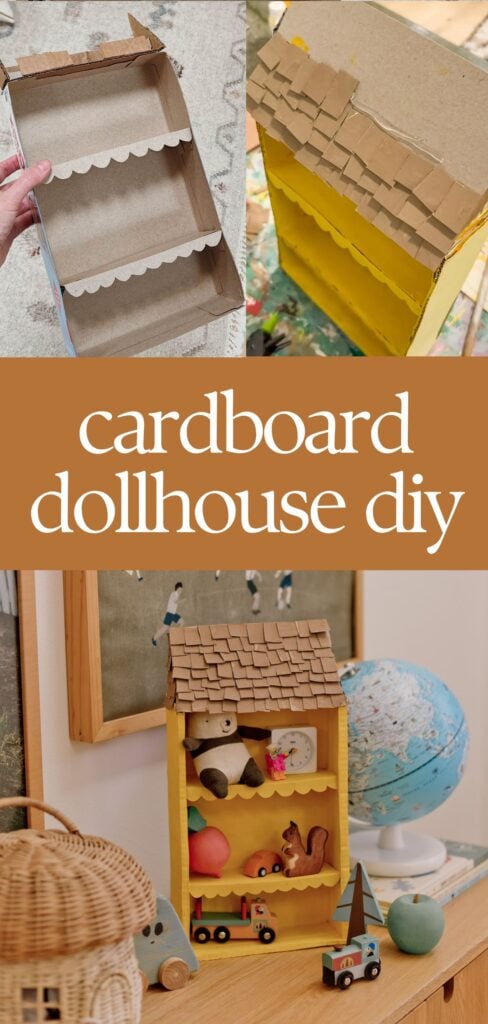
1. Reduce the cereal field.
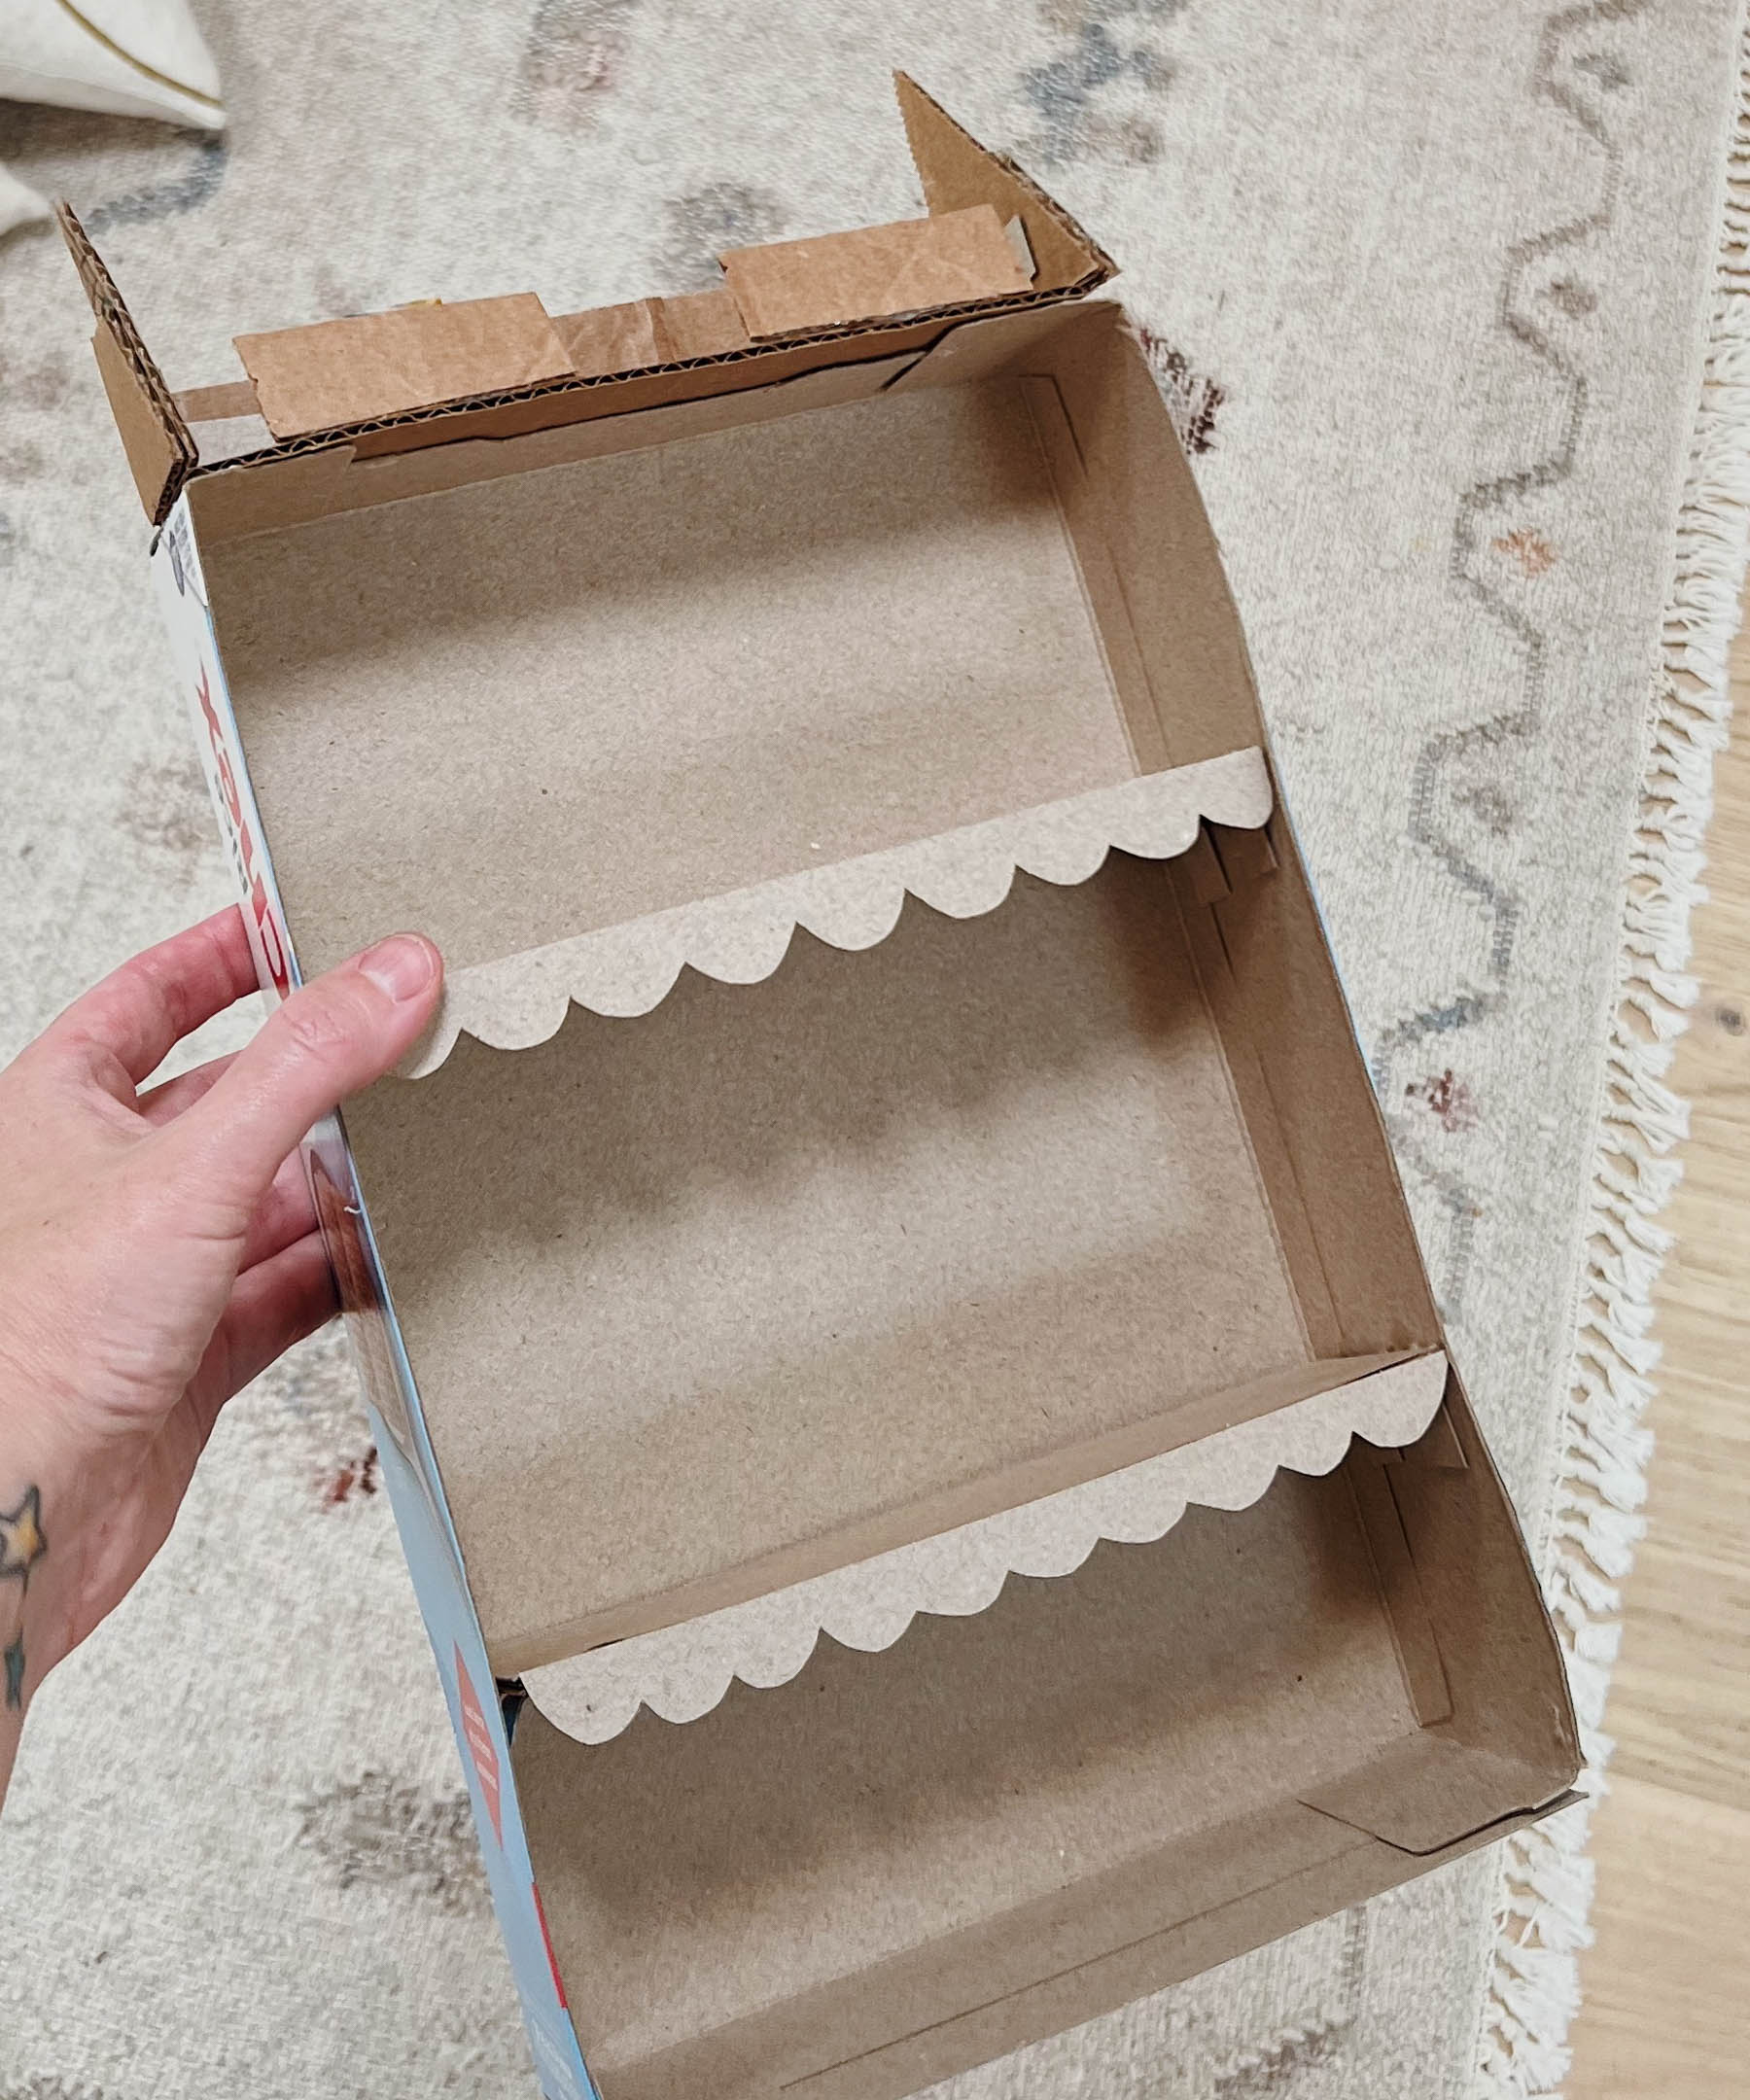
Begin with a cereal field and a few thicker cardboard from a delivery field. Fastidiously minimize the entrance panel from the cereal field, leaving all different sides intact.
2. Reinforce with extra cardboard.
Reinforce the within of the field (again panel, sides, and backside with thicker delivery field cardboard. Use a glue gun to connect.
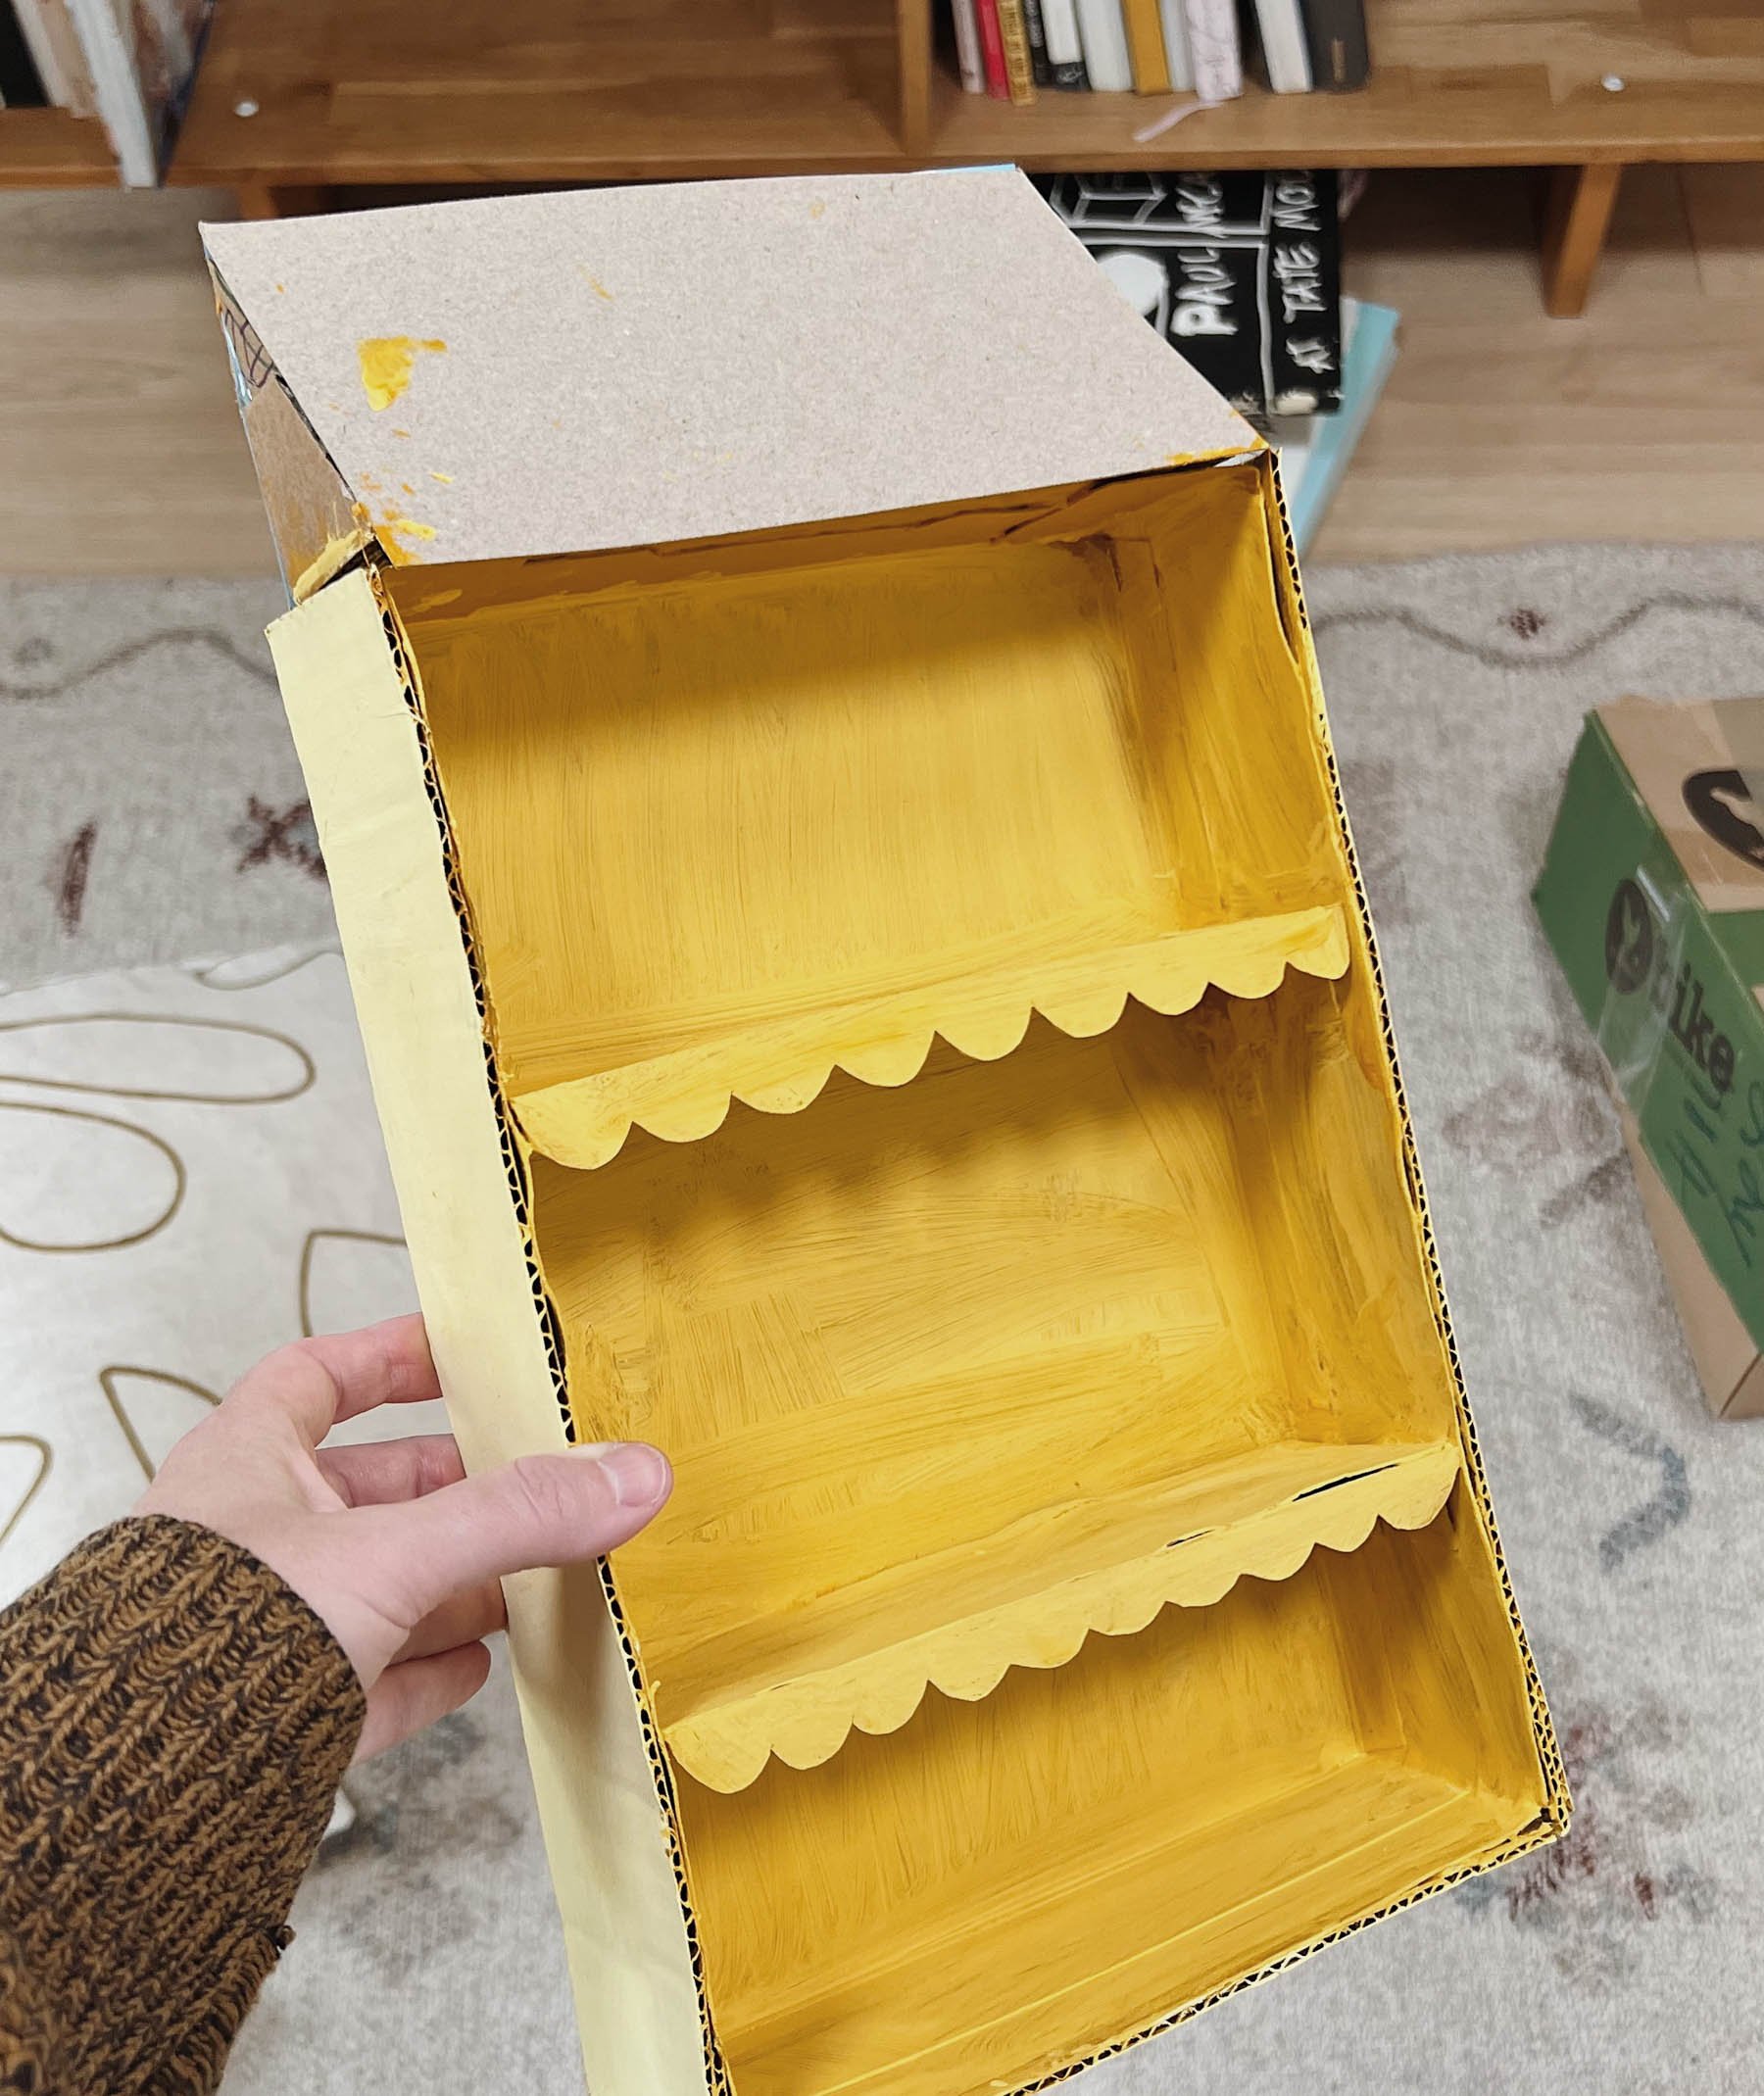
3. Construct and fix the cabinets.
Then begin constructing the cabinets. I simply measured the within of the field and minimize cardboard items to suit. I doubled them as much as make every another sturdy after which added little help flaps beneath every shelf.
Glue them into the within of the field at various heights.
4. Add ornament.
Add an ornamental edge to every shelf, like scallops, if desired, with extra cardboard. Glue them on.
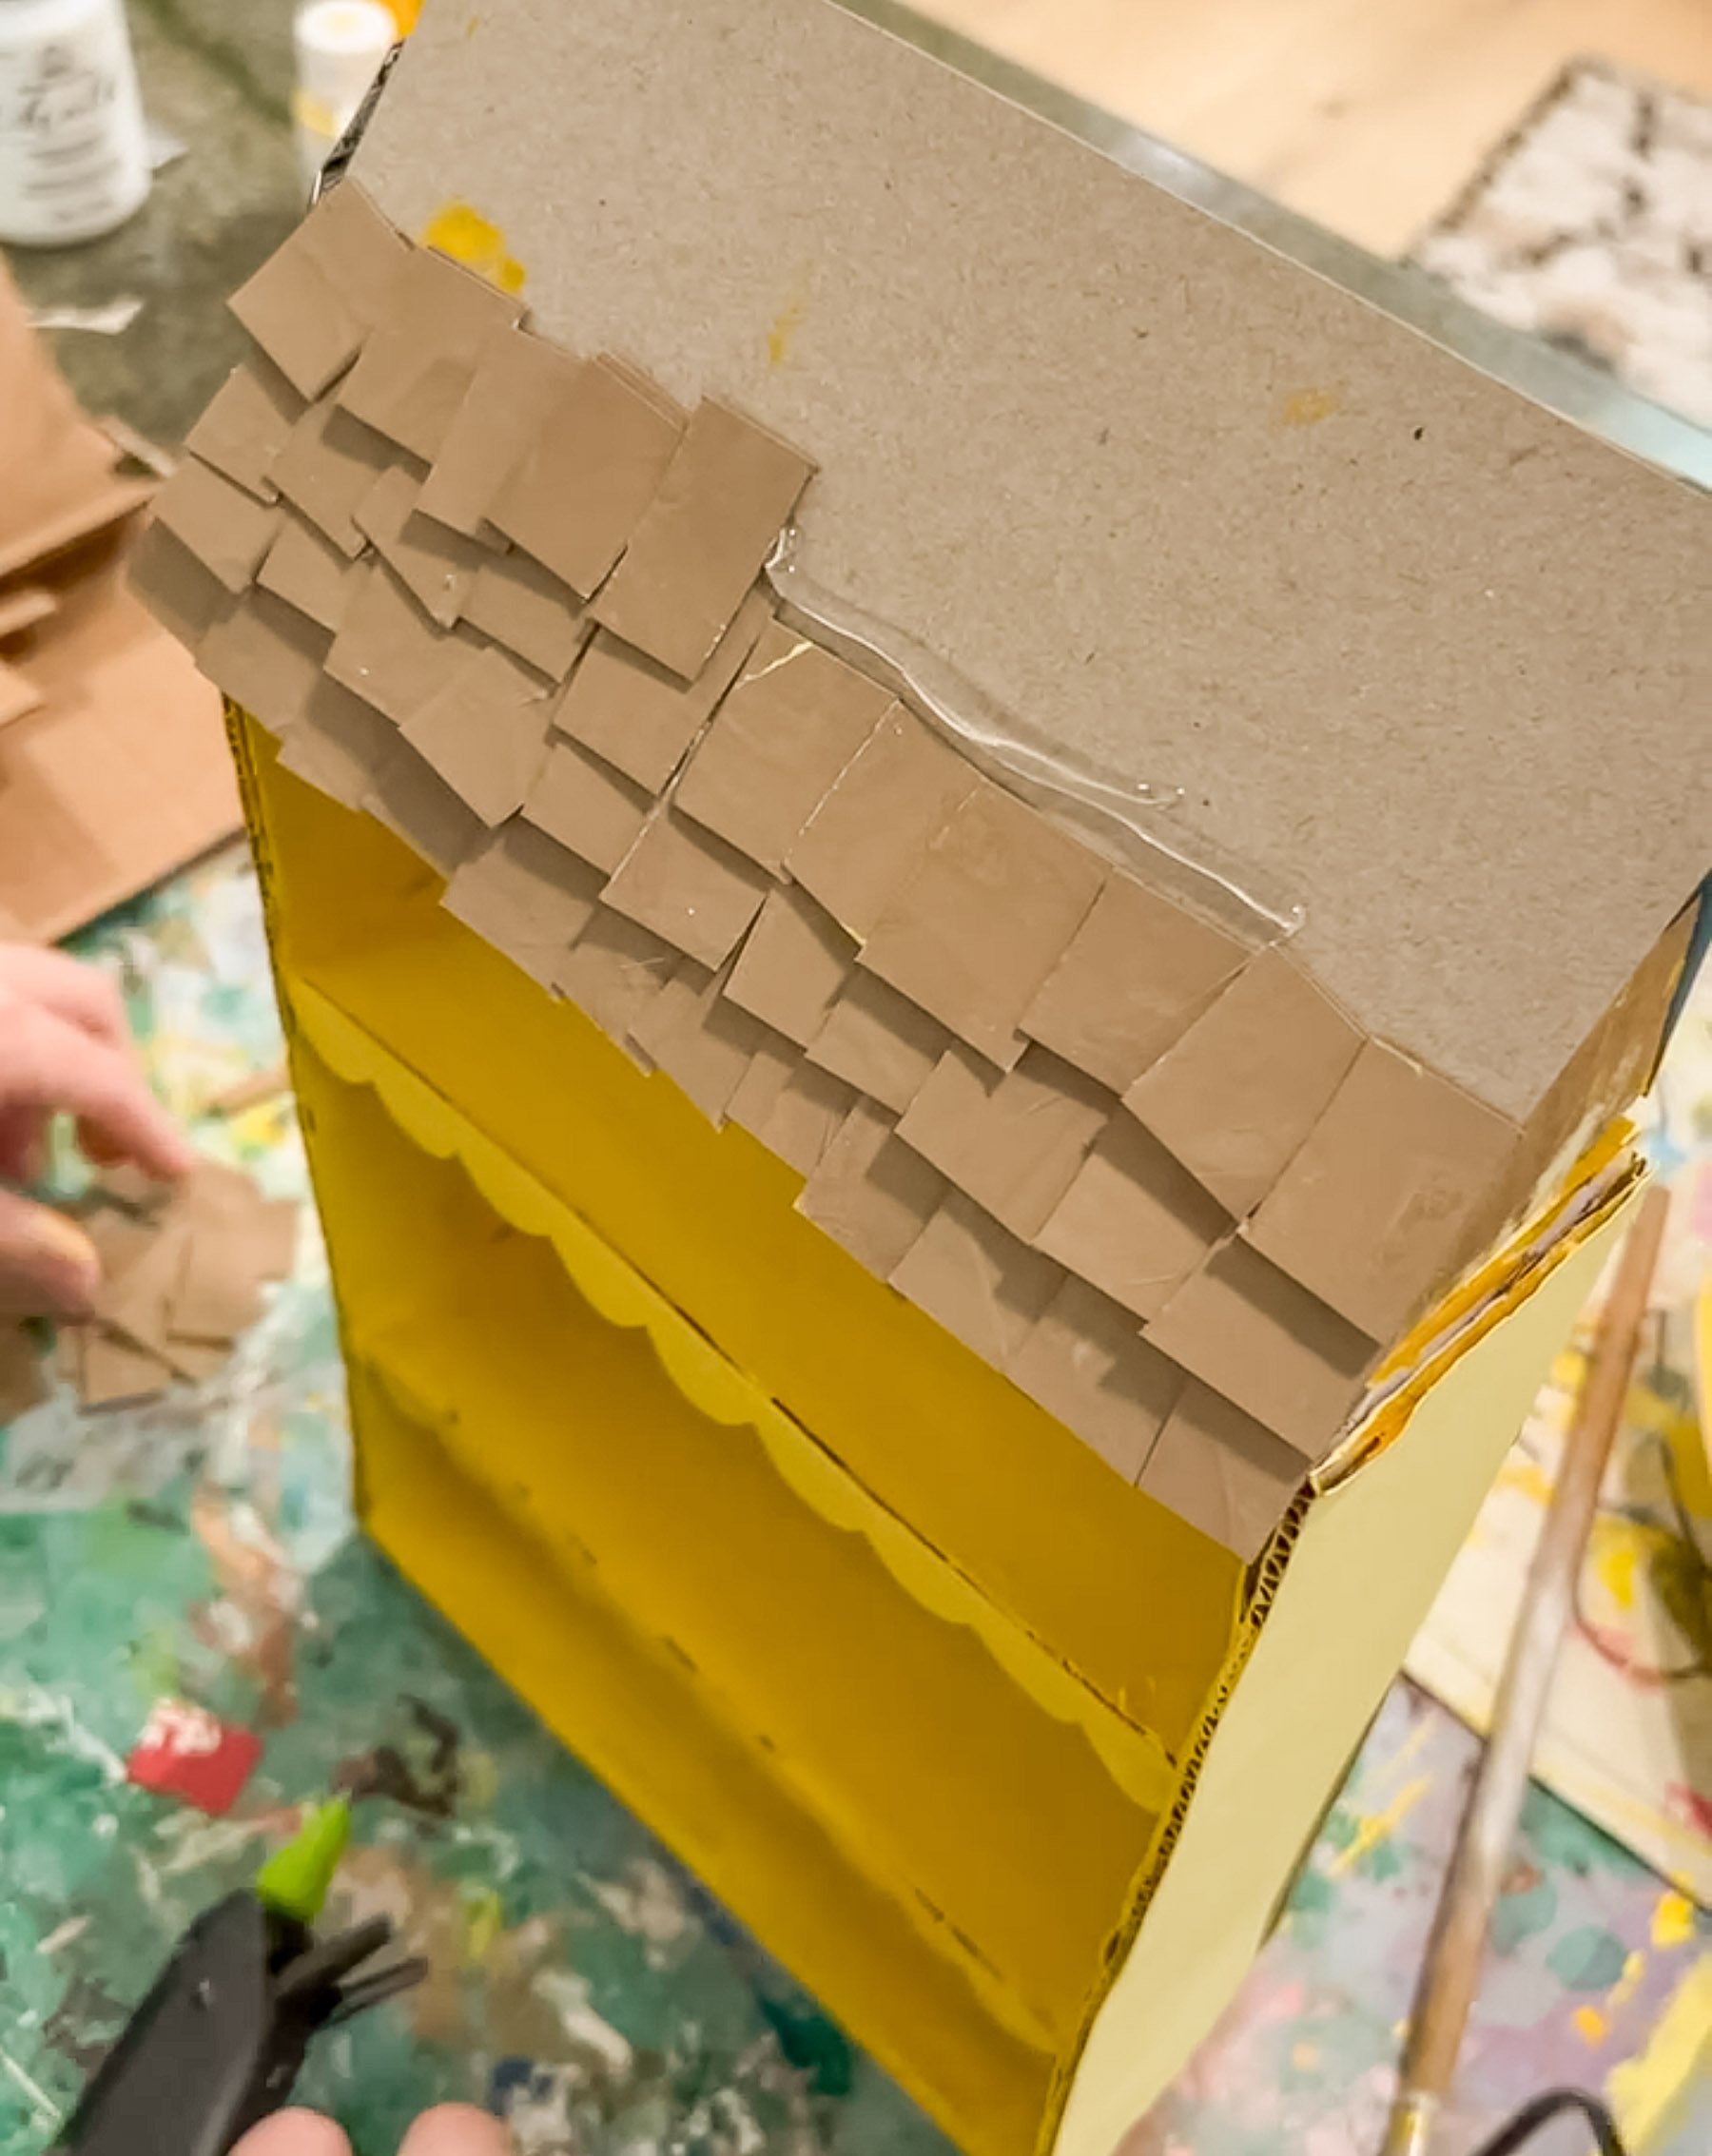
5. Make a roof.
Roof time! I’m certain there are simpler methods to make the roof, however right here’s what I did… I glued some cardboard flaps to the entrance and triangles to every aspect to create the roof angle. As soon as these have been glued to the highest of the cereal field, I glued a bigger sheet of cardboard to the flaps and the triangles on the aspect. Then a again plate.
6. Paint.
Time to color. Paint the dollhouse base (the whole lot however the roof) no matter shade you determine. You’ll probably want just a few coats.
7. Make and fix roof shingles.
Subsequent, minimize little rectangle shingles on your rooftop. It should save a while in the event you paint the cardboard first, earlier than reducing all of the shingles. Then glue the shingles onto the roof cardboard with scorching glue. Begin on the backside and work your means up, one row at a time.
Take it Additional
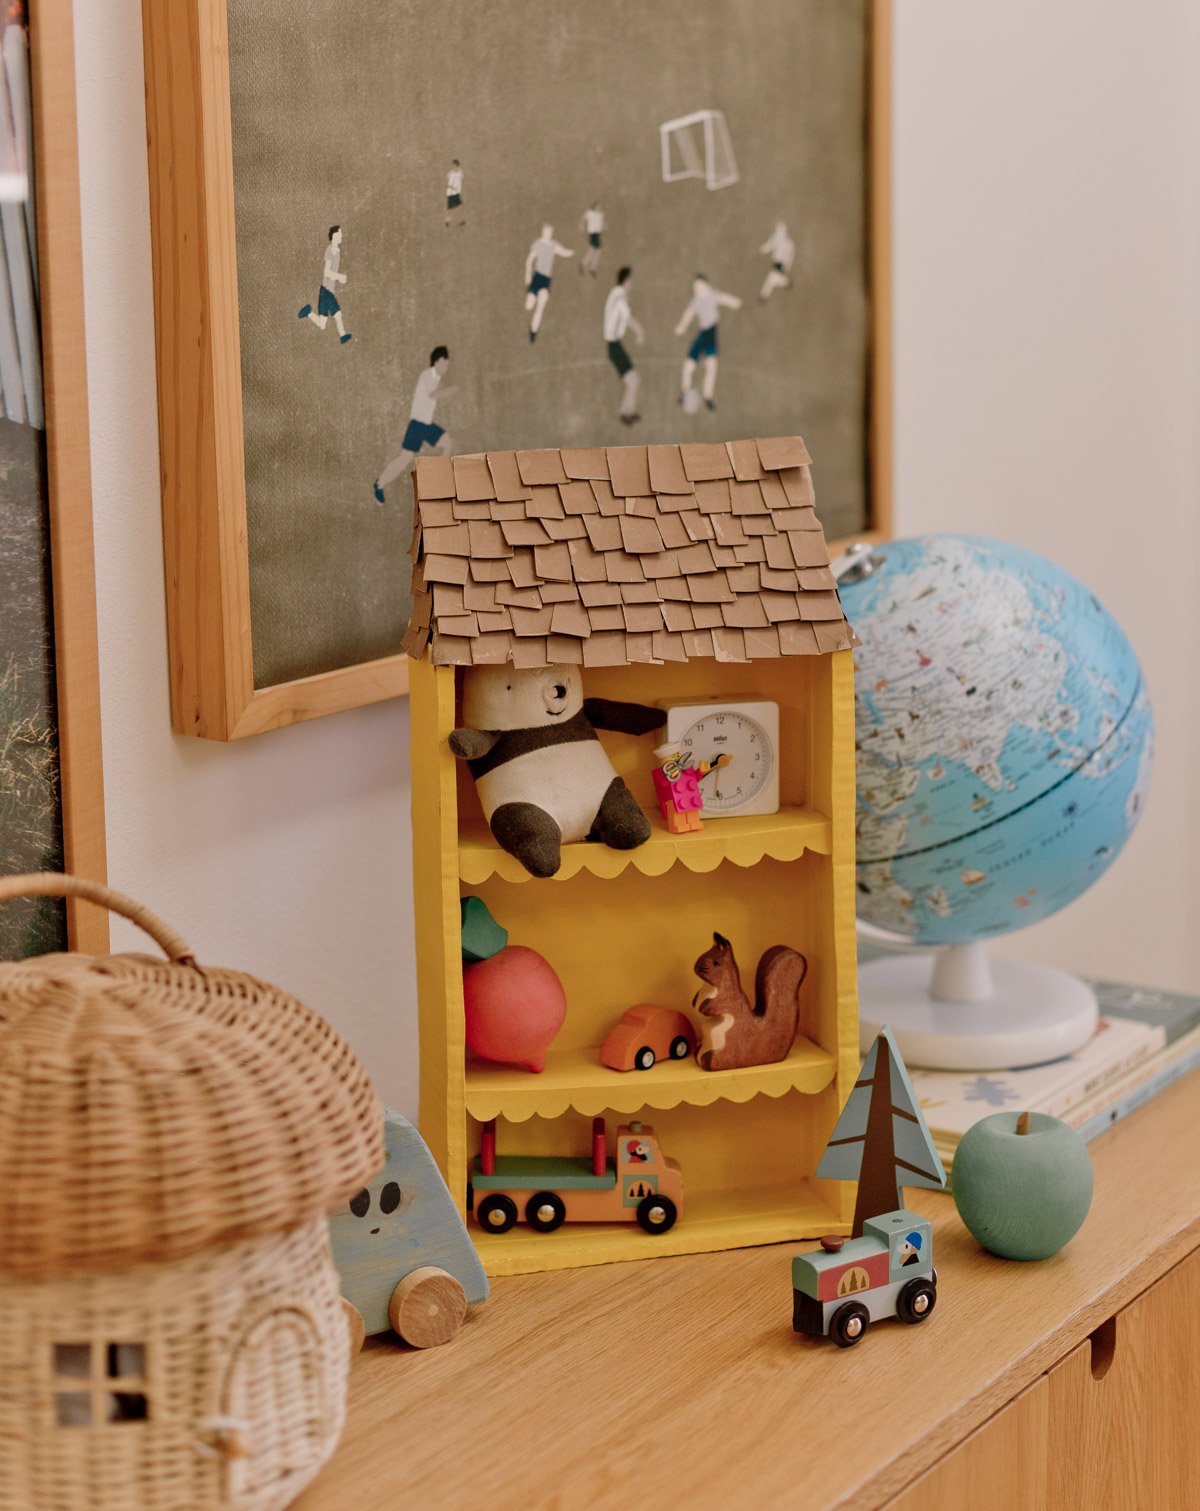
- You may also minimize out home windows and doorways, beautify every room / degree with completely different colours of paint or patterned paper, and even stack a number of packing containers to create an even bigger dollhouse.
- Tiny furnishings can be a enjoyable factor to attempt. I made some fast dollhouse furnishings utilizing random issues we already had in the home. Popsicle sticks and wooden blocks work marvel too. However that was brief lived as a result of we actually simply use it as a storage shelf.
- In case you are planning to make use of the finished mission as a dollhouse, catalogs are nice for clipping little items of dollhouse artwork and rugs as properly – even printing stuff you see on-line from your private home printer.

Cardboard Dollhouse from a Cereal Field
Cardboard dollhouse DIY – a enjoyable straightforward mission to work on with youngsters! Use it as an precise dollhouse or for toy storage.
-
Scissors
-
glue gun
-
paint and paint brush
- cardboard cereal field
- thicker cardboard (from a delivery field is good)
Reinforce with extra cardboard.
-
Reinforce the within of the field (again panel, sides, and backside with thicker delivery field cardboard. Use a glue gun to connect.
Construct and fix the cabinets.
-
Then begin constructing the cabinets. I simply measured the within of the field and minimize cardboard items to suit. I doubled them as much as make every another sturdy after which added little help flaps beneath every shelf.
-
Glue them into the within of the field at various heights.
Add ornament.
-
Add an ornamental edge to every shelf, like scallops, if desired, with extra cardboard. Glue them on.
Make a roof.
-
Roof time! I am certain there are simpler methods to make the roof, however this is what I did… I glued some cardboard flaps to the entrance and triangles to every aspect to create the roof angle. As soon as these have been glued to the highest of the cereal field, I glued a bigger sheet of cardboard to the flaps and the triangles on the aspect. Then a again plate.
Make and fix roof shingles.
-
Subsequent, minimize little rectangle shingles on your rooftop. It should save a while in the event you paint the cardboard first, earlier than reducing all of the shingles. Then glue the shingles onto the roof cardboard with scorching glue. Begin on the backside and work your means up, one row at a time.
")

")


")
