


Ceilings are criminally underrated. Ever since we began coloration drenching and wallpapering our ceilings, we’ve been hooked. And as soon as we including tongue and groove ceiling planks to our upstairs hallway just a few weeks in the past, we couldn’t assist ourselves… our front room wanted it too, clearly.
I’ve been dreaming about doing a DIY shiplap ceiling in right here for years. However not the farmhouse form. I needed these buttoned up with that conventional crown molding nonetheless having a second.
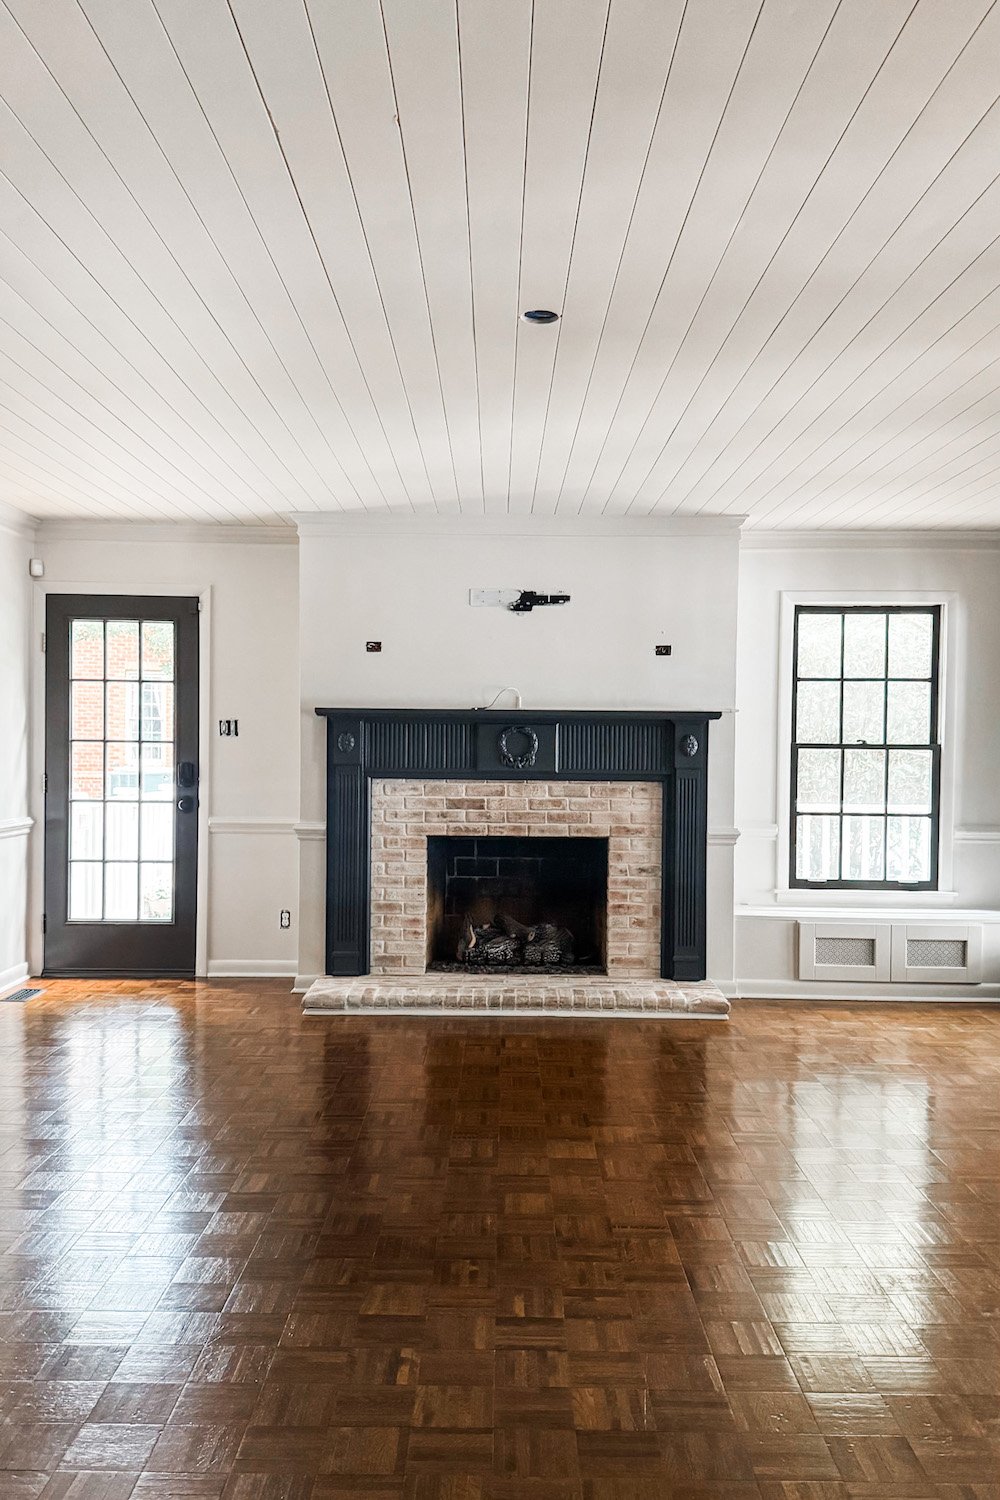
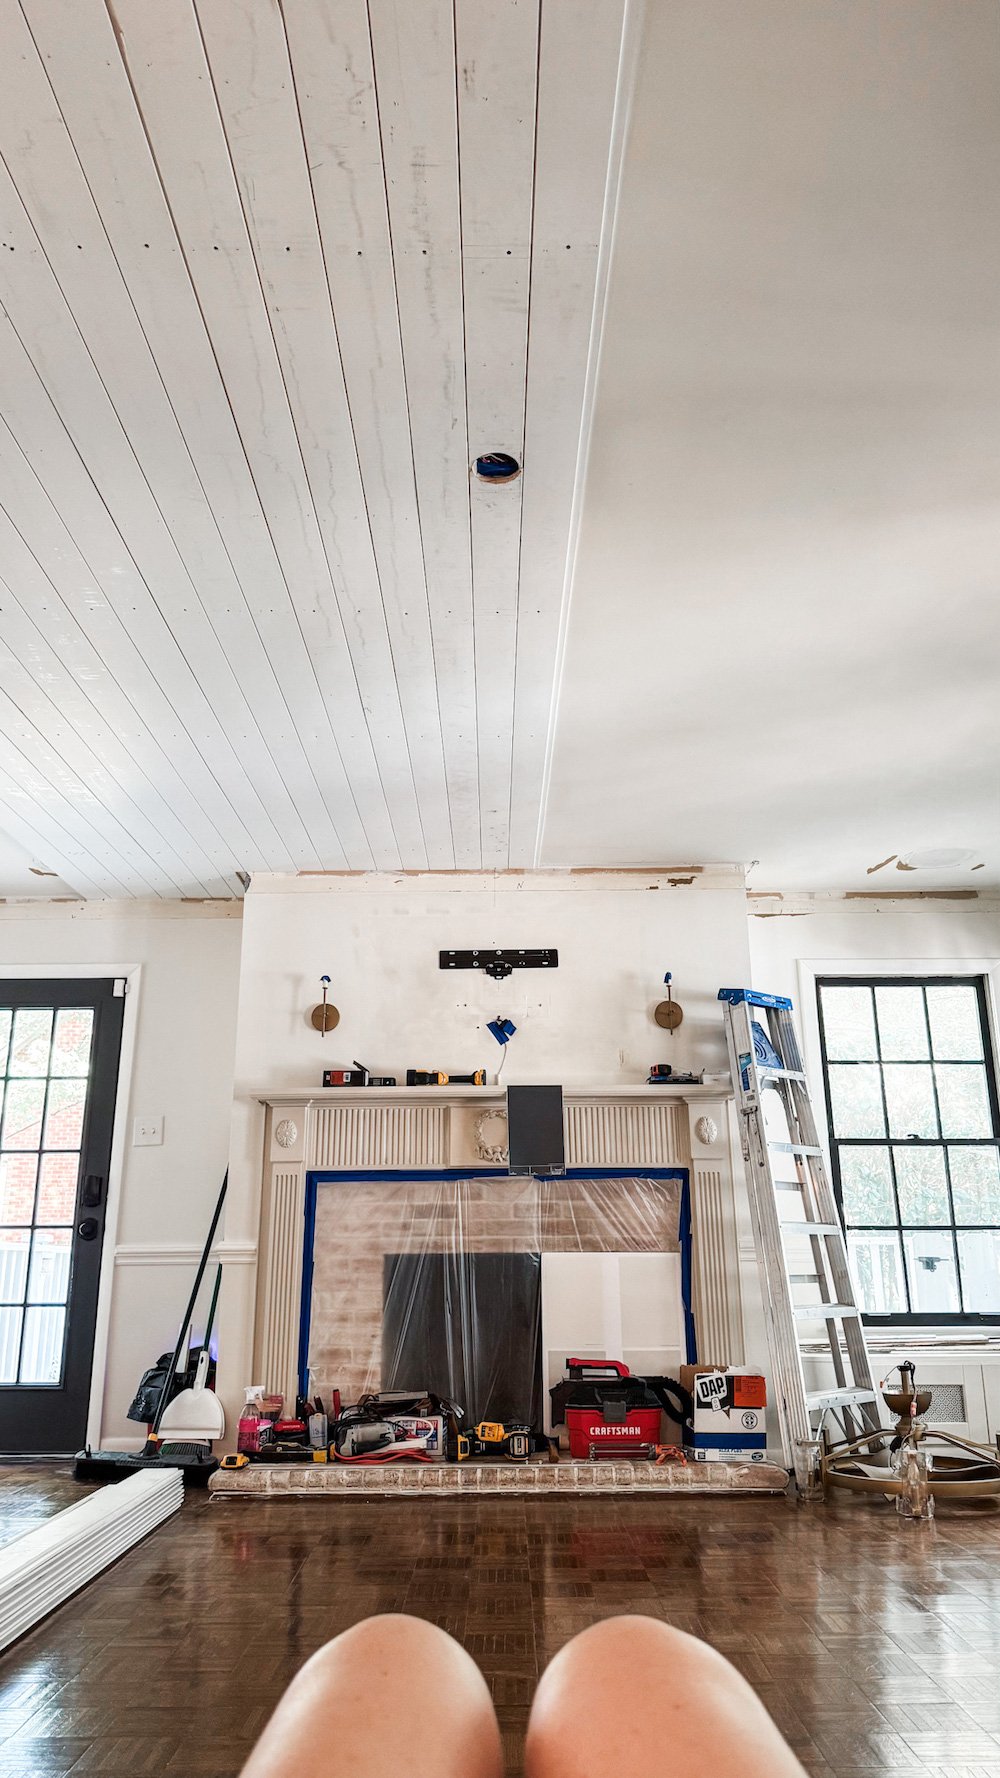
Our front room has all the time felt cozy, however the flat 8-foot ceiling simply… lacked character. It was an enormous clean canvas begging for texture and attraction, so now that we’re embarking on the front room makeover, it was the proper time to do it.
So as soon as we eliminated the outdated attic fan vents and the non-working ceiling audio system (bless their ’90s hearts), we lastly received to sort out the ceiling improve I’ve had at the back of my thoughts since without end.
Let me inform you, it turned out even higher than I pictured.
DIY Shiplap Ceiling Tutorial (With Crown Molding)
If you happen to’ve received a weekend (and a cordless nailer), this undertaking is completely doable, even if you happen to’re not a professional. Right here’s precisely how we did it:
Provides We Used
Right here’s a fast listing of every little thing we used for this undertaking:
1. Take away Previous Trim and Molding
We began by fastidiously eradicating the prevailing trim and crown molding. This gave us a clear slate and made it simpler so as to add the brand new planks flush towards the wall.
2. Measure Your Ceiling and Plan Structure
Measure the size and width of your ceiling to calculate what number of planks you’ll want (add about 10% additional for cuts and waste). Then, utilizing a scrap piece of plank, mark your ceiling to check the spacing. This helps keep away from ending the row with an ungainly sliver alongside your crown or hearth.
3. Mark the Middle Line
Discover the middle of your ceiling and snap a chalk line. Ranging from the middle helps preserve issues symmetrical and offers you extra management over structure.
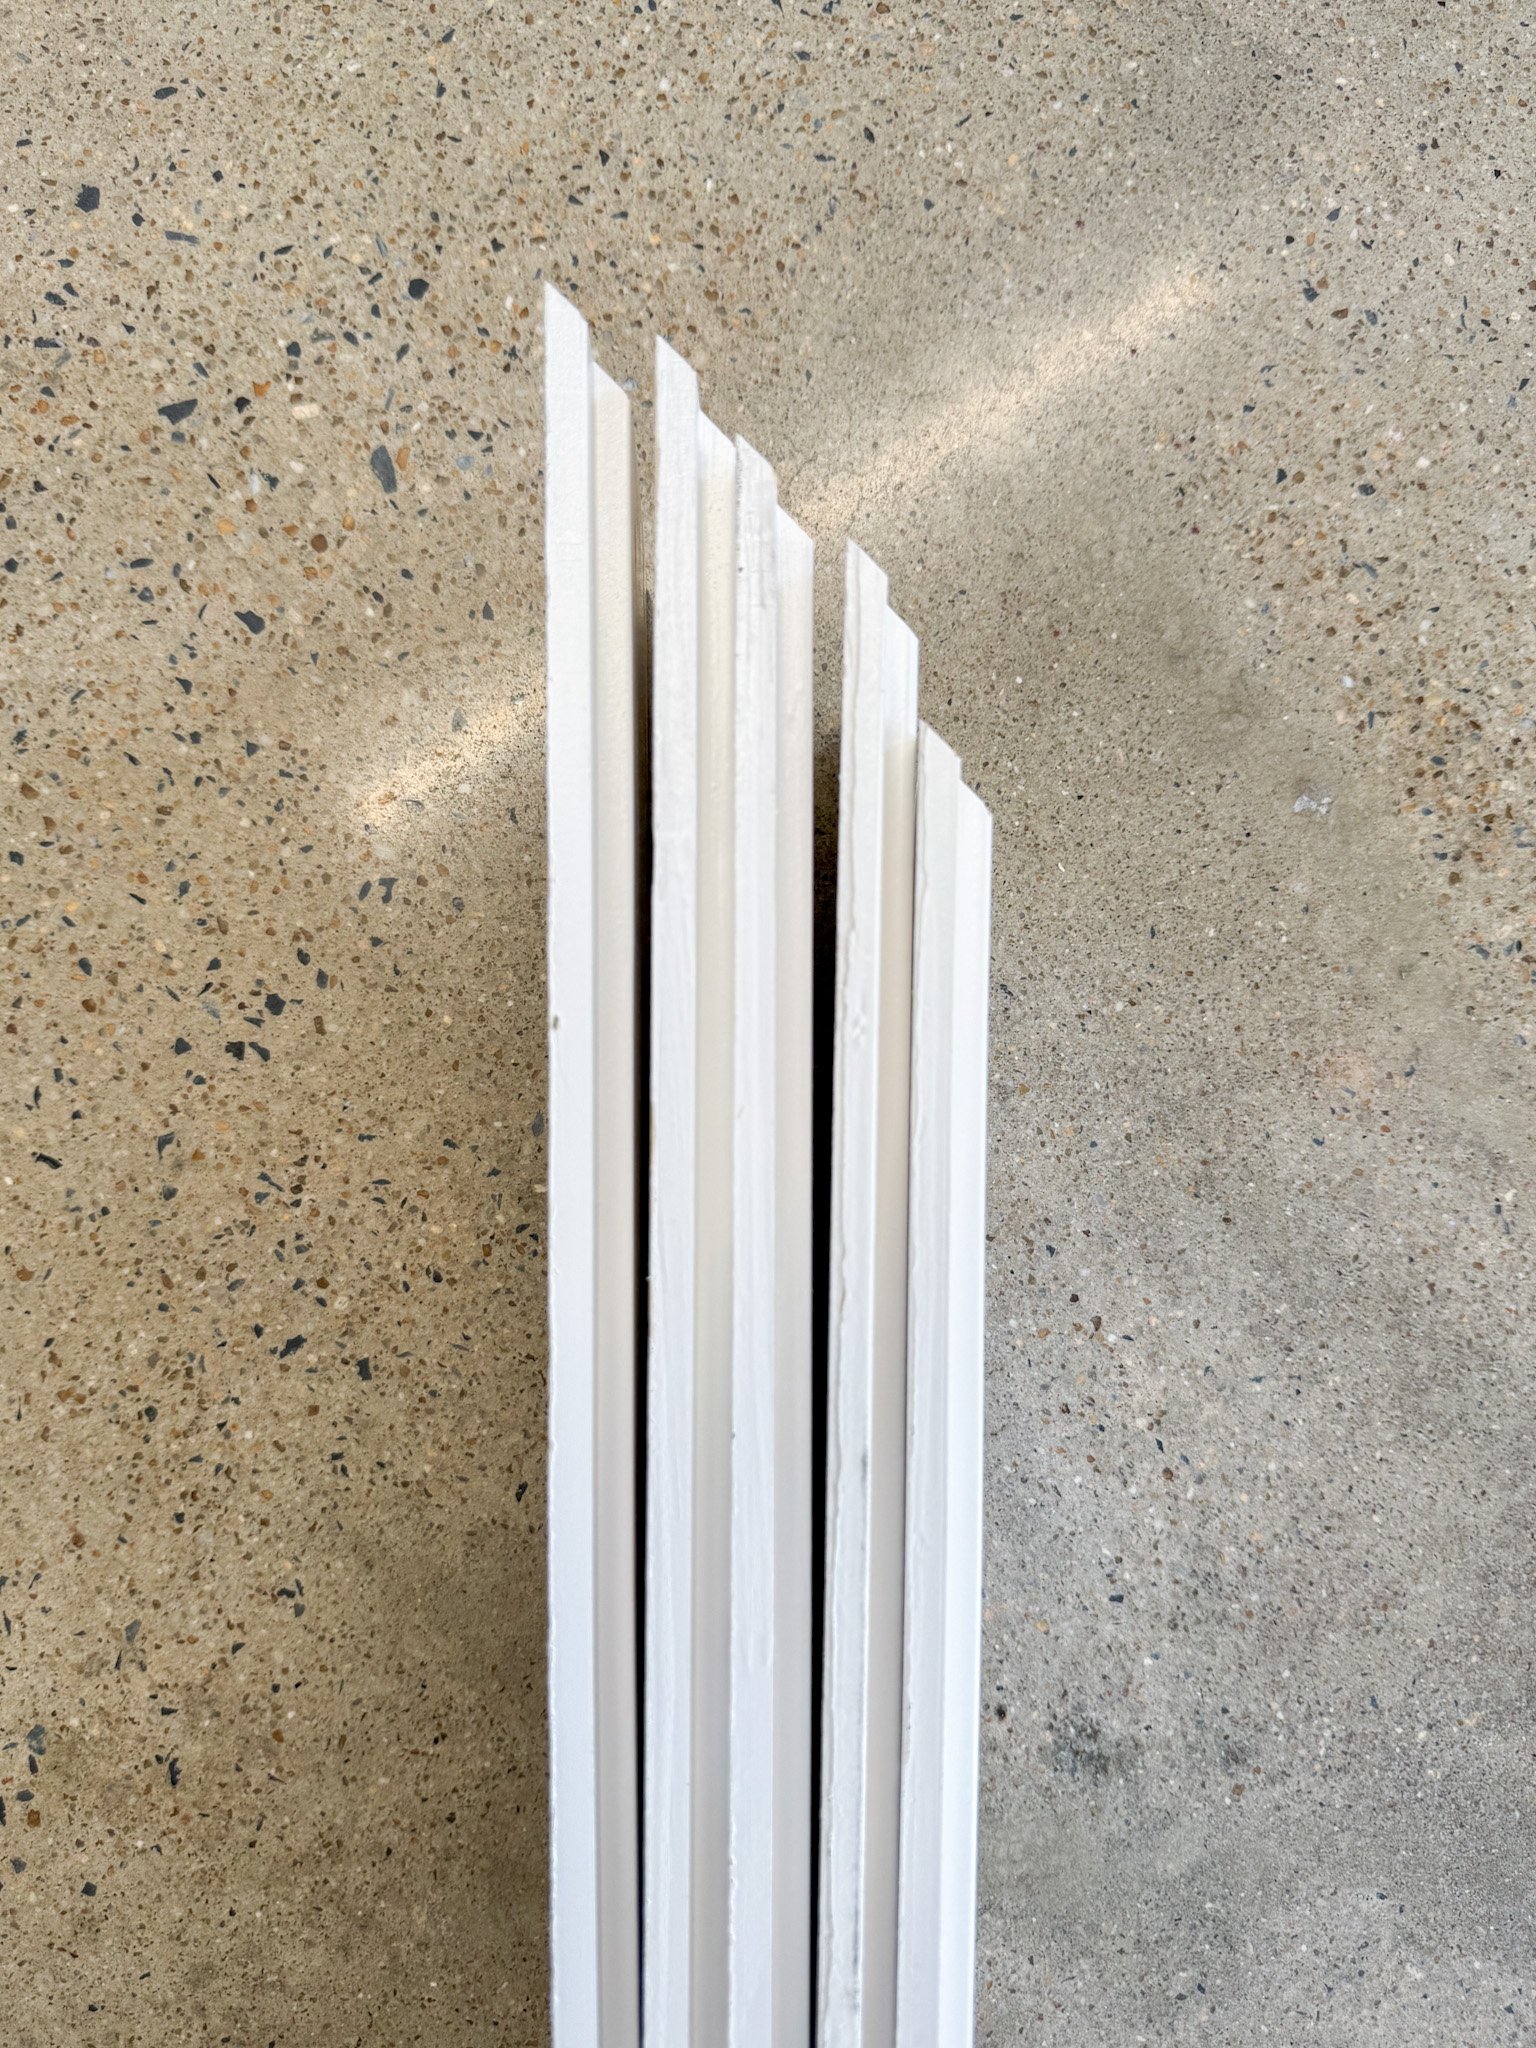
4. Bevel the First Plank
Reduce one finish of your first plank at a 45-degree angle utilizing a miter noticed. This provides a beveled edge that helps the planks be part of seamlessly with much less seen gapping.
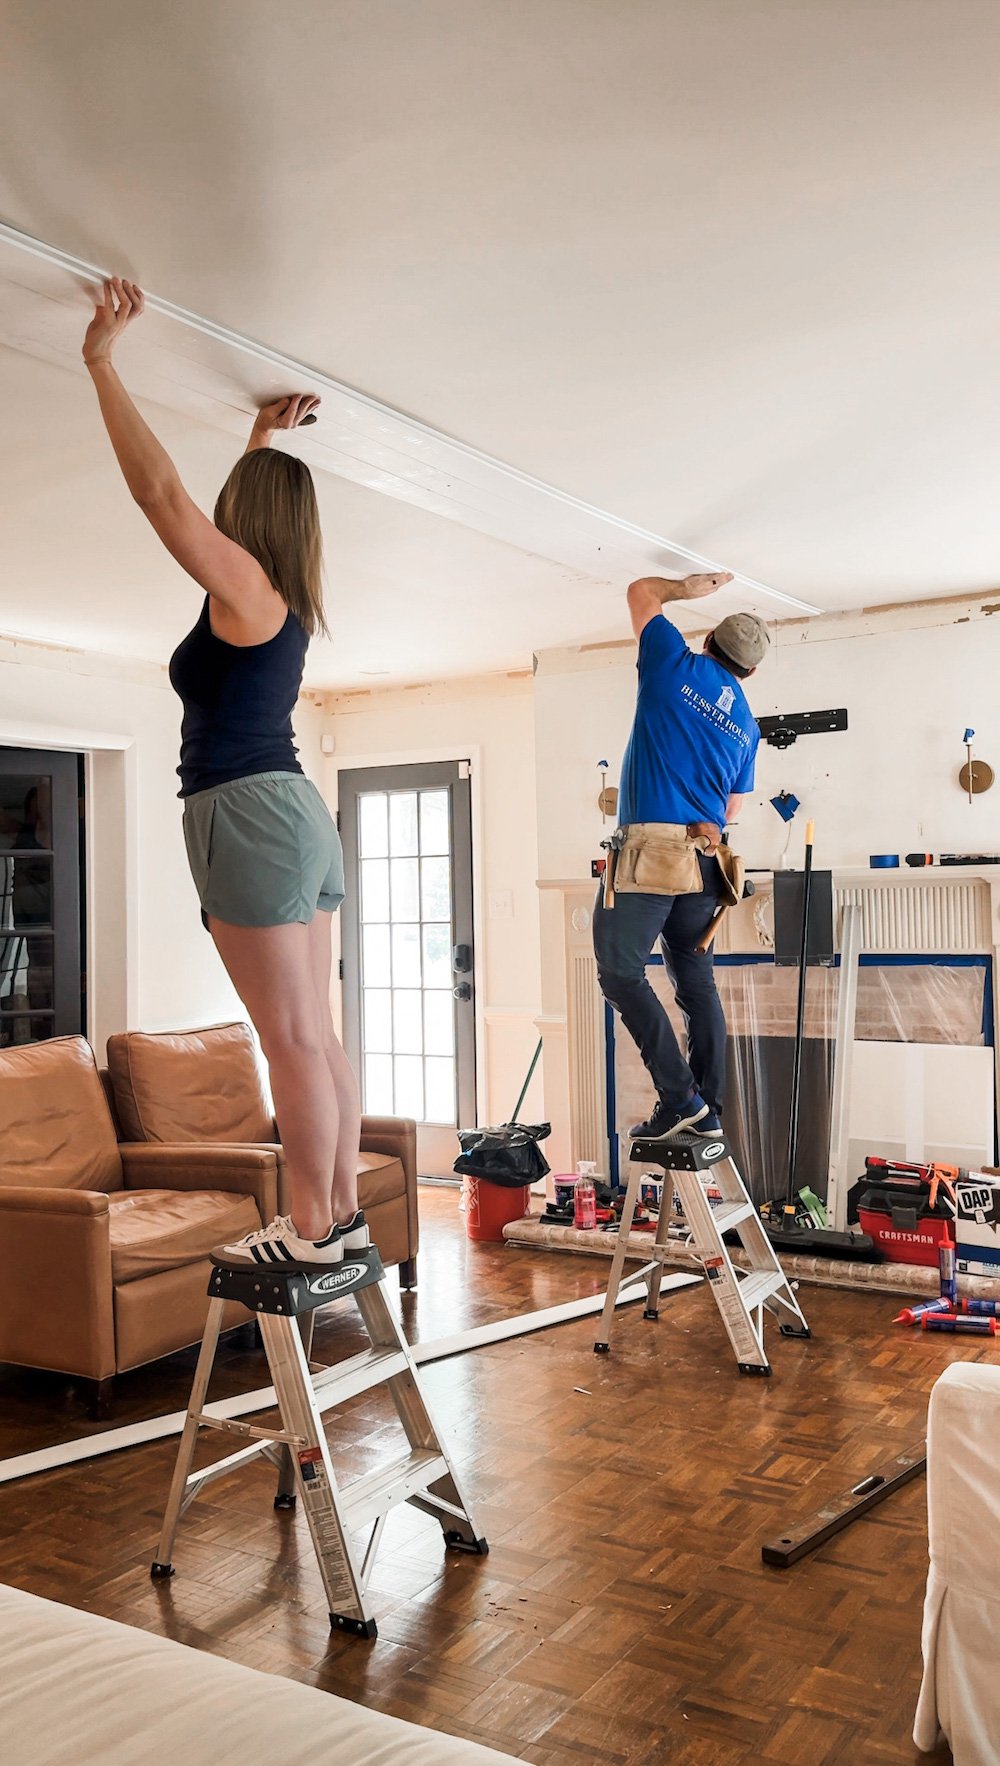
5. Set up the First Plank
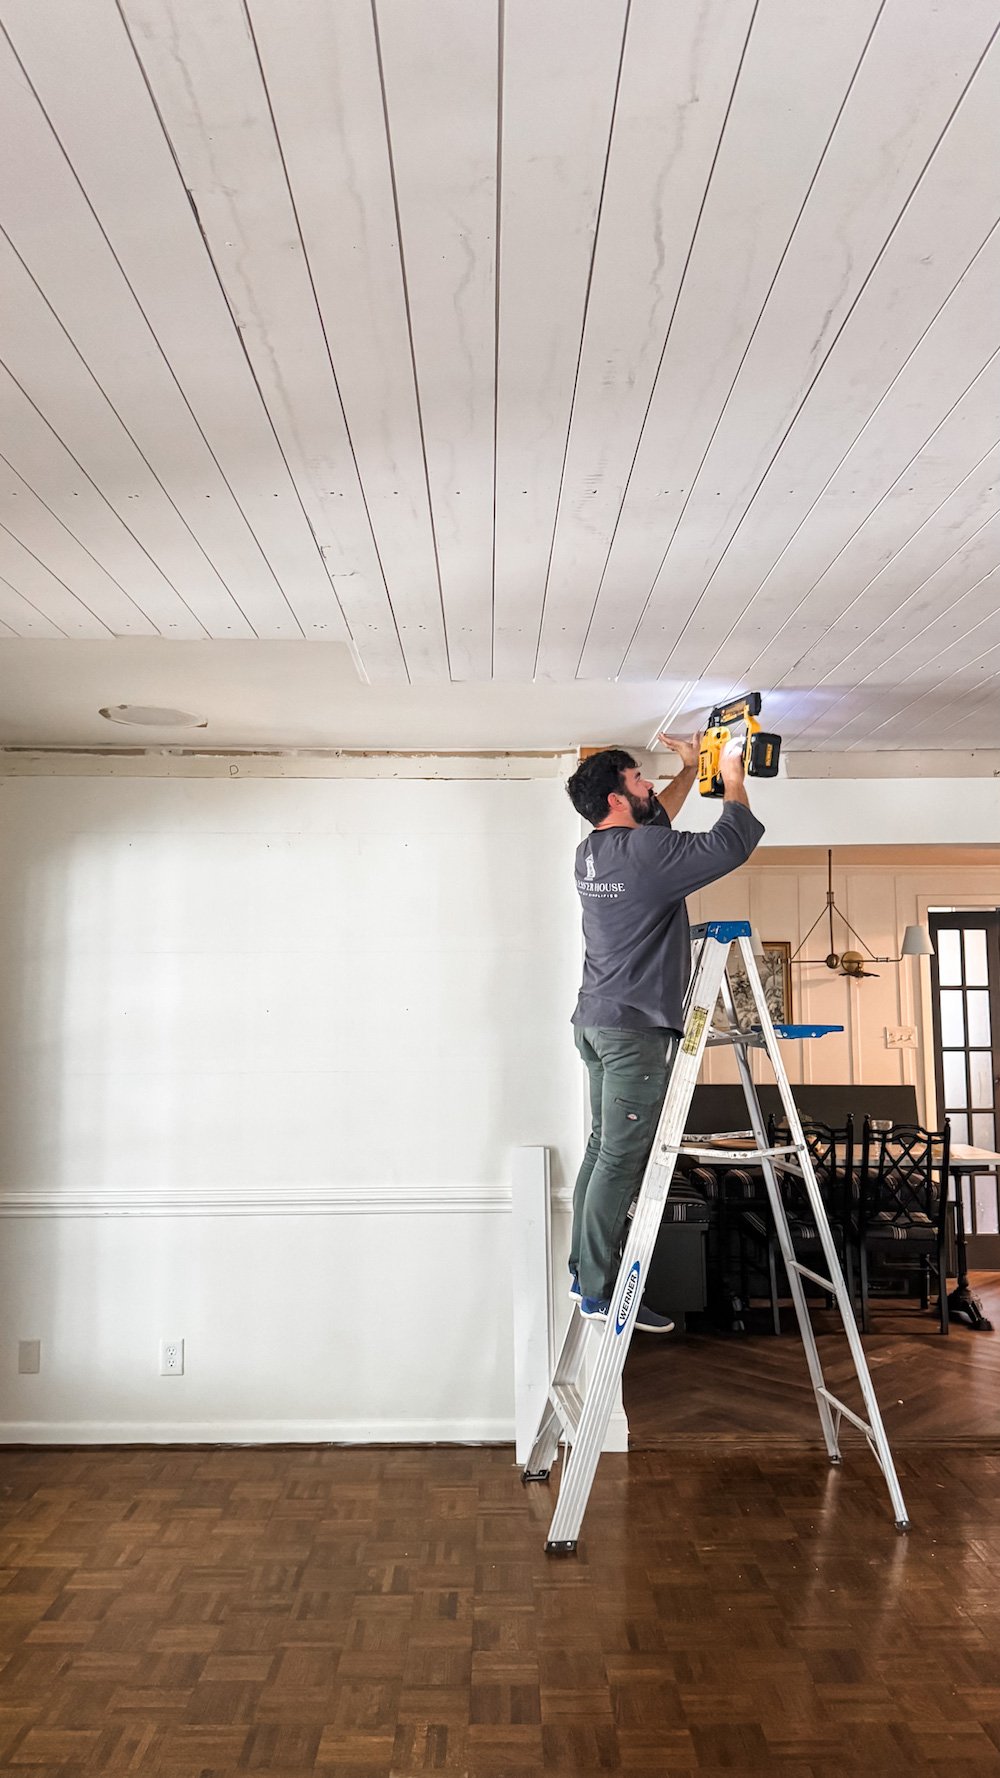
Apply development adhesive to the again of the plank and safe it to the ceiling utilizing 2″ 16-gauge end nails with a cordless nailer. Screw into ceiling joists when you may for additional power.

6. Proceed Putting in
Work your method out from the middle, locking the sides collectively. We utilized adhesive each 3–4 boards and continued slicing the ends at a bevel so the seams look intentional.
7. Fill the Ceiling
Proceed inserting and nailing the planks till the whole ceiling is roofed. Anticipate a stable arm exercise and plenty of ladder time! (Possibly schedule a therapeutic massage after this.)
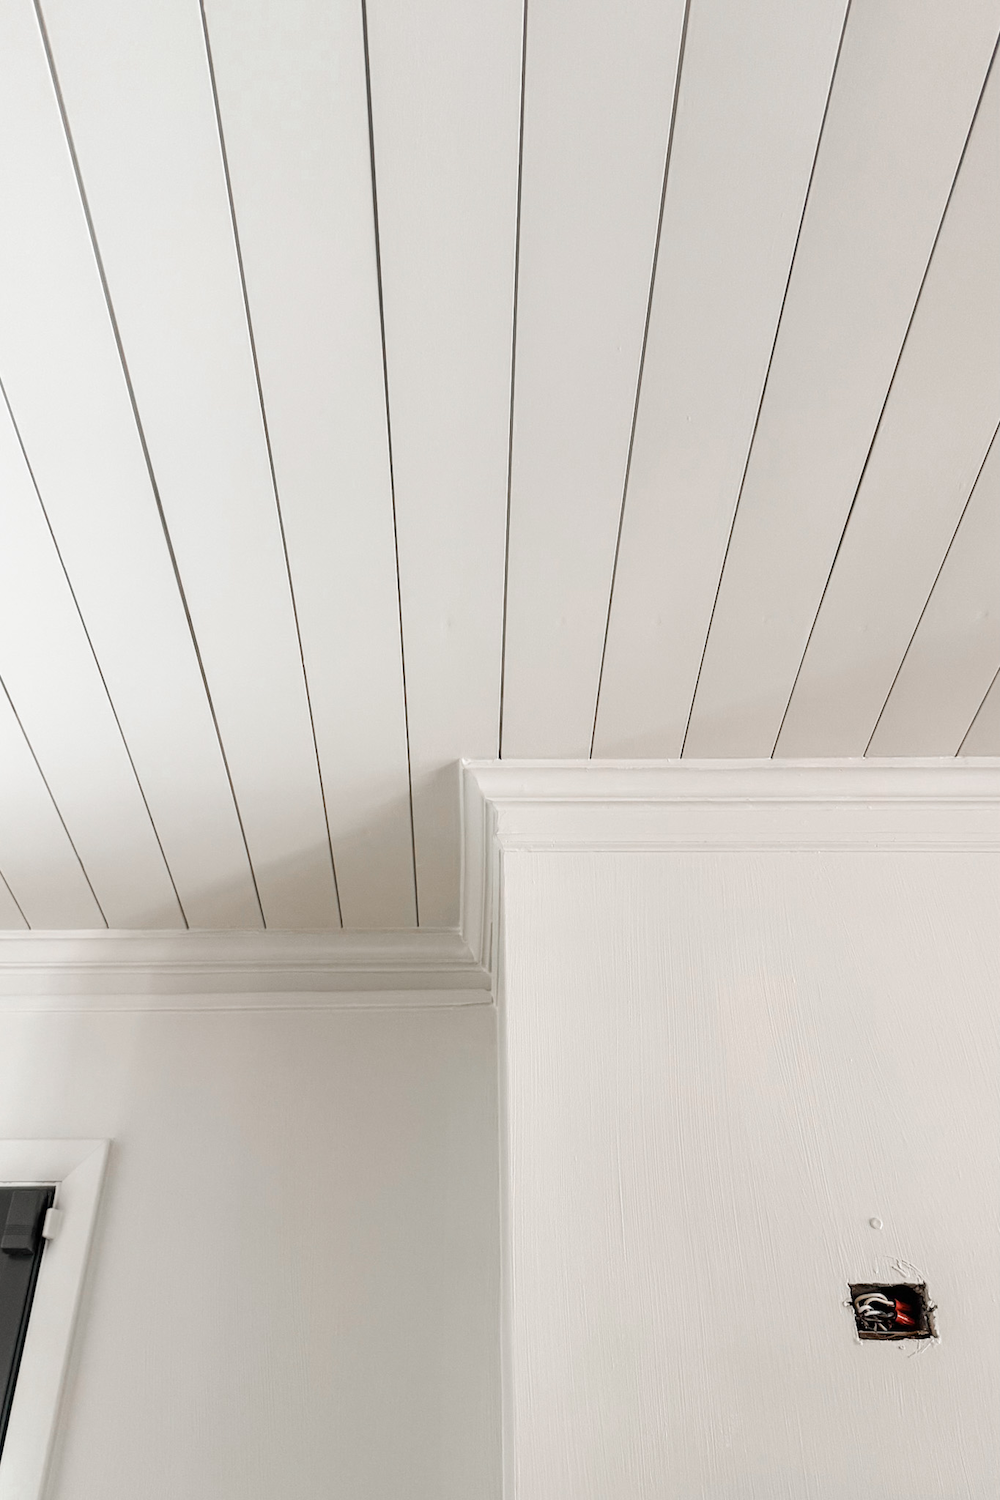
8. Add Crown Molding (Optionally available)
To complete it off, we put in the outdated crown molding across the perimeter. If you happen to’re putting in new molding, use a coping noticed for the corners to get a comfortable match and nail every little thing into place with end nails.
If you happen to need assistance with molding, we’ve tackled this earlier than with image body molding, and the method may be very related.
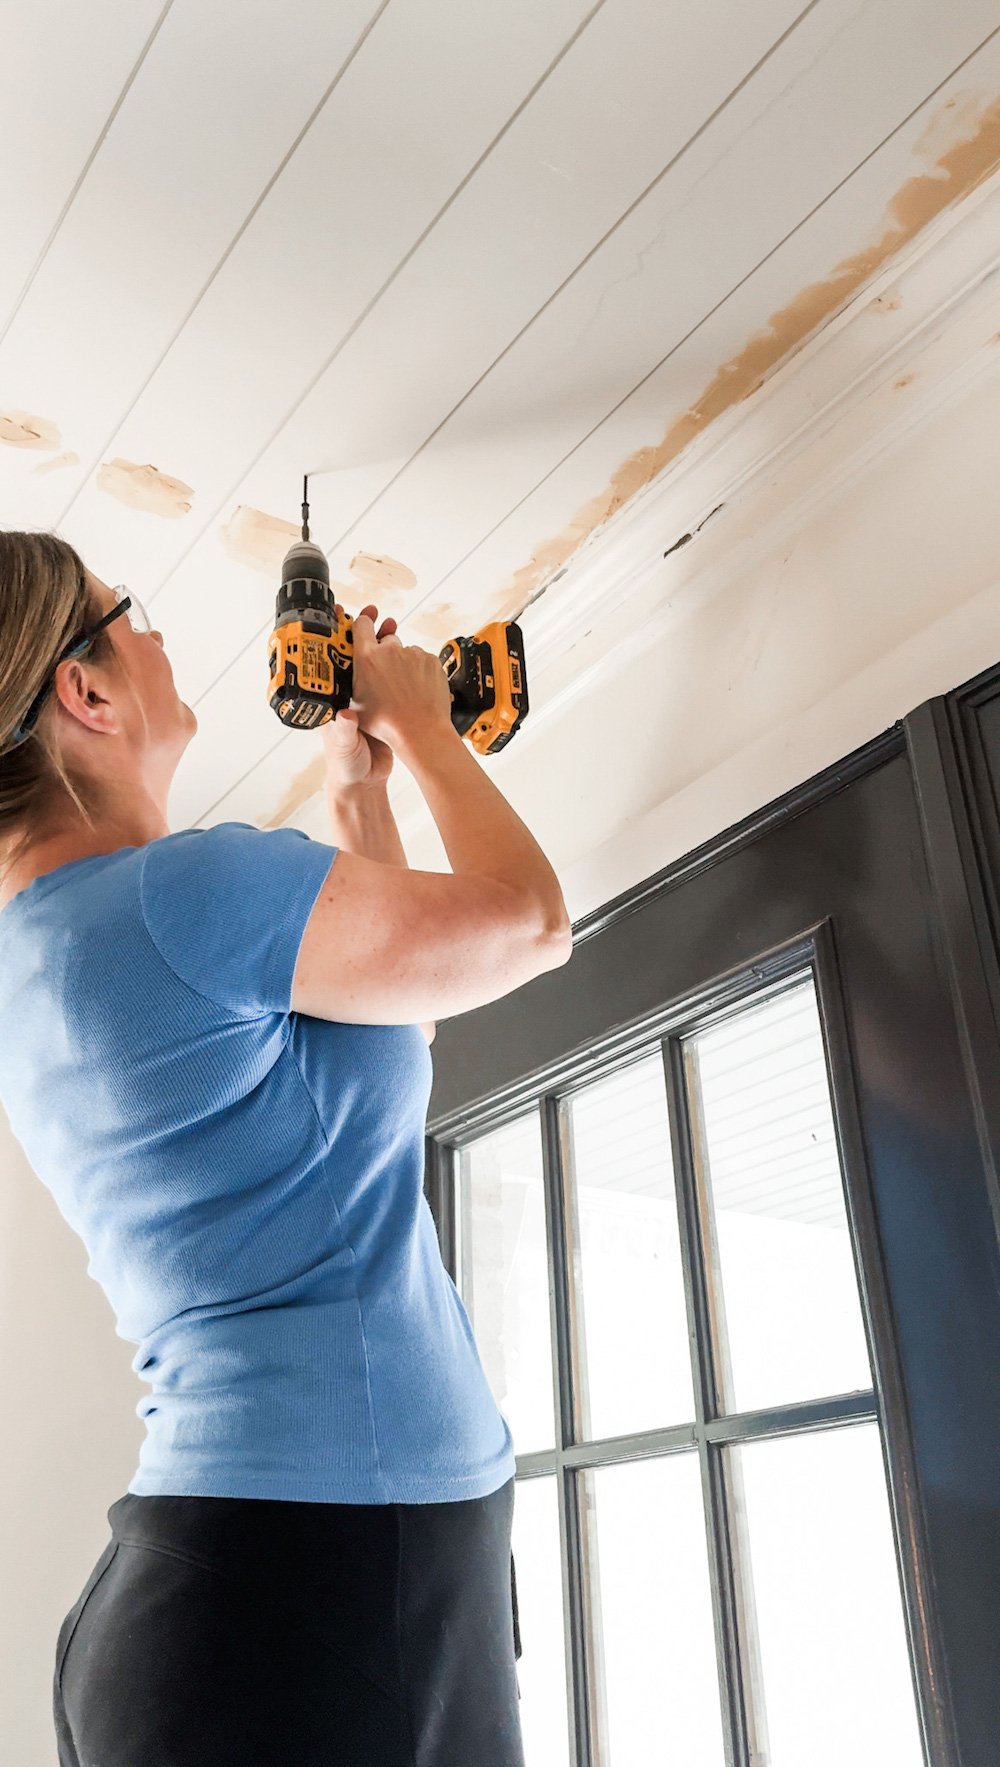
9. Fill, Caulk, and Dry
Use wooden filler to cowl all of the nail holes and any seen seams. Caulk the sides the place the crown meets the wall and ceiling for a clean end. Let every little thing dry fully.
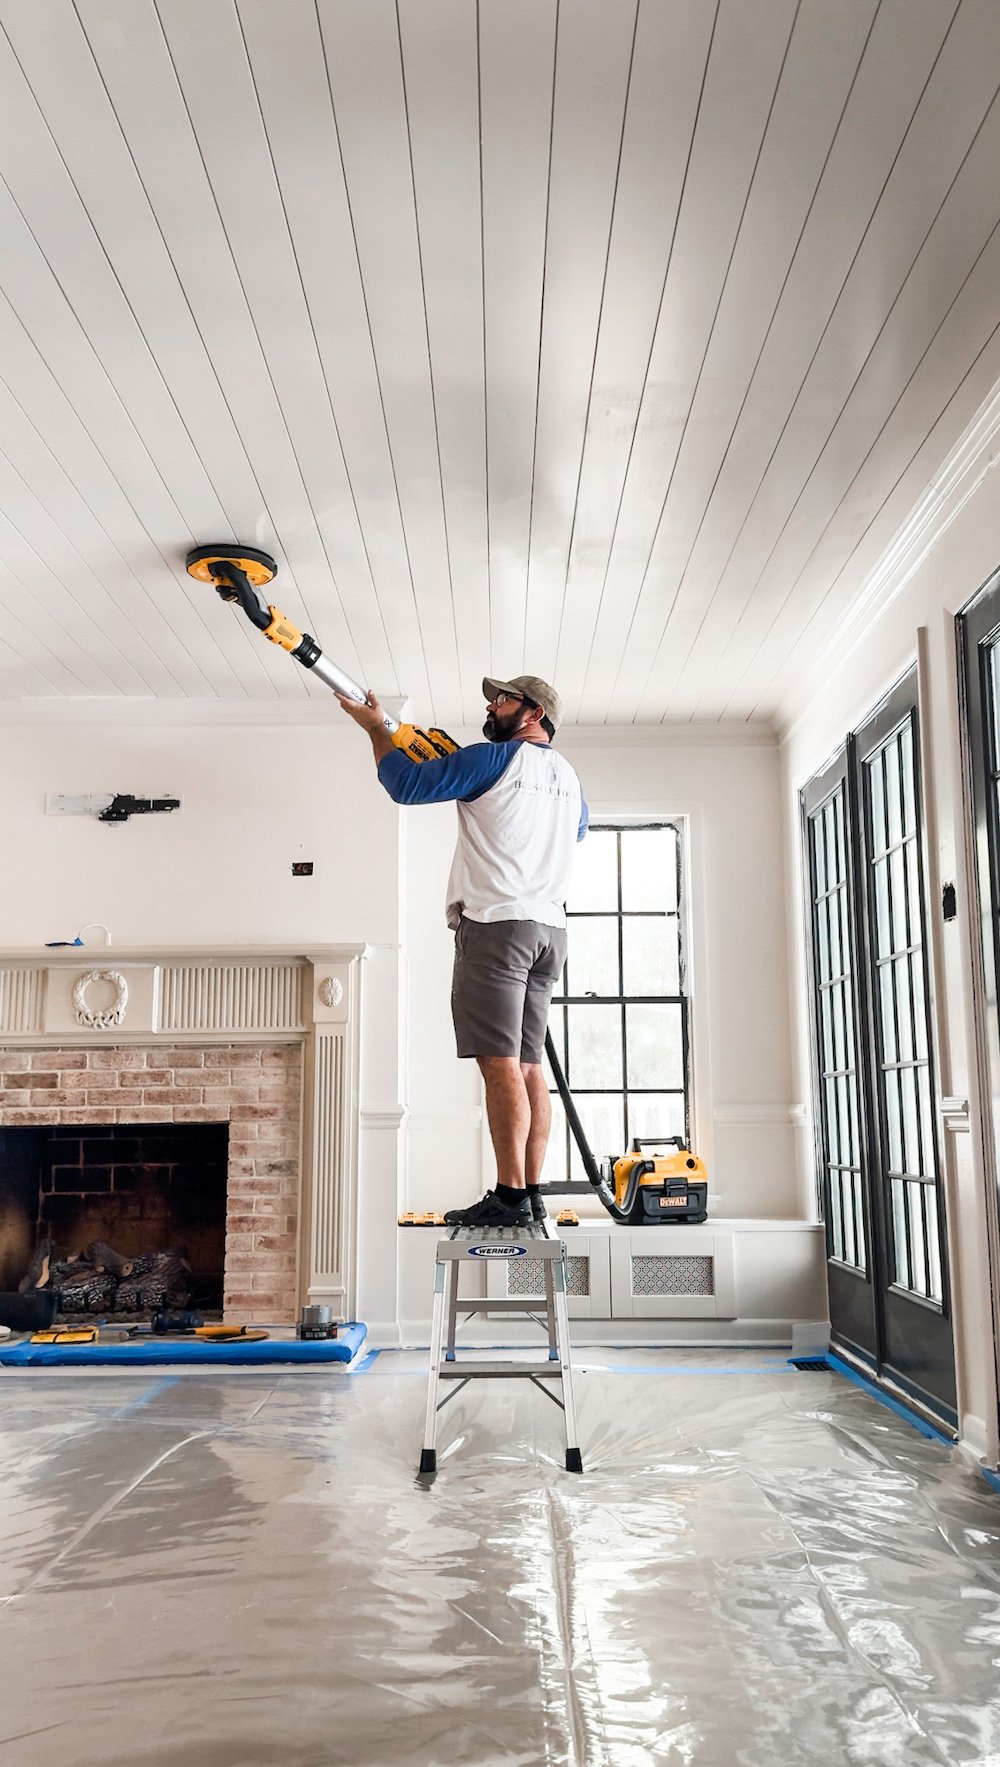
10. Sand Clean
We used a cordless drywall sander with a vacuum attachment and extension, which made the sanding course of 10x sooner and method much less messy.
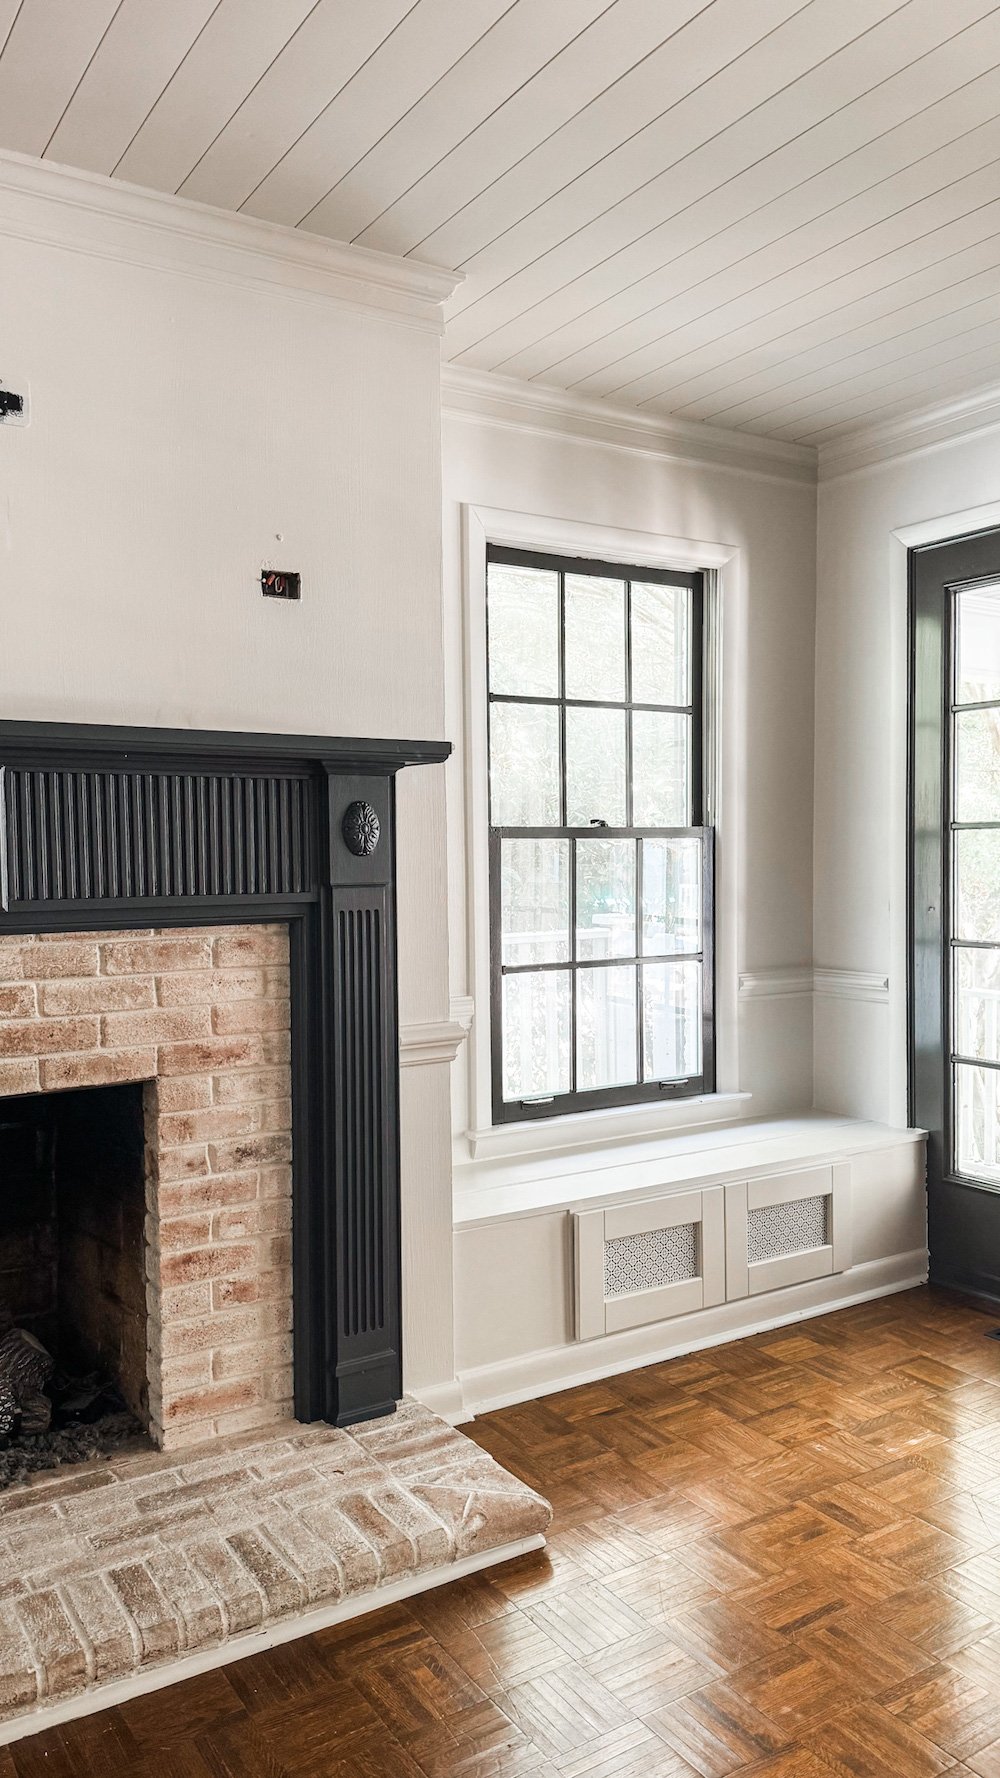
11. Prime and Paint
As soon as the mud was cleaned up, we primed the ceiling and painted it in Sherwin Williams Limewash, a creamy off-white that gave the house a lightweight, heat glow.
And we painted the mantel Benjamin Moore Temptation for distinction.
The Closing Outcome
Now that it’s performed, this ceiling positively my favourite a part of the lounge. (Or no less than it’s a tie with the ornate molding on the hearth and the wall of contrasting French doorways.)
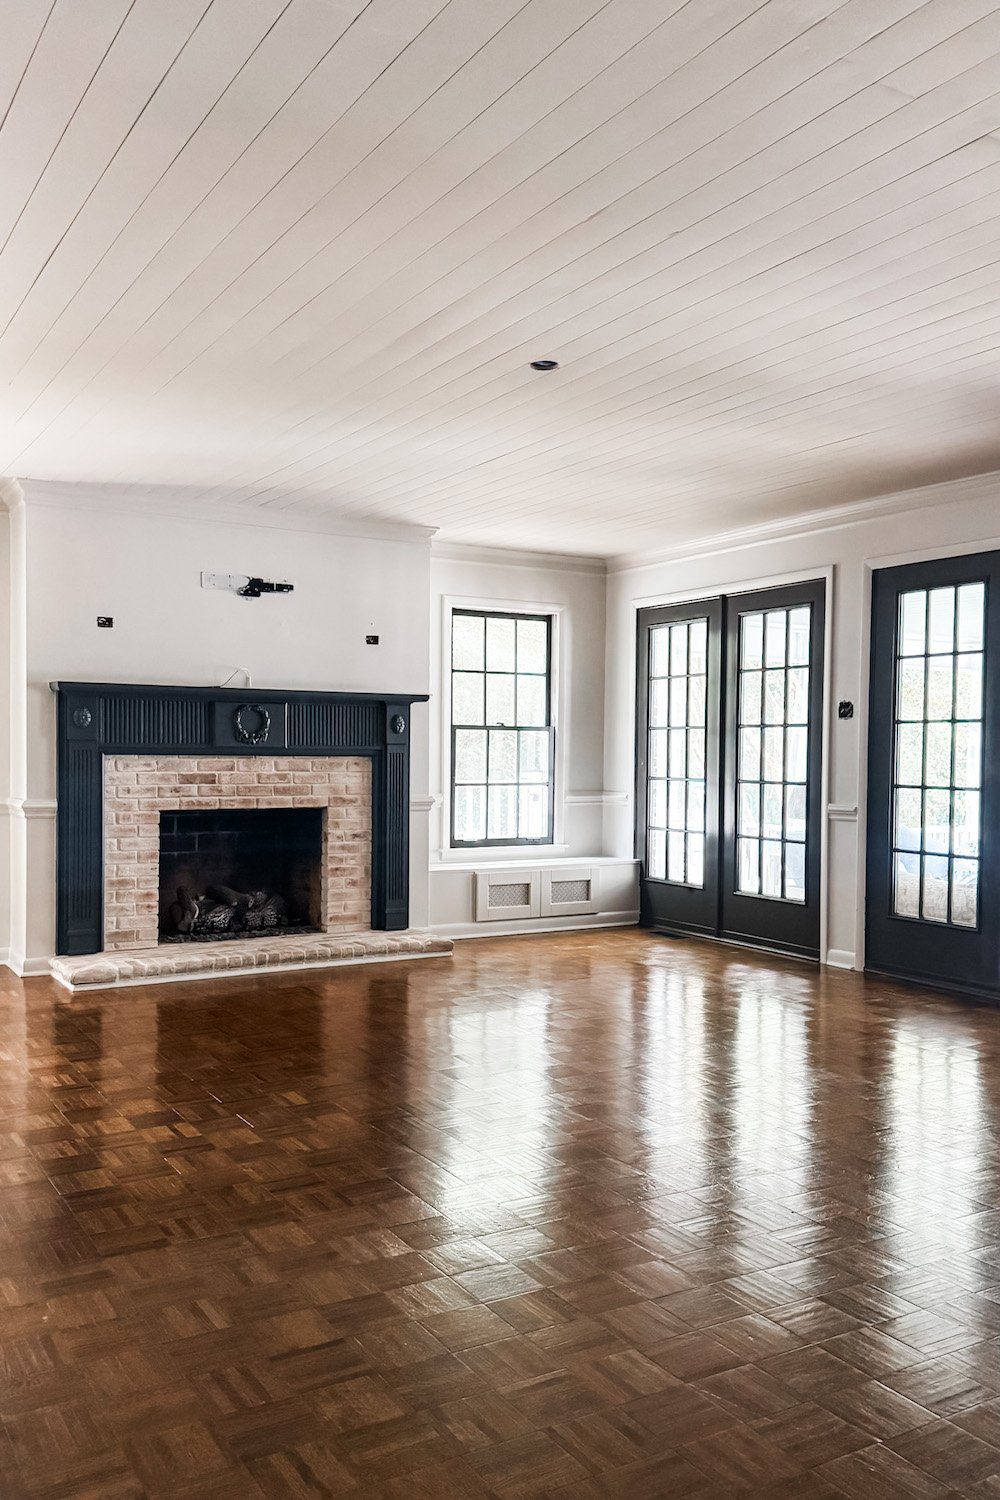
It provides a lot character with out being overwhelming. Most significantly, our low 8′ ceiling don’t really feel like cave-like. It’s one of many greatest methods to make a small room look greater. The feel, the mushy creamy paint, the crisp strains of the crown… it’s just like the ceiling lastly received invited to the social gathering.
Subsequent up: we’re putting in the lighting (a fandelier after all), hauling the furnishings again in, and including some cozy, traditional styling to match our new and improved view above.
If you happen to’ve ever considered doing a DIY shiplap ceiling in your house, that is your signal. You possibly can completely do it, and the payoff is so price it. (And if in case you have popcorn ceilings you wish to cowl up, this may do the job fantastically.)
Extra Concepts for Your Ceilings

")

")


")
