

")
The upholstered headboard for the bed room is completed! I’m so excited to lastly have this challenge completed. It was one of many greatest tasks left on my “to do” listing for the bed room, so with this achieved, I really feel like I’ve cleared a fairly large hurdle. The opposite two huge tasks remaining are (1) ending the curtains, and (2) ending the upholstered mattress base. However for now, let me present you ways I made this DIY upholstered headboard with piping.
Constructing The Body For The Upholstered Headboard
This course of ended up being a bit extra concerned than I assumed it could be, nevertheless it wasn’t notably tough. I began out with a tough sketch of how I wished my headboard to look.
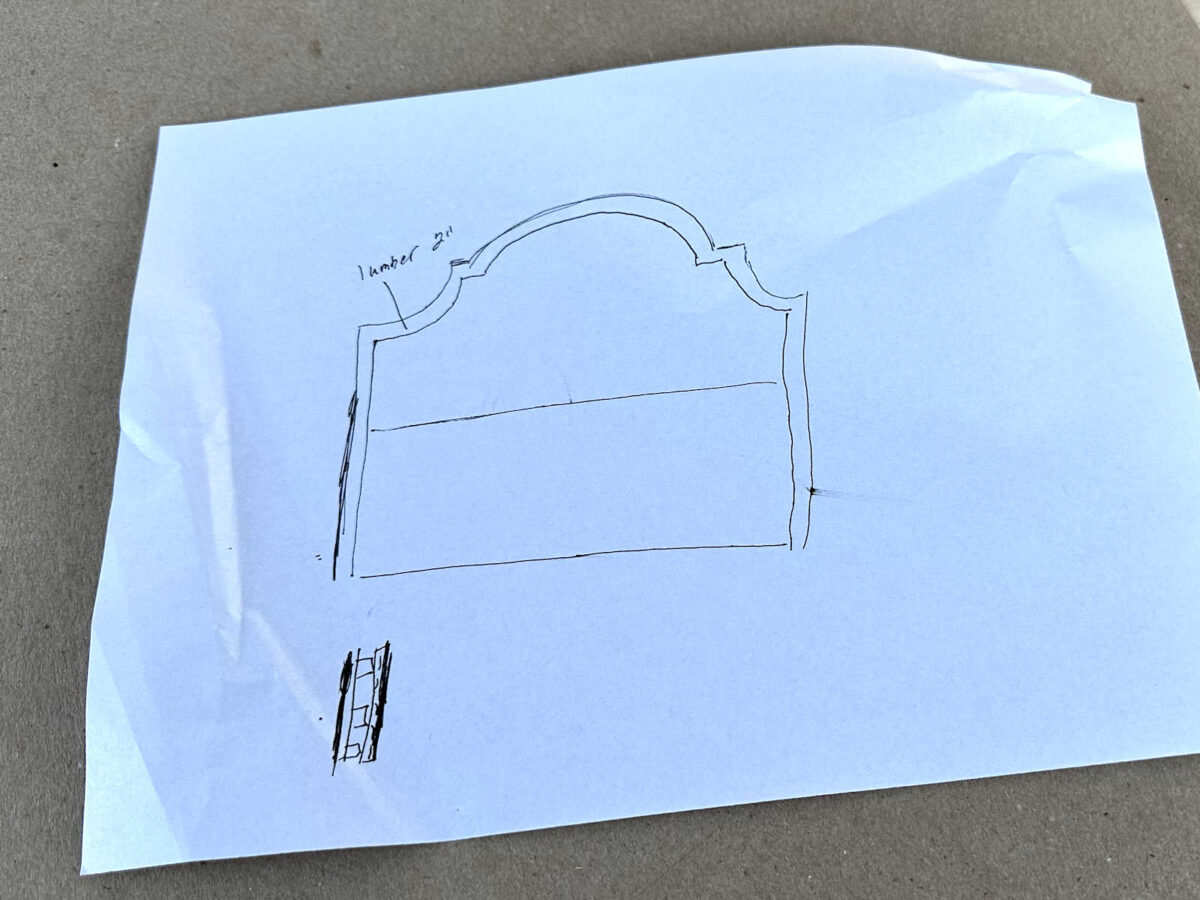
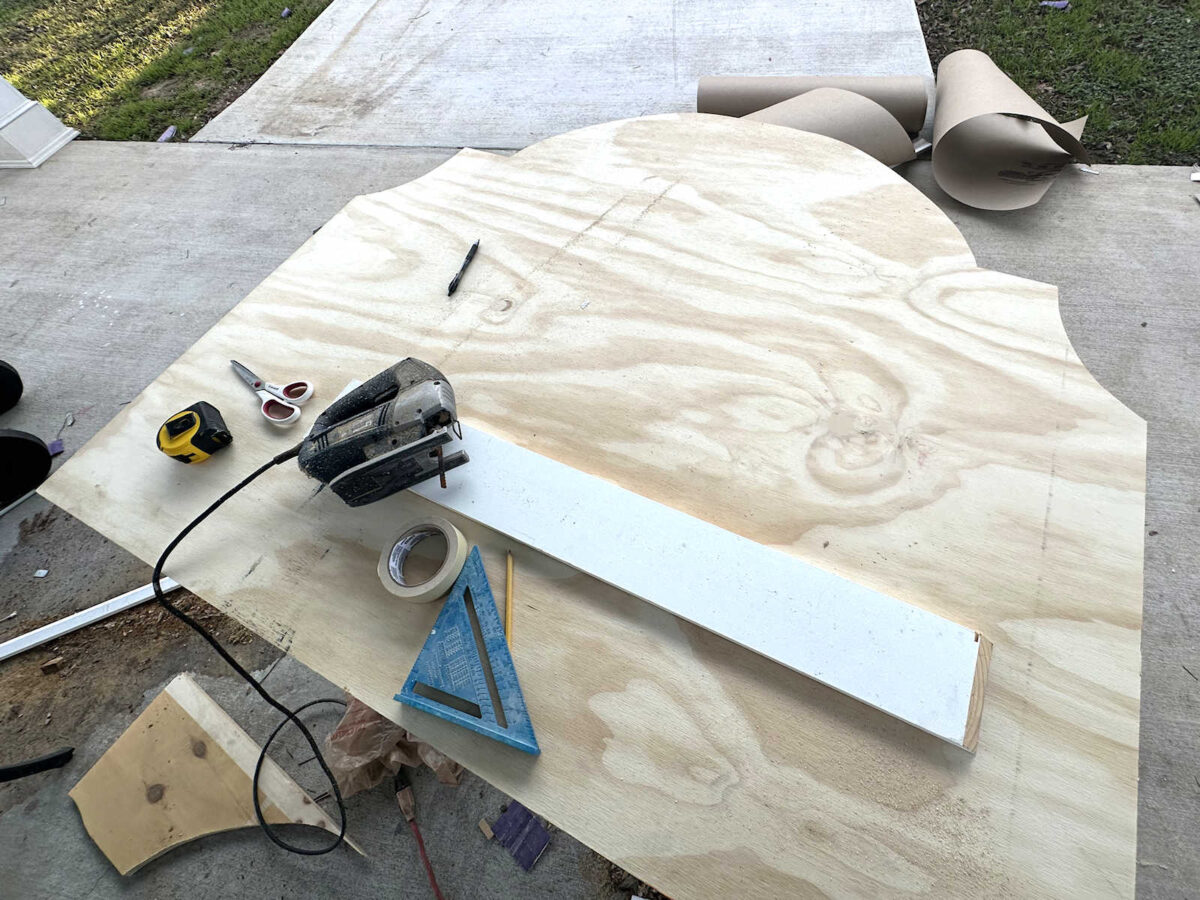
I lower a bit of three/4″ plywood to the general dimension of the headboard (48″ excessive and 58″ extensive). After which I lower a bit of brown paper to half the width of the headboard and taped it onto the left half of the headboard.
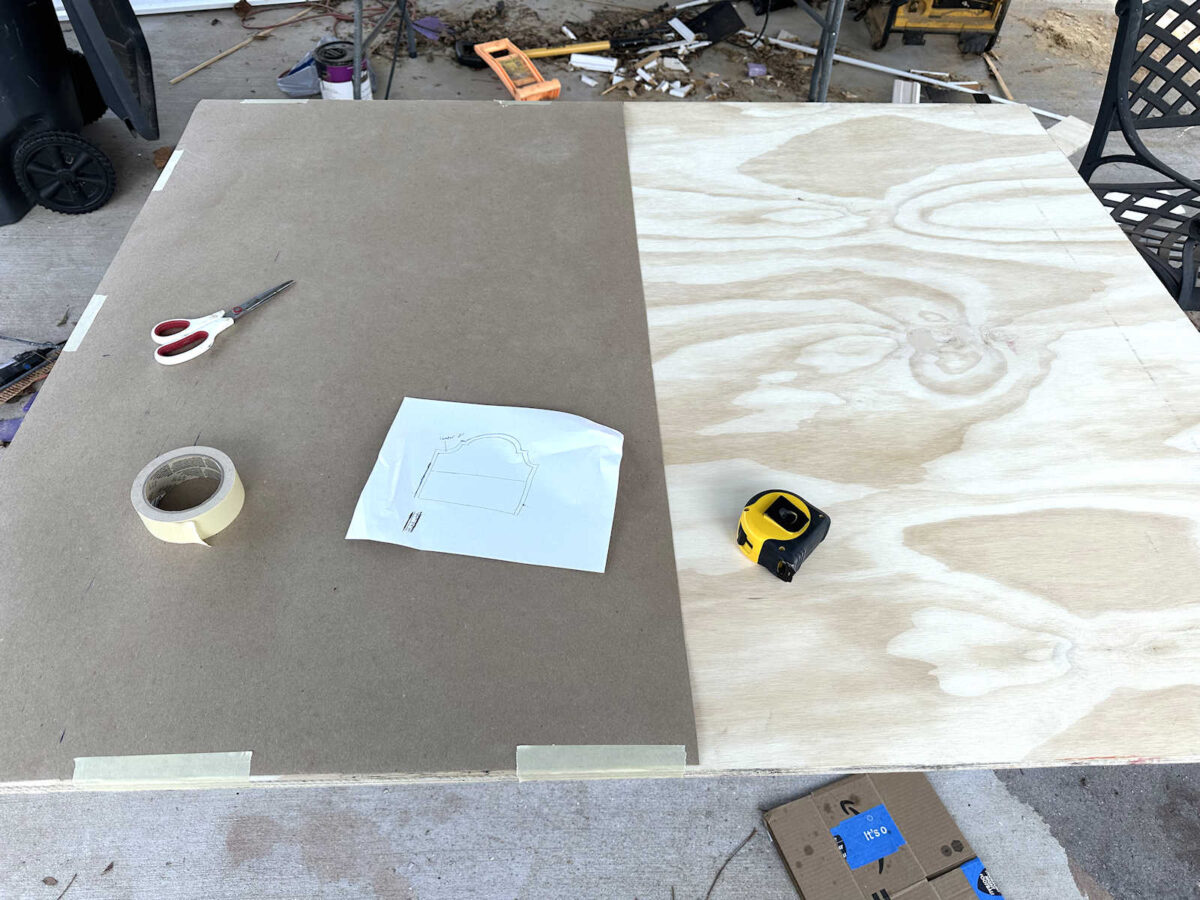
After which I drew my sample onto the brown paper. I simply eyeballed the design and freehanded most of it, however I did use my pace sq. and a straight edge to ensure that the one straight line within the design was an ideal 90-degrees to the left aspect of the plywood.
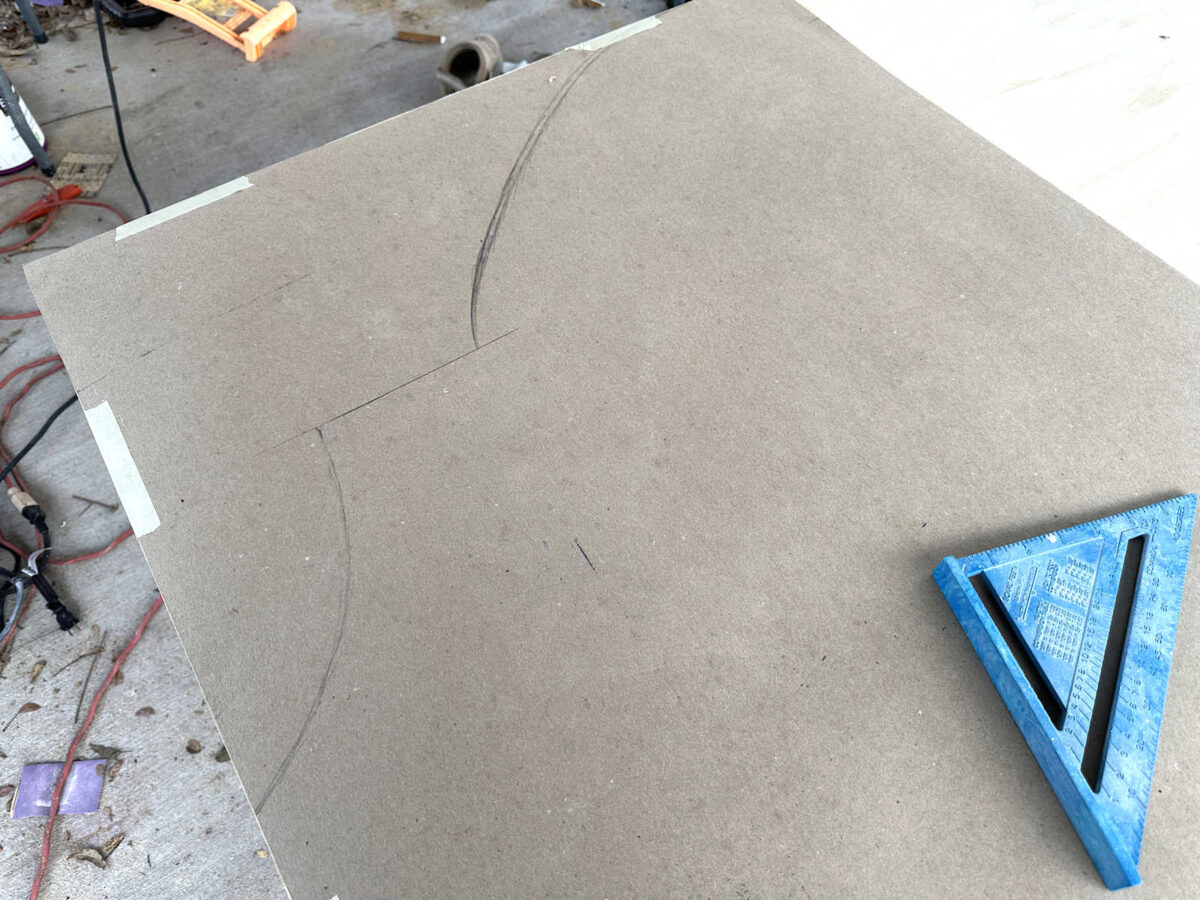
As soon as I received the design how I wished it, I lower it out after which used it as a sample to hint the design onto the plywood.

After which I flipped the sample over to the precise aspect of the plywood and traced the design once more. The paper saved wanting to twist so I used varied objects to weigh it down earlier than tracing.
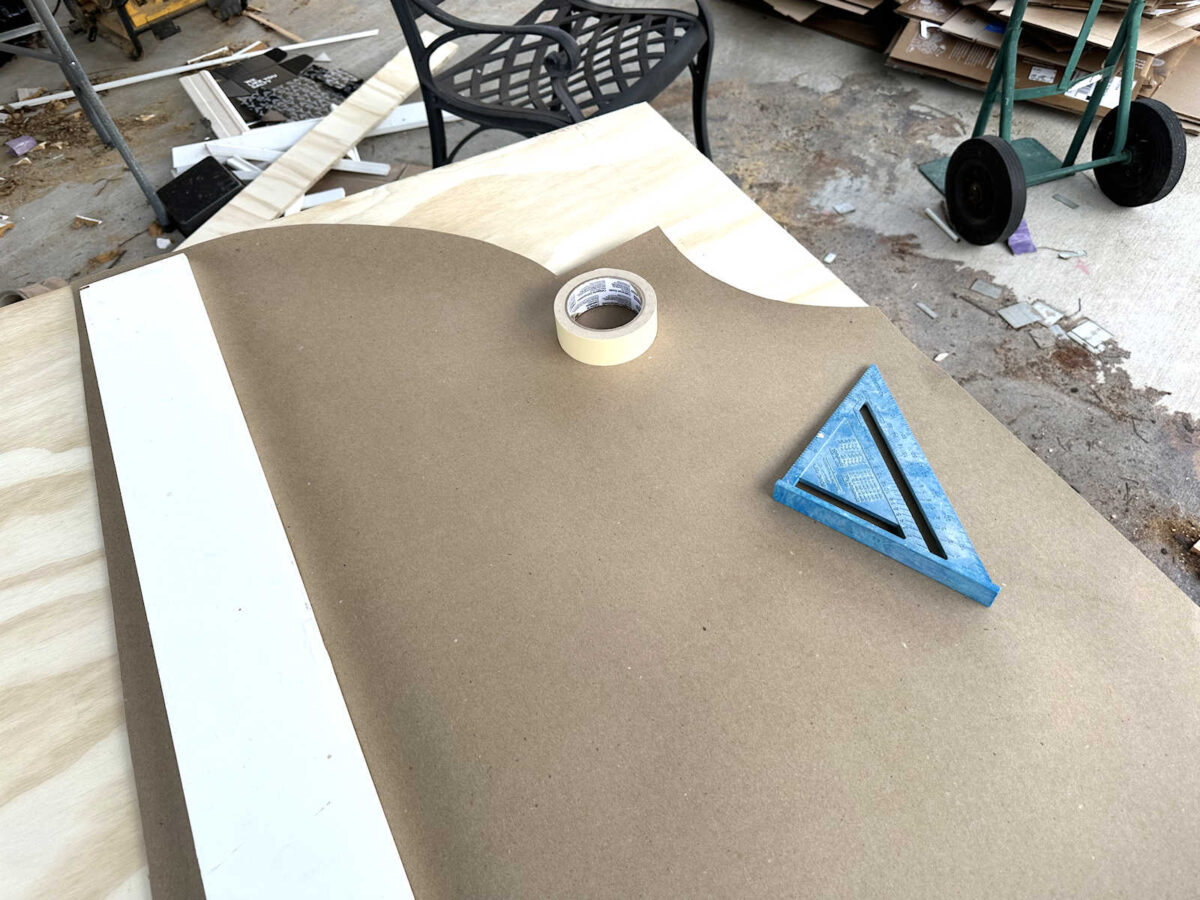
As soon as the entire design was traced onto the plywood, I used my jigsaw to chop out the design.
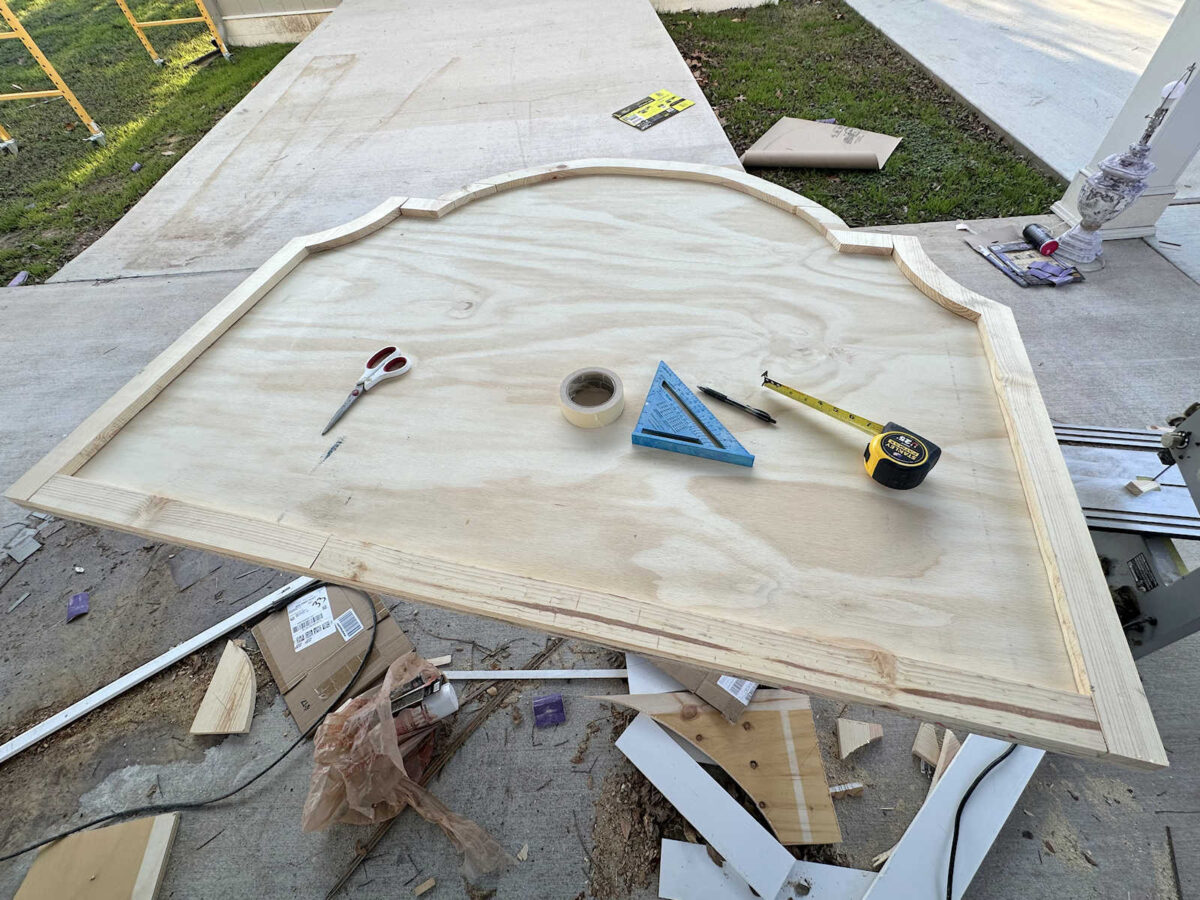
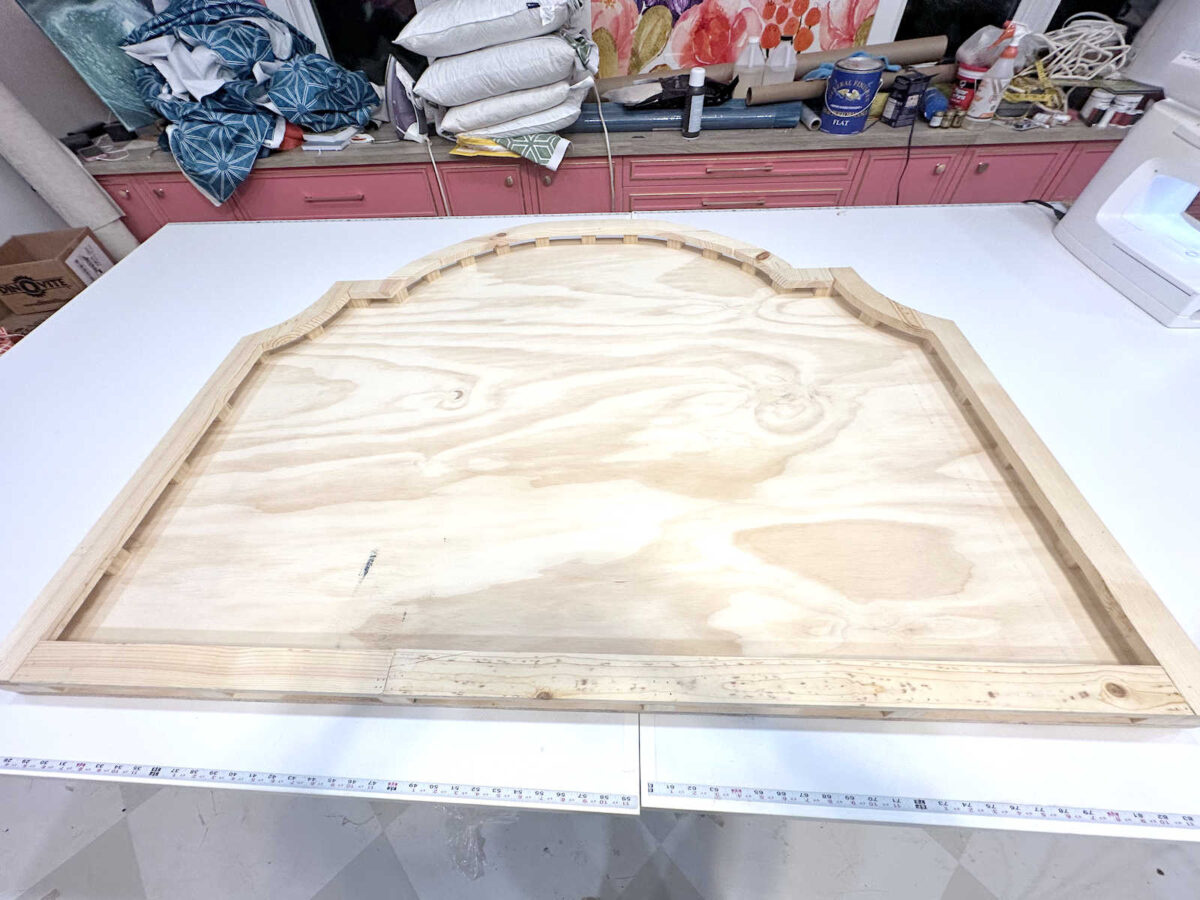
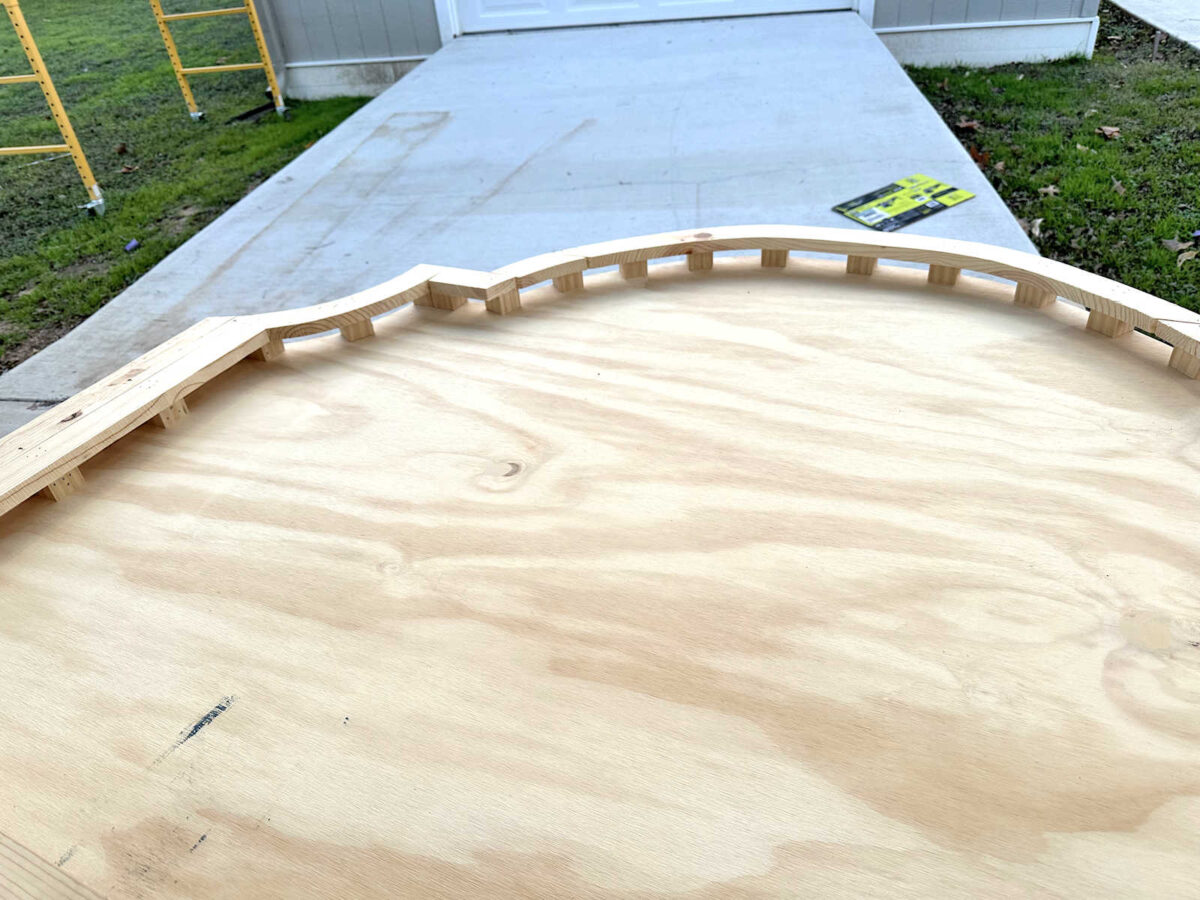
This was the half that received a bit of tough, nevertheless it’s actually not tough. I simply needed to suppose via the right way to obtain what I wished. Principally, I wanted to make a body across the edges of the plywood backing that my 2-inch foam would sit inside. If I had been doing a easy wrap-and-staple headboard, this body wouldn’t have been wanted. However I wished so as to add piping to this headboard, and I wanted one thing to staple the piping onto, so I wanted a wooden body. I made this body out of a number of items of scrap wooden and a mix of my jigsaw (to chop the curves), desk noticed (to tear the straight items to 2″ extensive), and miter noticed (to chop the items to the proper size). As soon as I had all the items lower to create a body all the best way across the headboard, it appeared like this. Word that I didn’t connect these items but.
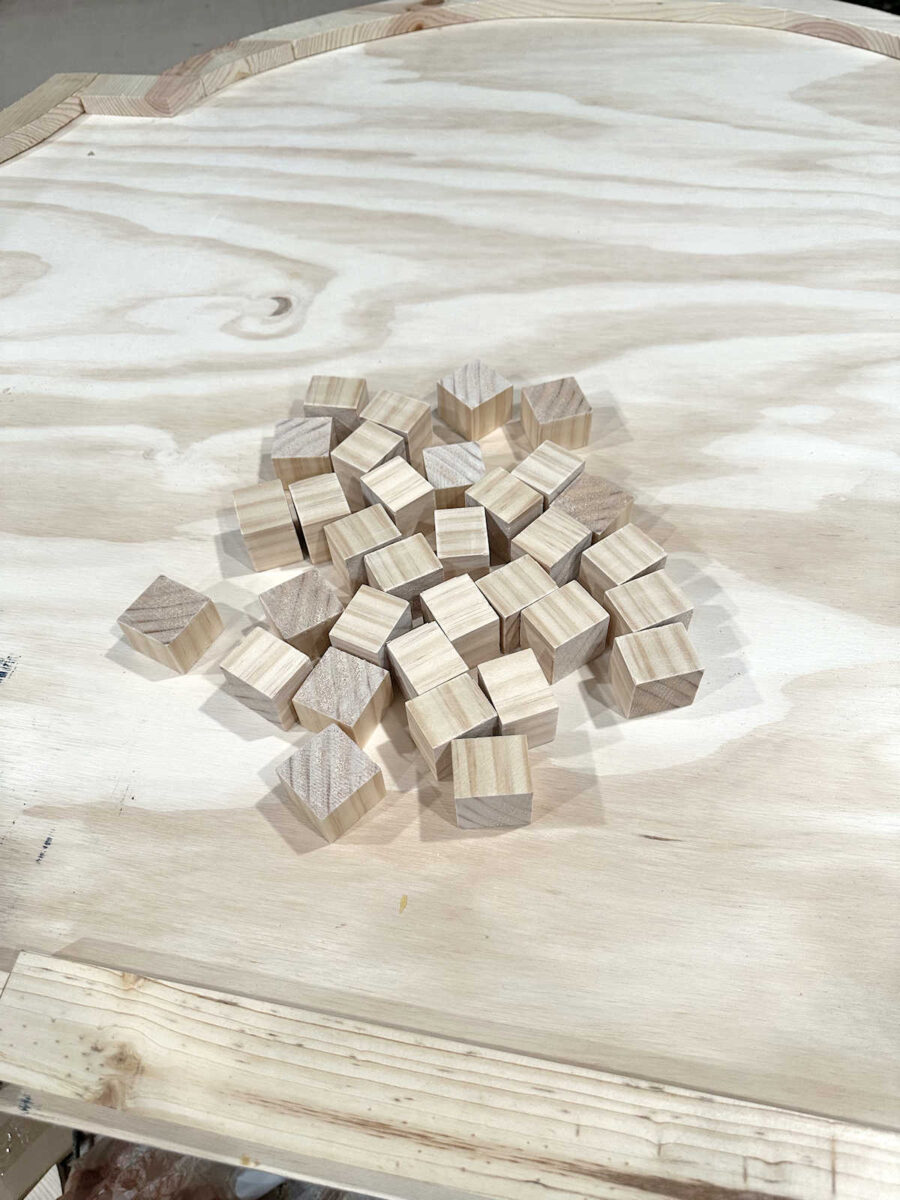
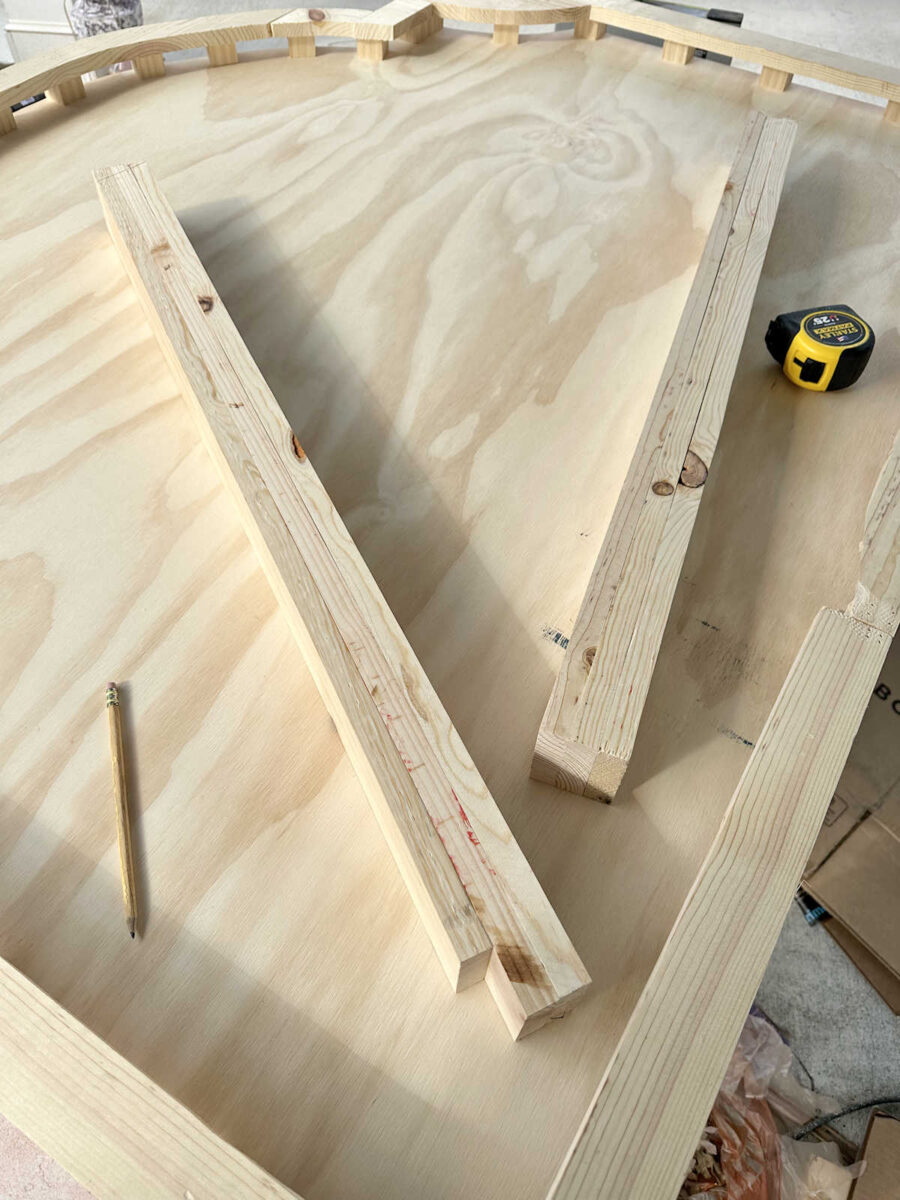
As I discussed, the froth that I used to be utilizing was 2 inches thick, so I wanted to construct that body up on the sides to create a 2-inch-deep “properly” within the center. I did this by slicing a bit of two″ x 2″ x 8′ lumber into blocks to present me the added peak wanted to make up the distinction between the three/4″ thickness of the body and the two″ depth that I wanted. So I lower these blocks to 1 1/4″ thick utilizing my miter noticed.
I spaced these blocks across the edges of the plywood and nailed them into place utilizing 1.25″ 16-guage nails in my nail gun. I nailed them on via the again of the plywood and into the again of the blocks. These additionally might have been hooked up with wooden glue, however that will have taken longer ready for the glue to dry.
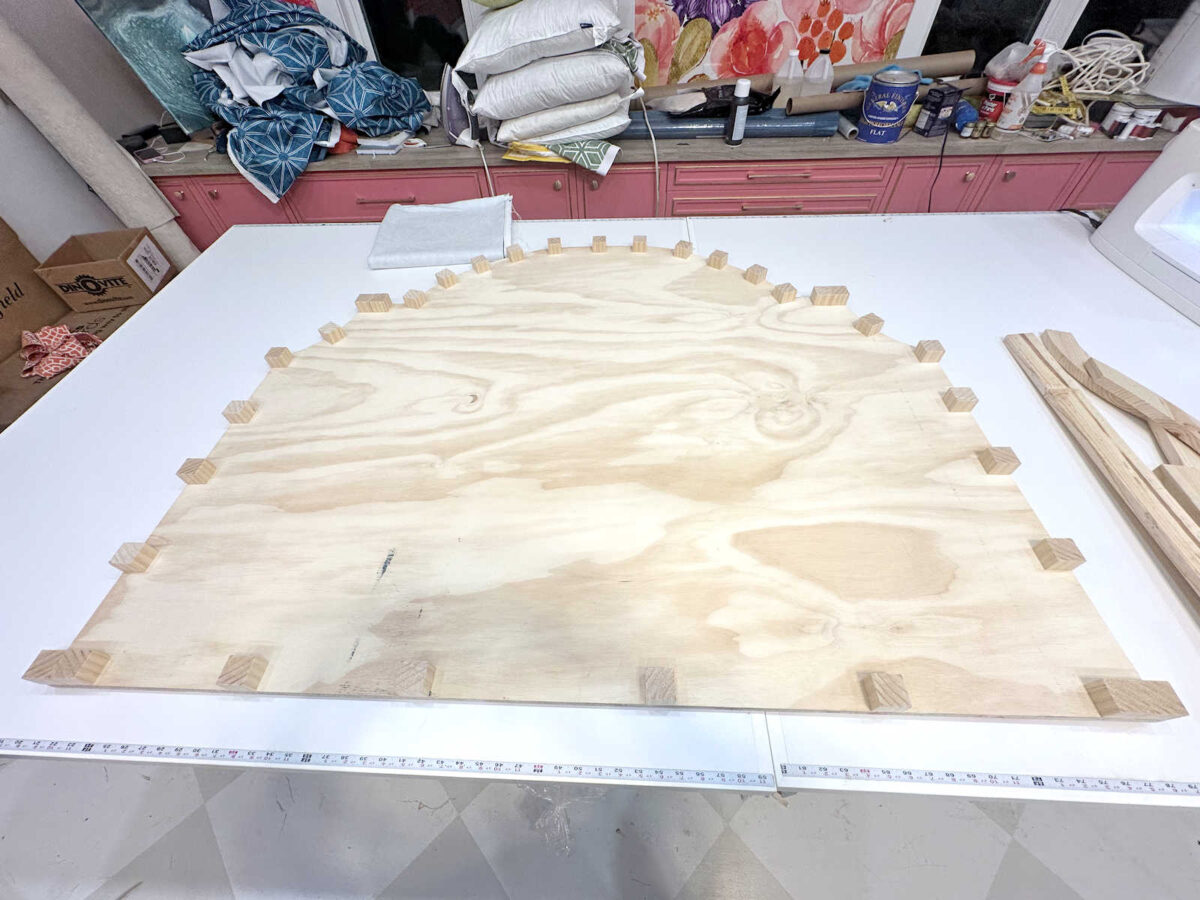
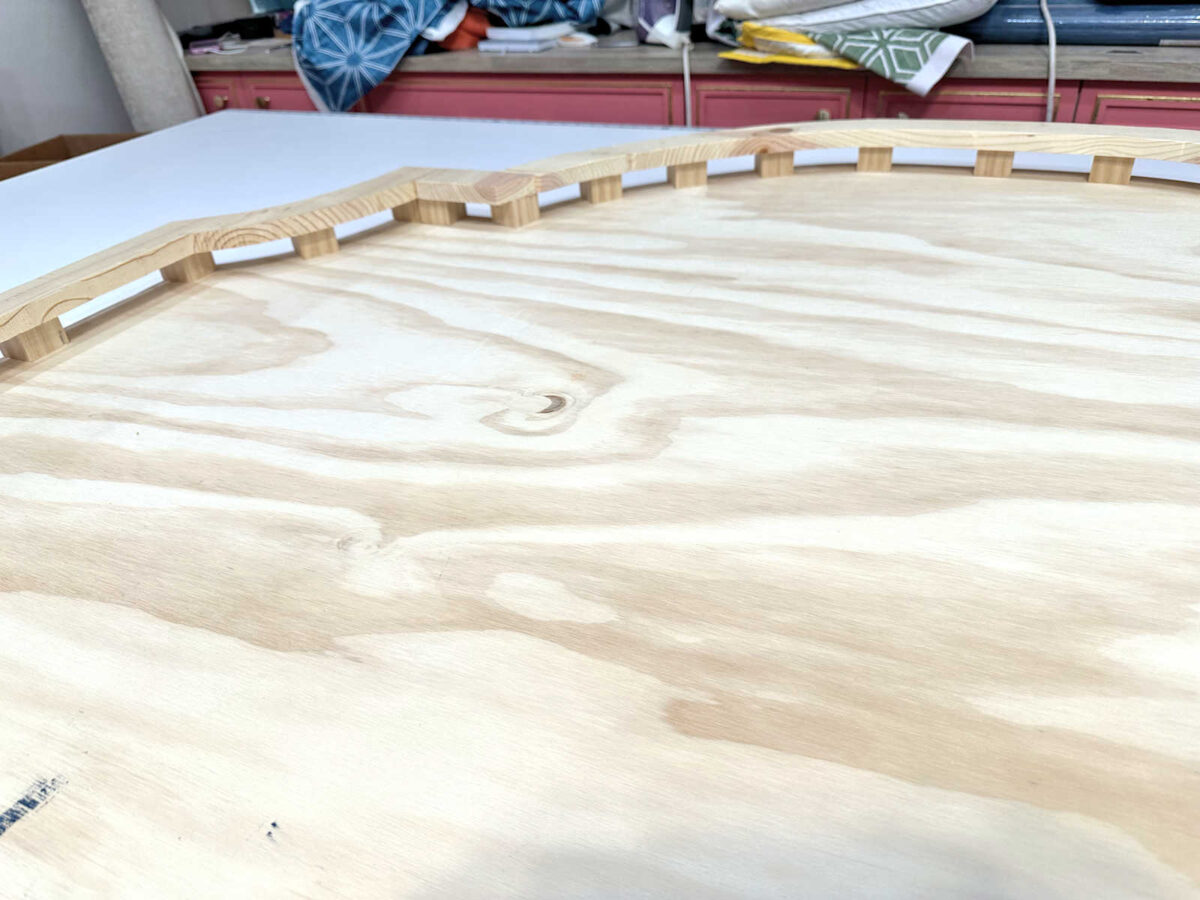
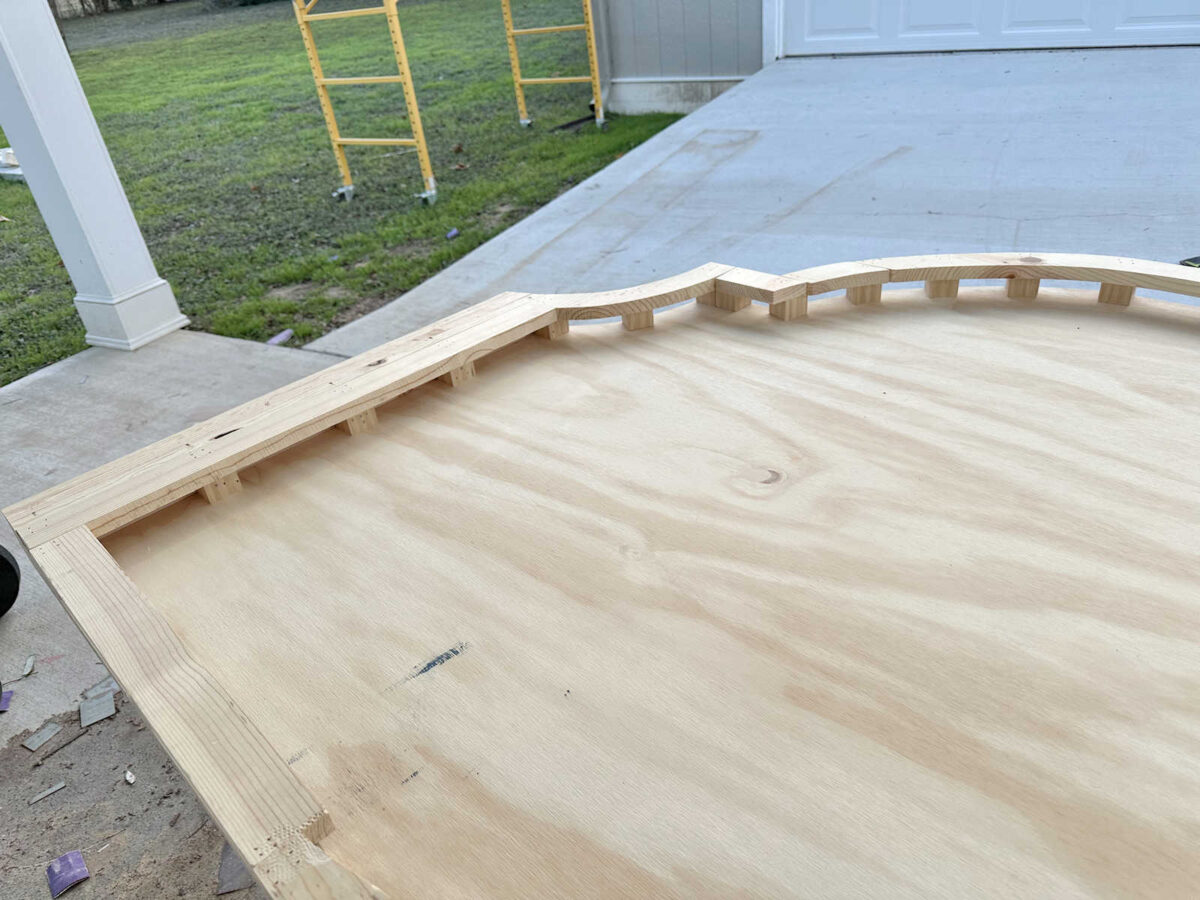
After which I positioned the body items on prime of the blocks and nailed them onto the blocks.
You may see how these blocks raised up the body items and gave me the wanted 2-inches of depth for my 2-inch foam to suit into.
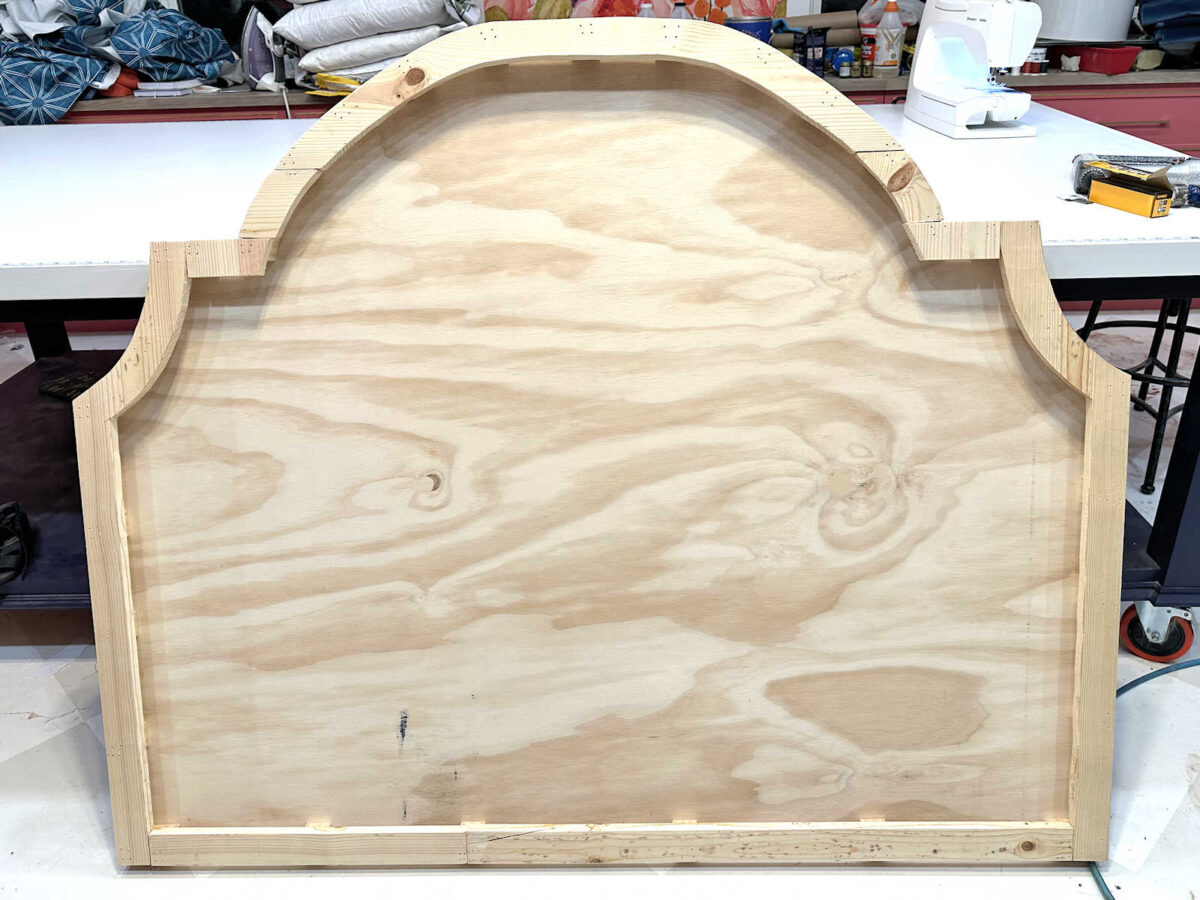
And right here’s what the upholstered headboard wooden body appeared like at this level.
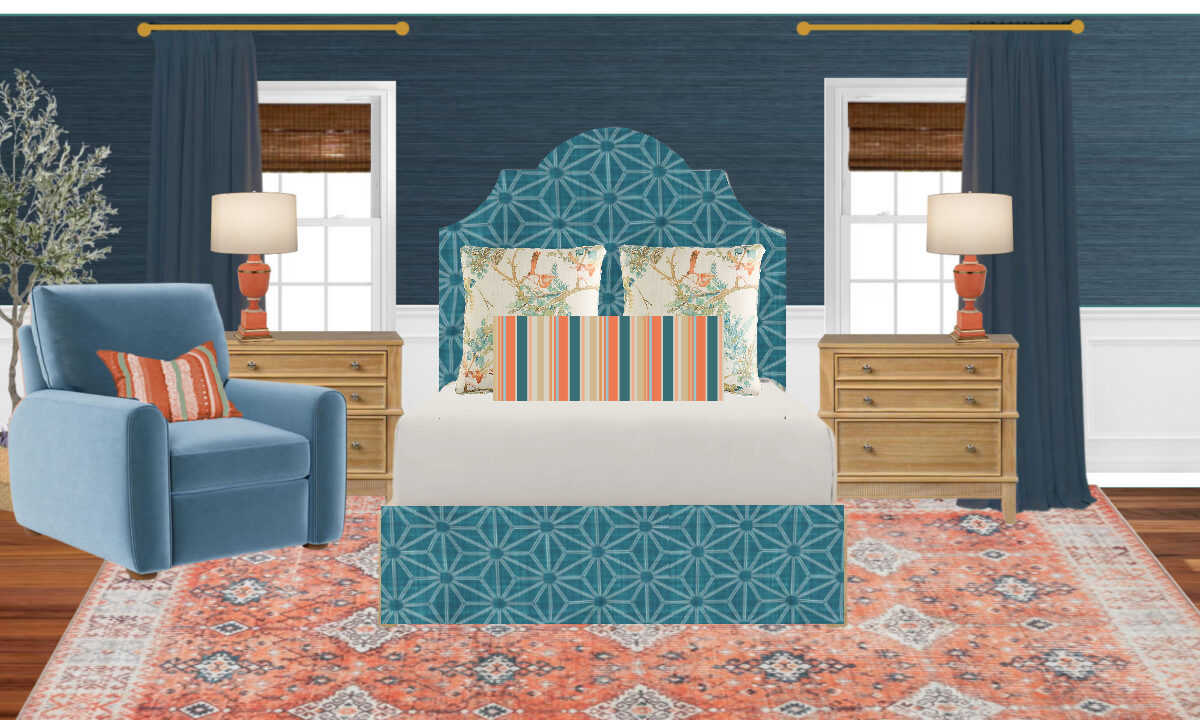
It was at this level that I modified my thoughts about the remainder of the mattress. I had deliberate to make use of a bedskirt on the mattress base, however simply earlier than I went any additional on the headboard, I modified my thoughts and determined that I wished an upholstered mattress base as a substitute. That will require the headboard to be wider by about 5 inches, so earlier than I moved to the subsequent step, I wanted so as to add some width to my headboard. I ripped just a few items of wooden to the thickness of the headboard after which stacked and nailed collectively three items collectively for all sides to make up for that additional width that I’d must match the width of an upholstered mattress base.
I held the piece to the aspect, continued the curved design onto the extension after which lower out that curve utilizing my band noticed earlier than nailing the extension to the aspect.

I repeated that course of on the opposite aspect, after which my headboard was the proper width to match the upholstered mattress base. This was additional work that I created for myself as a result of I modified plans mid-project. Had I deliberate for an upholstered base from the beginning, I’d have made the unique headboard body the proper width and that will have saved me these additional steps. However it simply goes to point out that there’s all the time a solution to repair an issue. You simply need to get inventive and determine it out.
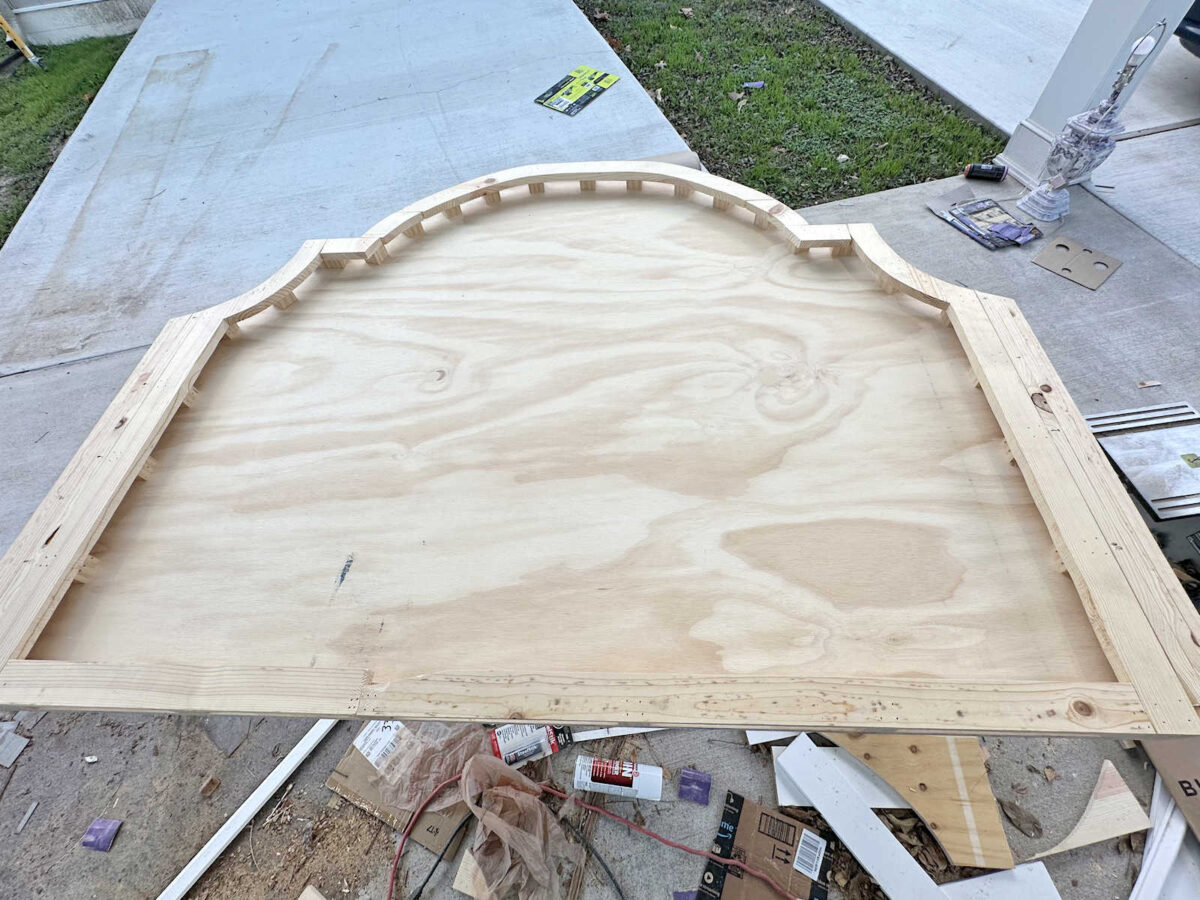
So right here’s what the headboard body seems to be like with the prolonged sides.
Including The Foam And Batting
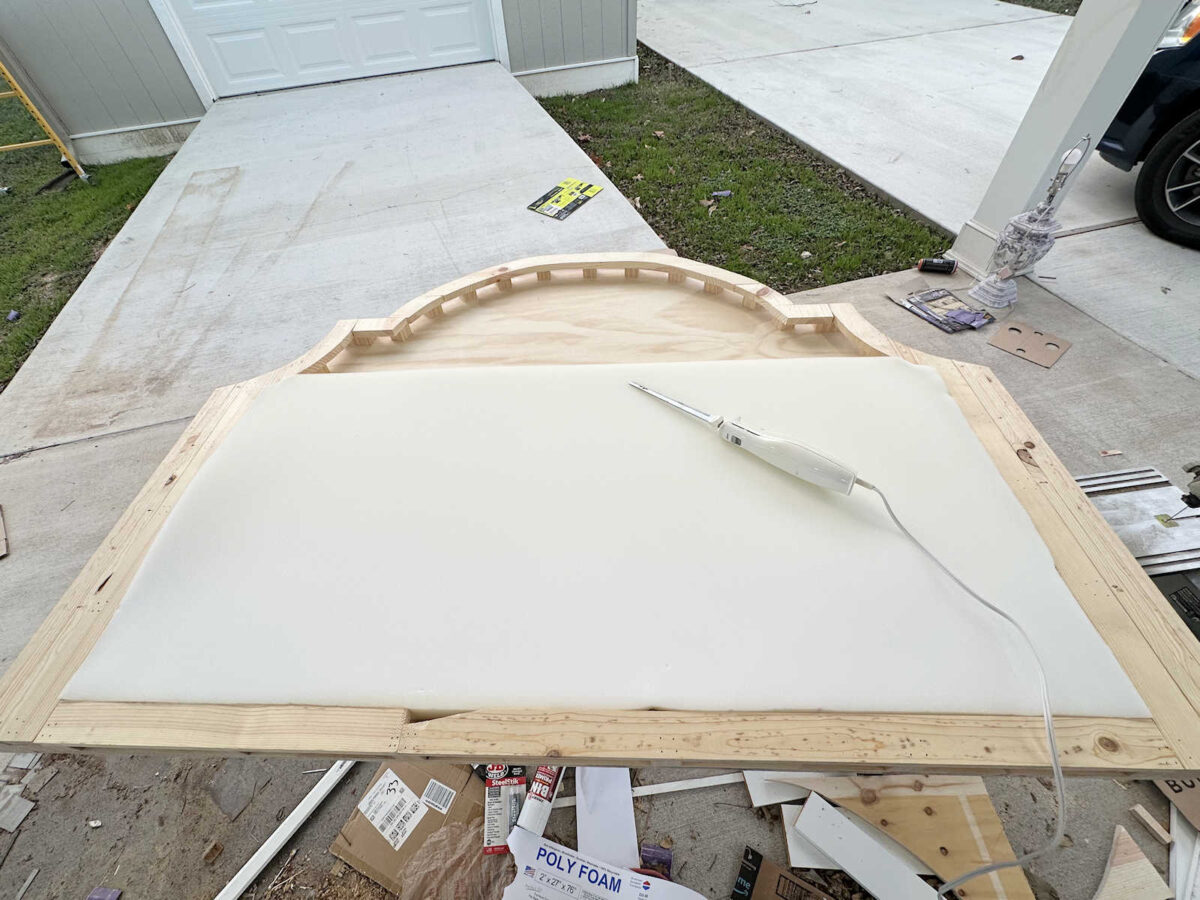
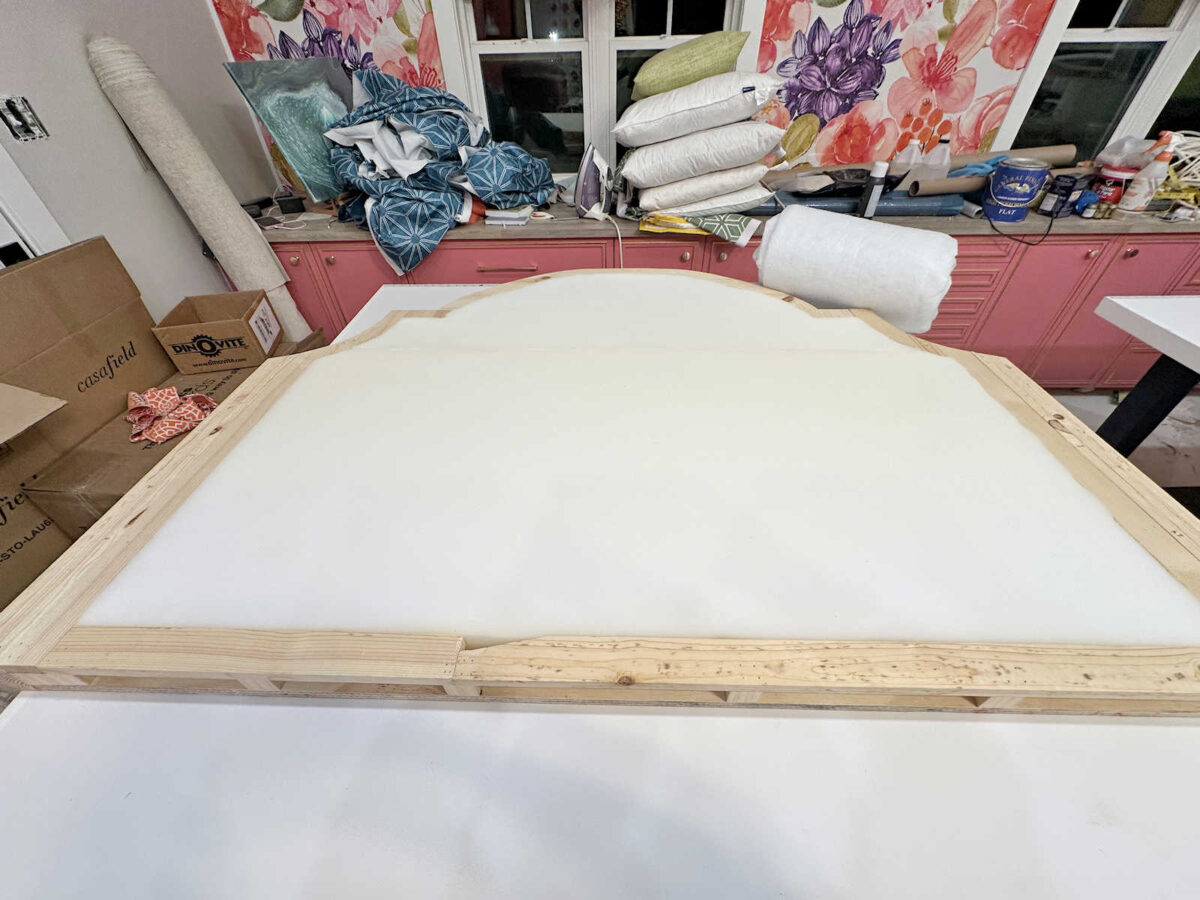
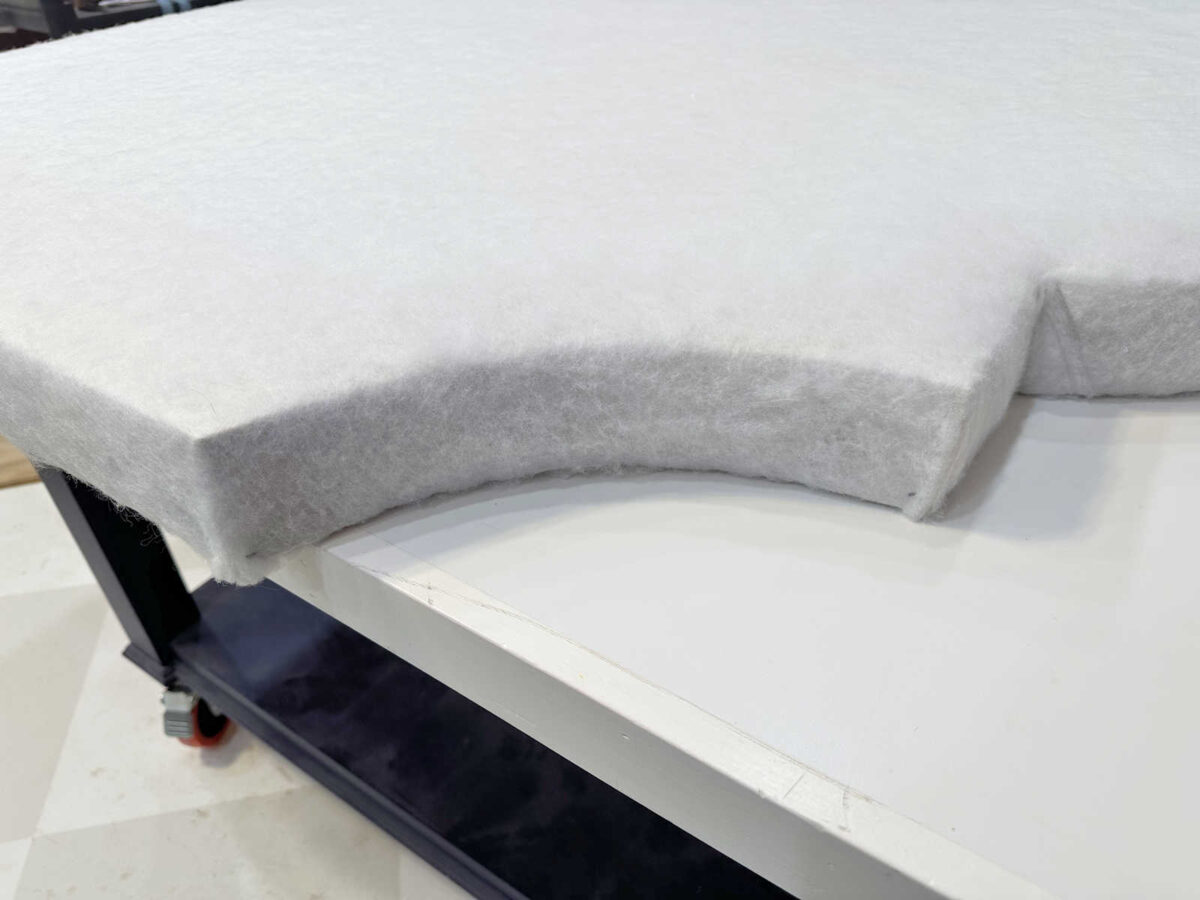
With the body completed, I used to be prepared so as to add my 2-inch foam to the “properly” created by these perimeter body items.
I used this spray adhesive and coated the plywood with the adhesive.

I additionally coated the again of the froth with the spray adhesive, waited a few minutes for all the adhesive to get cheesy, after which positioned the froth onto the plywood. I used my electrical knife to chop the froth and make it match contained in the perimeter body.
It took two items of froth to cowl all the headboard. When I’ve two items of froth that meet on an upholstery challenge, I not solely adhere them on the again, however I additionally be certain that to stick them to one another on the sides the place they meet. So I pulled one again a bit, sprayed adhesive on each edges, waited about two minutes, after which caught them collectively in order that they might be seamless.

With the froth hooked up and lower to suit, I used to be able to wrap the entire thing with batting.
I used two layers of high-loft batting over the entire headboard and did a easy wrap-and-staple, wrapping the batting to the again of the plywood and stapling it into place on the again.
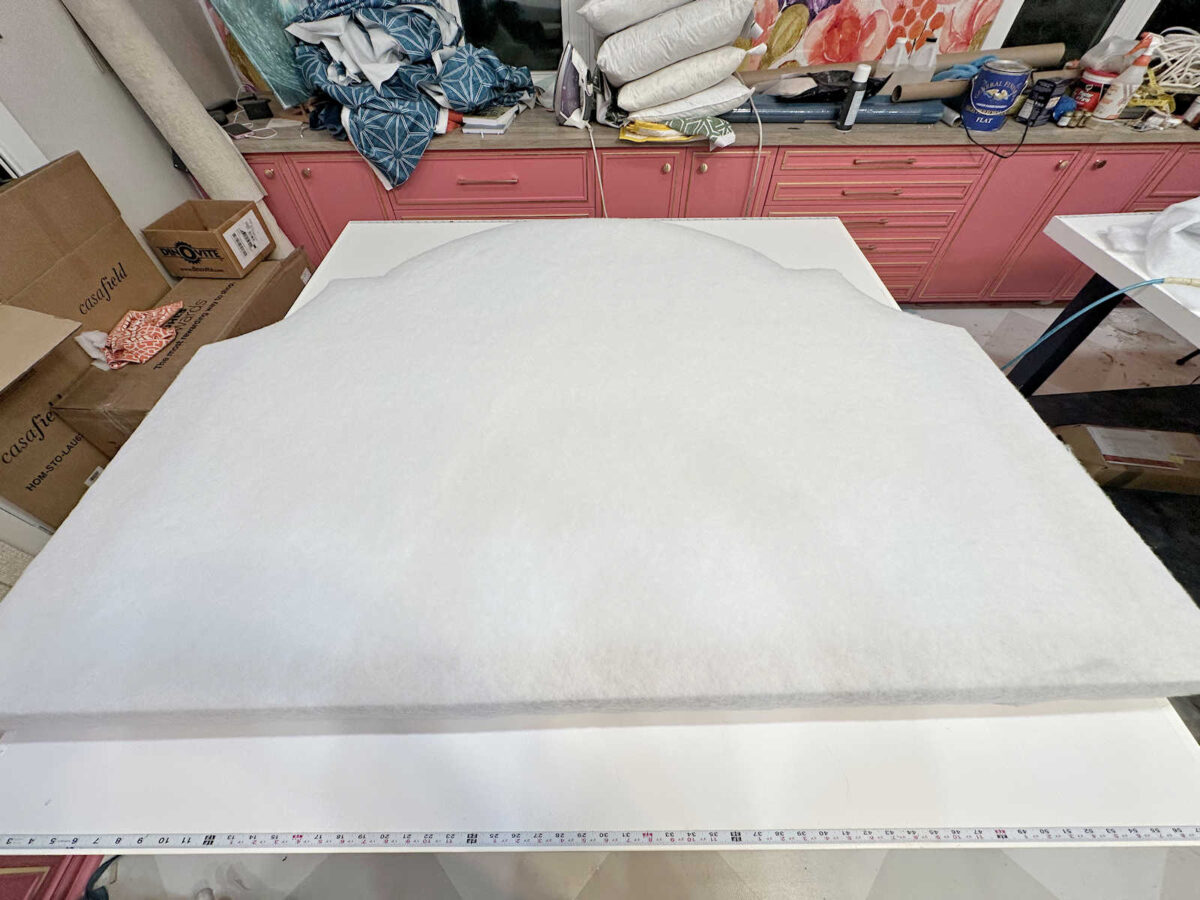
The underside and straight sides had been quite simple to wrap and staple.
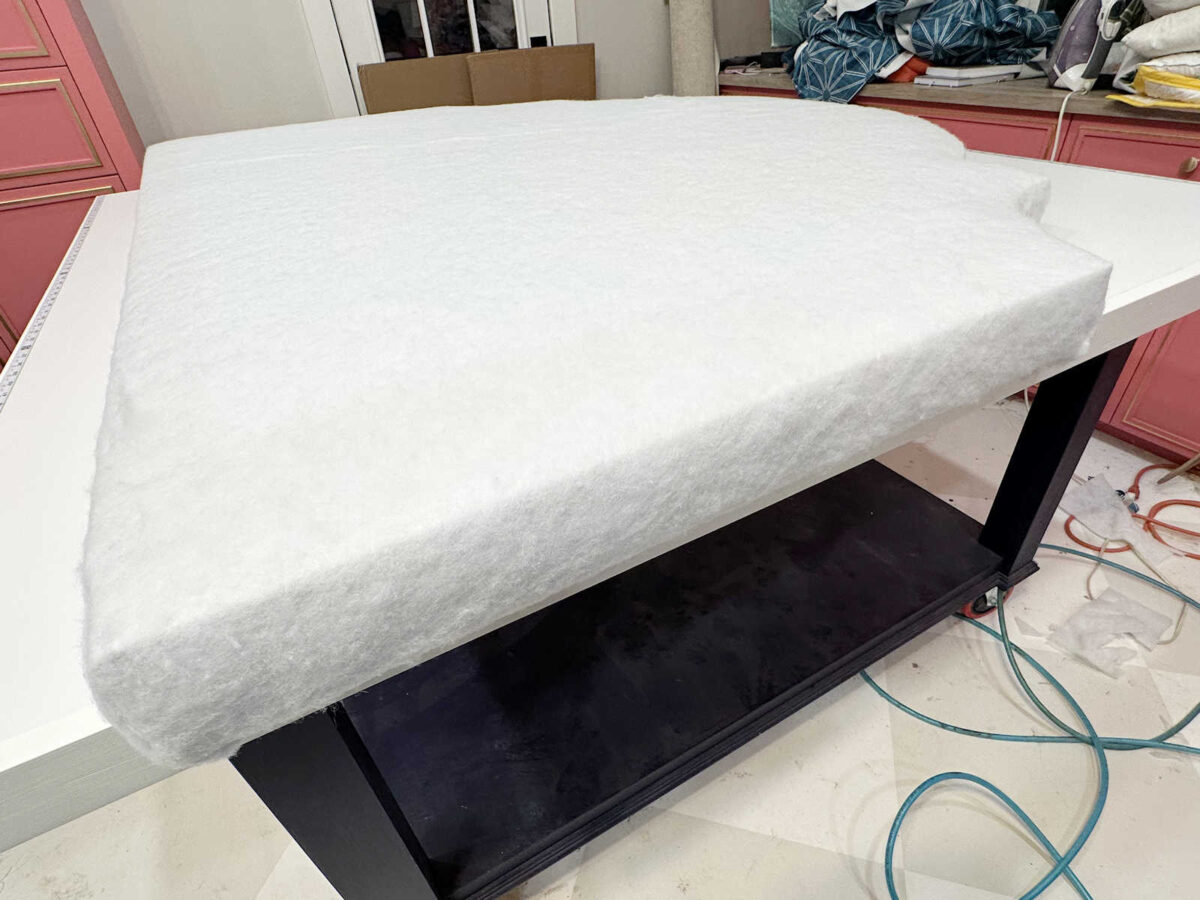
The curve was a bit more difficult, however this inside nook actually gave me grief. I ended up having to chop it proper to the nook on the entrance edge after which filling within the nook with a separate small piece of batting.
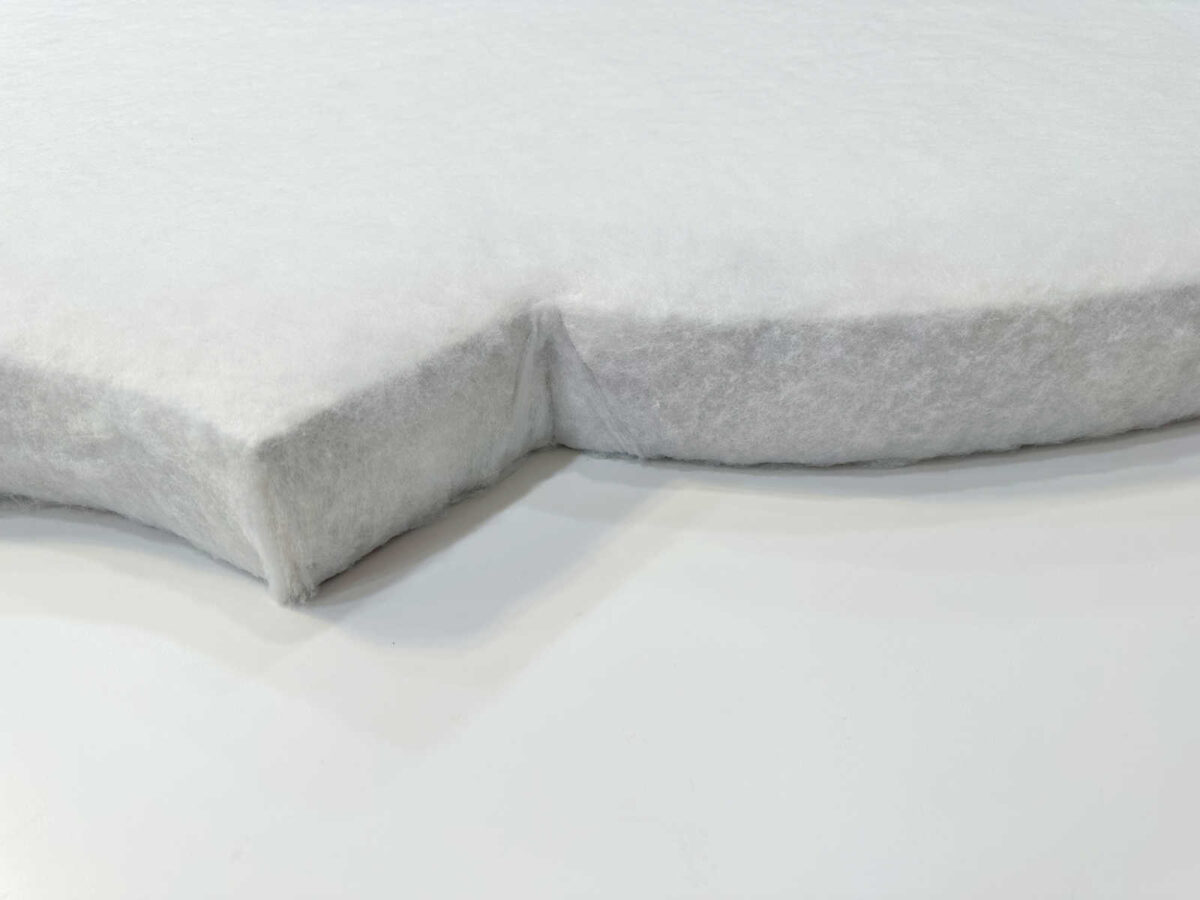
Right here’s the way it turned out. I used to be fairly happy with this.
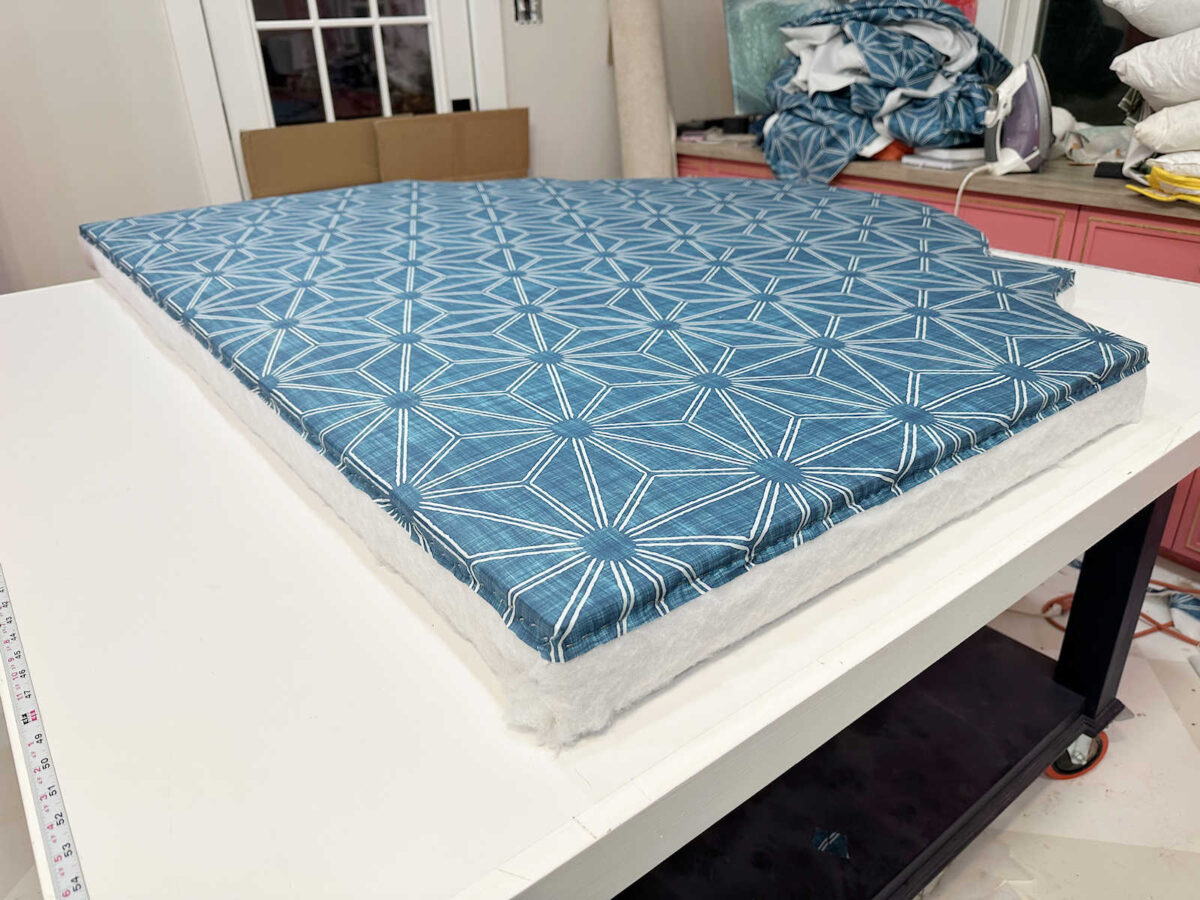
Including The Face Cloth
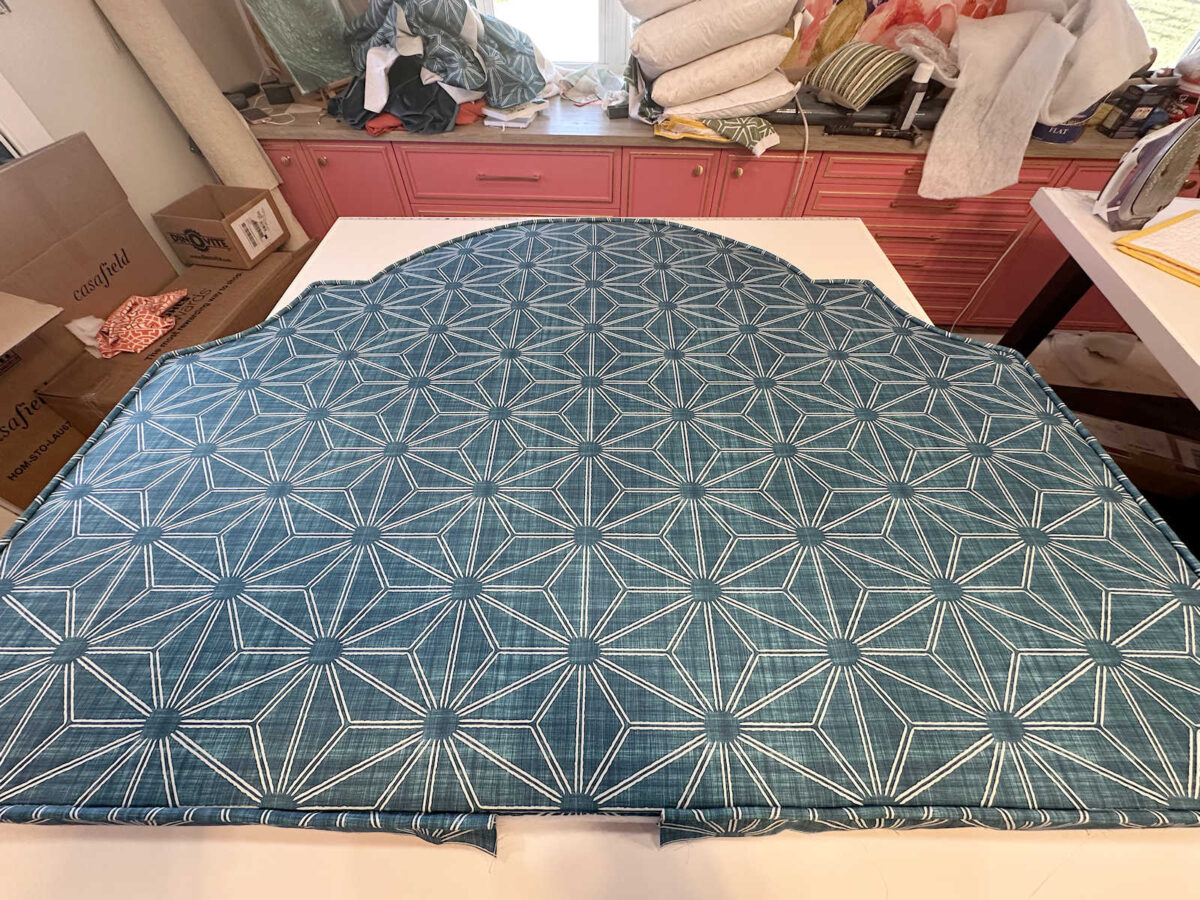
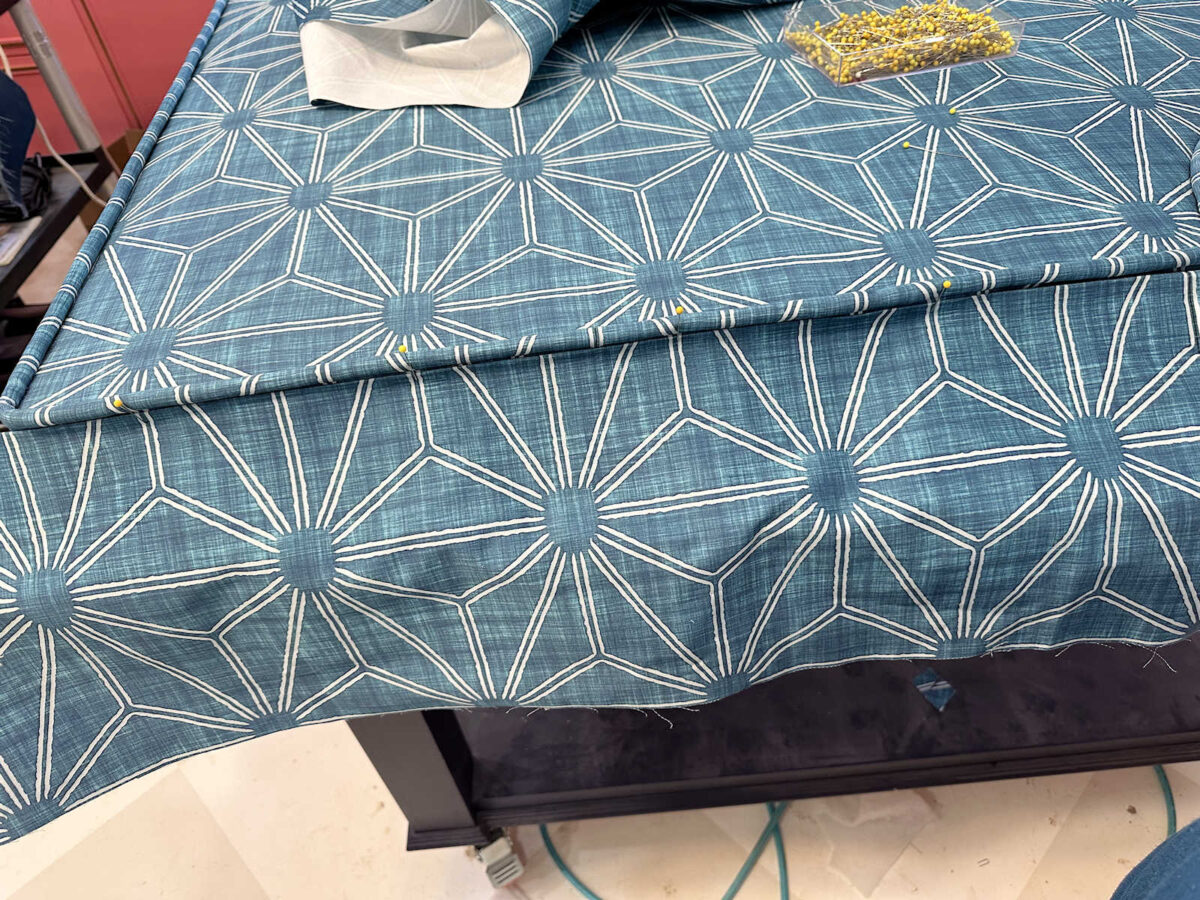
With the batting stapled on, I used to be lastly prepared for the material. I unfold it out and received the design centered, after which began stapling on the underside edge. I stapled the underside edge all the best way throughout as a result of it was crucial for me to maintain the design straight, and the traces on this sample made it simple.
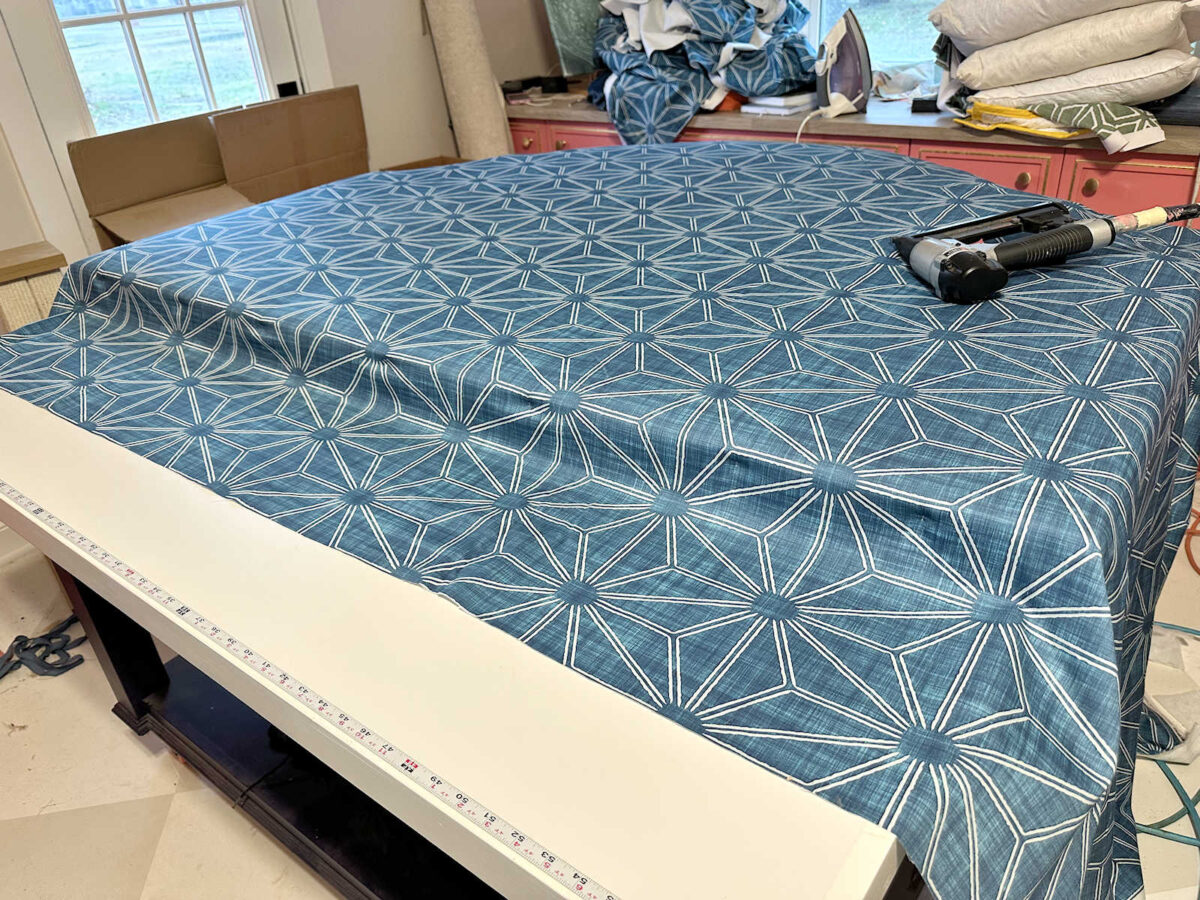
I stapled the face cloth on the sting about 1/2″ down on the aspect. After stapling all method the throughout the underside, I moved to the highest curve. Beginning within the center, I labored my solution to one aspect, after which to the opposite aspect, ensuring that the sample stayed straight. You may see right here (the arrow) how far down I used to be stapling on the sting of the headboard body. Because of this I wanted that wooden perimeter body to present me one thing to staple into.

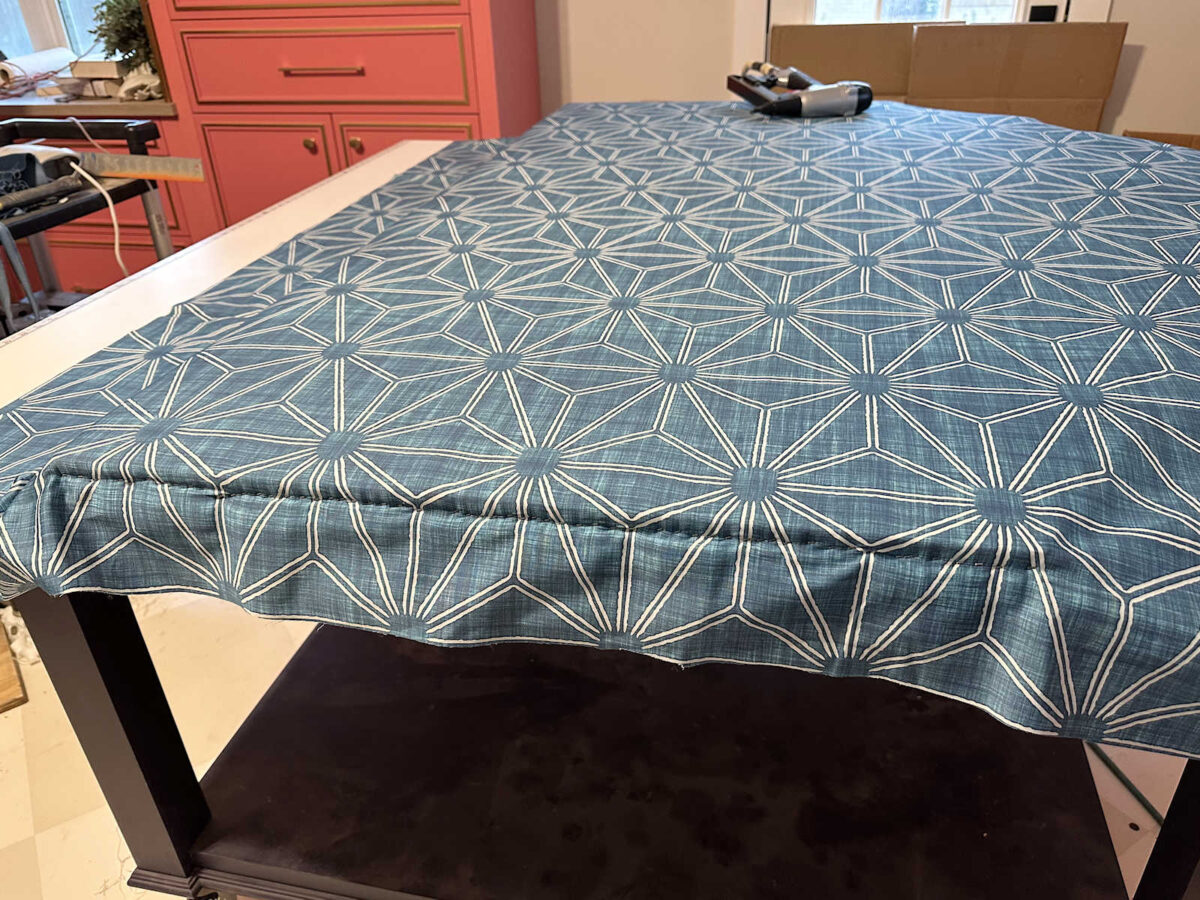
After stapling a superb portion of the highest curve, I moved to the aspect and stapled all the size of the straight edge. After which I repeated that on the opposite aspect.
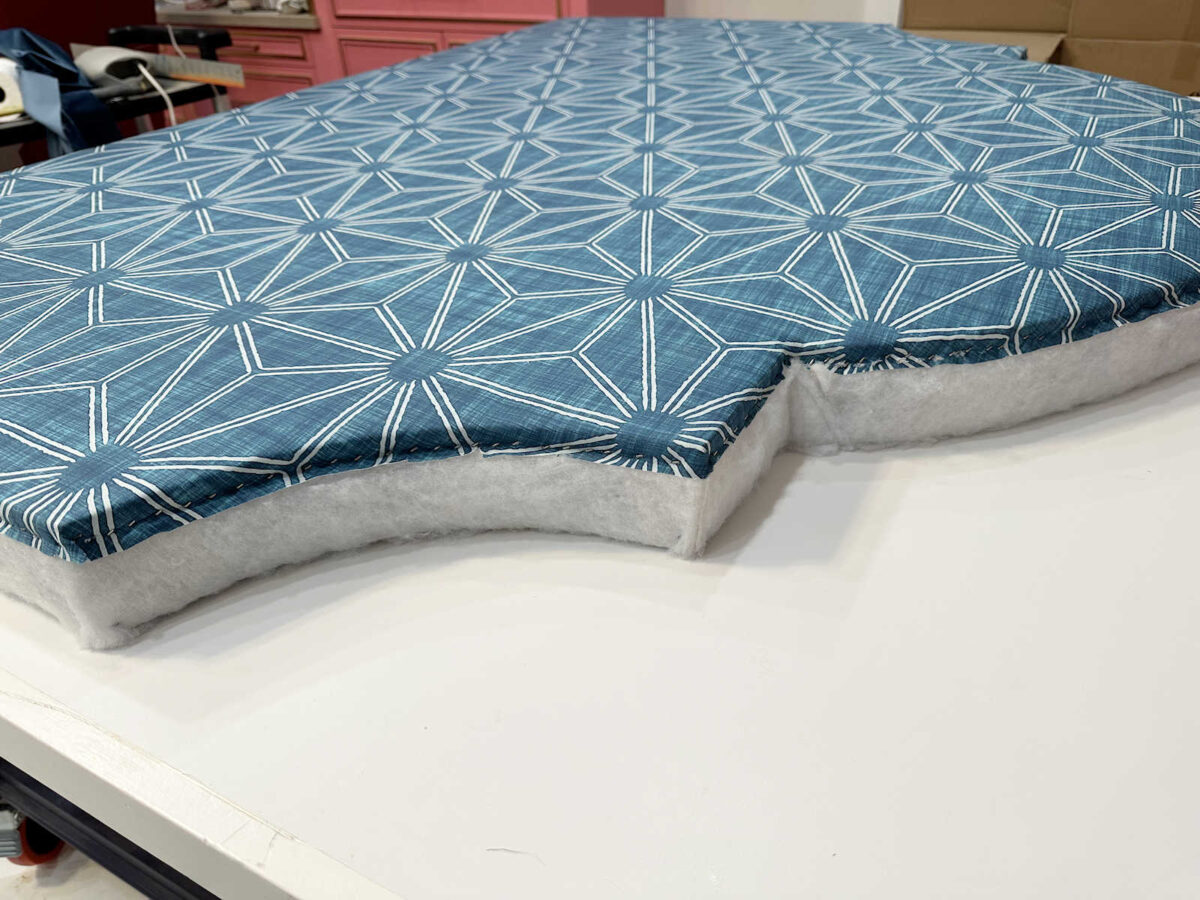
The curve was a bit difficult and required a variety of aid cuts with a view to get the material to wrap across the curve.
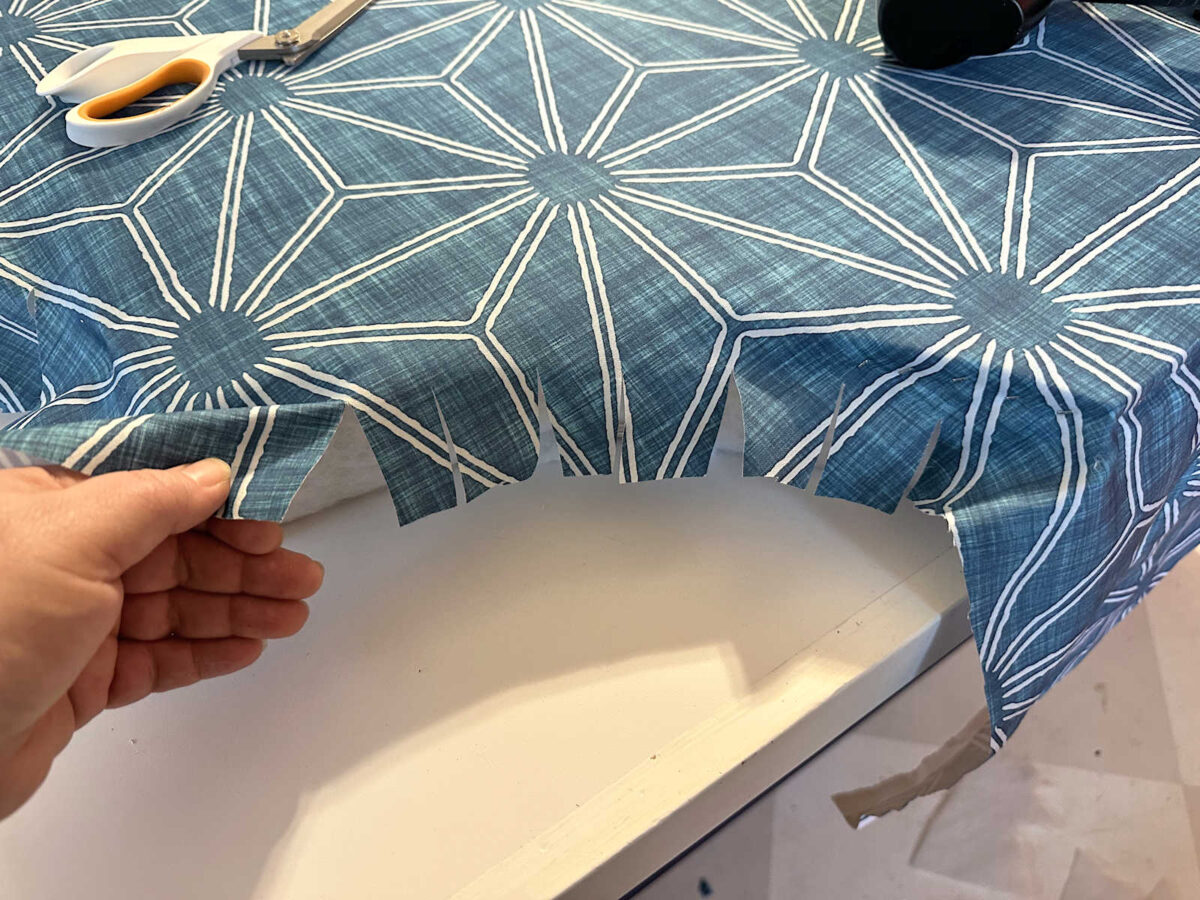
However even that curve was a cake stroll in comparison with this inside nook. It made me so nervous to place a aid lower that far in, however that’s what was required to get the material to lie flat with no puckers.

As soon as the face cloth was stapled all the best way round, I lower off the additional cloth. Right here’s what it appeared like at this stage.
Including The Piping
The following step was so as to add the piping. I’m not going to enter element on the right way to make piping. There are a thousand movies on YouTube exhibiting this course of, and it’s quite simple. As soon as I had my piping coated with my cloth, I used to be prepared to connect it. I do need to present that I left a variety of cloth on my piping. I typically lower off this extra cloth earlier than attaching it, however for this challenge, I made a decision to go away it. I wished to point out you that so that you simply don’t get confused about what you’re seeing in these images. This extra cloth is just not getting used to cowl the sting of the headboard. It’s simply extra cloth that I left on, nevertheless it actually serves no objective.

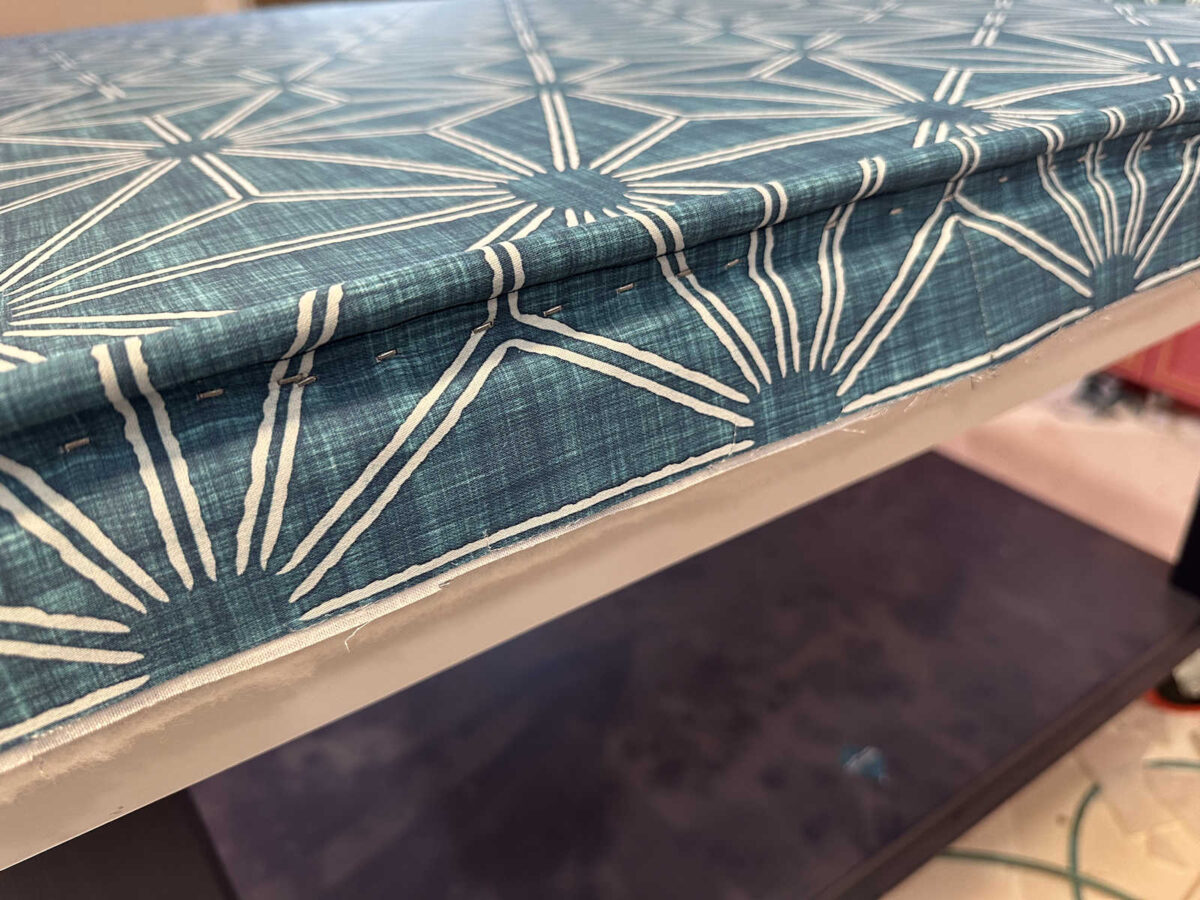
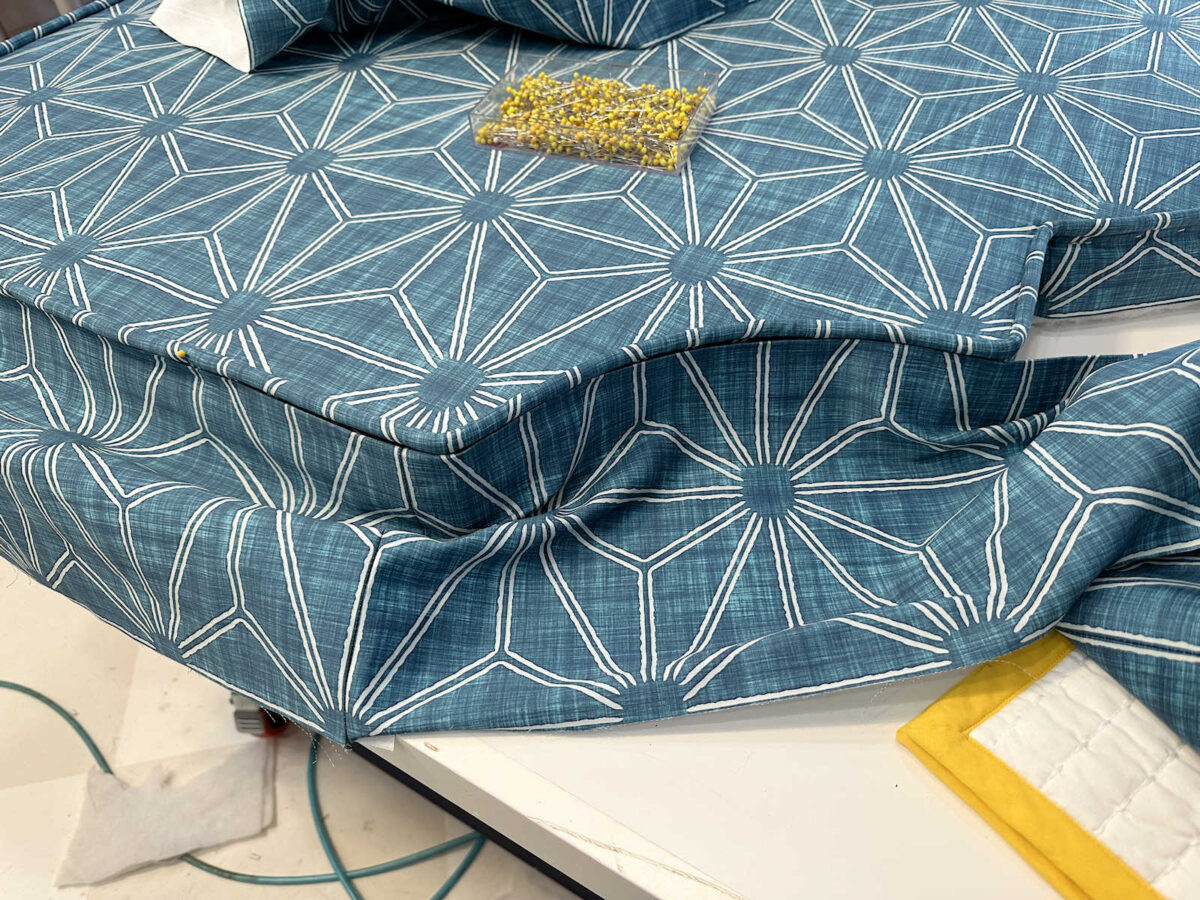
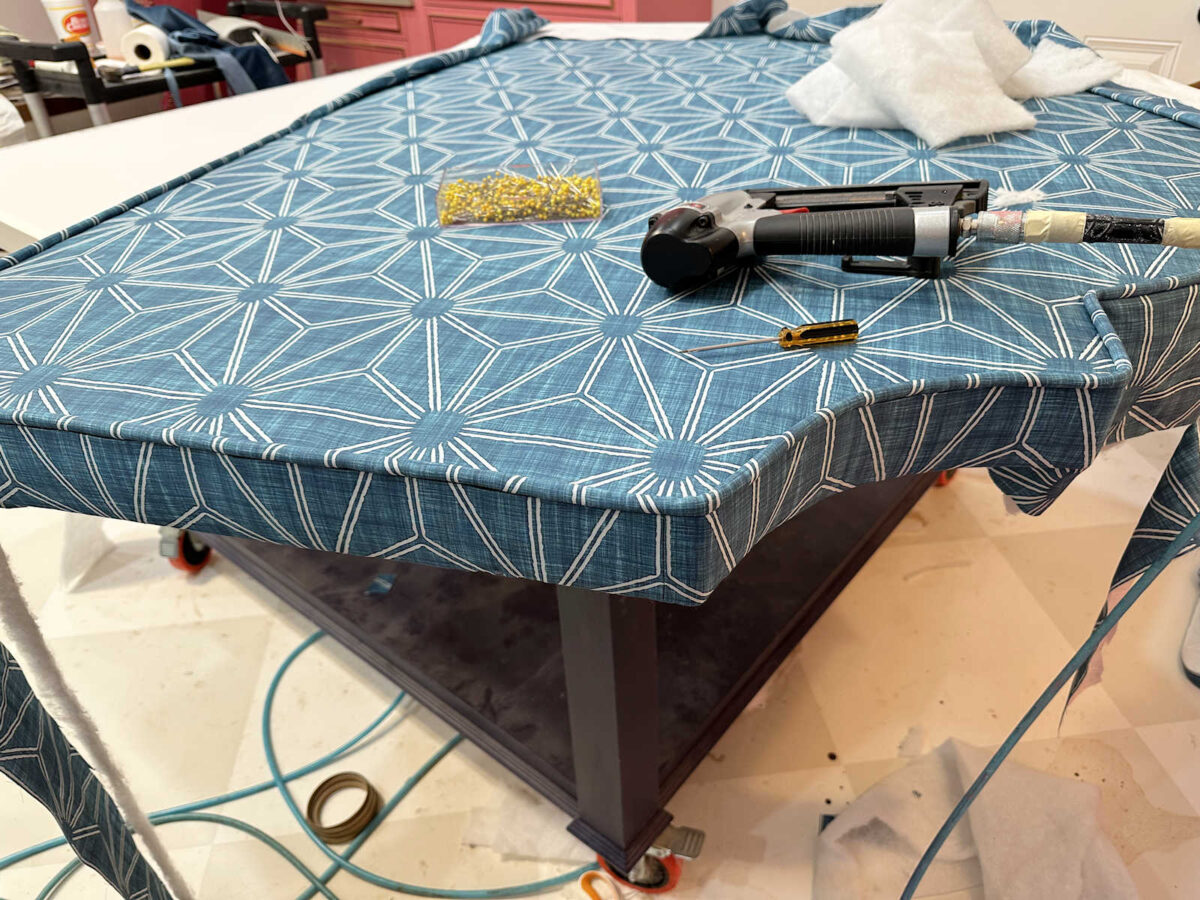
I positioned the piping alongside the highest fringe of the headboard and stapled it into place all the best way round.
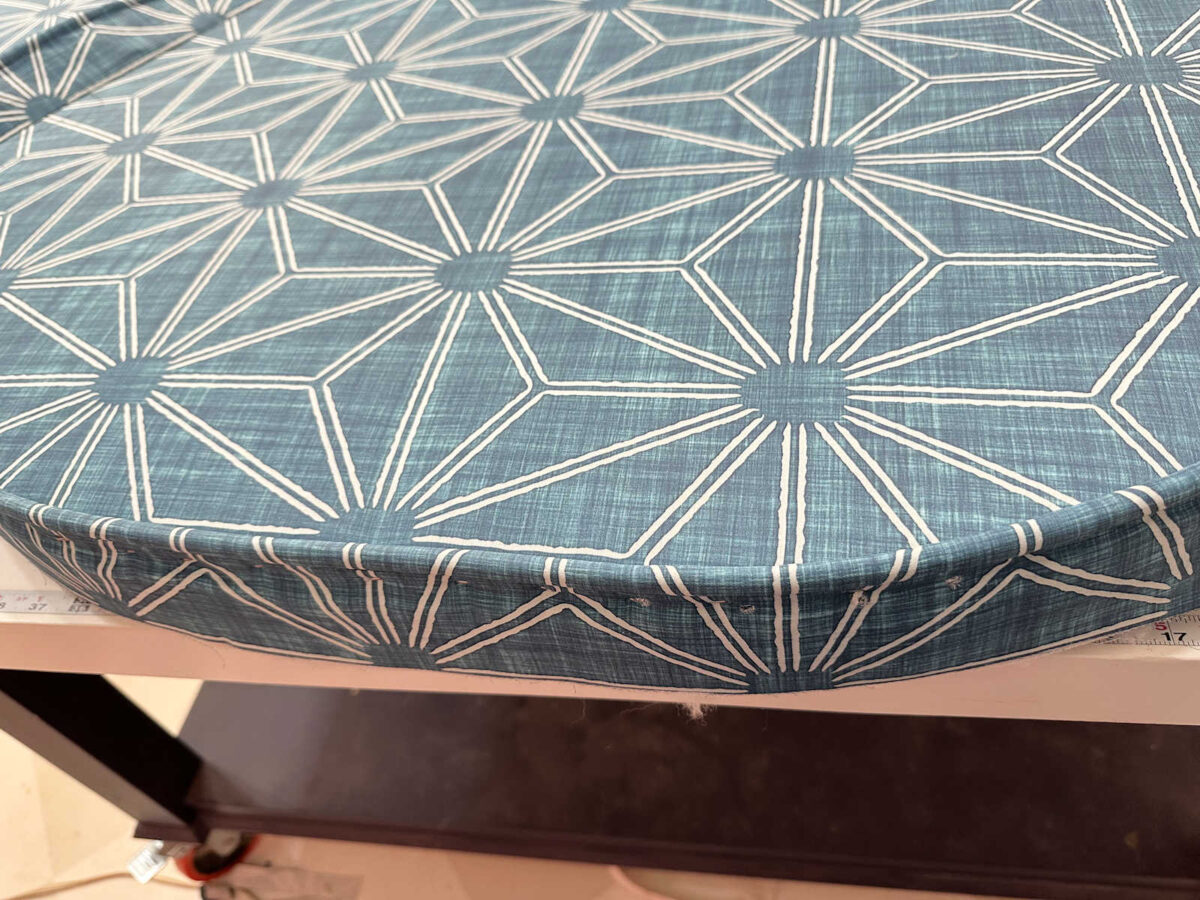
Keep in mind that what you’re seeing under the piping is simply extra cloth that I didn’t trim. It serves no objective within the upholstering of the edges.
I clearly didn’t measure accurately as a result of I used to be just a few inches quick on my piping. That’s okay, although. That backside edge gained’t present as a result of it’ll be behind the mattress.
And right here’s a better take a look at the place I stapled the piping.
Upholstering The Edges Of The Headboard
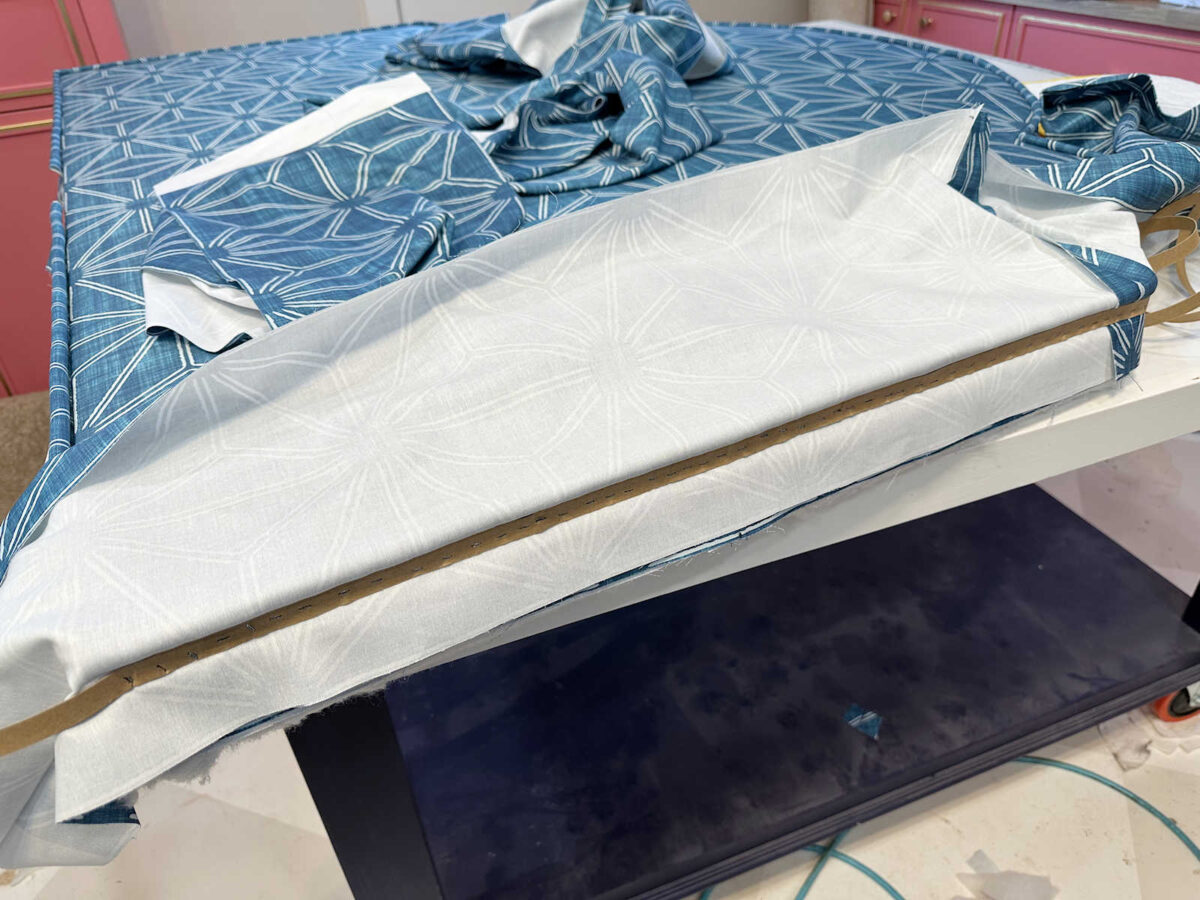
Lastly, I wanted to cowl the edges of the headboard. I lower strips of cloth about eight inches extensive and sewed them collectively in order that I had a strip lengthy sufficient to go all the best way across the headboard.
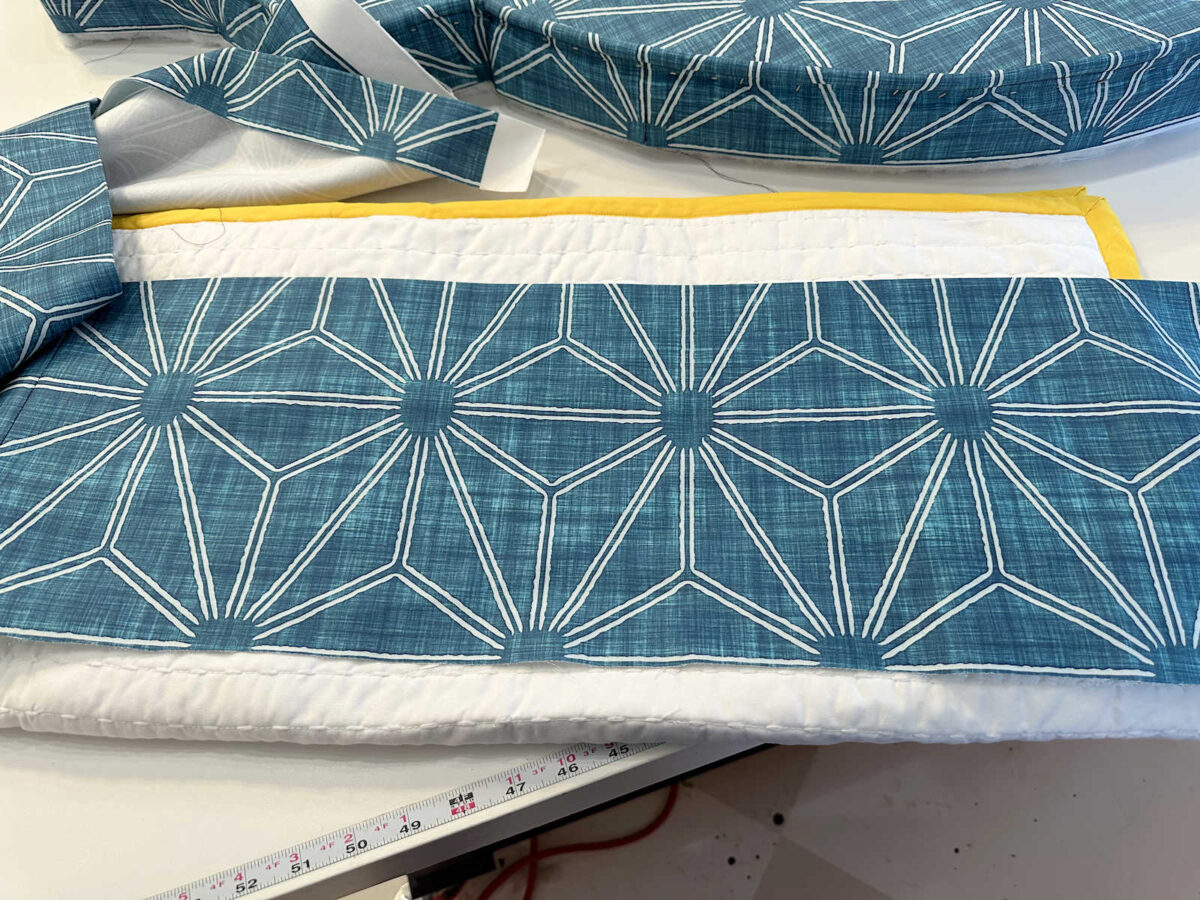
After urgent all the seams within the lengthy strip of cloth, I folded the highest edge down about 1.5 inches and pressed that fold into place with my steam iron.
Right here’s what this piece appeared like on the again.
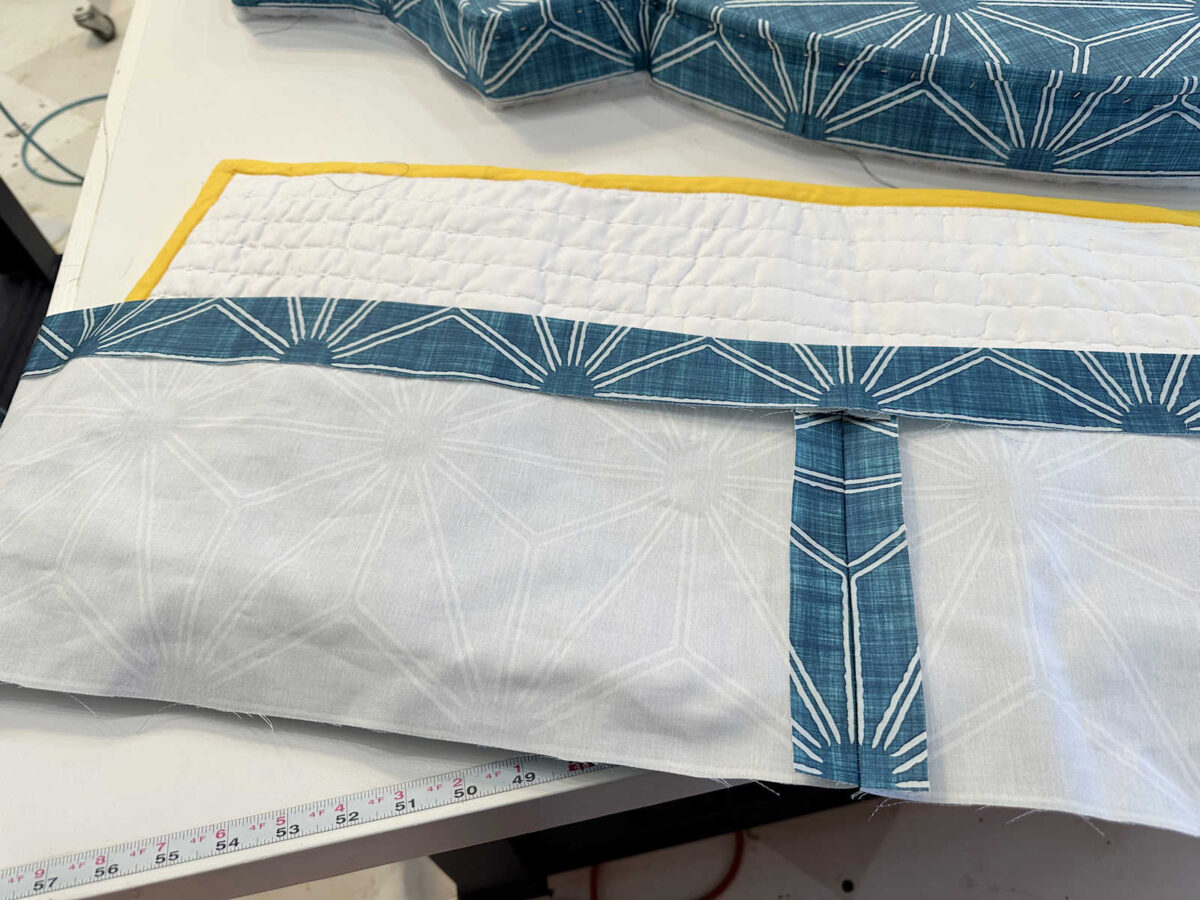
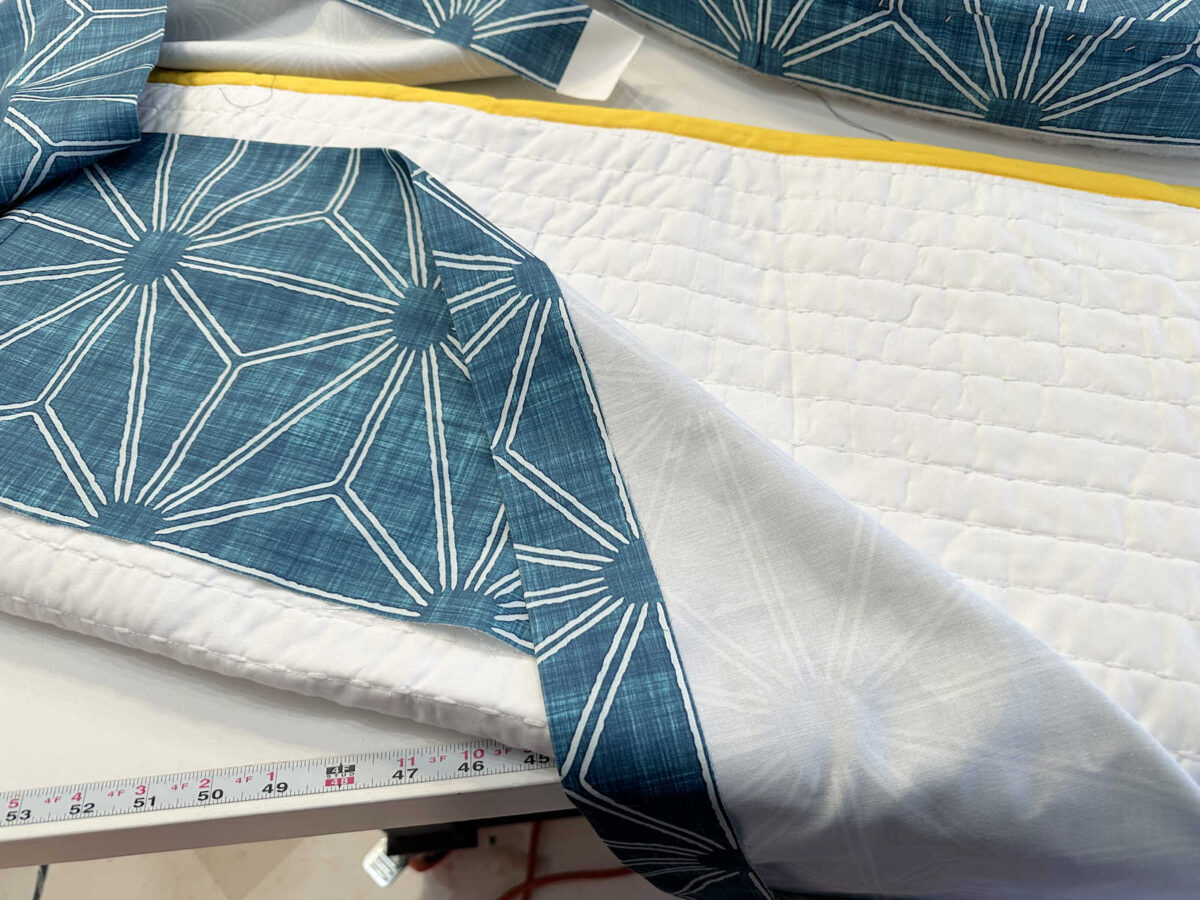
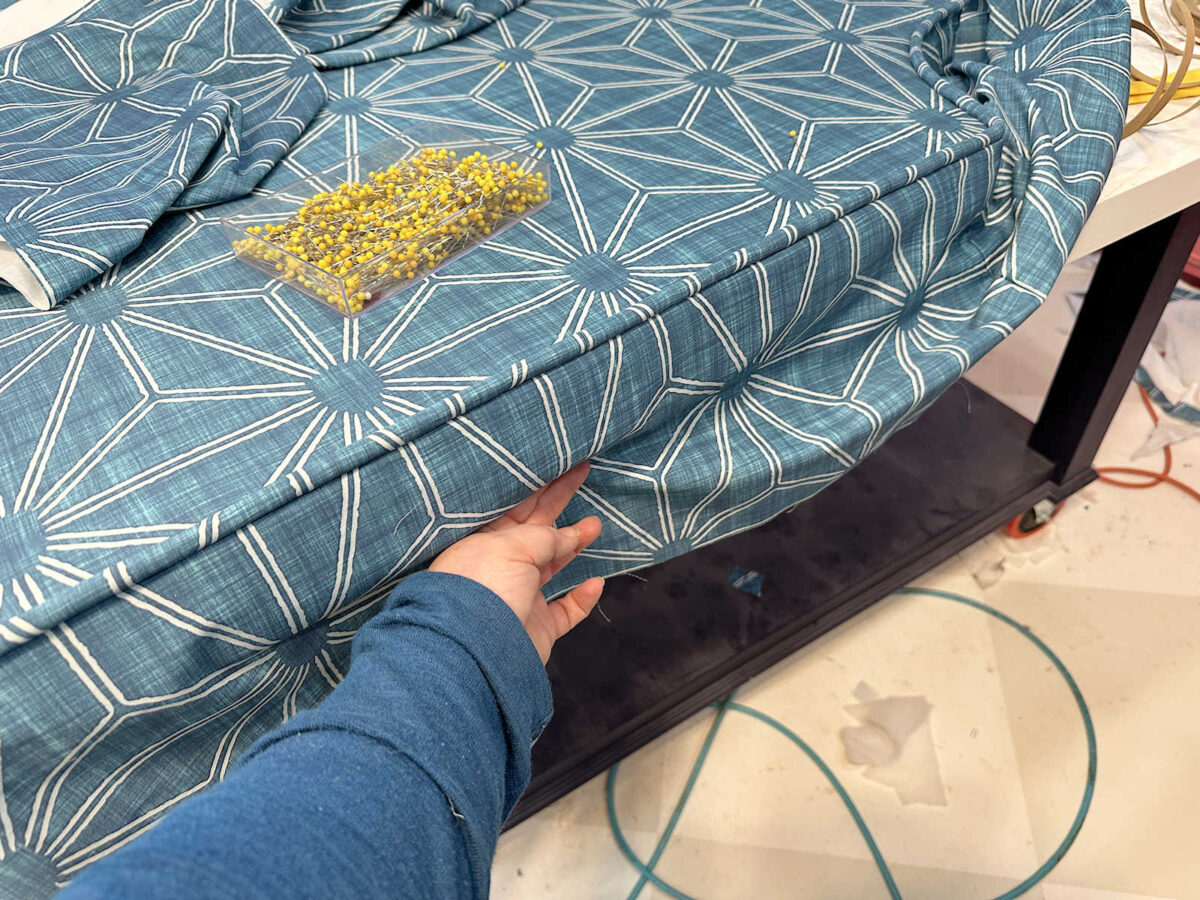
I pinned the piece to the sting with the folded/ironed edge just below the piping.

I attempted my hardest to match the sample on the edges to the face cloth.
However in fact, as soon as it wrapped across the curve, the matched sample was misplaced.
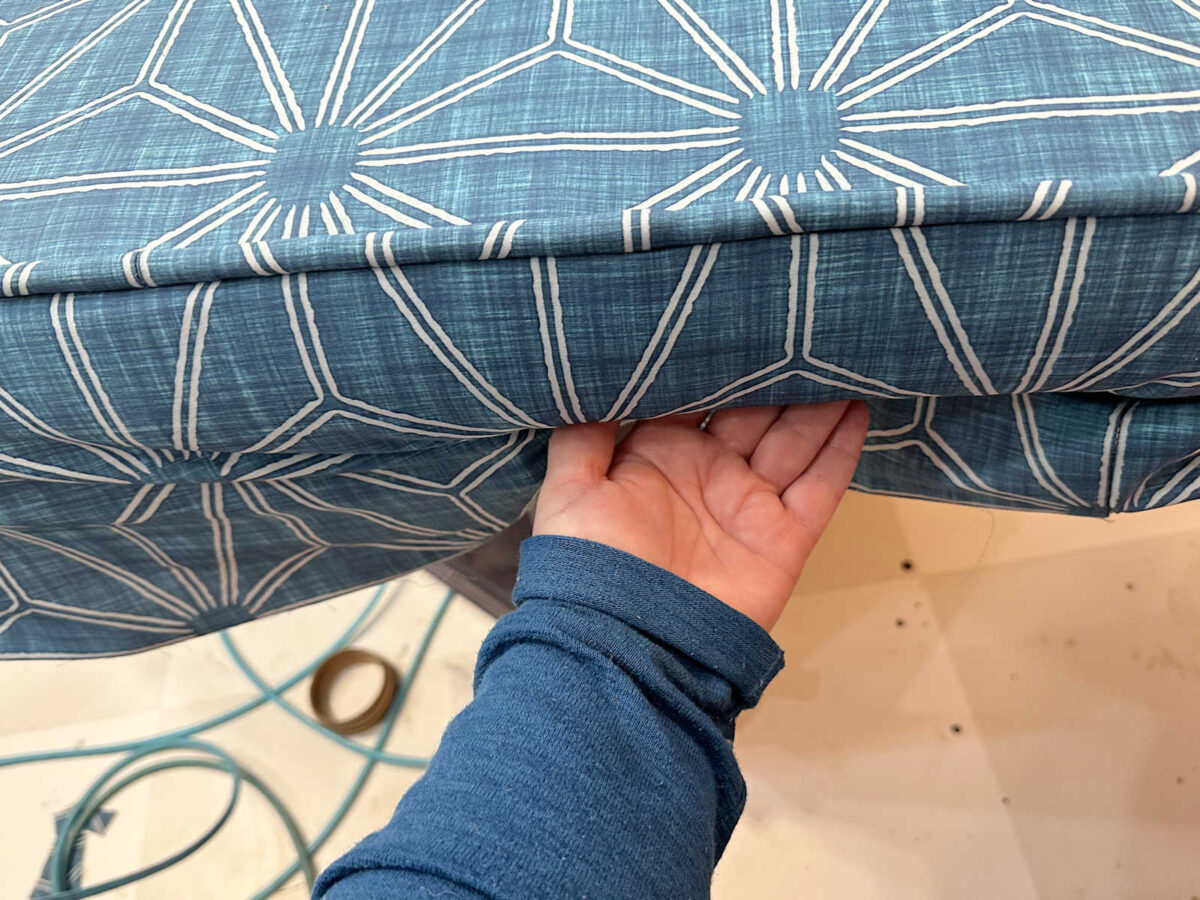
To connect this piece, I lifted up the material, leaving the folded piece towards the aspect of the headboard, and I slipped a cardboard strip into the fold. I made certain the cardboard was proper up towards the piping, and proper within the fold that I had ironed into the material, after which stapled it into place.
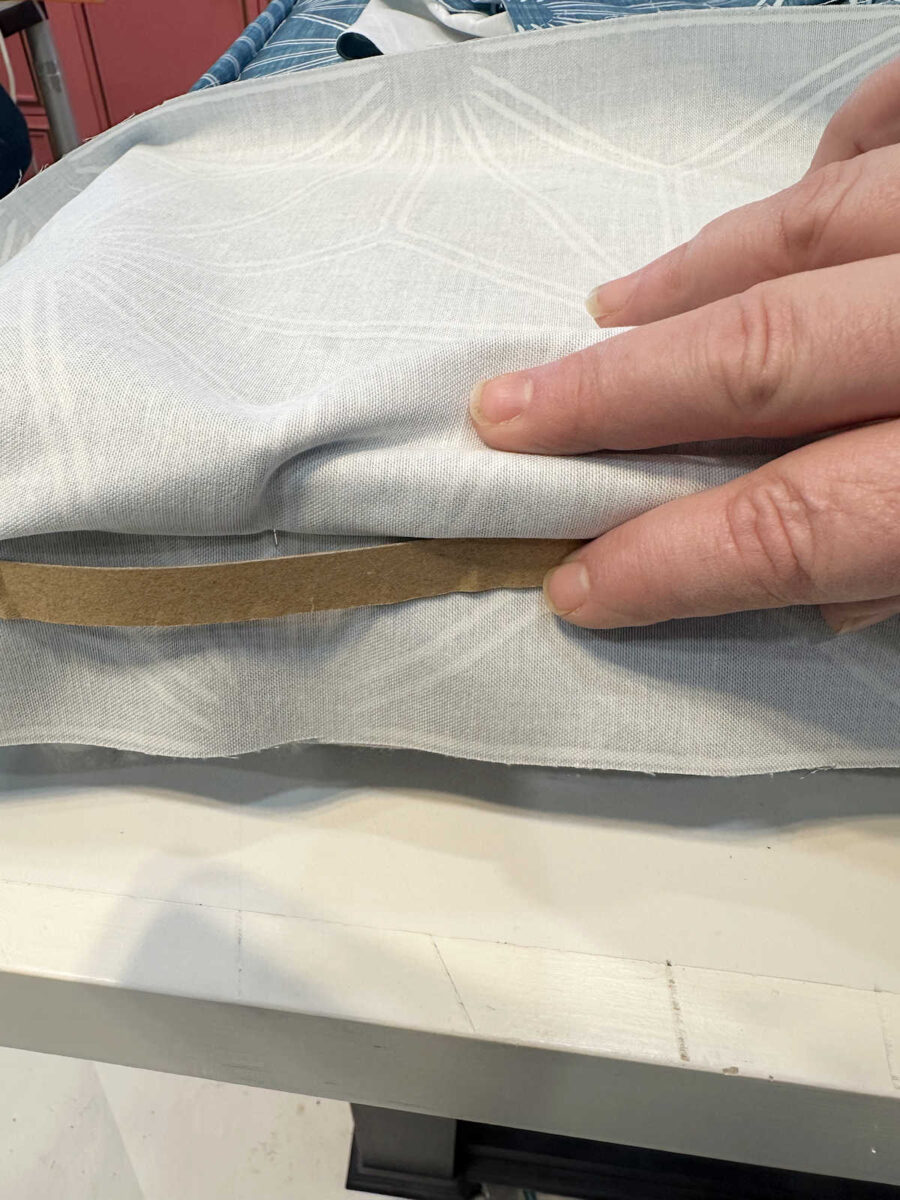
Right here’s what the aspect appeared like with the cardboard strip stapled on.
And right here’s what it appeared like with the material flipped again down over the aspect.

And from there, all I wanted to do was wrap this additional cloth to the again of the plywood and staple it into place.
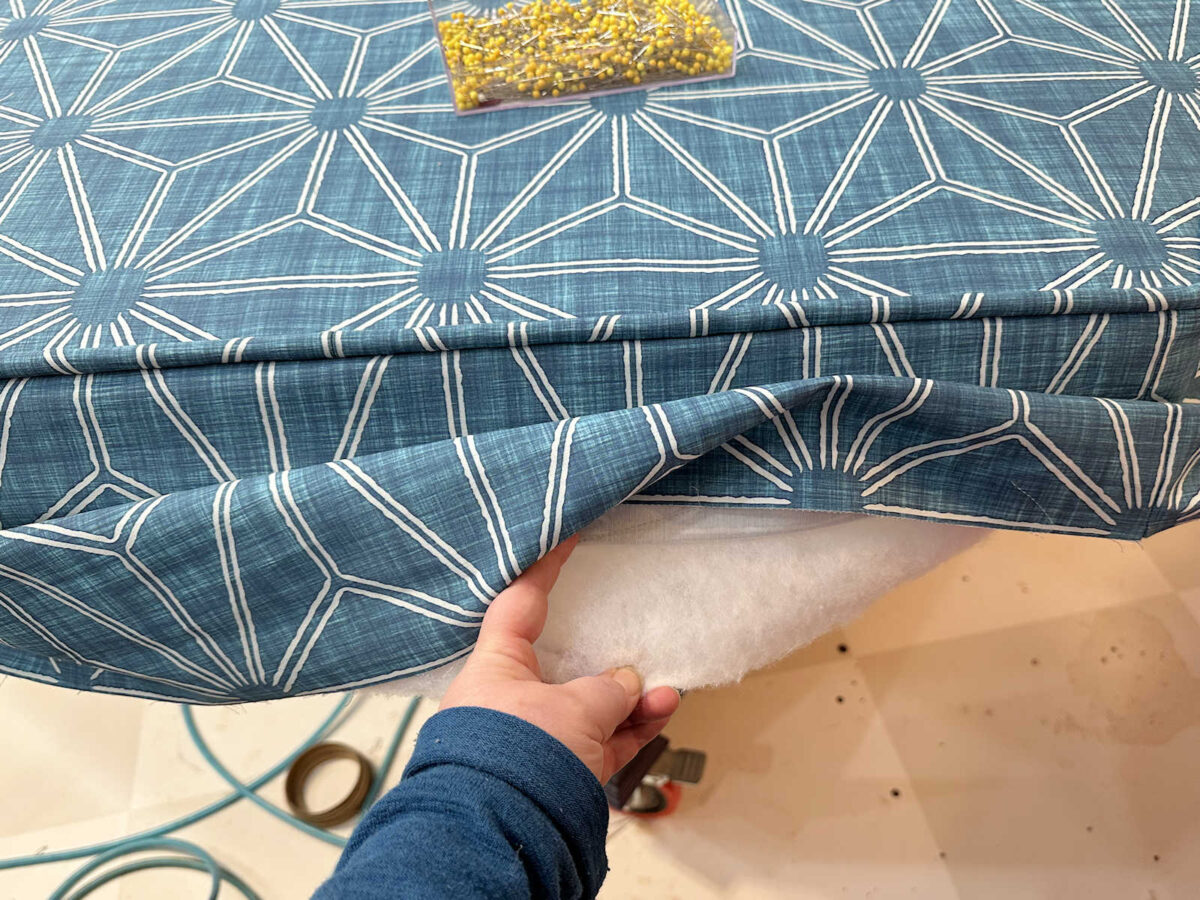
However earlier than I did that, I added a strip of batting across the fringe of the headboard.
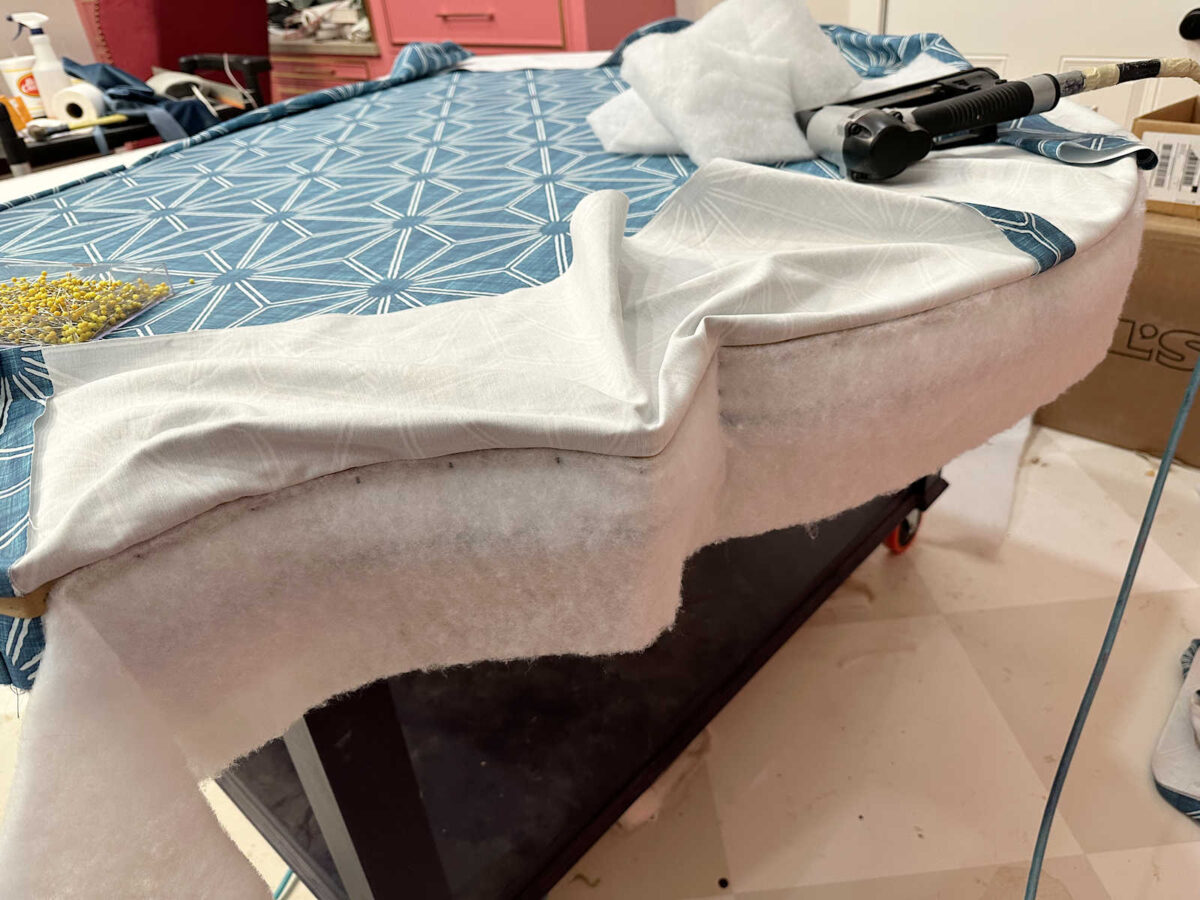
So after I flipped the material down, there was one layer of batting beneath it.
After which I wrapped each to the again and stapled them into place.
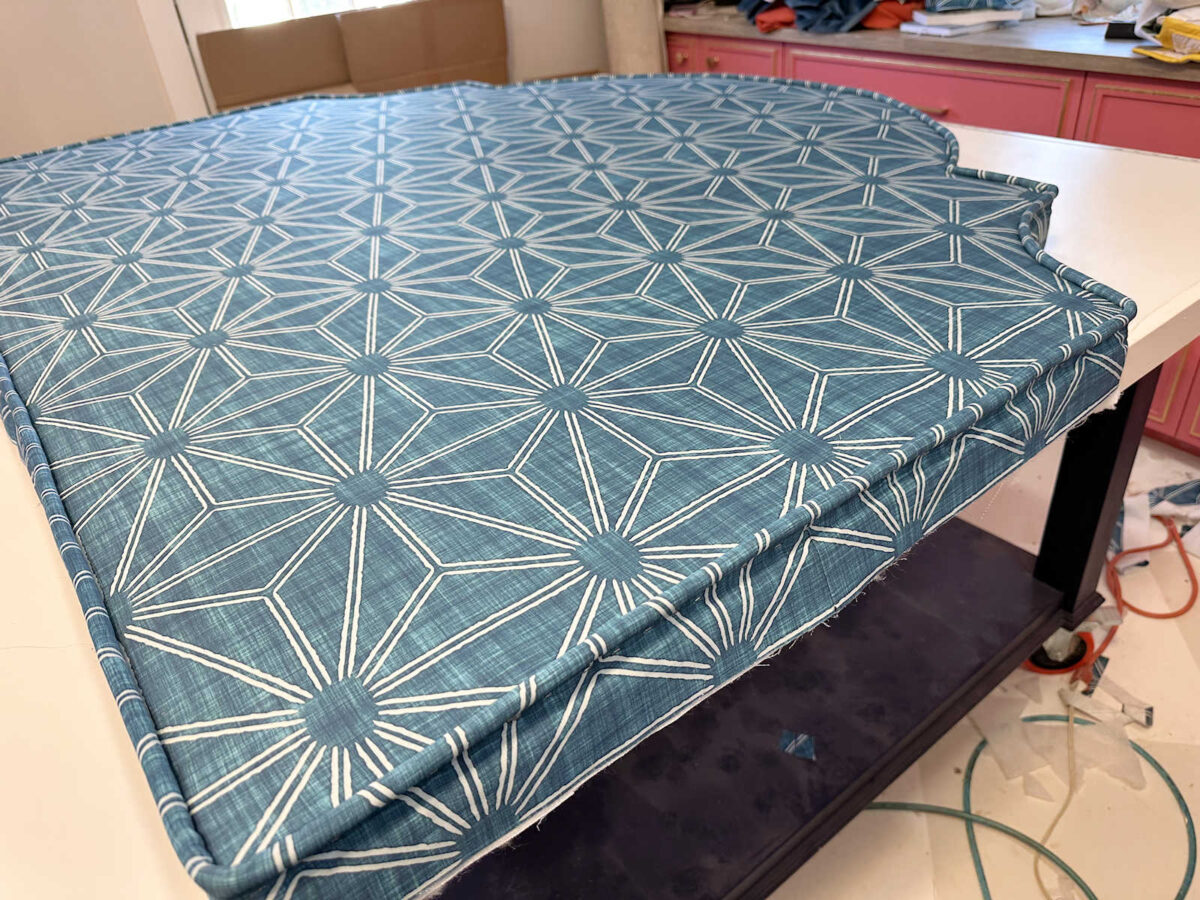
Right here’s what it appeared like with the batting and cloth wrapped to the again and stapled into place.
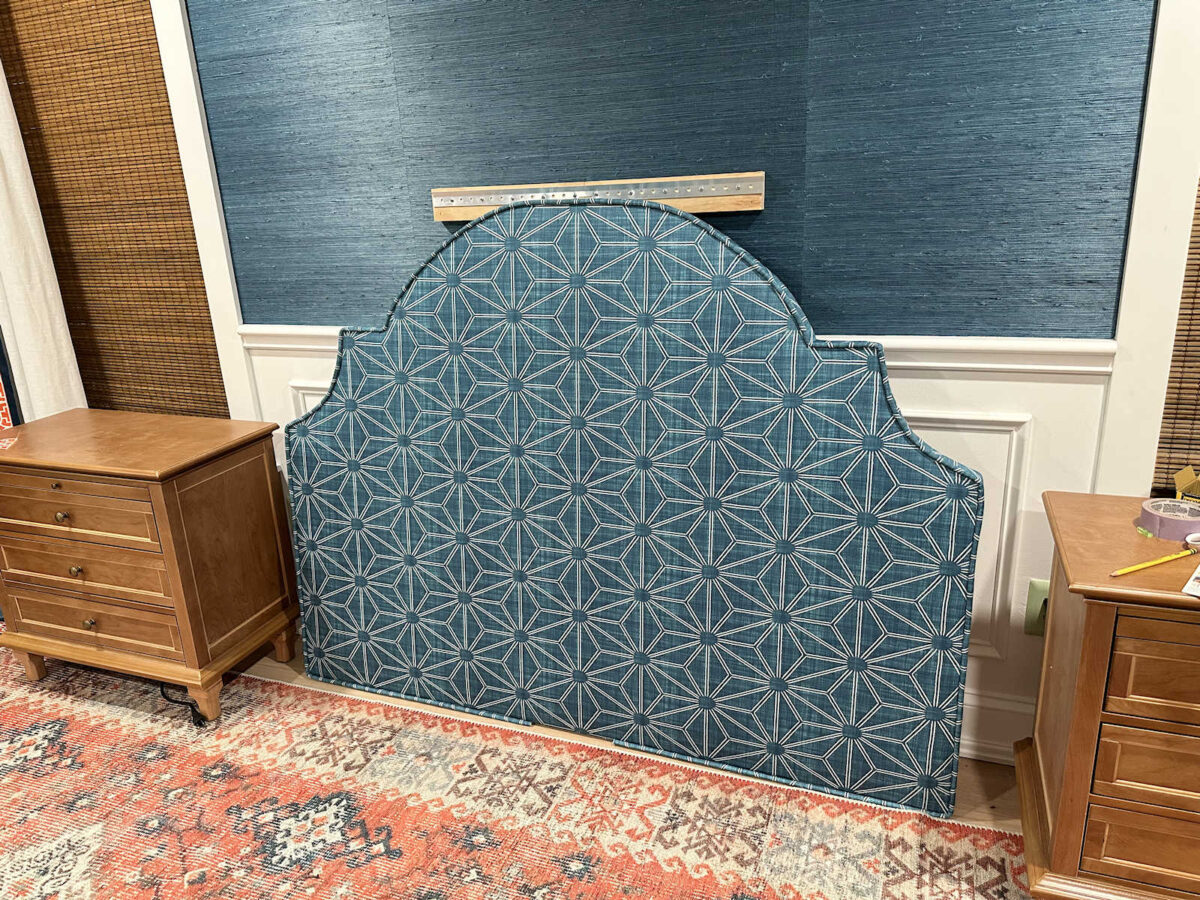
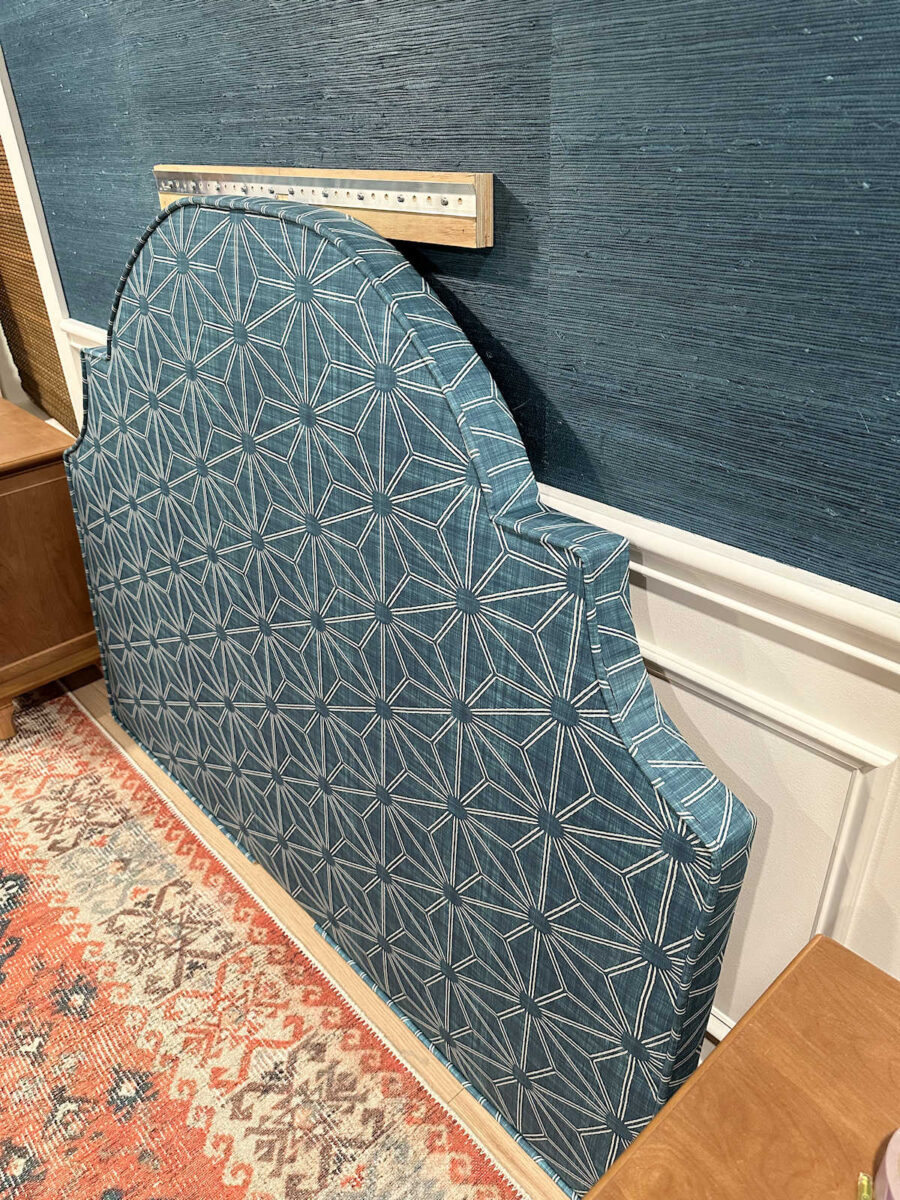
And as soon as I did that each one the best way across the edges, it was completed!
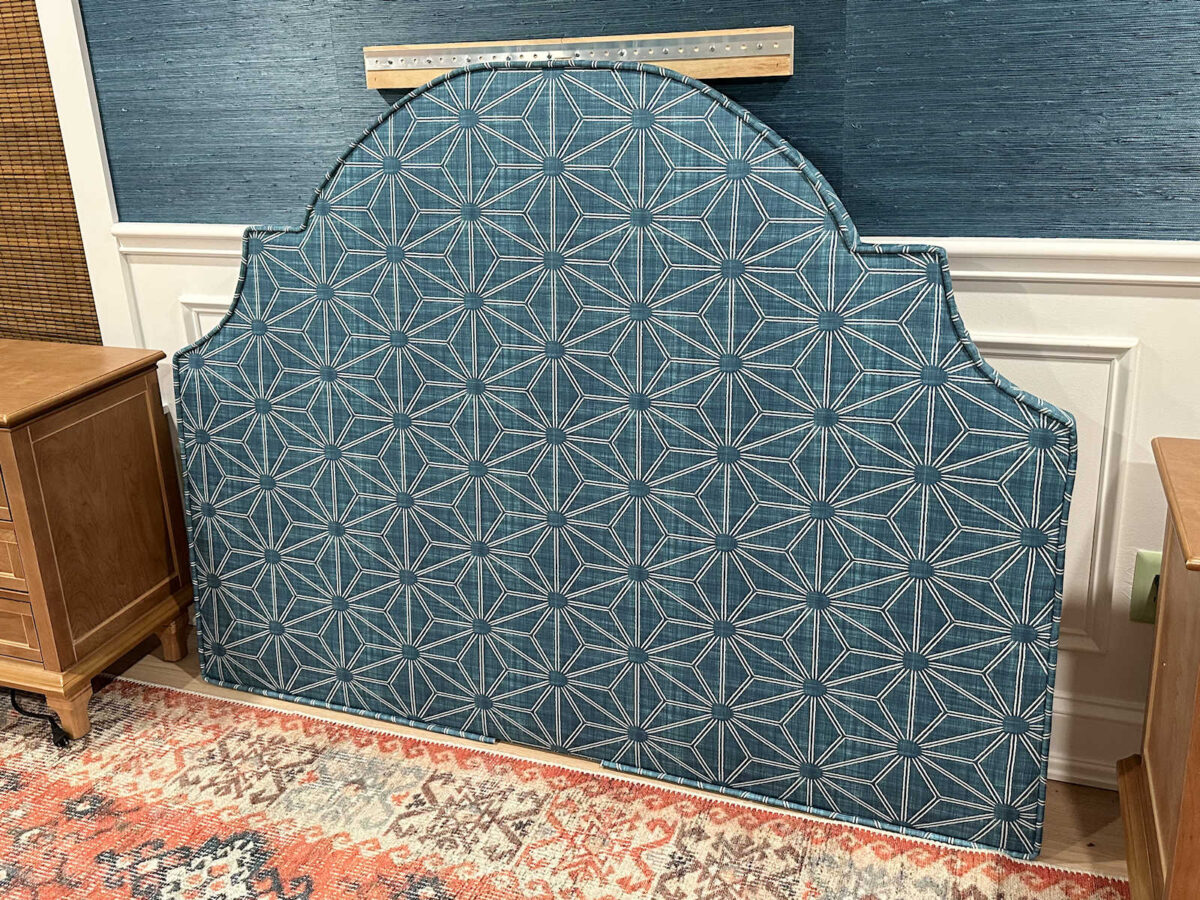
I haven’t been in a position to grasp it but as a result of I can’t do it on my own, however I’ve all the pieces prepared to hold it on the wall. As you’ll be able to see, I’m utilizing a French cleat, however as a result of it must clear the chair rail, I needed to connect some scrap wooden first, after which connect the cleat to the wooden.
I selected to not add piping to the again fringe of the headboard, however in fact, you are able to do that as properly. I selected to not since my piping matches the headboard, however if you happen to’re utilizing a distinction piping, I’d personally apply it to the entrance edge and the again edge.
In order that’s it! I’m so glad to have this completed! I’ll get it held on the wall immediately (with assist) after which get the mattress base completed immediately as properly. That signifies that we’ll be in our new bed room immediately!
Extra About Our Grasp Bed room
see all grasp
bed room diy tasks
learn all grasp
bed room weblog posts

Addicted 2 Adorning is the place I share my DIY and adorning journey as I transform and adorn the 1948 fixer higher that my husband, Matt, and I purchased in 2013. Matt has M.S. and is unable to do bodily work, so I do the vast majority of the work on the home on my own. You may be taught extra about me right here.
")

")


")
