


(Works with baskets, barrels, buckets, and extra!)
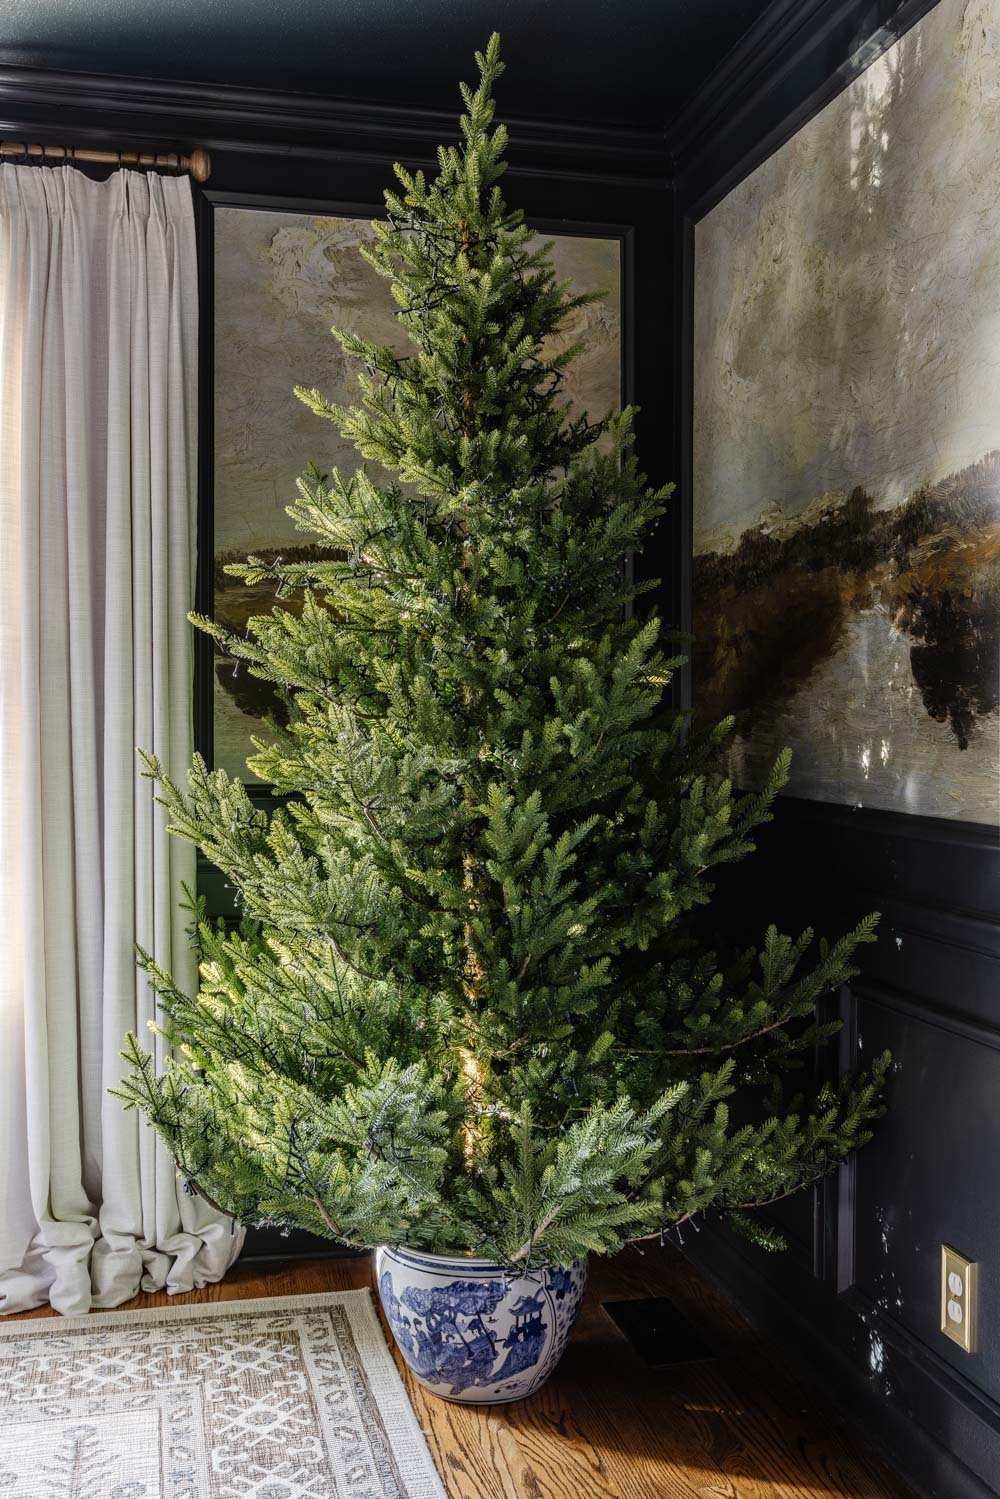
Yearly, I see Christmas timber in fairly planter pots on Instagram, and I make a psychological word to strive it however by no means get round to it. So I lastly determined this was the yr. I turned our tree right into a “potted Christmas tree” utilizing a planter we already owned and the distinction is chef’s kiss.
One of the best half is that this technique works with ANY ornamental container: a planter, a basket, a ceramic urn, a classic barrel, a wood trunk, an vintage crock, a galvanized bucket, even a tire or a bass drum… no matter suits your model, the quirkier the higher.
I shared this DIY tree stand tutorial as an Instagram reel, so when you want a video walk-through, click on over there, however I wished to interrupt down all of the steps right here so you may simply observe alongside to create it your self.
Let’s make your Christmas tree look customized and designer-worthy with out spending a fortune. As a result of better of all… the provides solely price about $20! (Minus the planter I swiped to repurpose from my entrance porch.)
As an Amazon Affiliate, I earn from qualifying purchases. Full disclosure
Provides You’ll Want
(In case your Christmas tree is bigger than 7.5′, you would possibly want to make use of a 3-gallon or 5-gallon bucket to anchor it with extra weight.)

Step 1: Select Your Container
Choose an ornamental vessel that matches your adorning model.
A couple of nice concepts:
- Massive ceramic planters
- Classic wooden barrels
- Galvanized metallic buckets
- Woven baskets
- Wood trunk
Tip: Your container needs to be broad sufficient to comfortably match a 1-gallon bucket inside with slightly wiggle room. Ensure that no matter vessel you select has a flat backside.

Step 2: Prep the Base
This step is what makes the tree tremendous sturdy, even sturdier than many store-bought stands.
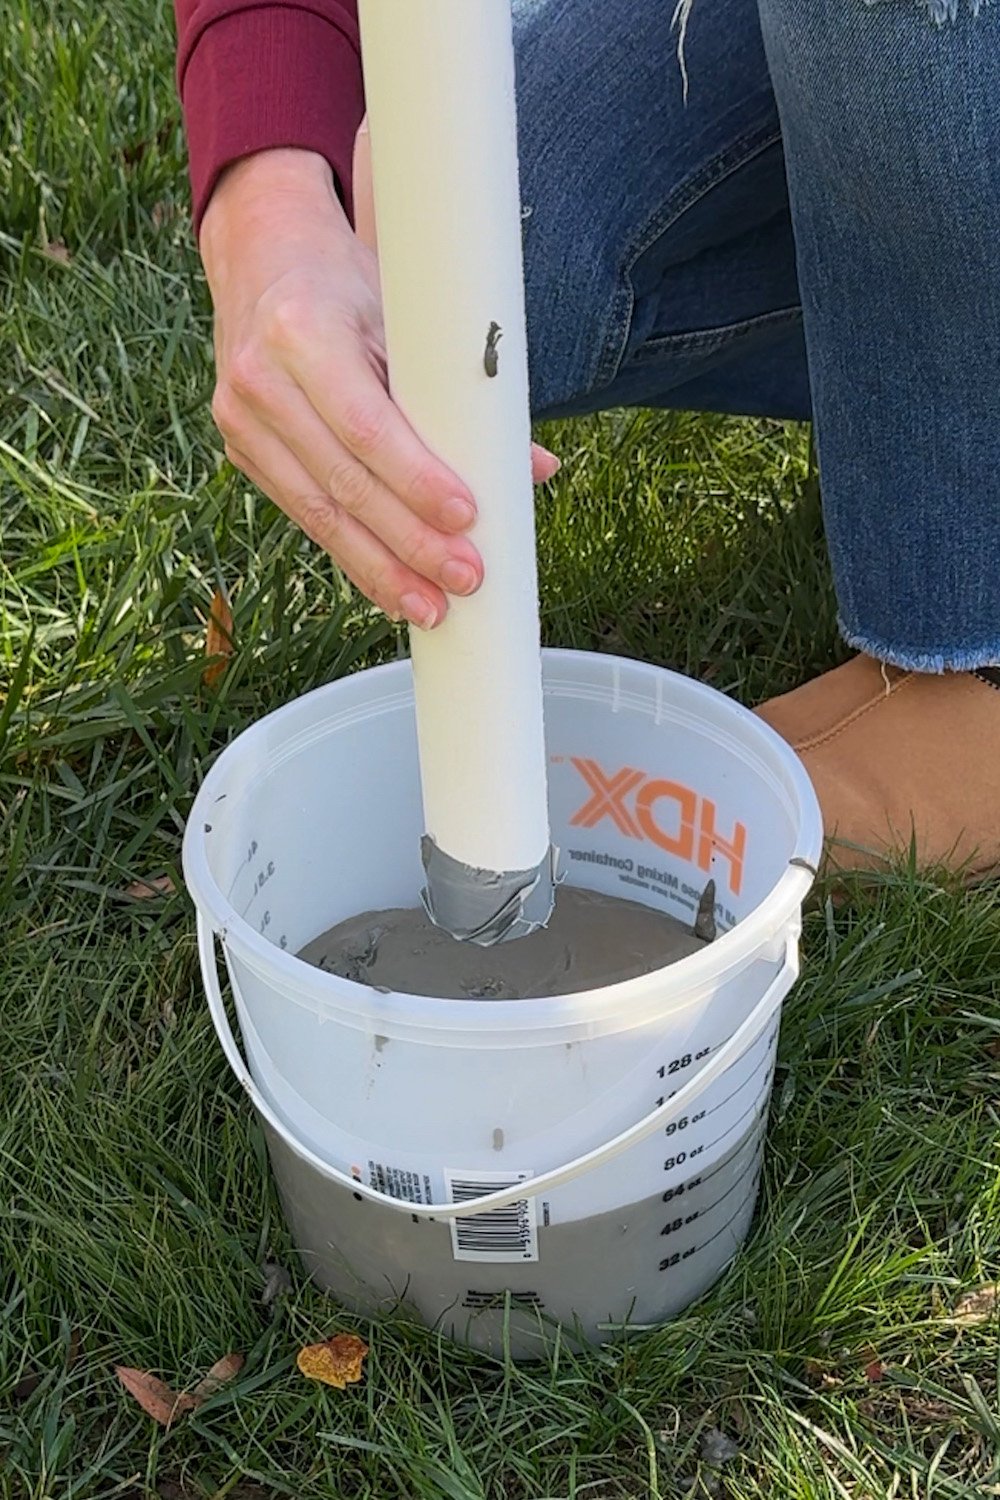
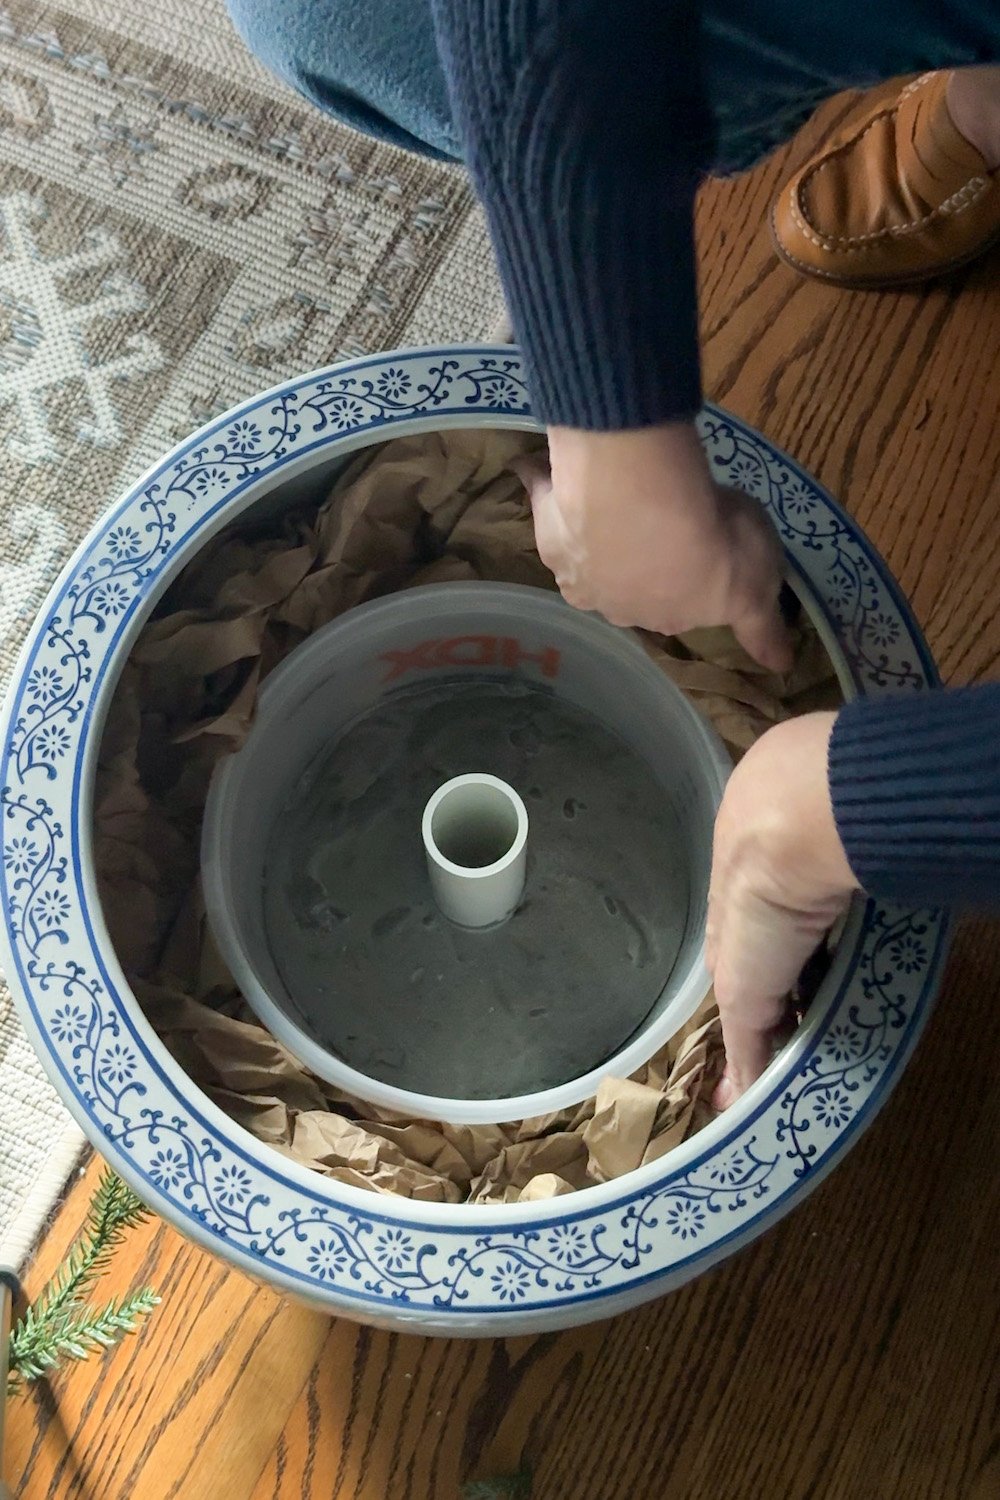
- Place the 1-gallon bucket inside your ornamental planter.
- Measure your tree’s trunk/pole so you understand what diameter PVC pipe you want.
- Minimize the PVC pipe so it can sit contained in the bucket whereas sticking up excessive sufficient to help a lot of the tree pole.
- Seal the underside of the PVC with painter’s tape so concrete doesn’t fill the within.
This PVC “sleeve” turns into your new tree stand, so it’s essential to do that step to verify that it’s going to match first.
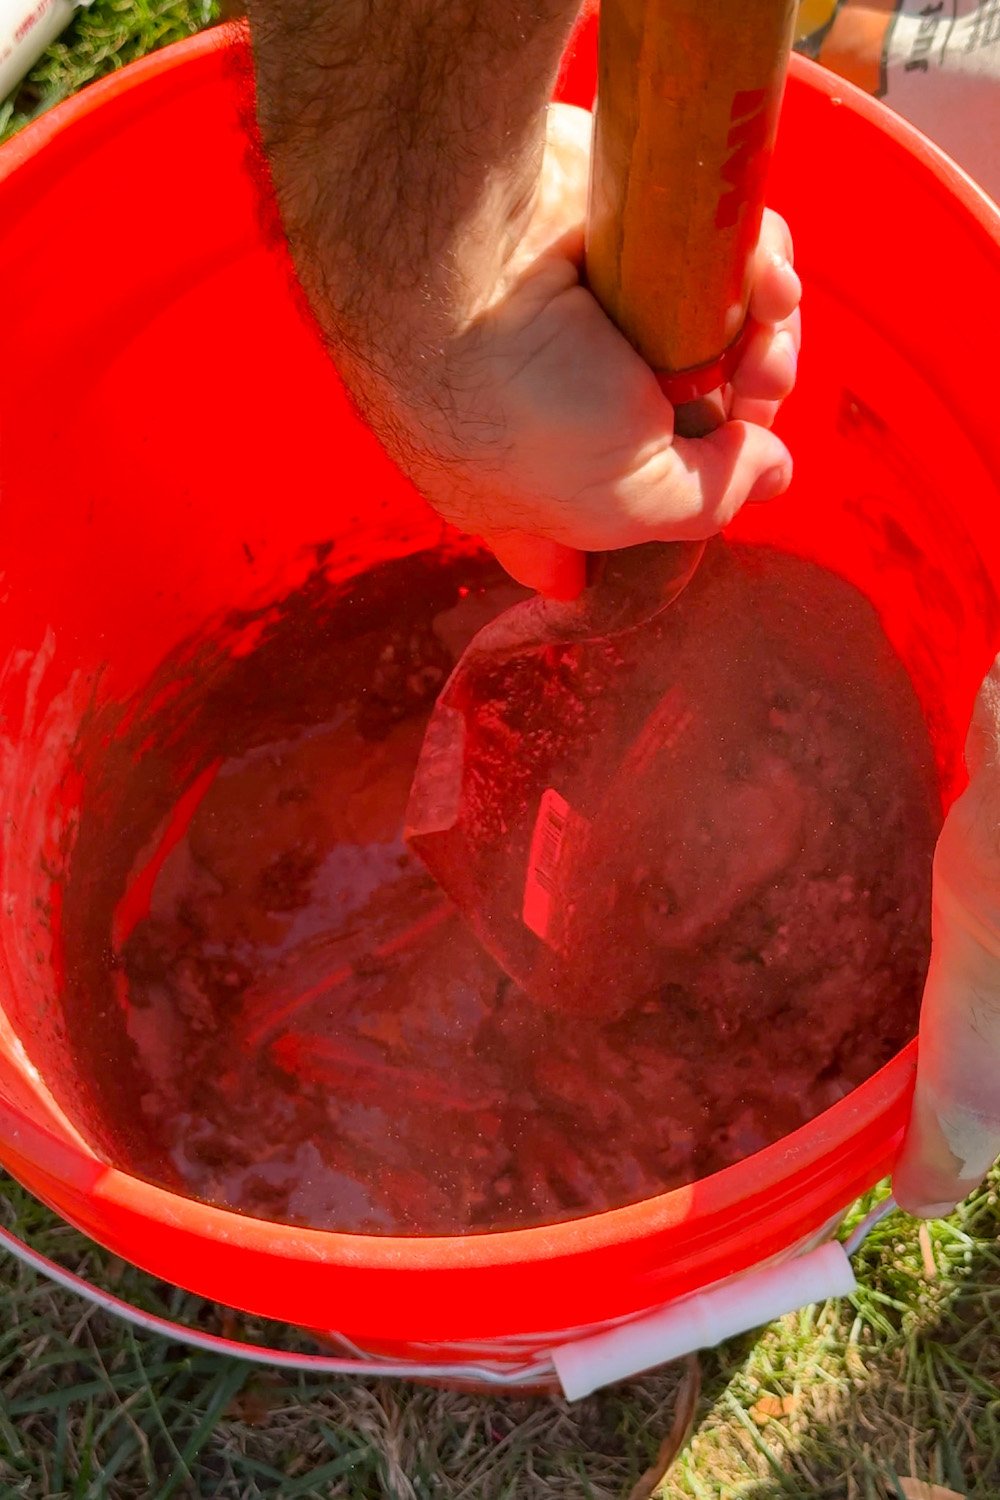
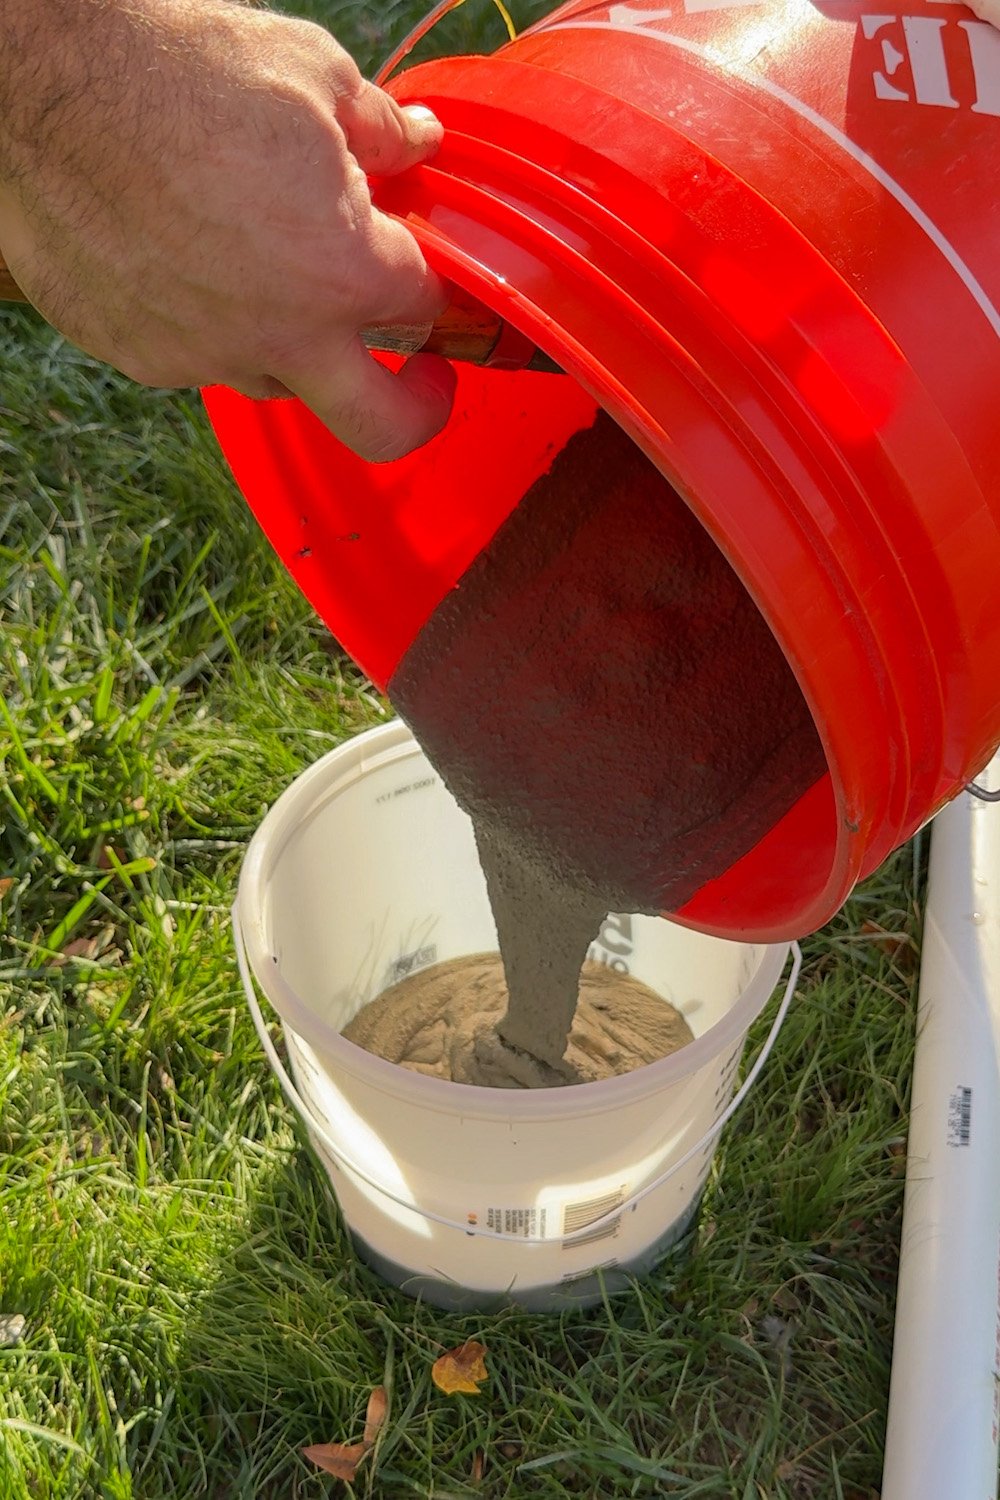
Step 3: Combine the Concrete
- Lay down a drop material to guard your flooring.
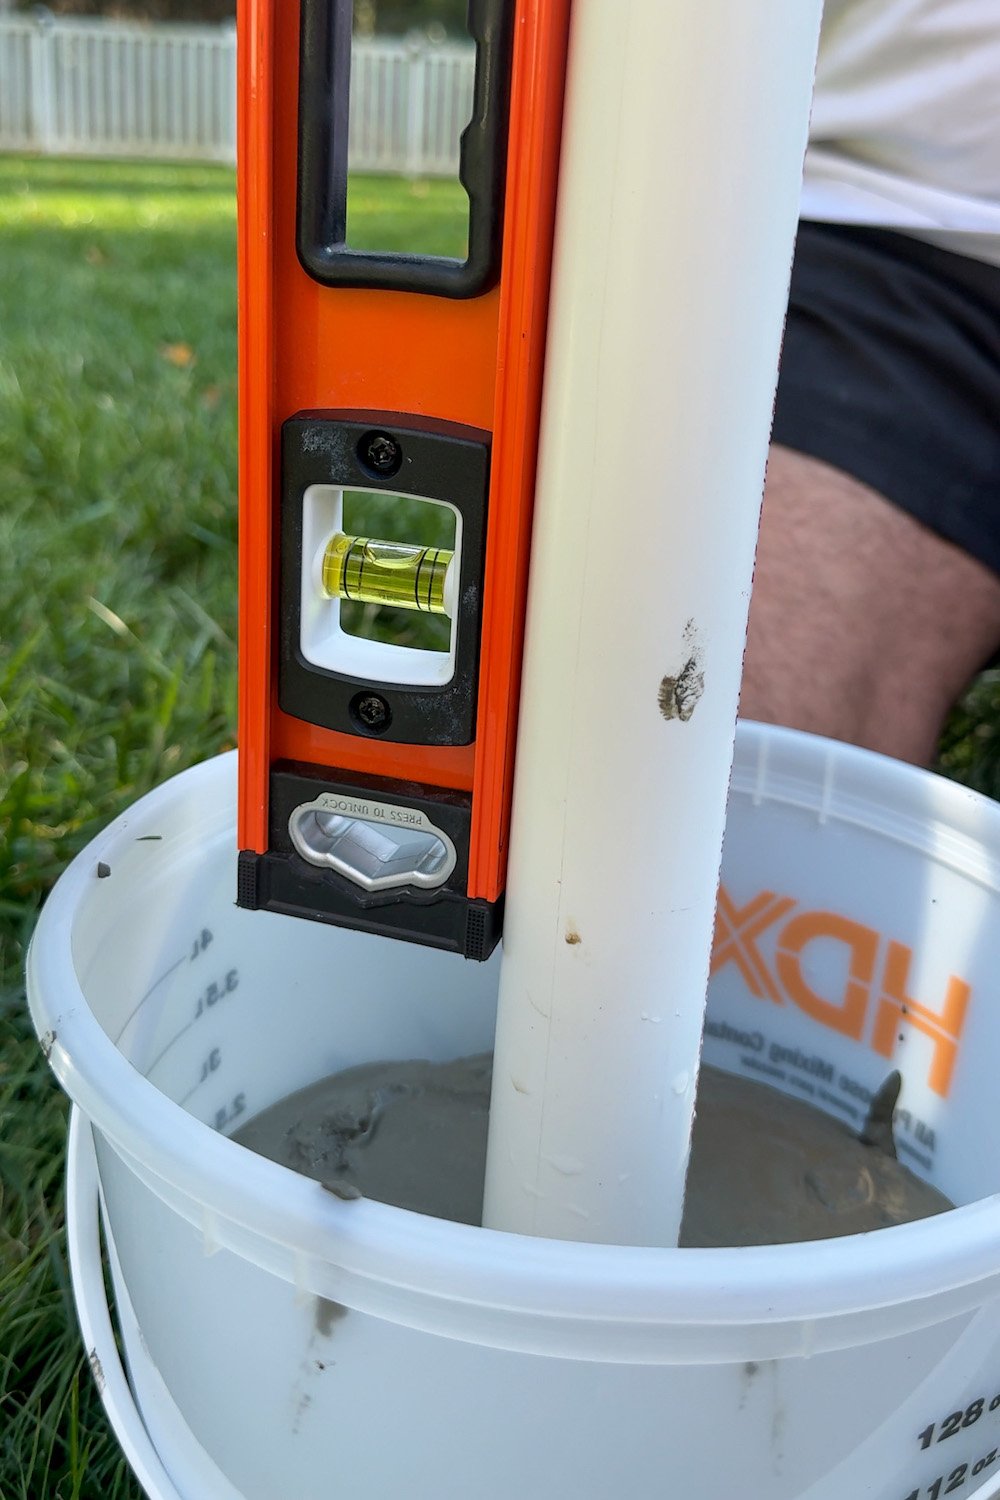
- Combine quick-set concrete in keeping with the bag directions.
- Pour the concrete into the bucket till it’s about ¾ full.
- Insert the PVC pipe into the middle of the moist concrete.
- Use a stage to ensure it’s completely straight throughout (plumb).
- Use wood boards or concrete blocks positioned throughout the highest of the bucket to maintain the pipe in place because the concrete dries.
- Let the concrete absolutely treatment, in a single day is good.
As soon as cured, you’ll have a heavy, strong base that your tree can slip proper into.
Step 4: Insert the Tree into the PVC Pipe
When the concrete is absolutely set:
- Slide the underside pole of your tree into the pipe.
- If it’s too unfastened: wrap slightly electrical tape across the pole till it suits snugly.
- If it’s too tight: sand the within of the PVC or take away tape in case your pole has pre-installed grip tape.
- Give the tree slightly shake. It ought to really feel strong and safe.
- Should you nonetheless want some added safety, stuff packing paper tightly across the bucket so it suits snuggly within the planter.
Now assemble the remainder of your tree, fluff, and form as regular.
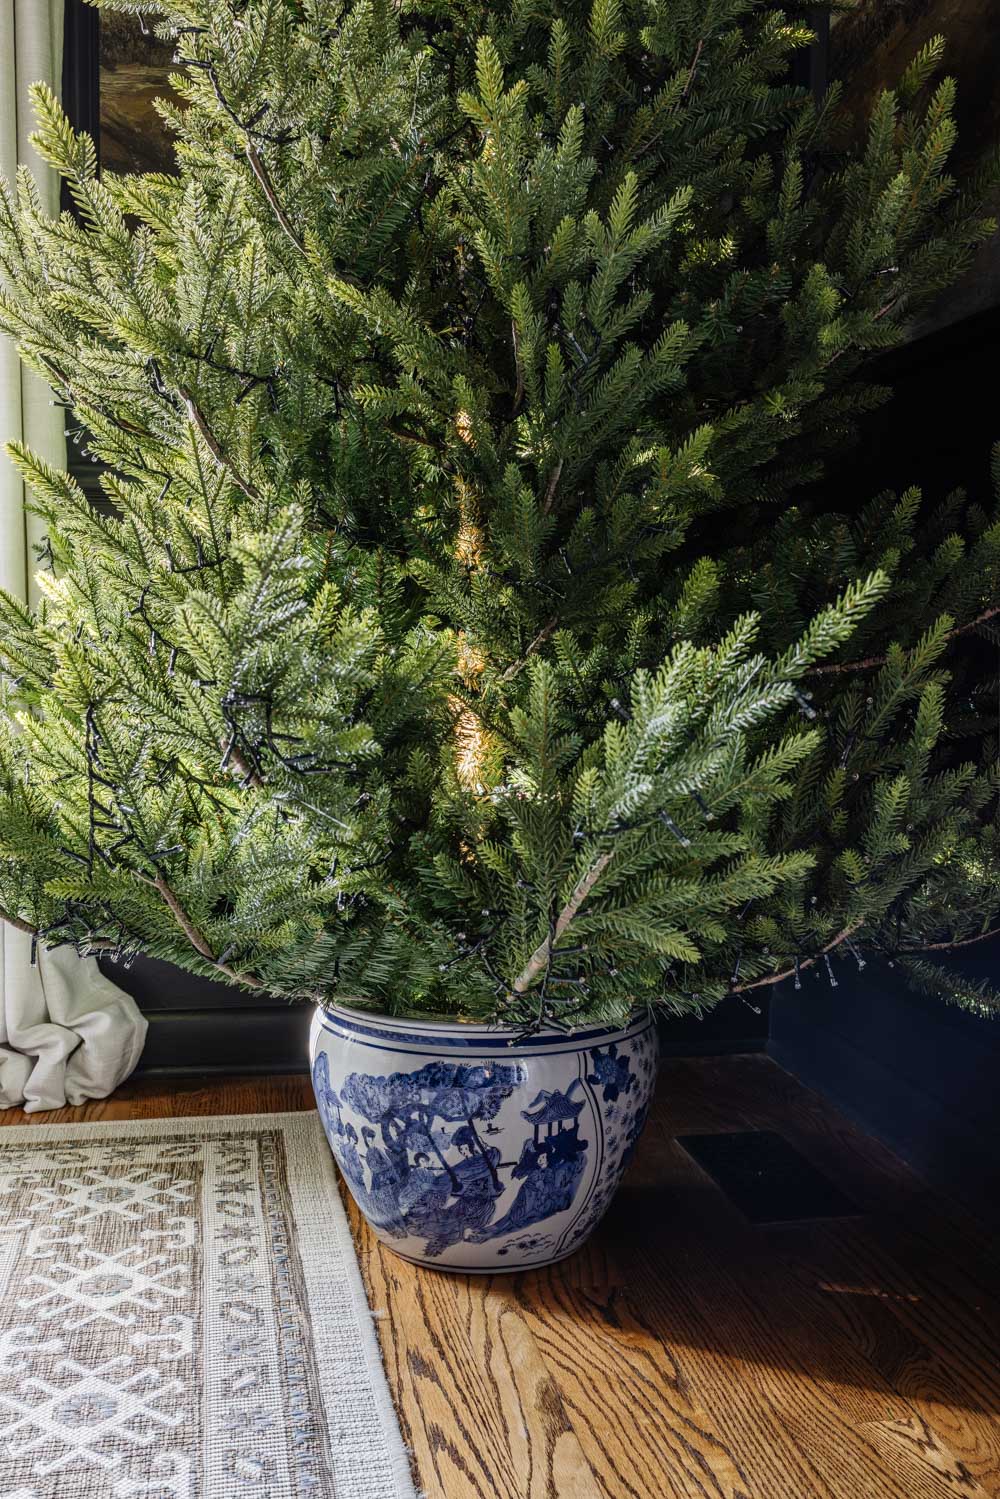
Step 5: Cover the Bucket & Fashion the Base
Relying on how deep your planter is, you won’t even see the bucket, however when you can see the highest edge, it’s straightforward to disguise.
Strive including:
- Spanish moss
- Wooden shavings
- Burlap
- A small blanket or scrap material
- Pretend snow
- Crinkle paper filler
This provides that cozy, layered look and makes the entire thing really feel intentional slightly than “DIY.”
- It appears designer. The planter turns into a part of your décor slightly than an eyesore.
- It’s extraordinarily sturdy. The concrete base is HEAVY, so it’s excellent if in case you have children, pets, or a tall tree.
- It really works in any room. Slim timber, tabletop timber, full timber… the tactic is completely adjustable.
- You’ll be able to reuse it yearly. Swap the planter for a distinct look with out rebuilding the bottom.

What measurement planter ought to I take advantage of?
A great rule: choose a planter that’s roughly ⅓ the width of your tree’s backside department unfold. The diameter of my tree’s backside branches is 58″, so I used an 18″ broad planter as the bottom.
Can I take advantage of a light-weight basket?
Sure, the load comes from the concrete within the bucket, not the basket itself.
Can I take advantage of this for actual timber?
Provided that the container is waterproof and also you’re utilizing a correct water reservoir. The concrete technique is greatest for synthetic timber.
What if my PVC isn’t an ideal match?
Too unfastened → wrap the pole in tape.
Too tight → sand the within of the pipe.
Straightforward repair.

I really like utilizing this technique for slimmer timber particularly; they generally look unusual in outsized tree collars, however they appear wonderful “potted” in a planter. It provides that Nancy-Meyers-meets-cottage-classic vibe with out shopping for a $200 ornamental base. And you need to use no matter container you have already got!
Plus, it frees up ground area so you’ve extra room for presents beneath versus a tree collar.
Should you’ve ever wished a Christmas tree that appears slightly extra customized and rather less “recent outta the shop field,” this DIY planter stand is such a straightforward improve. It’s budget-friendly, renter-friendly, and works for virtually any model whether or not that’s farmhouse, trendy, or conventional Christmas decor.
Should you strive it, tag me! I LOVE seeing your artistic spins on these initiatives!
Extra Christmas Tree Adorning Sources

")

")


")
