

")
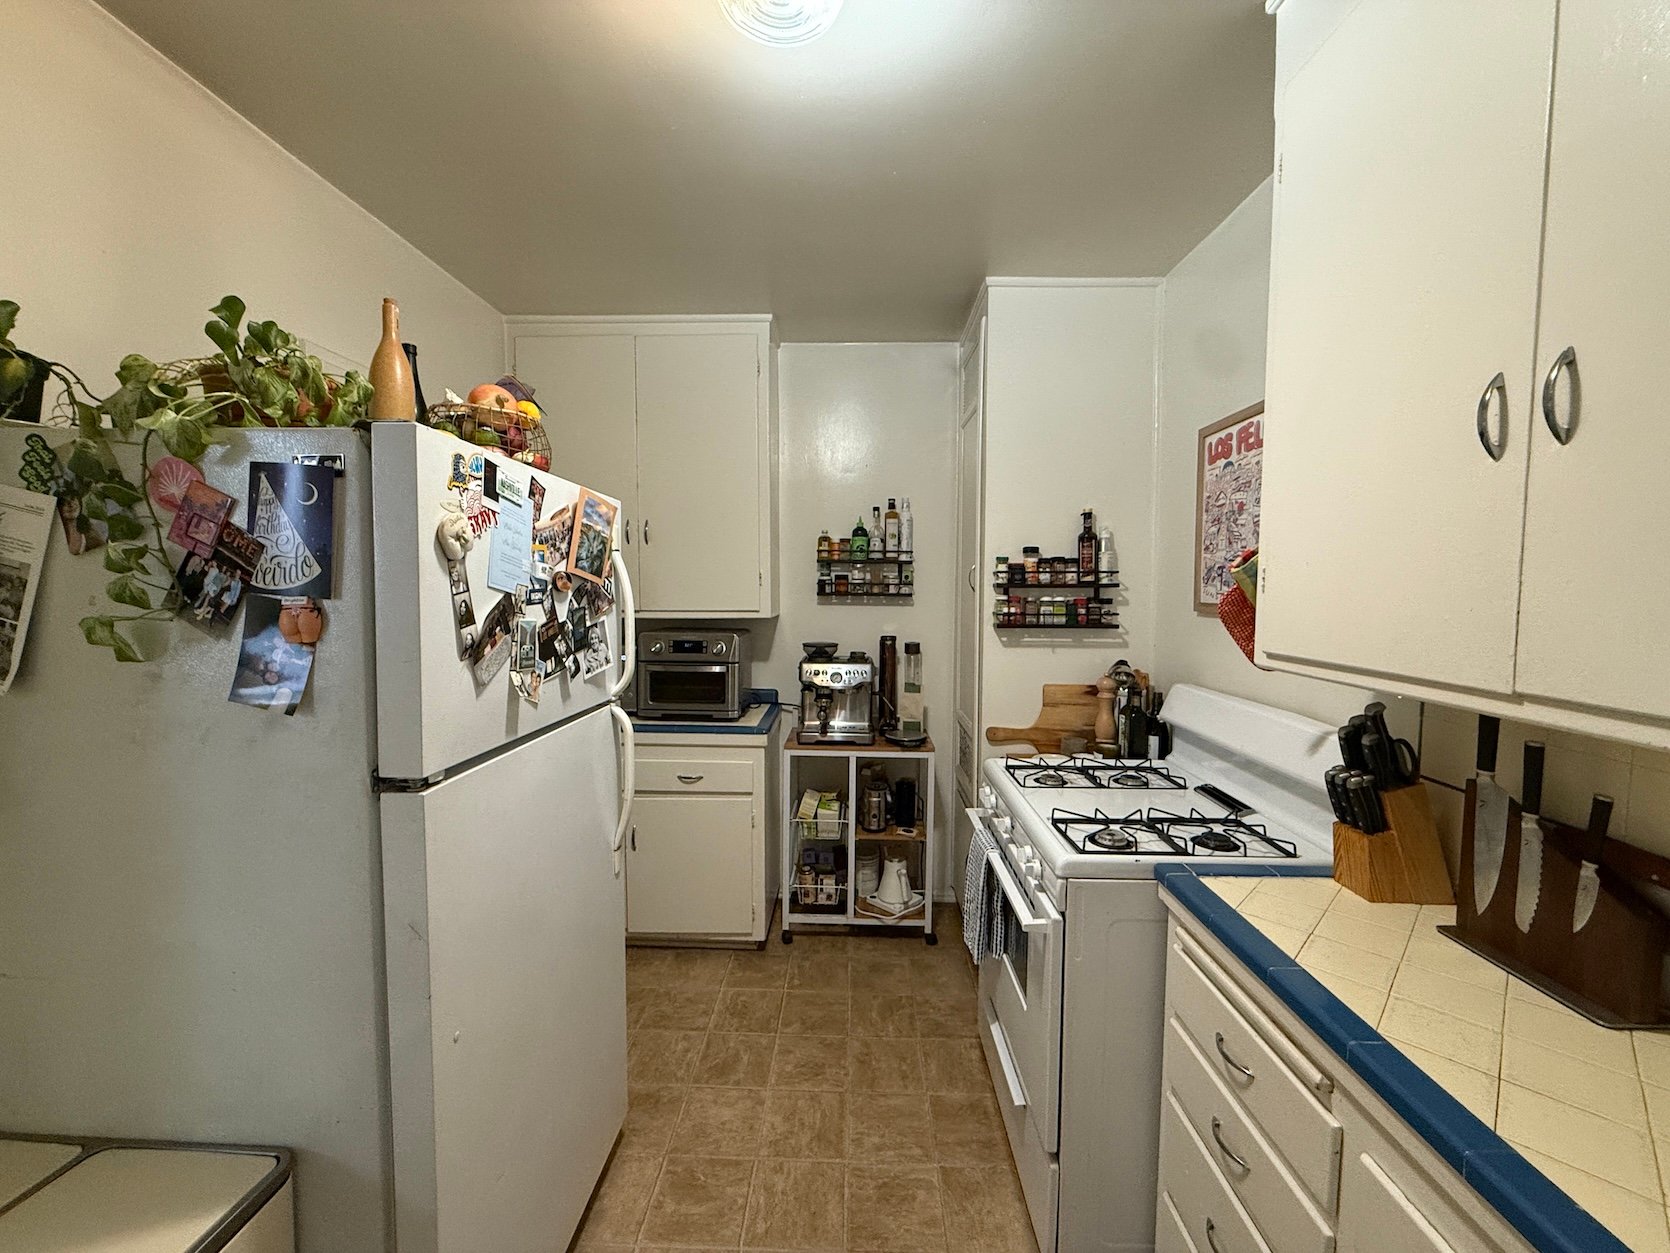
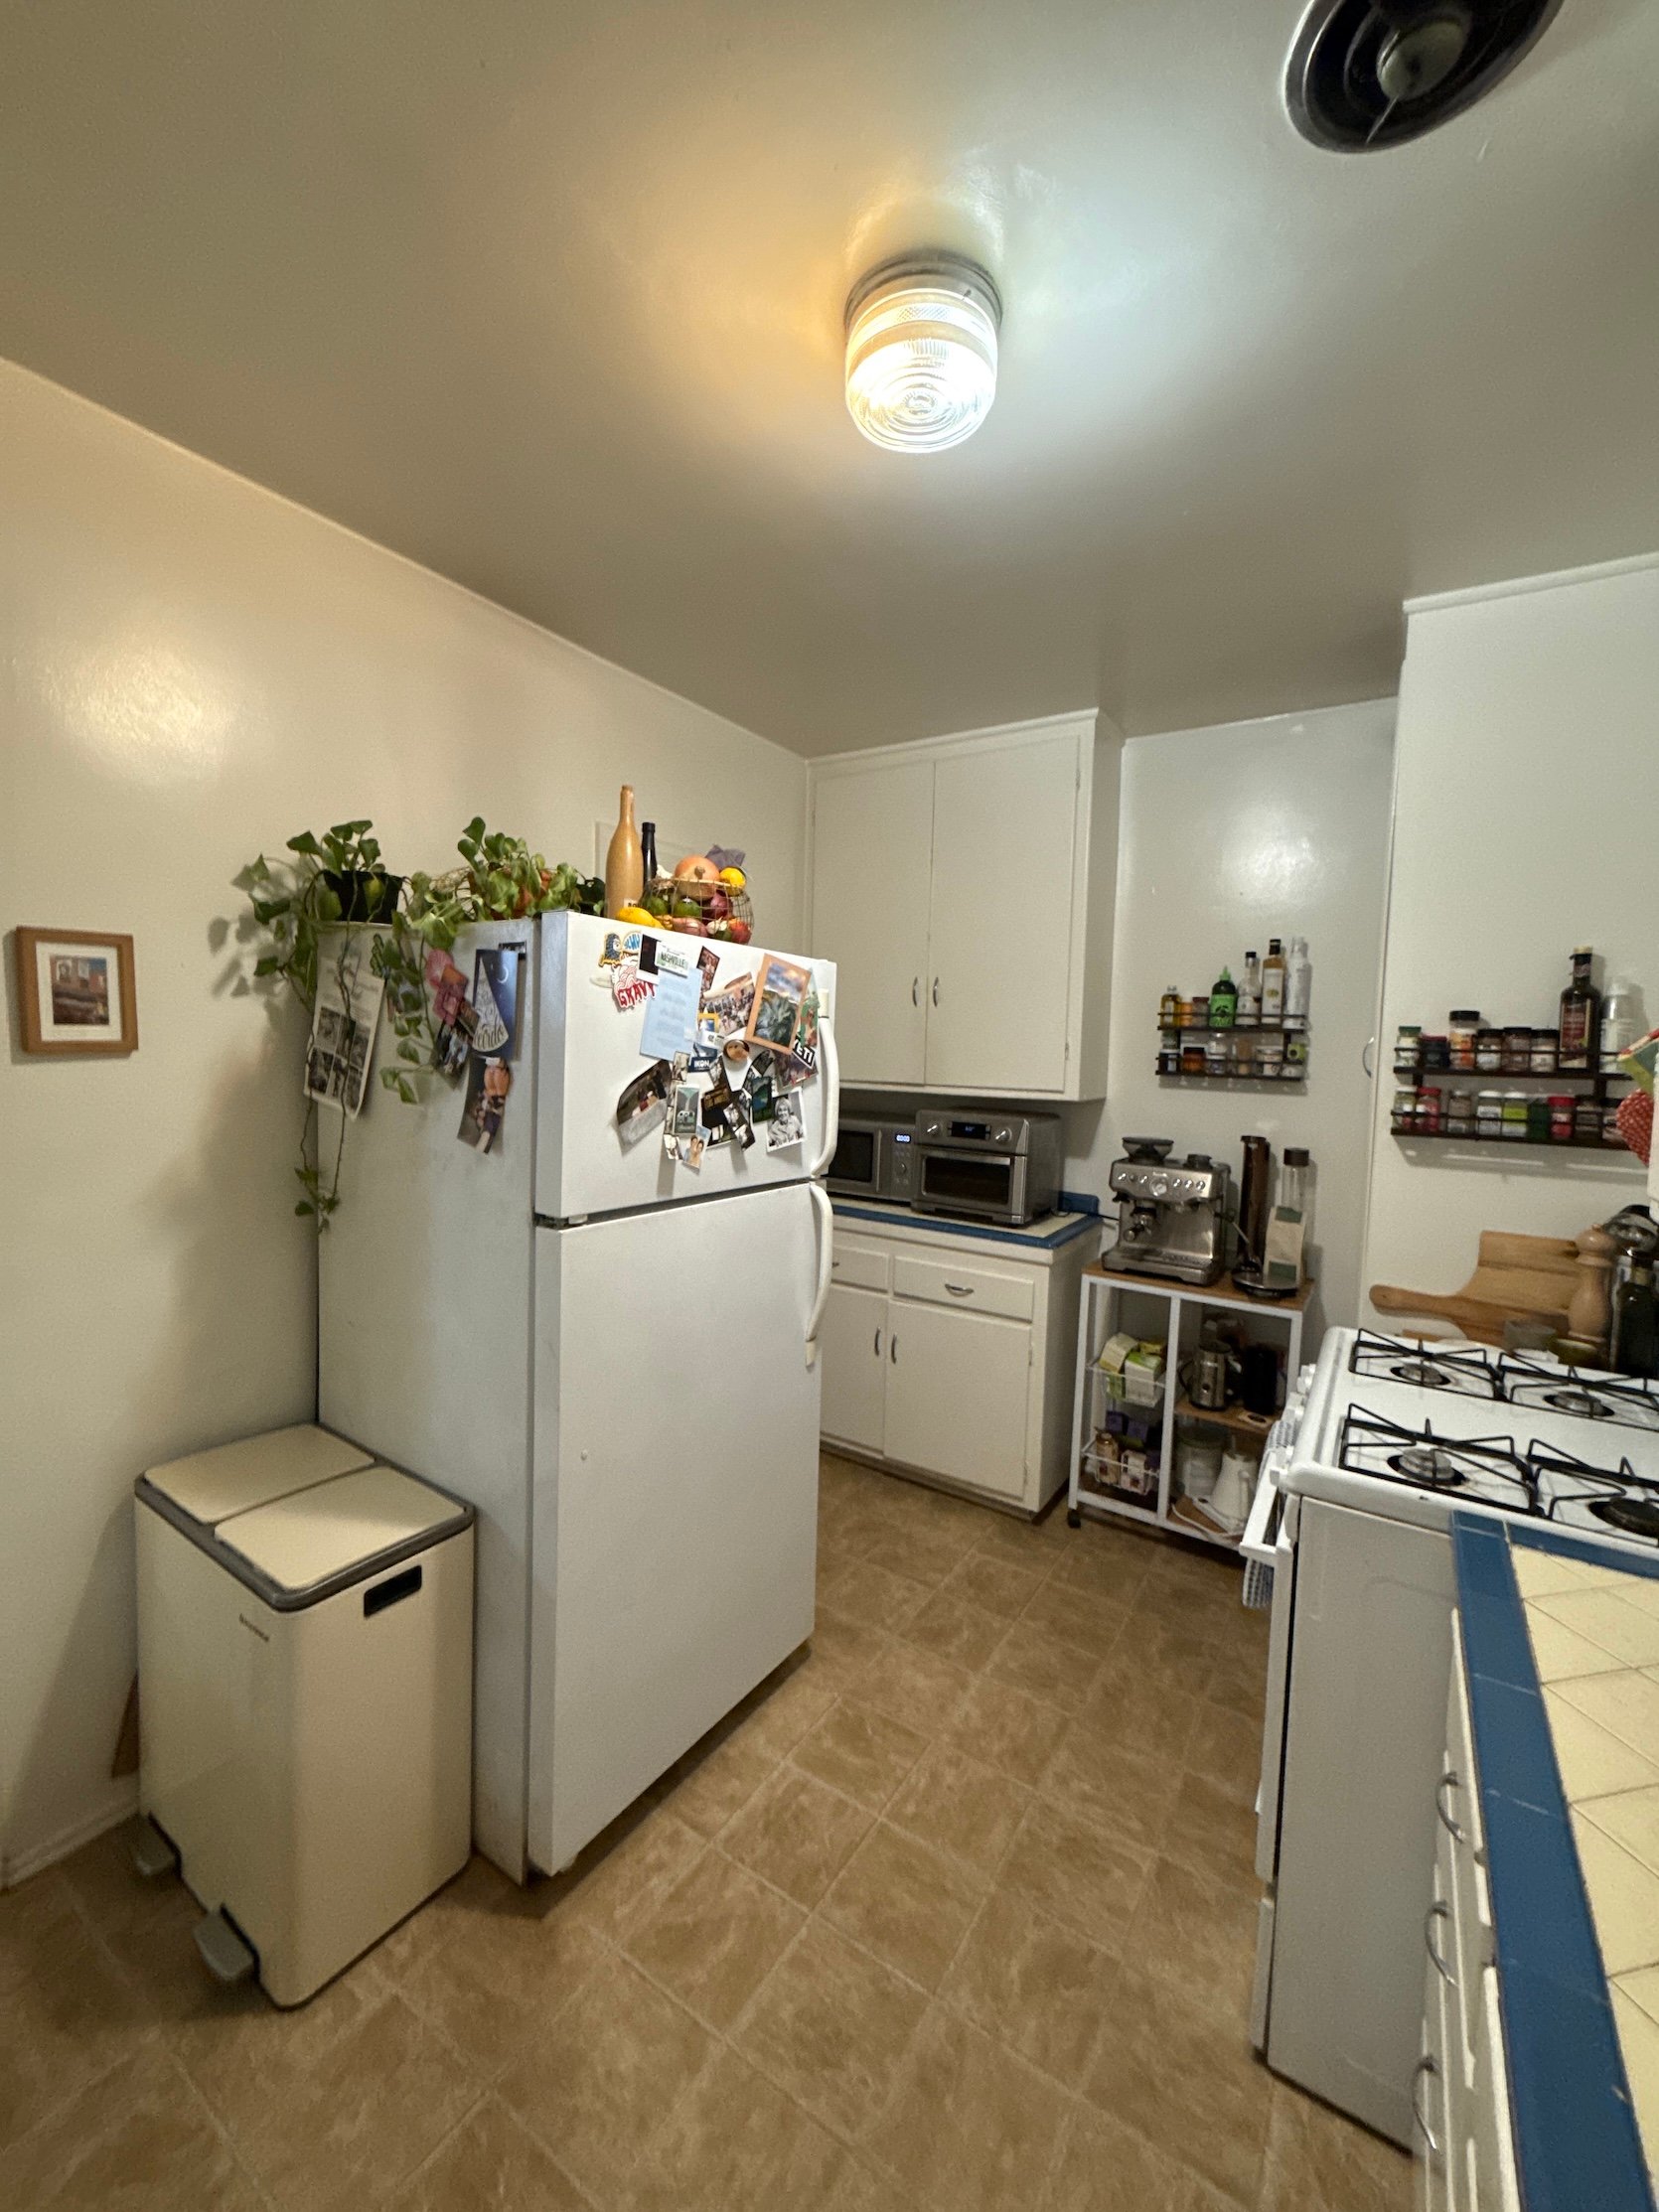
Welcome to (what was once) the tiniest, ugliest room in my condo! After I moved in, I knew the kitchen was lower than perfect, however with the condo worth, location, and roommate (hello Jade!) all completely aligned, I knew I might make it work. After I first toured my condo, I knew it had wonderful potential, but it surely was in want of a ton of affection. The constructing is from the Fifties and had a ton of cute unique particulars nonetheless intact, but it surely was actually given the “landlord particular” just a few instances over. Each condo has its execs and cons, and for this place, the professionals had been that the residing, eating, and bedrooms had been all decently giant, however the main con was that the kitchen was teeny tiny. Properly, tiny for LA requirements not less than…my New York condo kitchen can be so jealous it could most likely block this kitchen on Instagram. BUT contemplating my roommate and I each like to cook dinner and are sometimes each within the kitchen on the identical time, this room could be very, very small. Particularly due to the preliminary fridge placement…let me present you.
BEFORE

The Fridge Debacle
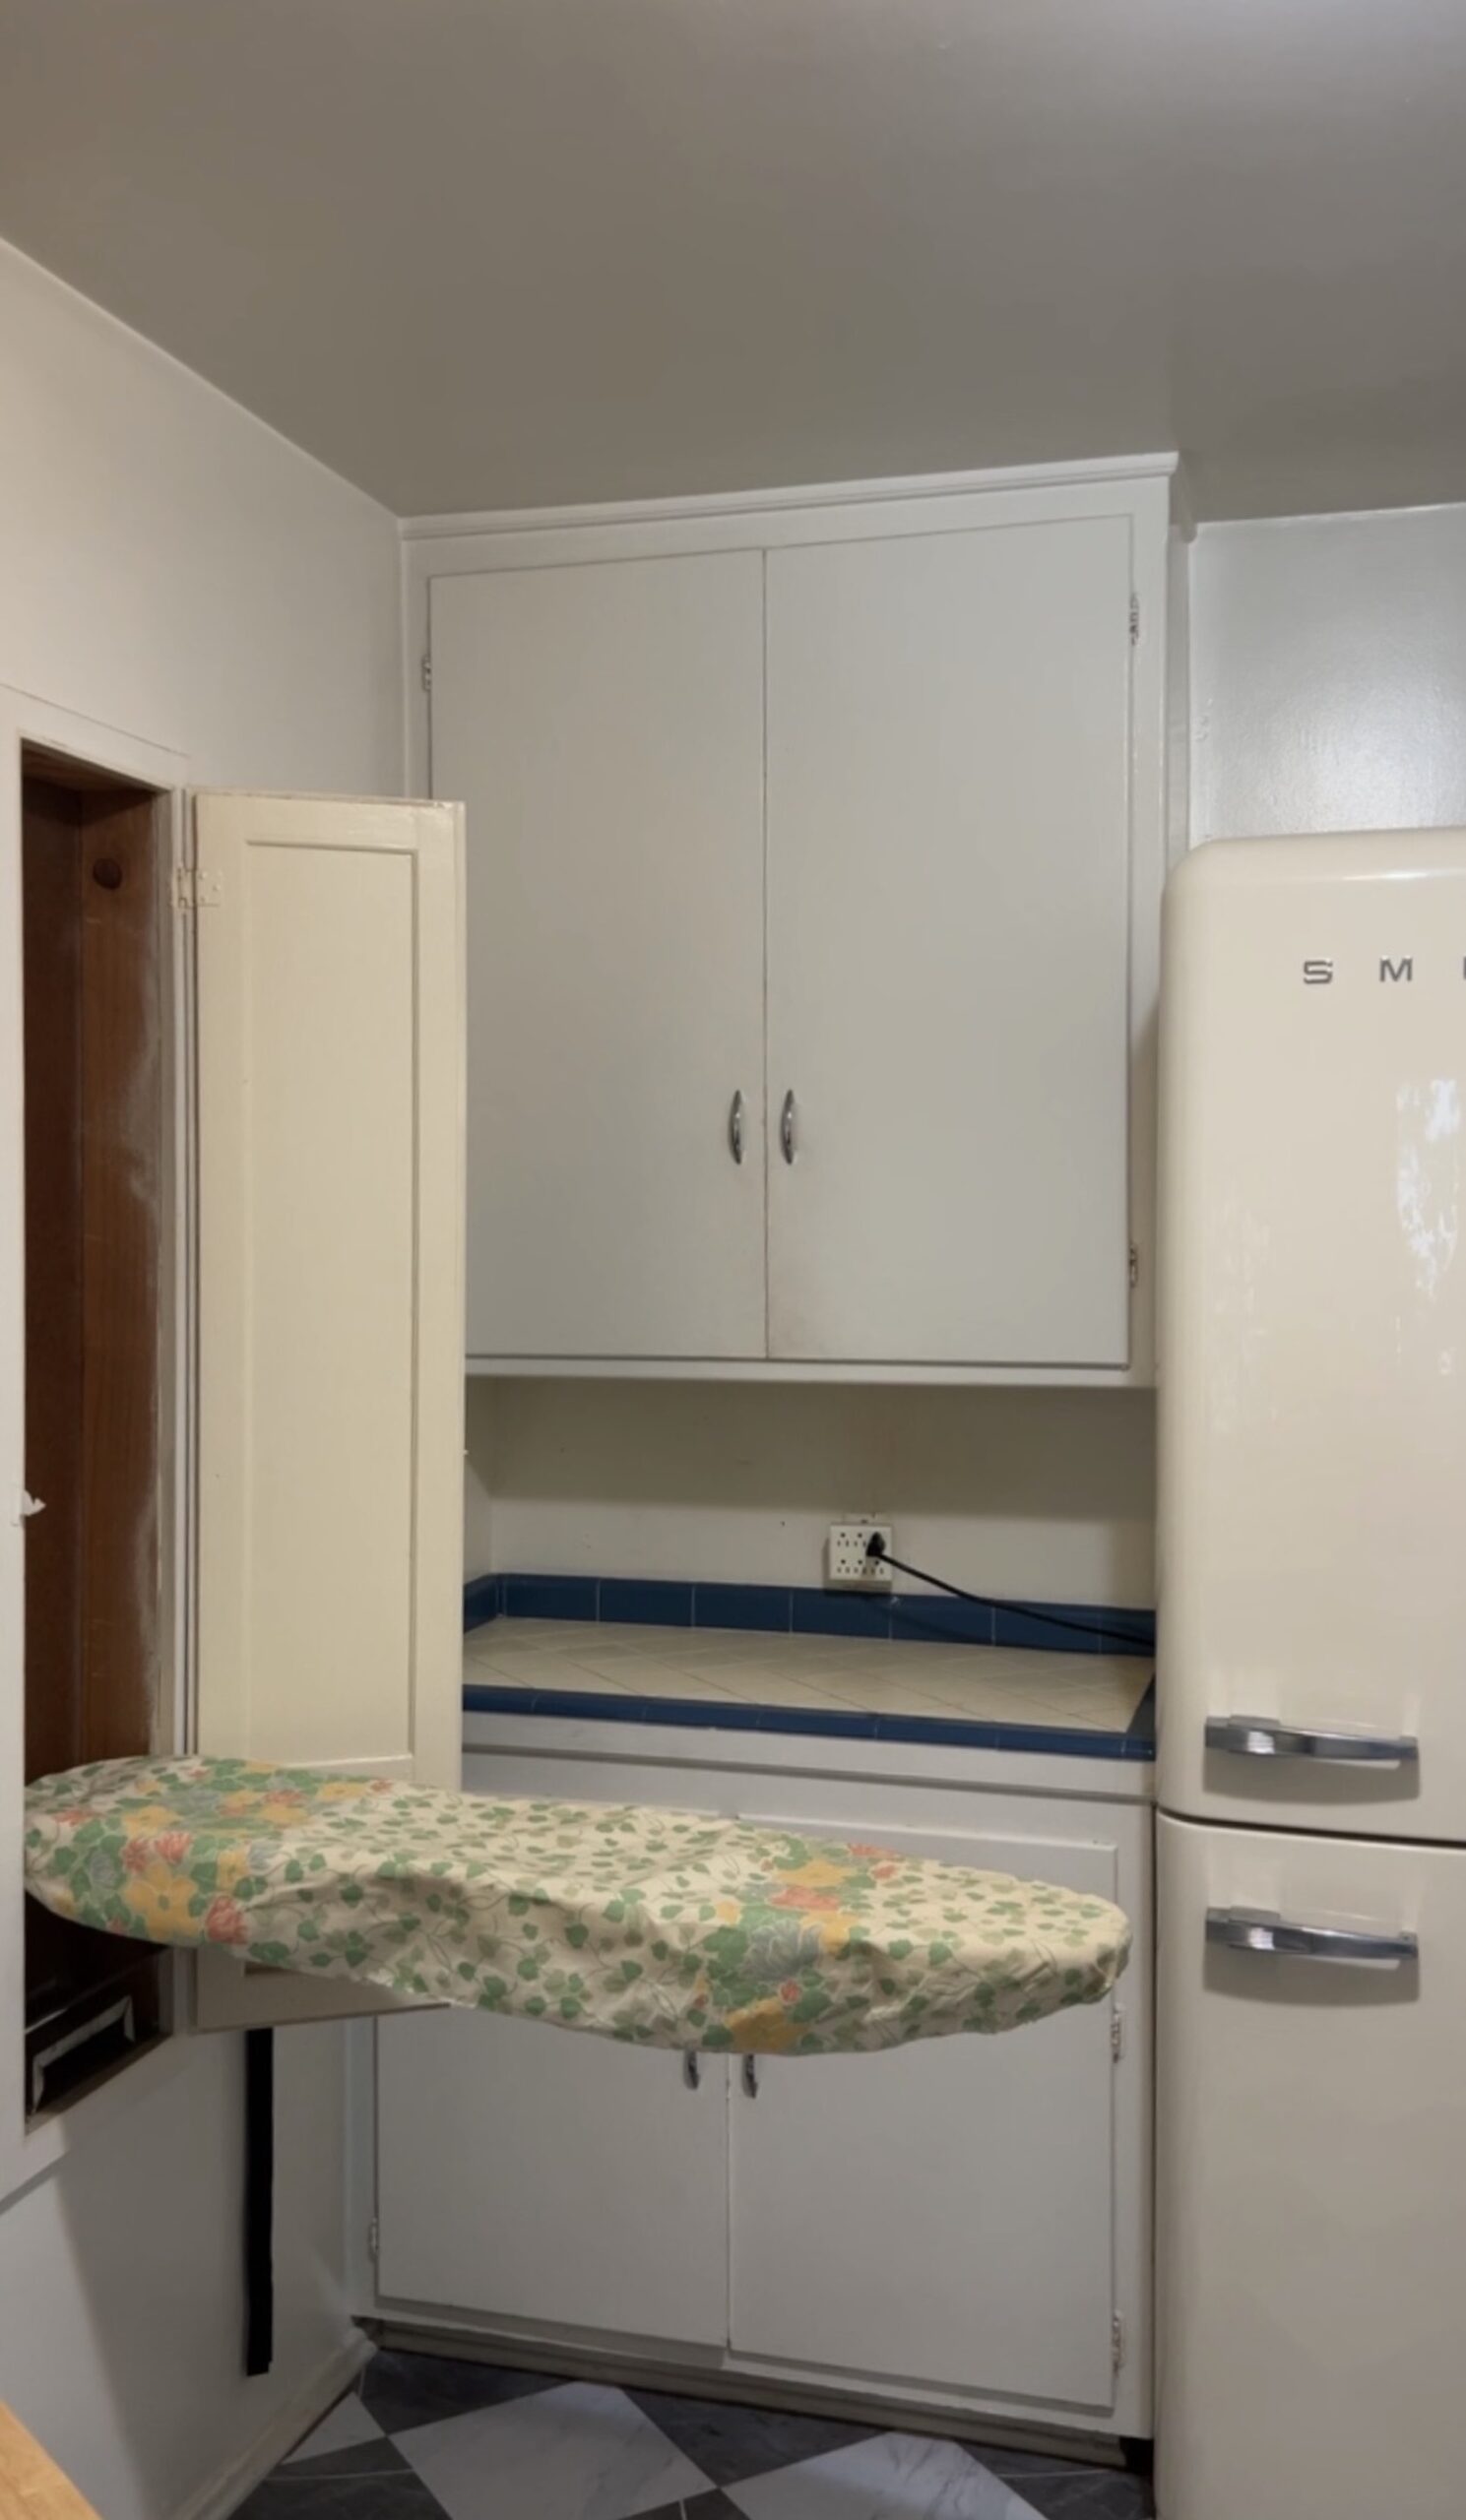
My favourite truth about this kitchen was that it didn’t include a fridge (which was excellent timing contemplating CA simply handed a legislation that landlords at the moment are required to supply fridges to tenants after I moved in…cheers!). So this fridge you’re seeing in these “earlier than” images was an outdated one which our pal’s boss was making an attempt to eliminate. It wasn’t a looker, and it leaked out puddles and puddles of water each day, which was a bit alarming, but it surely was primarily the scale and placement of this fridge that was the largest drawback. It was a lot too large for the house, so it made the room really feel even smaller, particularly once you had been cooking on the stovetop and wanted to seize one thing out of the fridge; when the door was open, you can hardly even match one individual in right here.
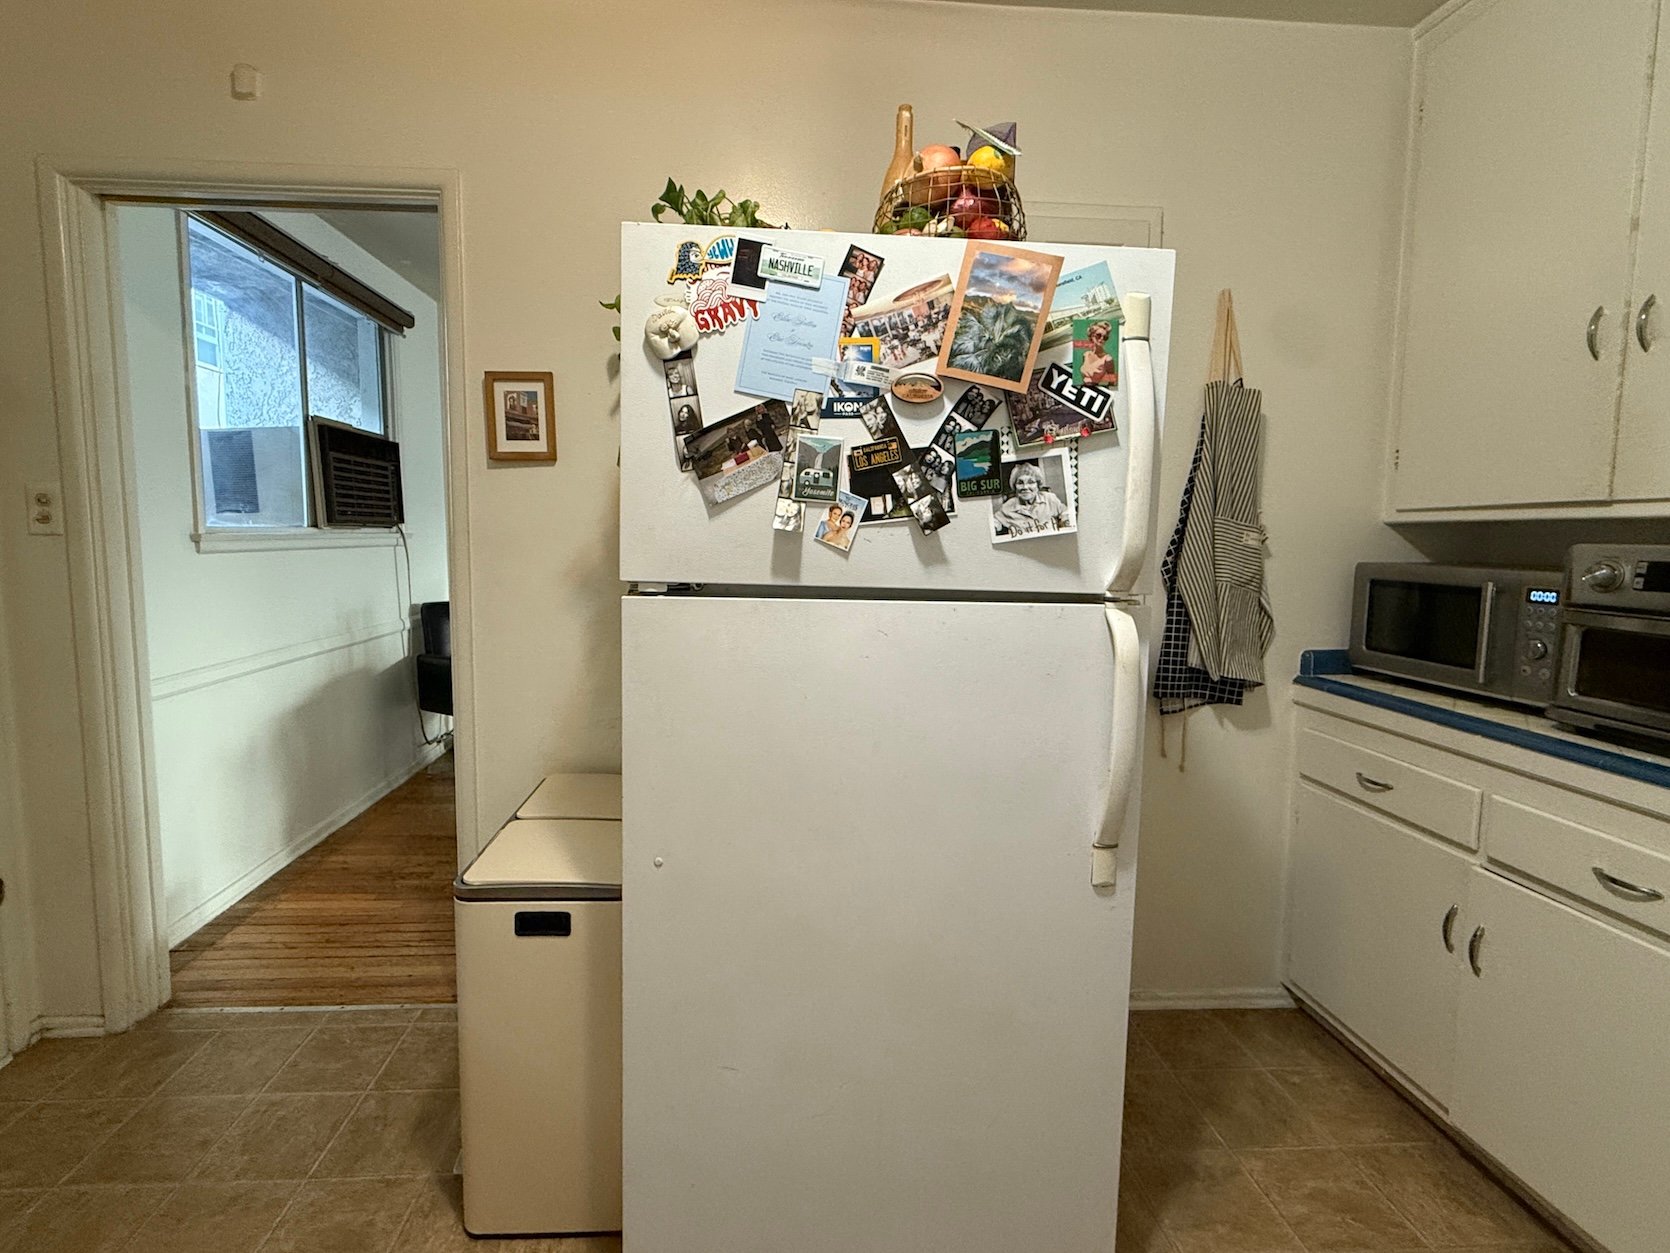
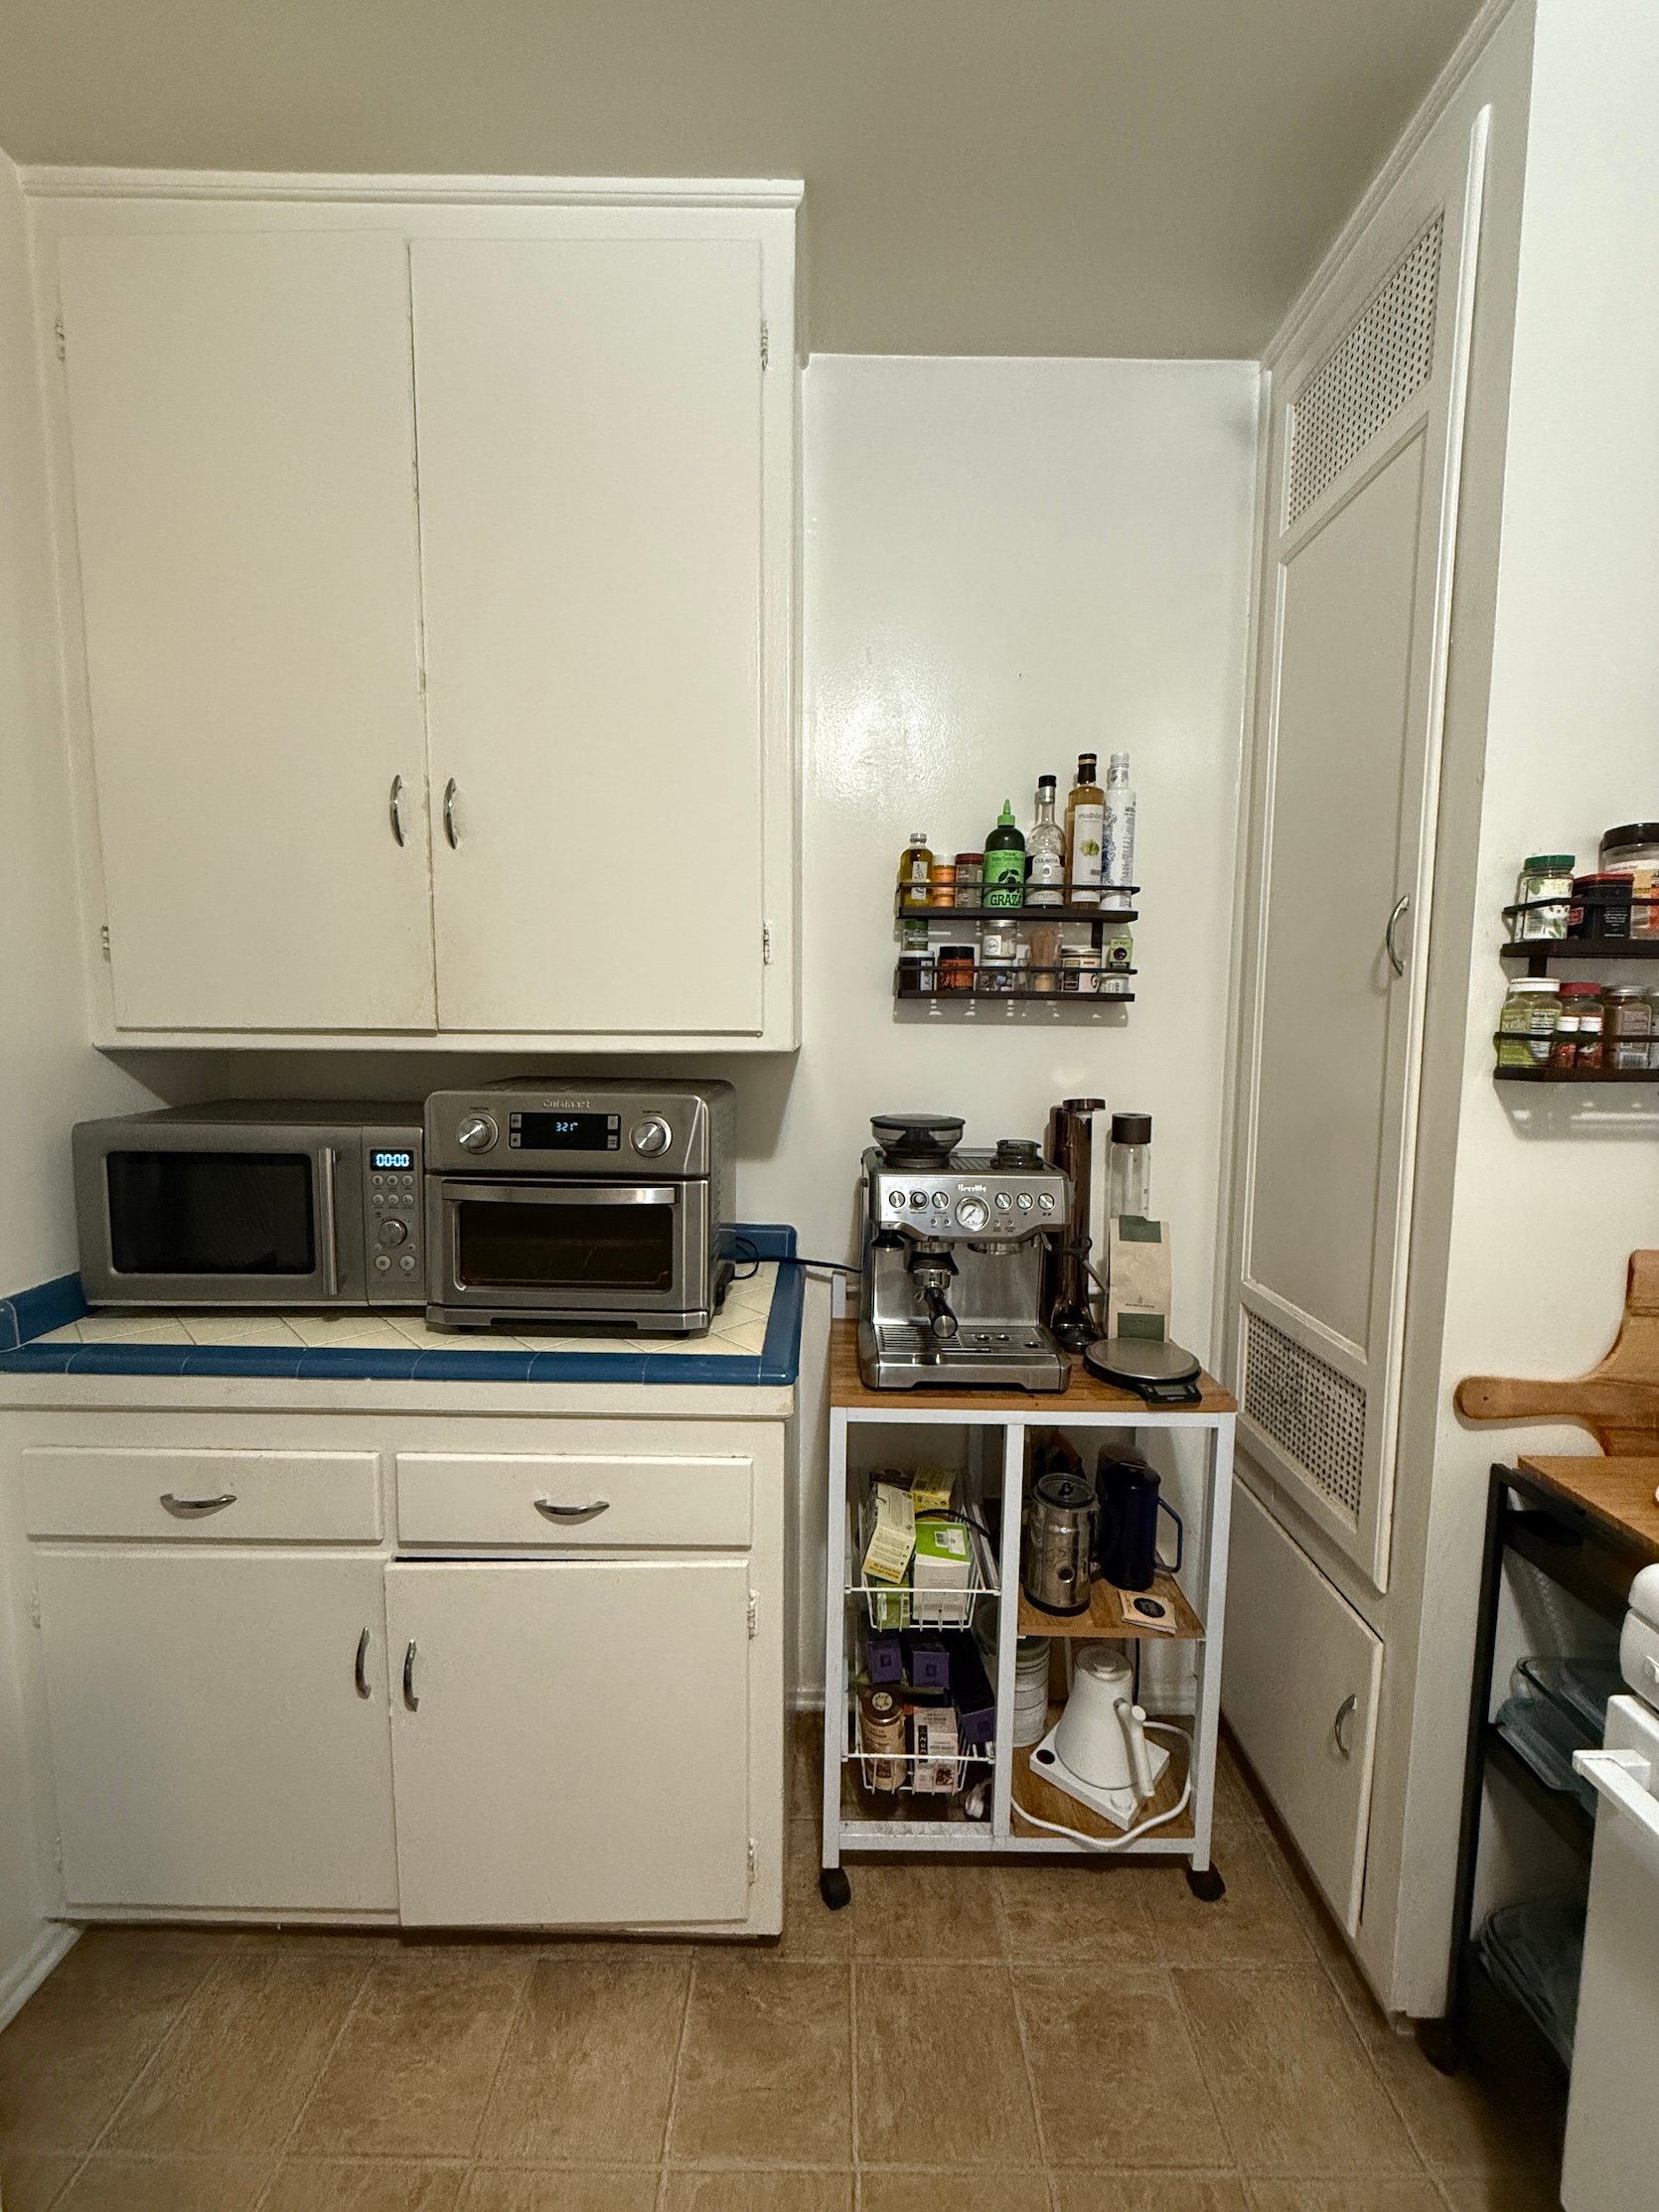
This was the primary wall I wished to sort out as a result of I knew if I simply moved just a few issues round over right here, I might make the house operate means higher for us. Not solely was the fridge protruding out into the center of the room, however we had been additionally significantly missing counter house. The deeper counter tops (those you’re seeing right here to the precise of the fridge) had been housing our microwave and toaster as a result of they’d nowhere else to go. So the one usable cooking prep house was on the other aspect of the room – and people counter tops are so shallow we couldn’t match a reducing board on them. Plus, the higher cupboards are tremendous low, which additionally made issues a bit troublesome, so with every little thing mixed, this kitchen was my private hell to cook dinner dinner in (which was so unhappy as a result of I really like cooking).
Decided to make this house extra purposeful (and prettier), I wheeled the leaky, damaged outdated fridge out of the kitchen door (which match by way of with lower than half of an inch to spare). And you’ll not consider what I discovered…
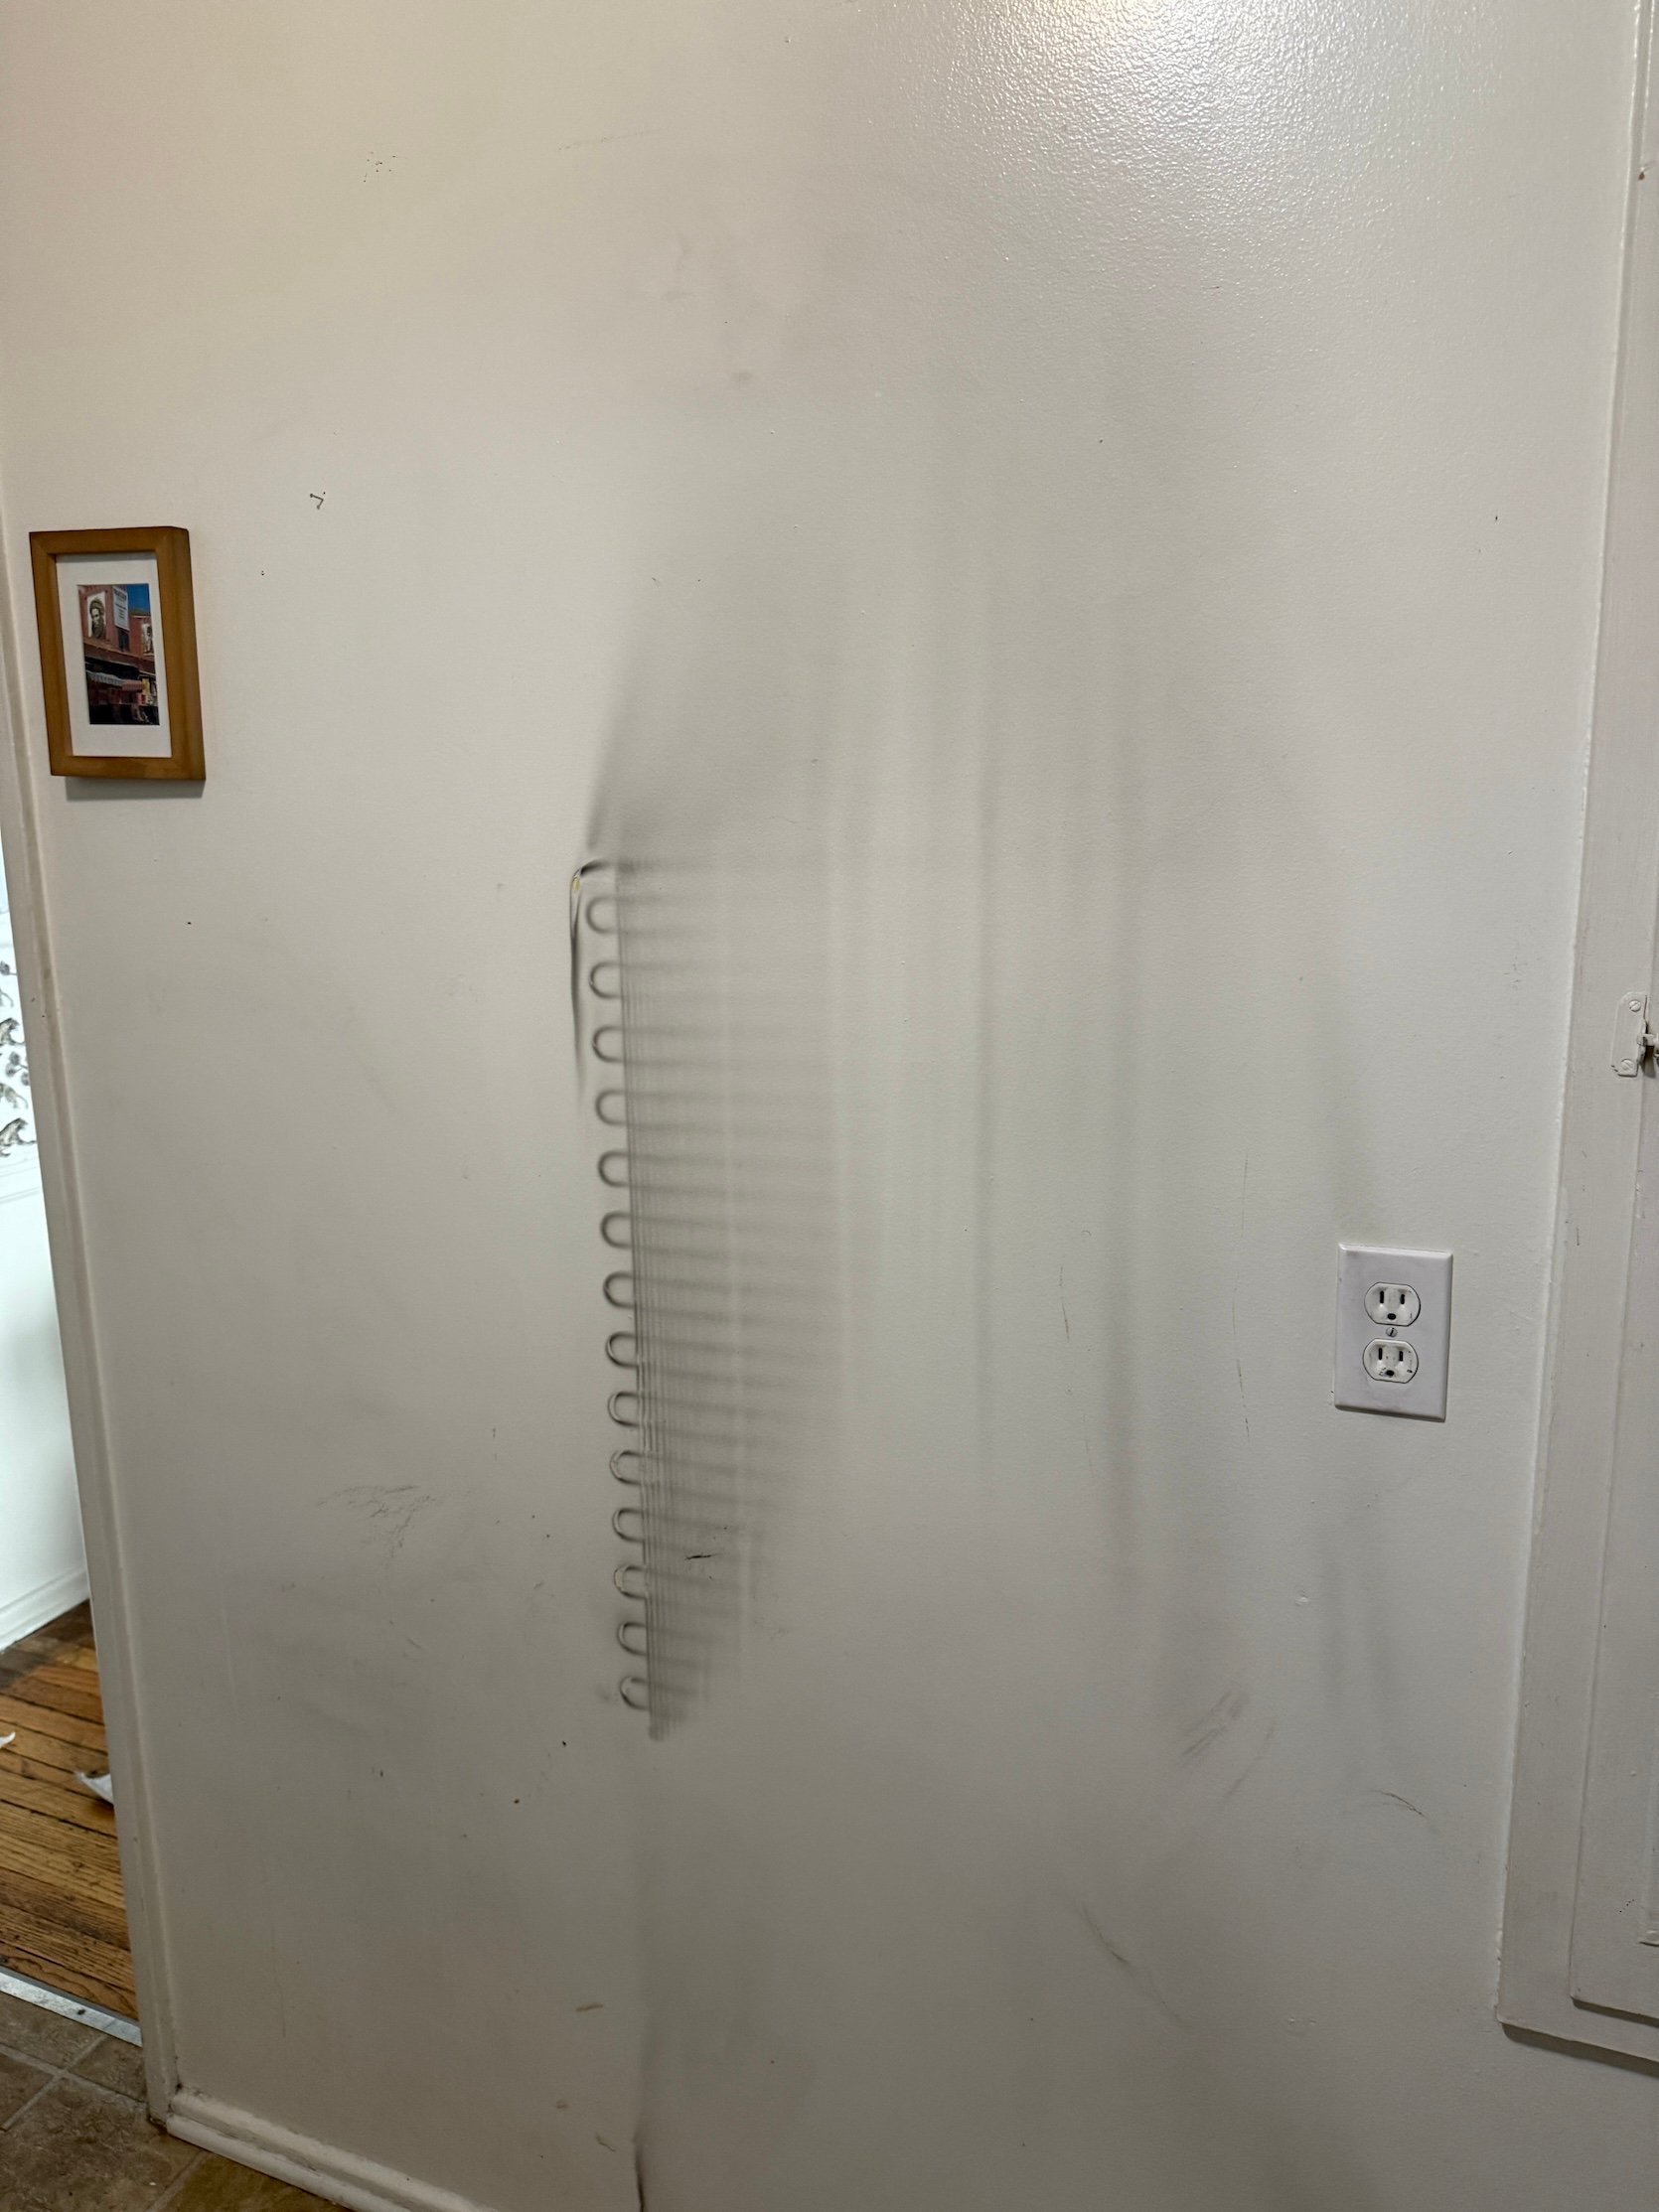
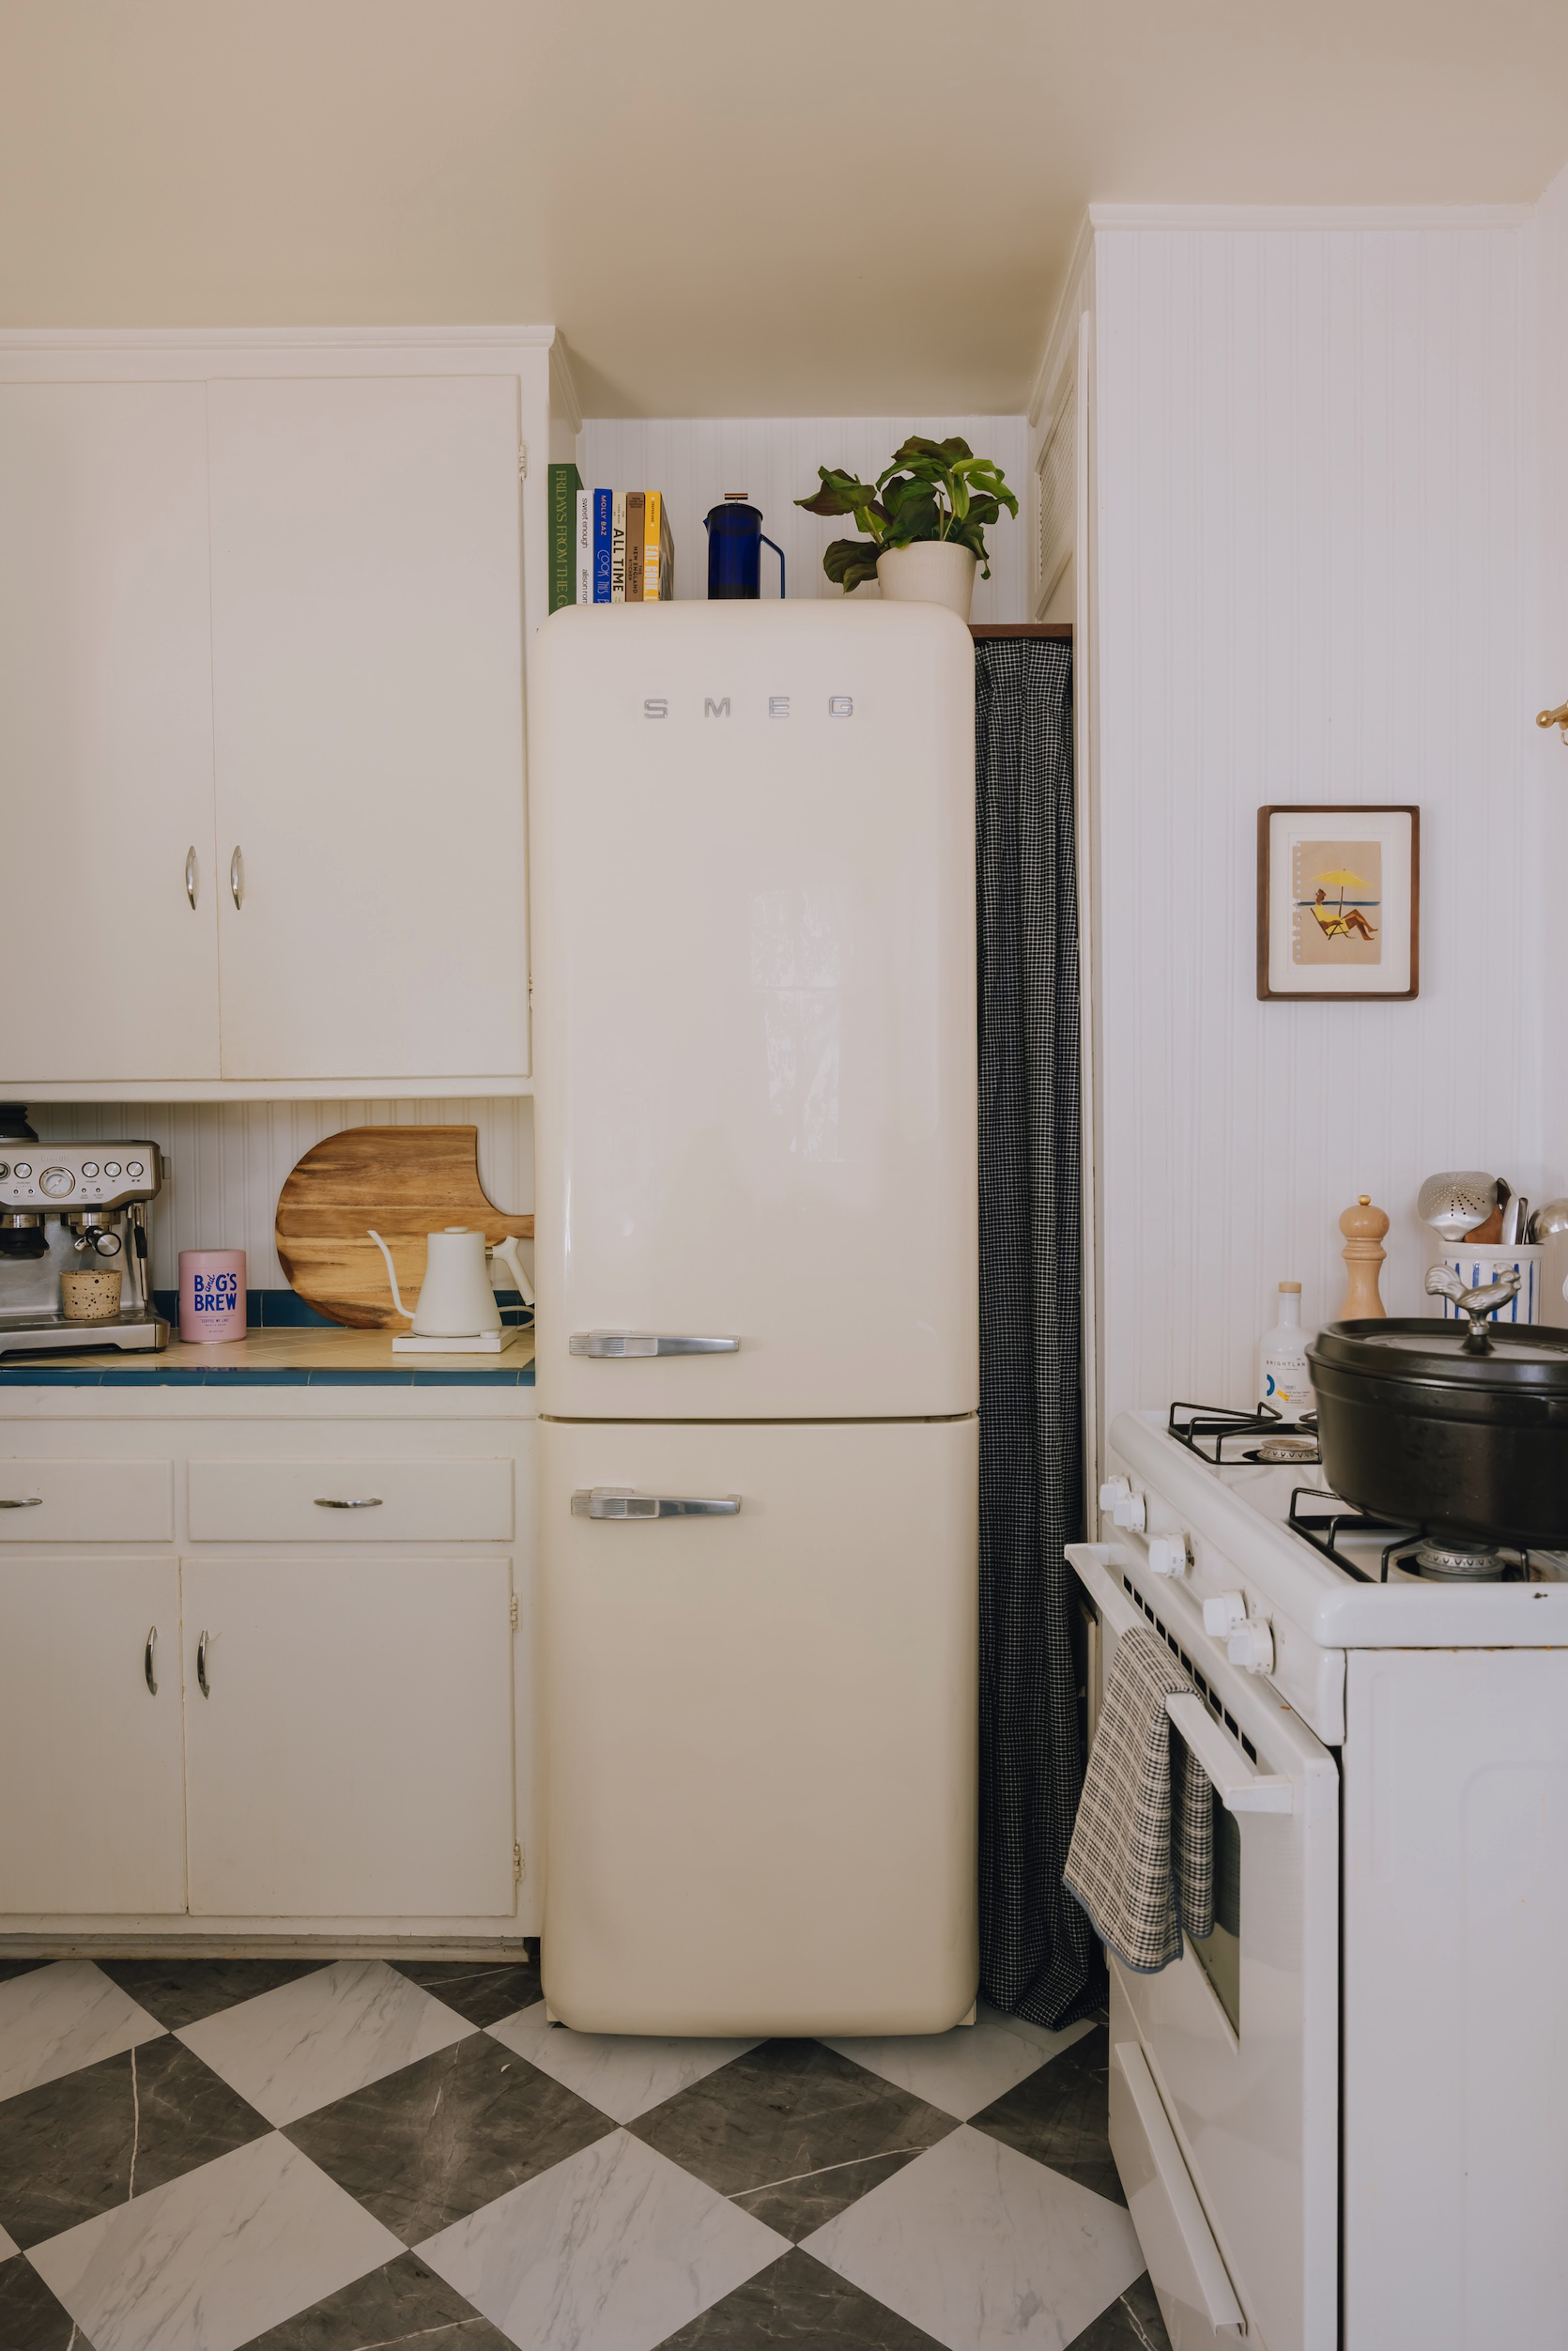
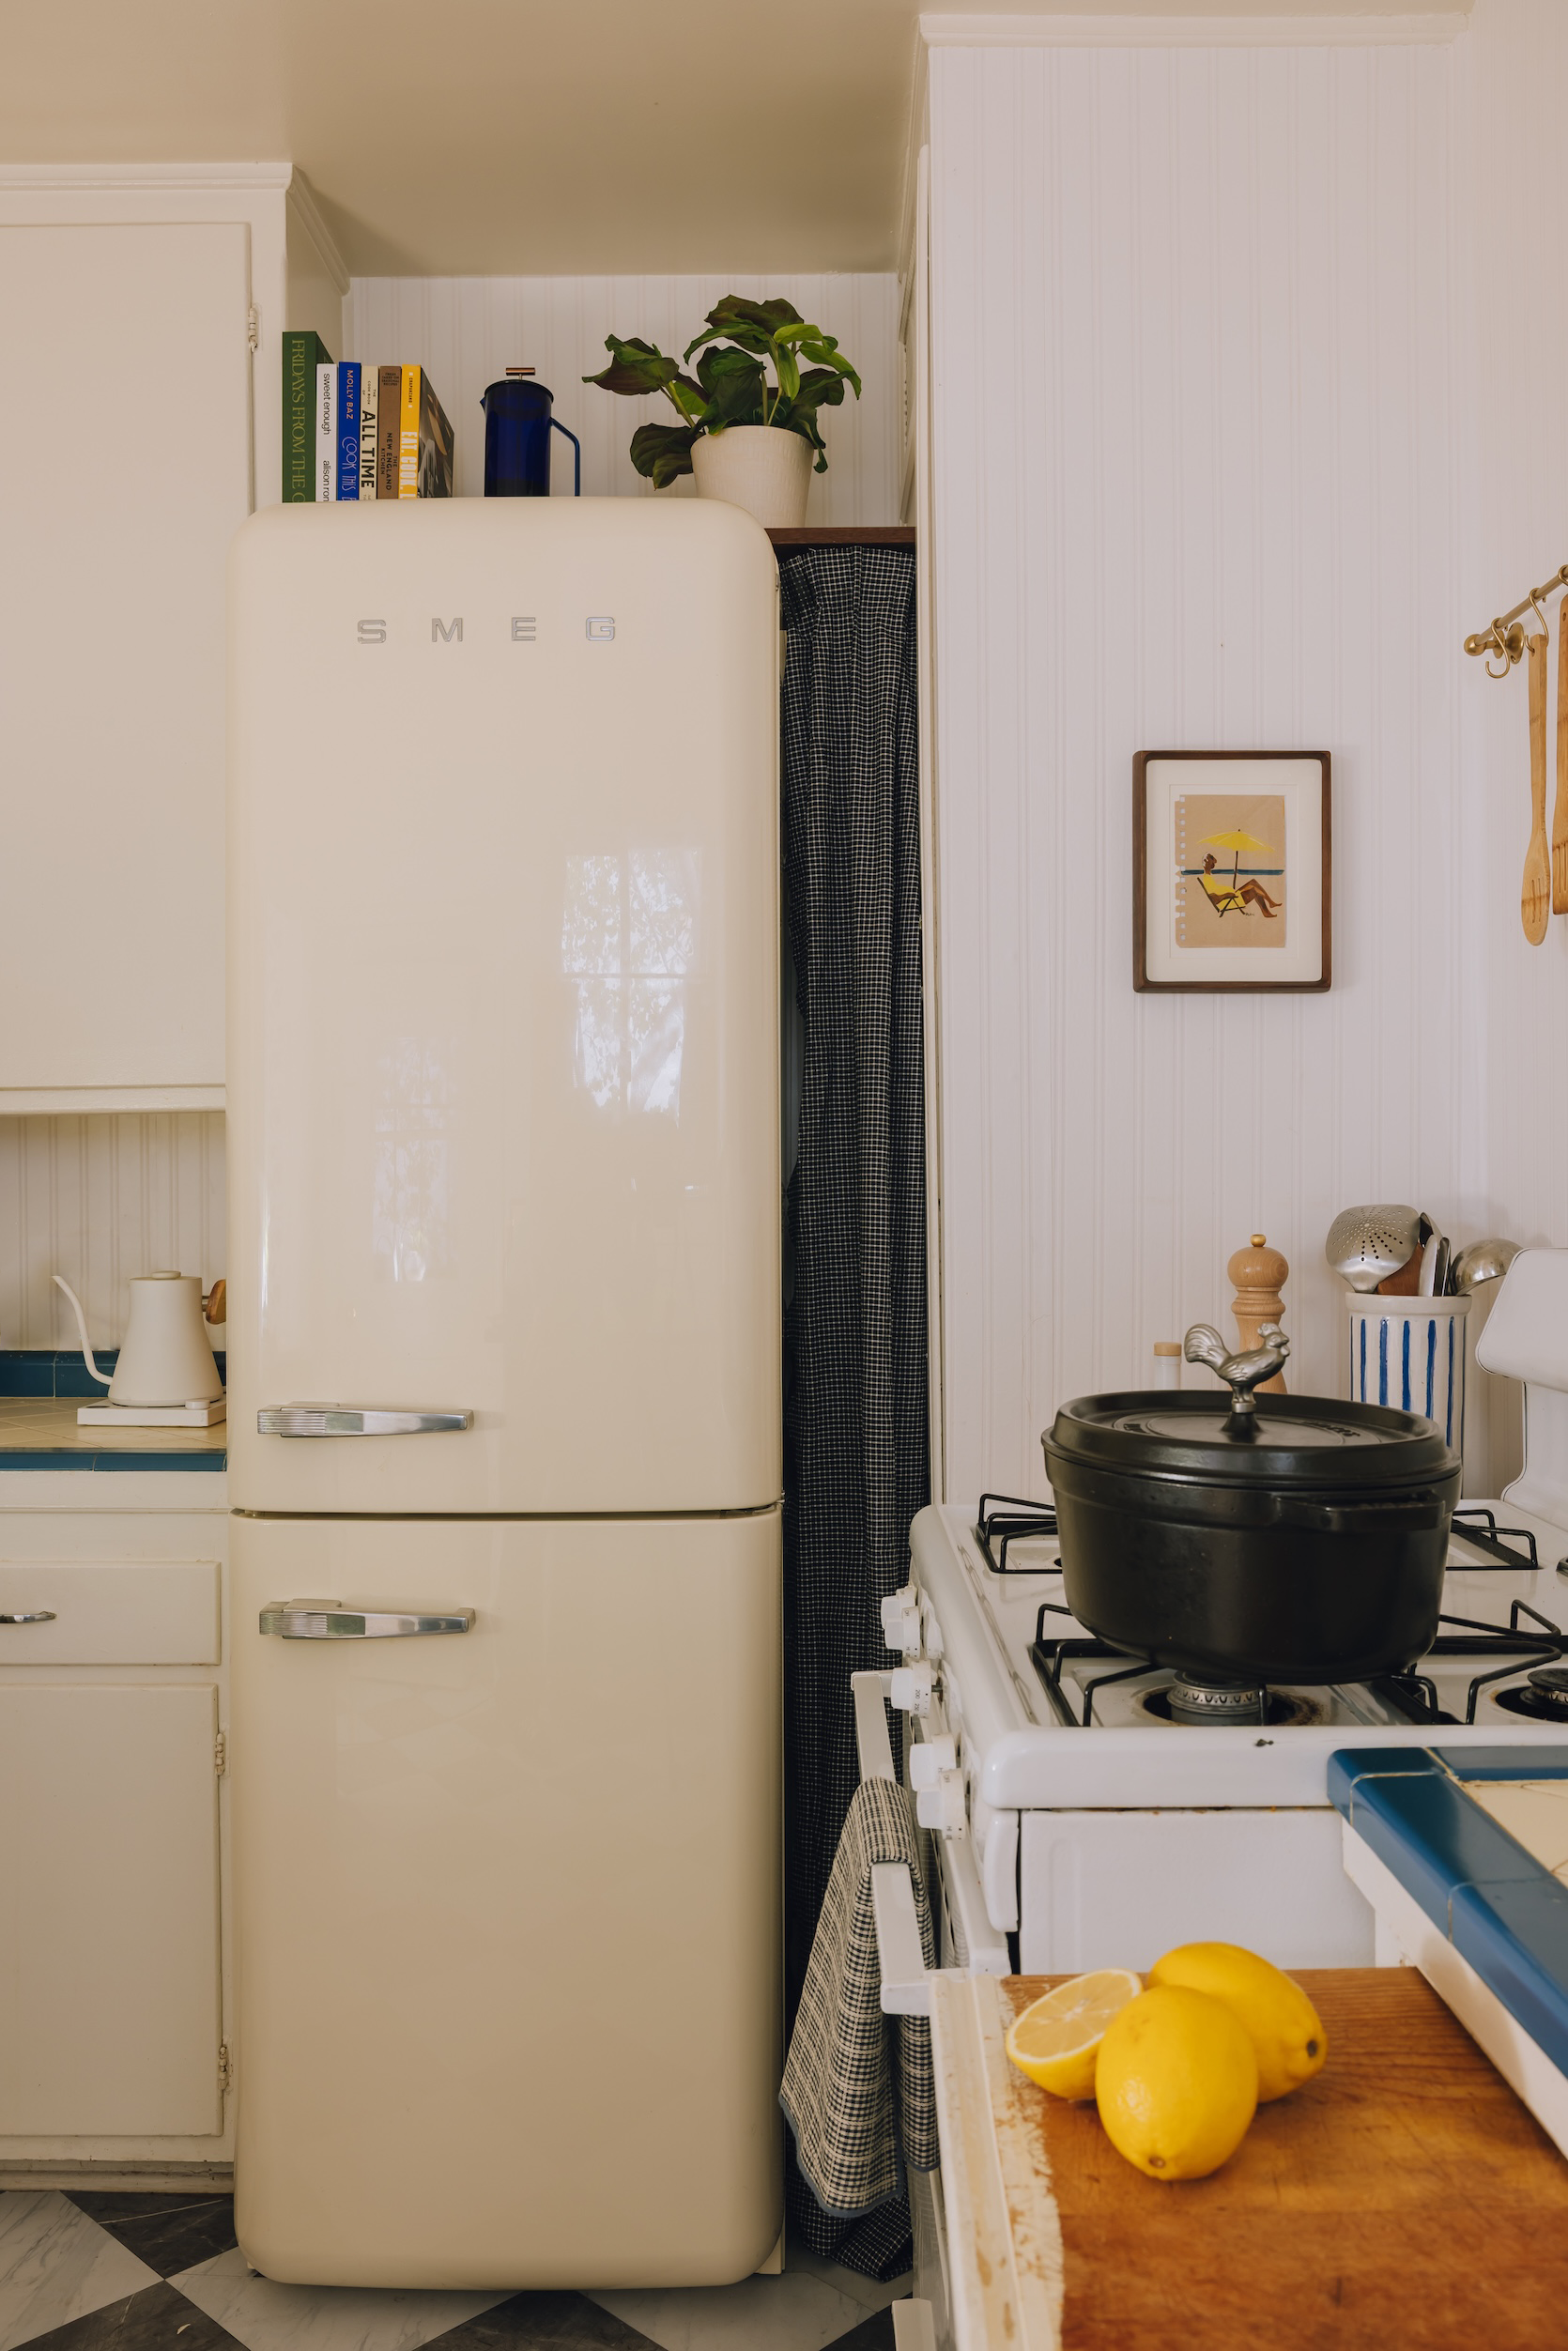
Okay, everybody, say it with me – a hearth hazard! COOL! This was truly terrifying to see, however on this second, I instantly knew I had made the precise option to eliminate this honker. Our condo is just about rent-controlled, month-to-month, and is the proper location in Los Feliz – walkable to all of the shops and eating places. So I moved in realizing I’d most likely must get a brand new fridge to make the kitchen actually usable, but it surely was a price I used to be keen to pay contemplating my month-to-month hire was such a great deal, and the placement was excellent. Additionally, since this place didn’t include a fridge, I might put money into one I’ve all the time wished, since I can take it with me into my future houses. And the one I’ve all the time wished?! A cream Smeg OF COURSE!
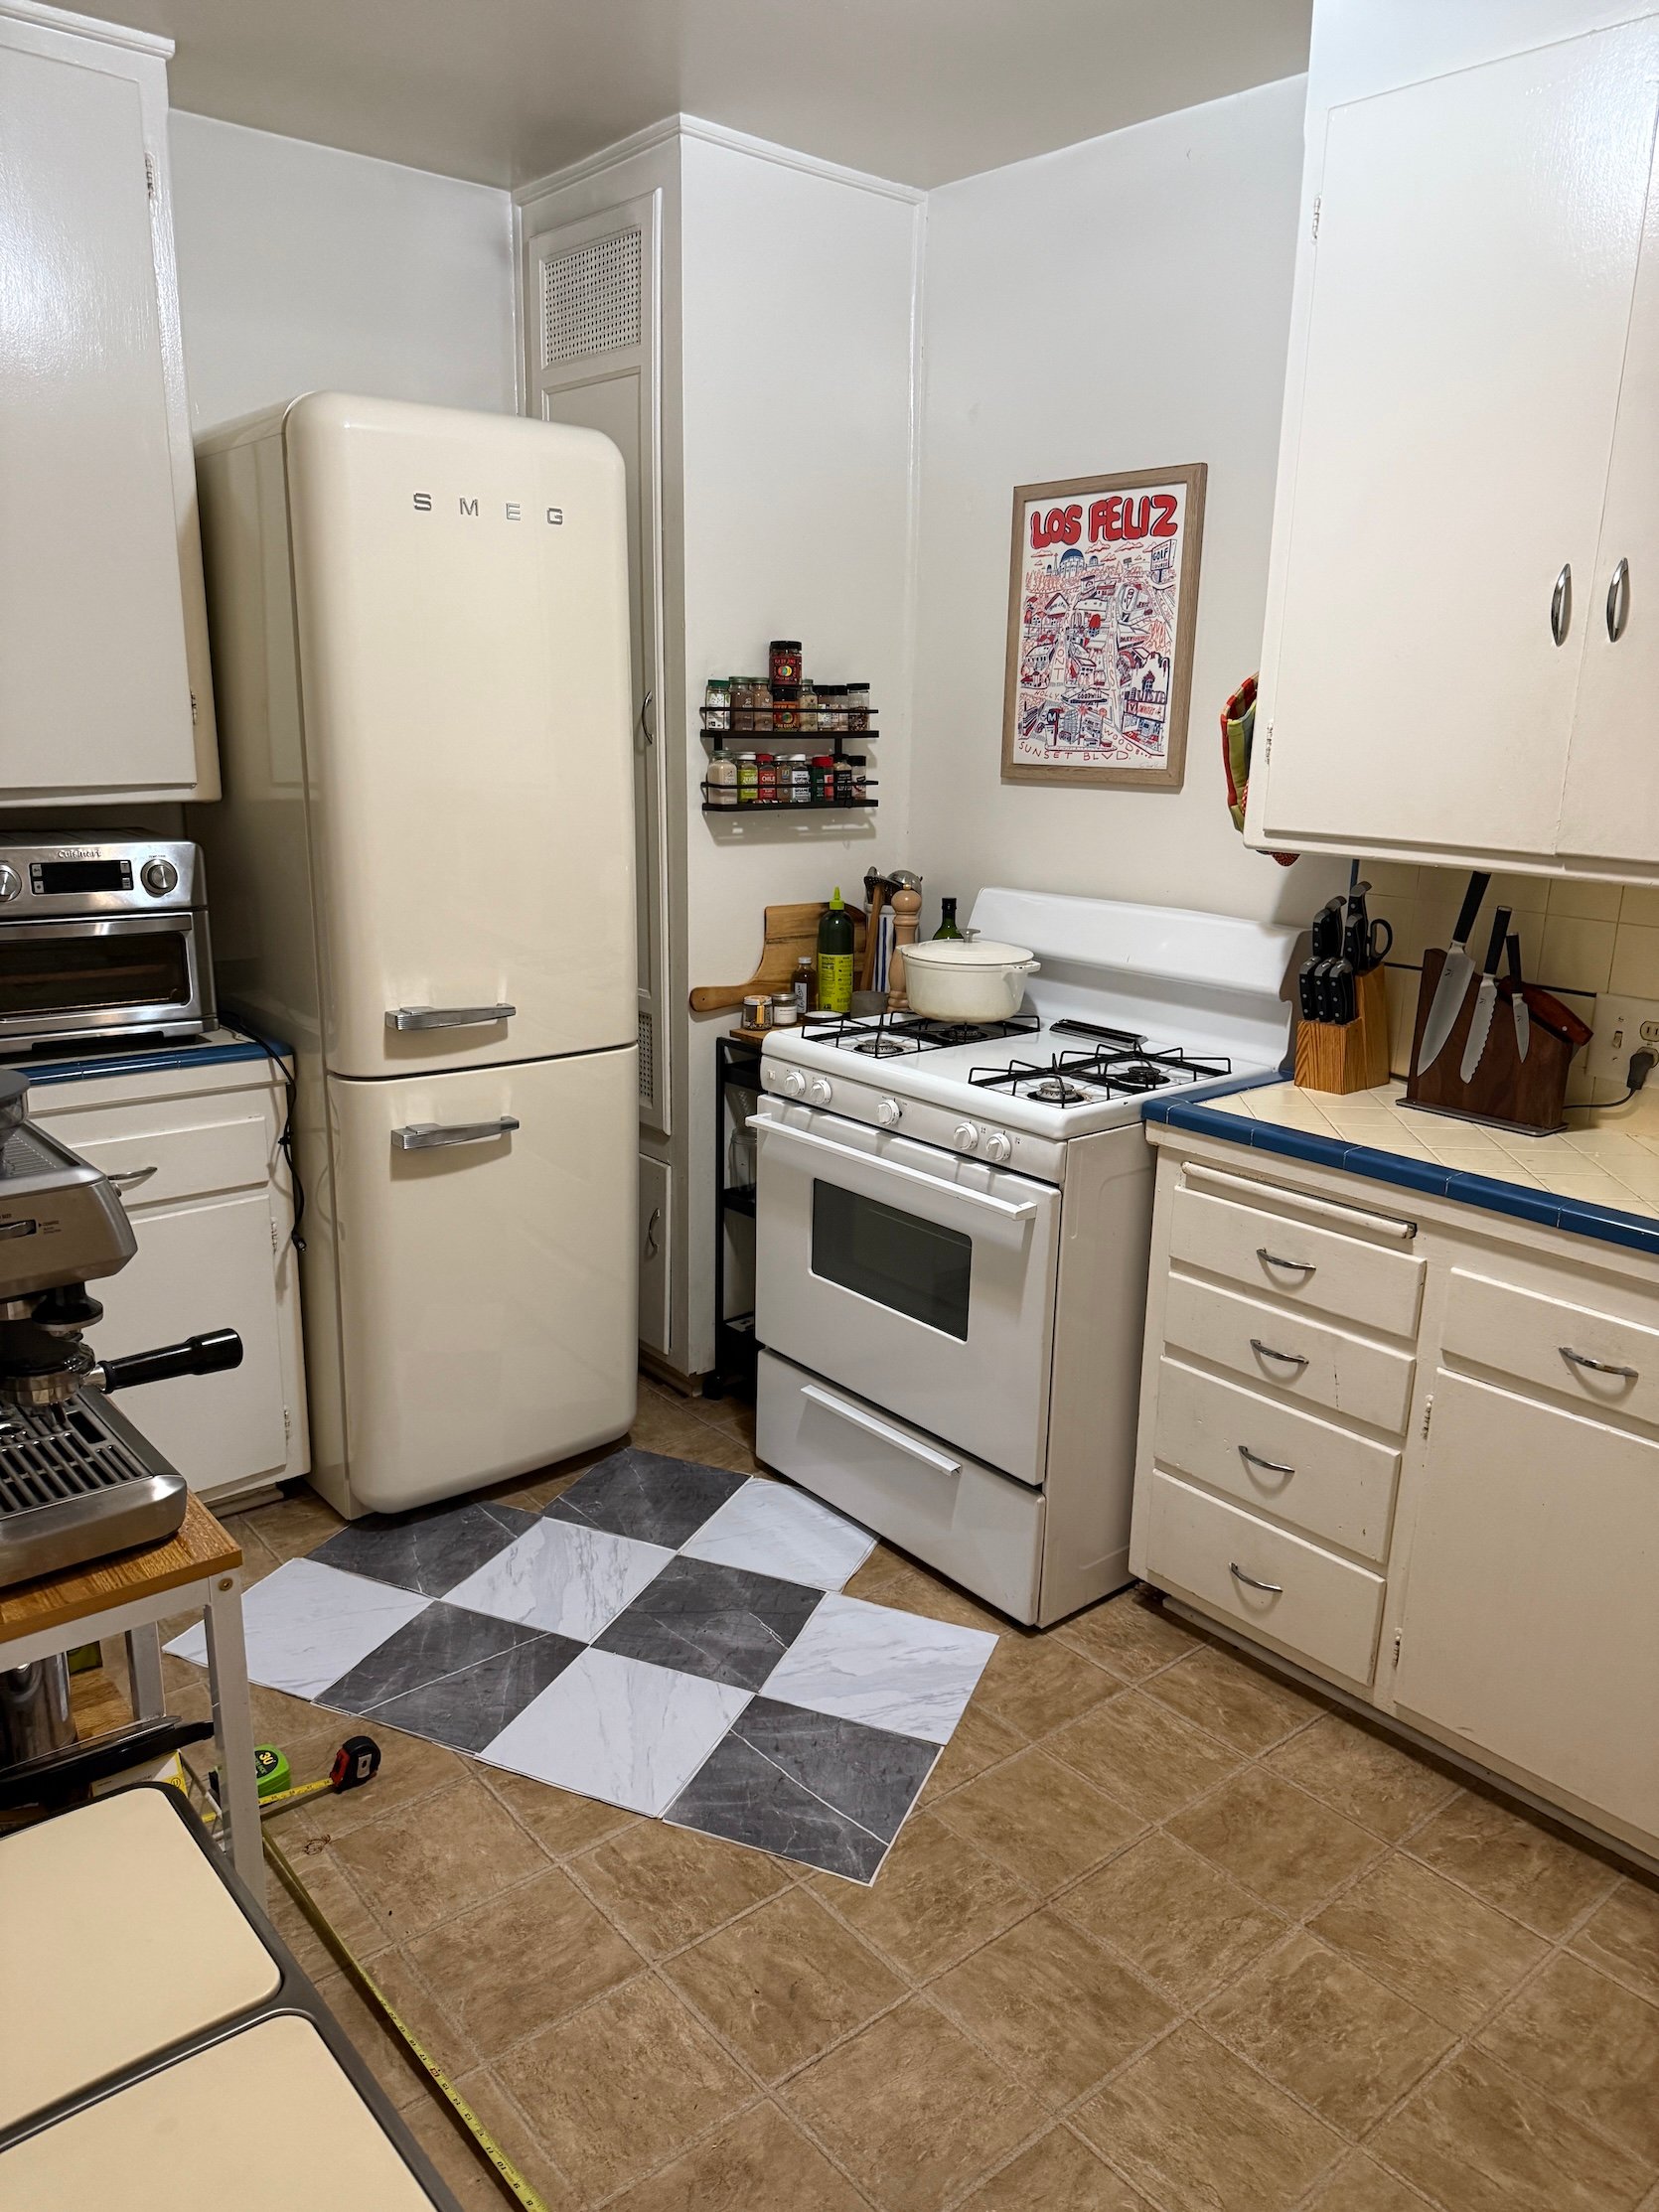
And the fridge match completely over on this nook, which freed up the house SO MUCH. OH, and in the event you’re questioning what that cupboard is subsequent to the fridge – it’s utterly non-usable, so don’t fear, we aren’t losing cupboard house (lord is aware of we’d like it). BTW, in the event you’re excited about investing in a Smeg, you need to CERTAINLY do what I did and use Caitlin’s Wayfair hack, which is: 1) Be part of Wayfair’s membership program after which B). Get $200 again in credit. The membership pays for itself, and also you get a good chunk again!! It was truly genius, and I by no means would’ve recognized about it except she posted about that, so shoutout to our woman Cait for the tip! And nope, this was not sponsored (though that may’ve been cool lol) – it simply genuinely was price it! The Wayfair supply workforce was additionally SO superior and did white glove, which was an precise dream (as a result of I’ve no clue what I’d’ve performed had I simply been right here alone).
As you’ll be able to see from the above picture, the following factor I did was cowl the horrific linoleum ground in Chris Loves Julia x Floorpops peel-and-stick tile, and I used to be SUPER impressed. I gained’t lie – it’s a bit trial and error to get a clear, straight reduce, however the weight of those tiles was stunning, and the standard was simply wonderful. The entire set up course of took me about 3 hours from begin to end, which was very quick IMHO. I’d completely do that once more!!
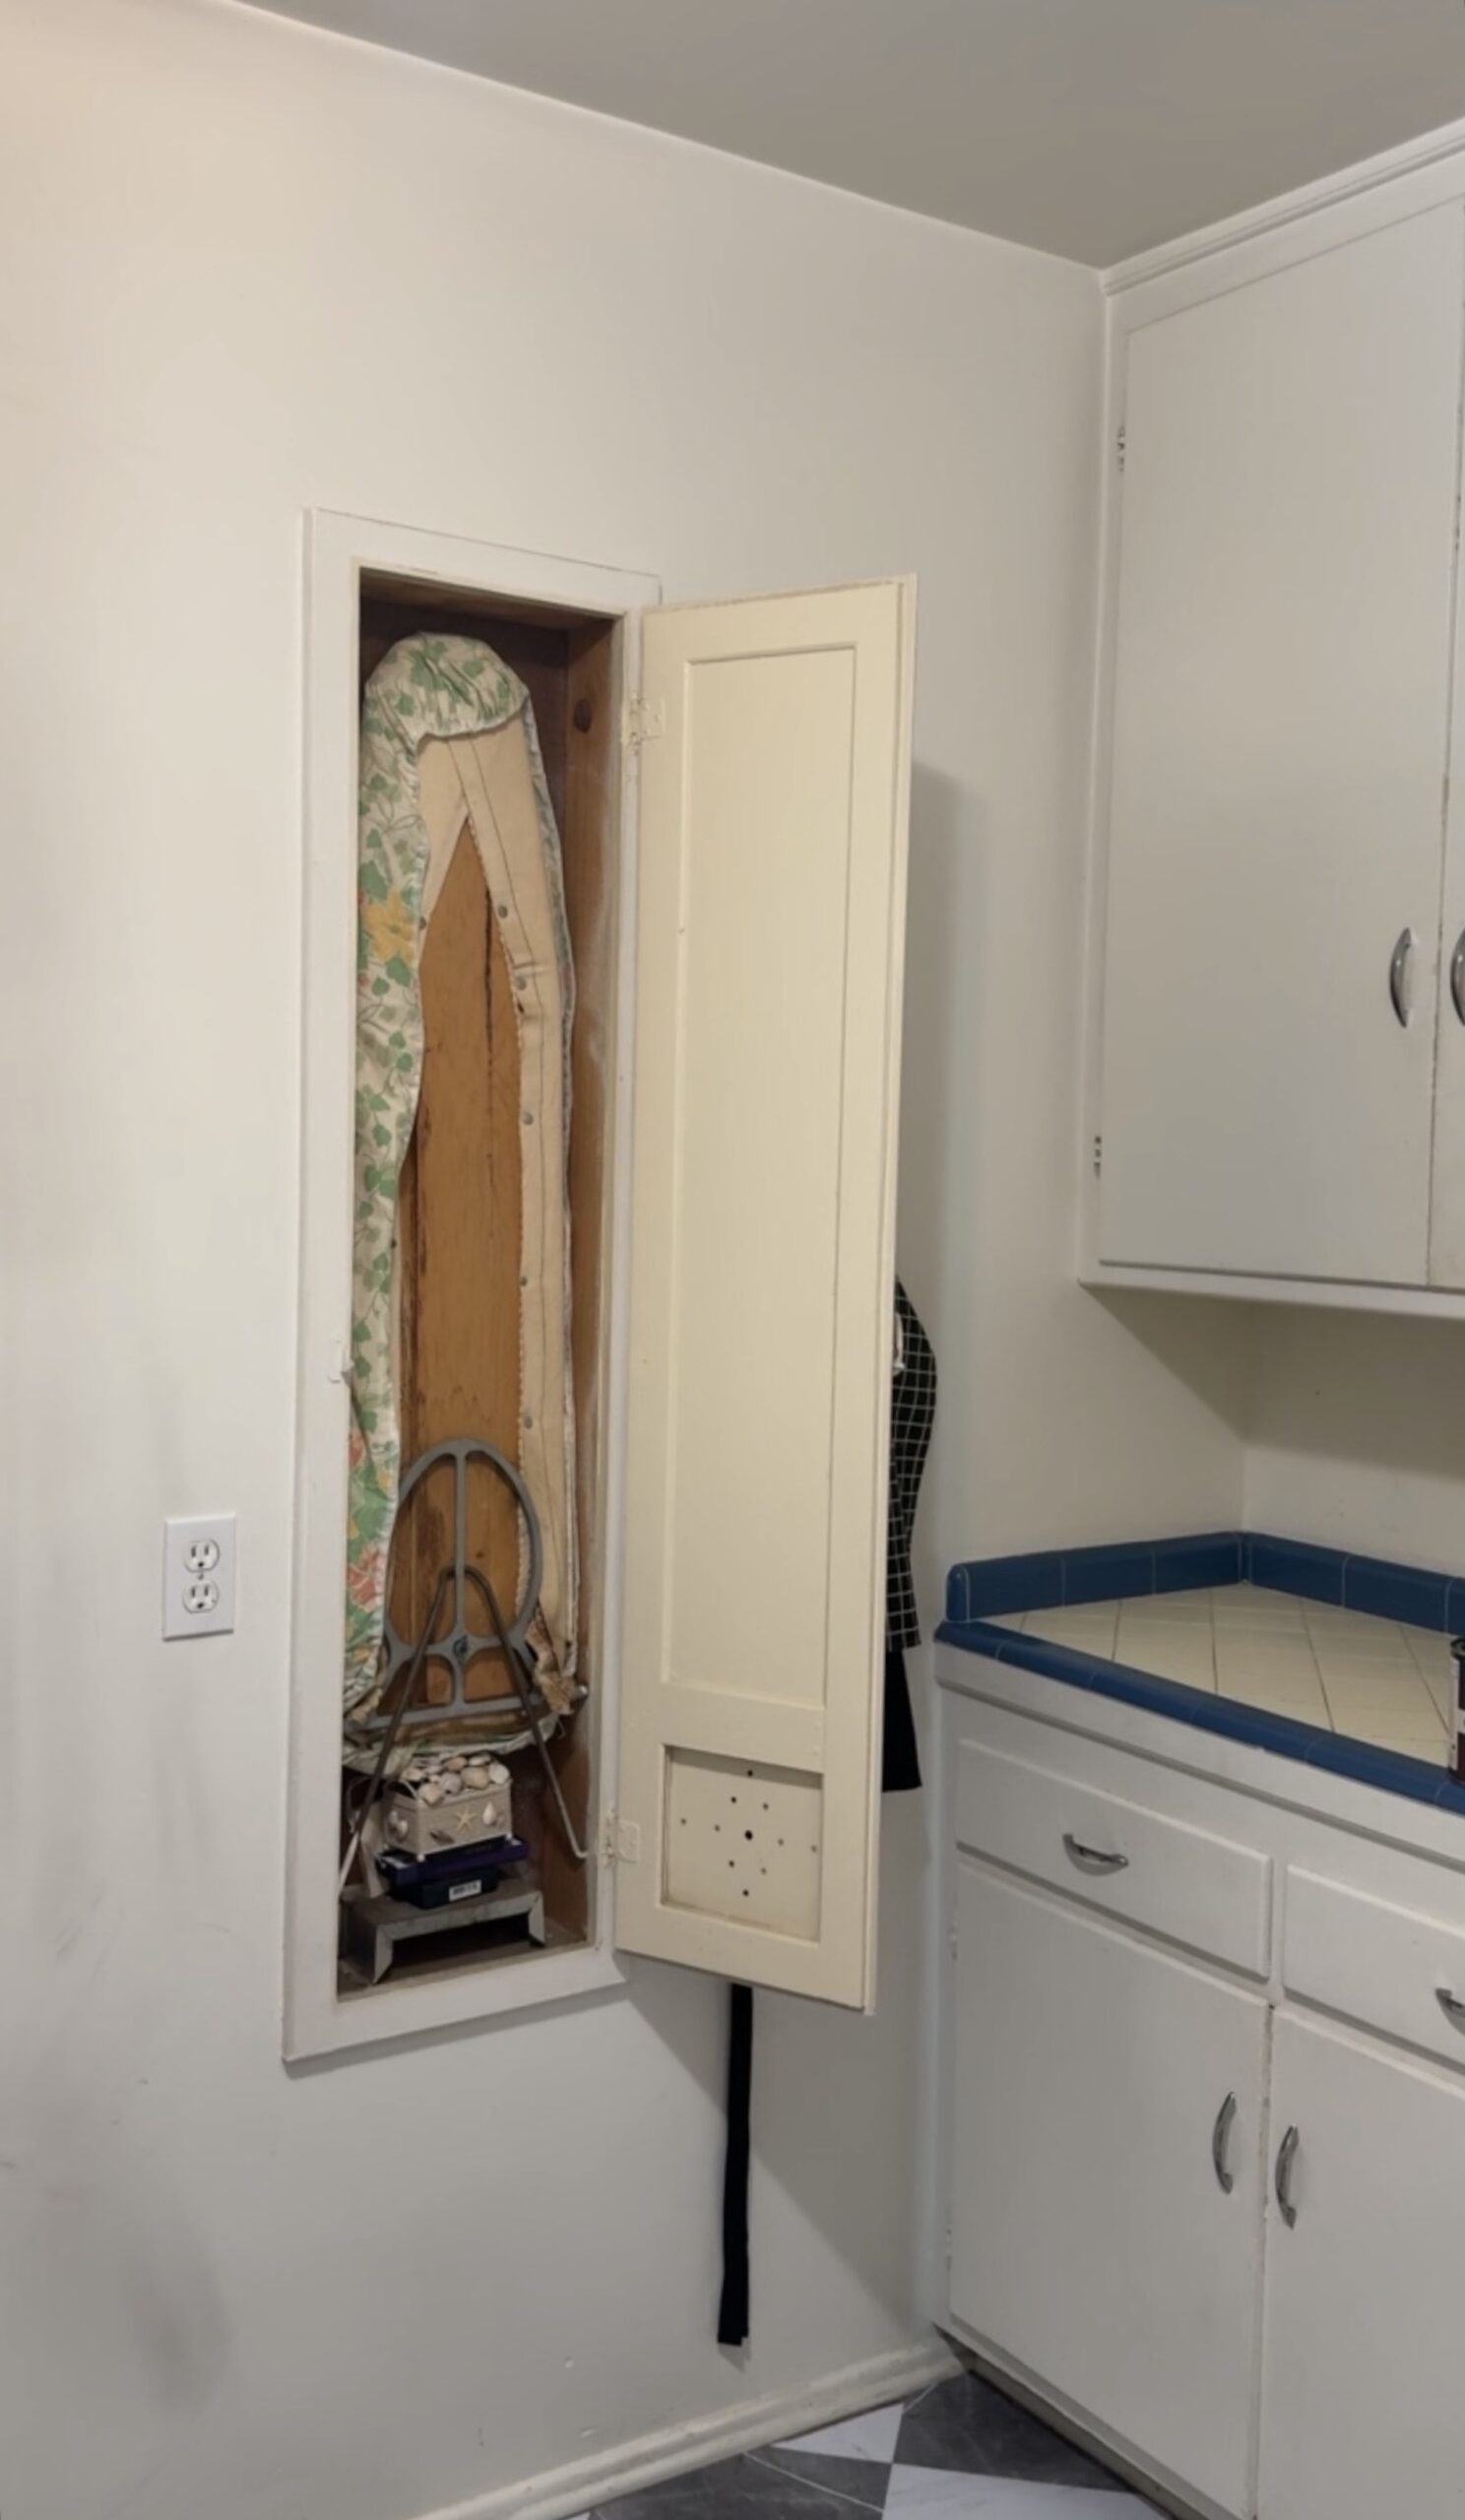
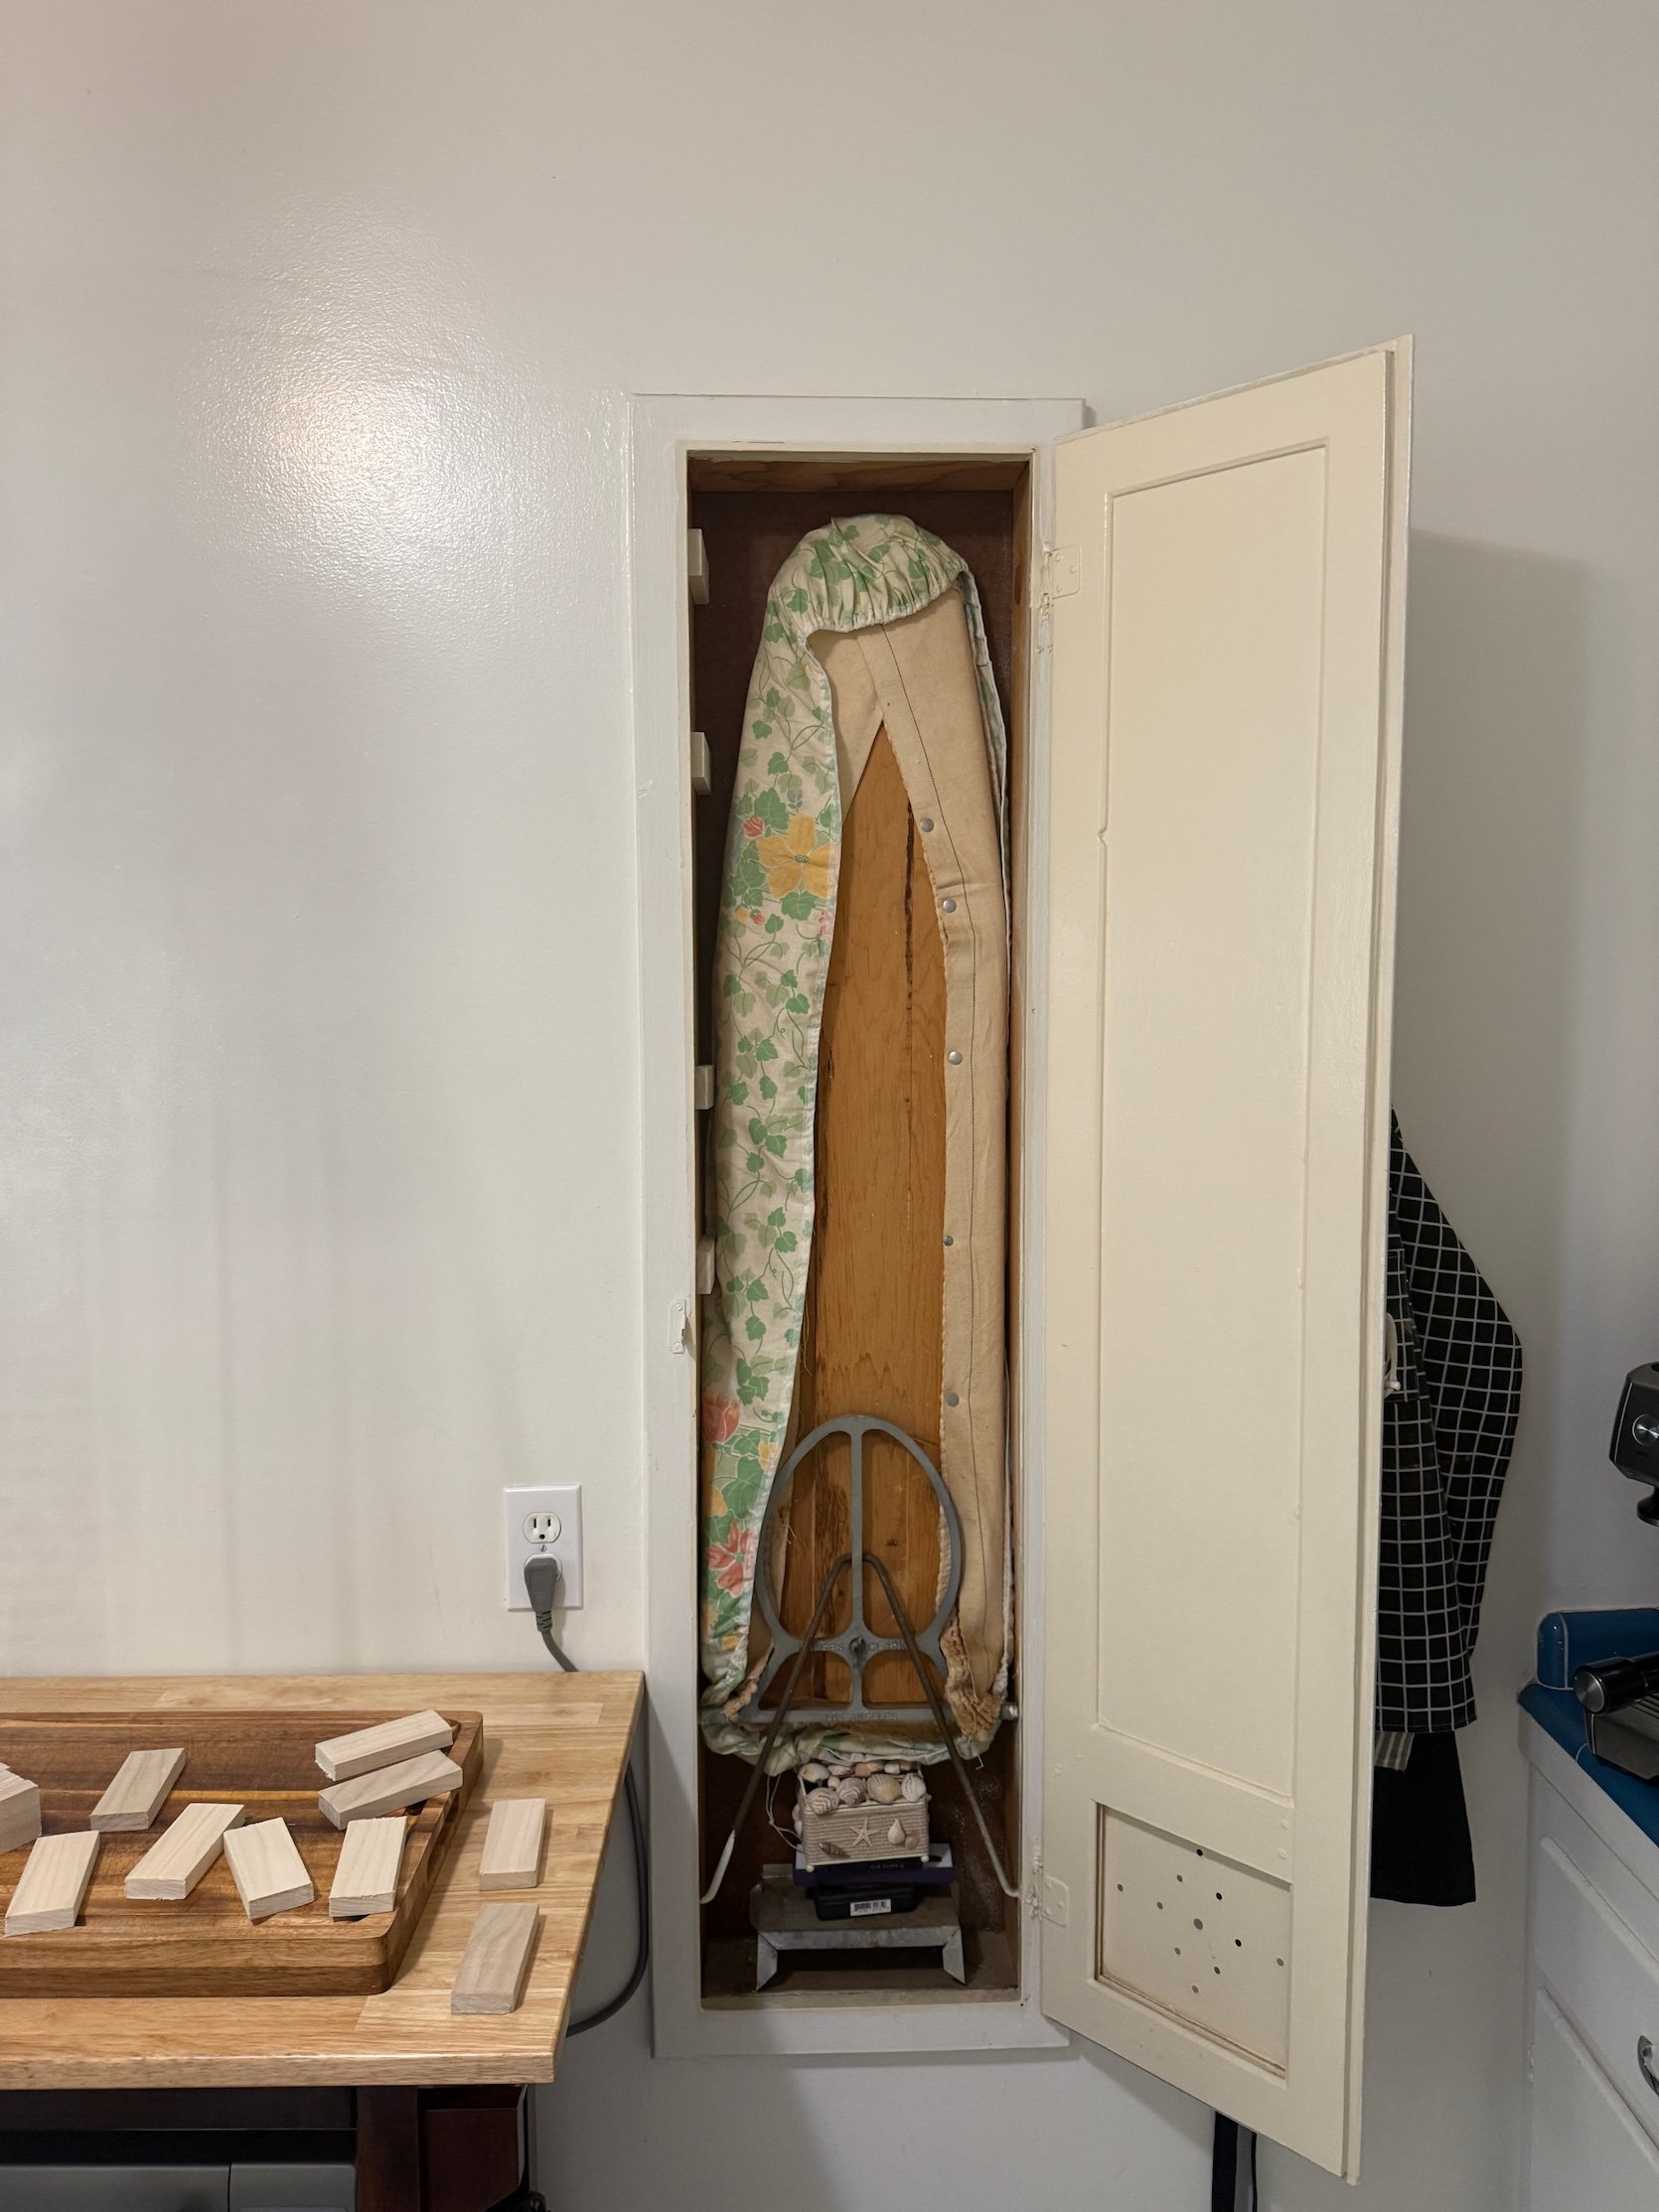
Subsequent up, I had this classic ironing board, which is objectively superior, however we by no means used it, and the material was fairly nasty and outdated, to be frank. As a steamer fanatic, I knew this space can be significantly better utilized as one thing else, and we had been fairly determined for extra cupboard space, so I turned it right into a enjoyable yellow spice cupboard!!
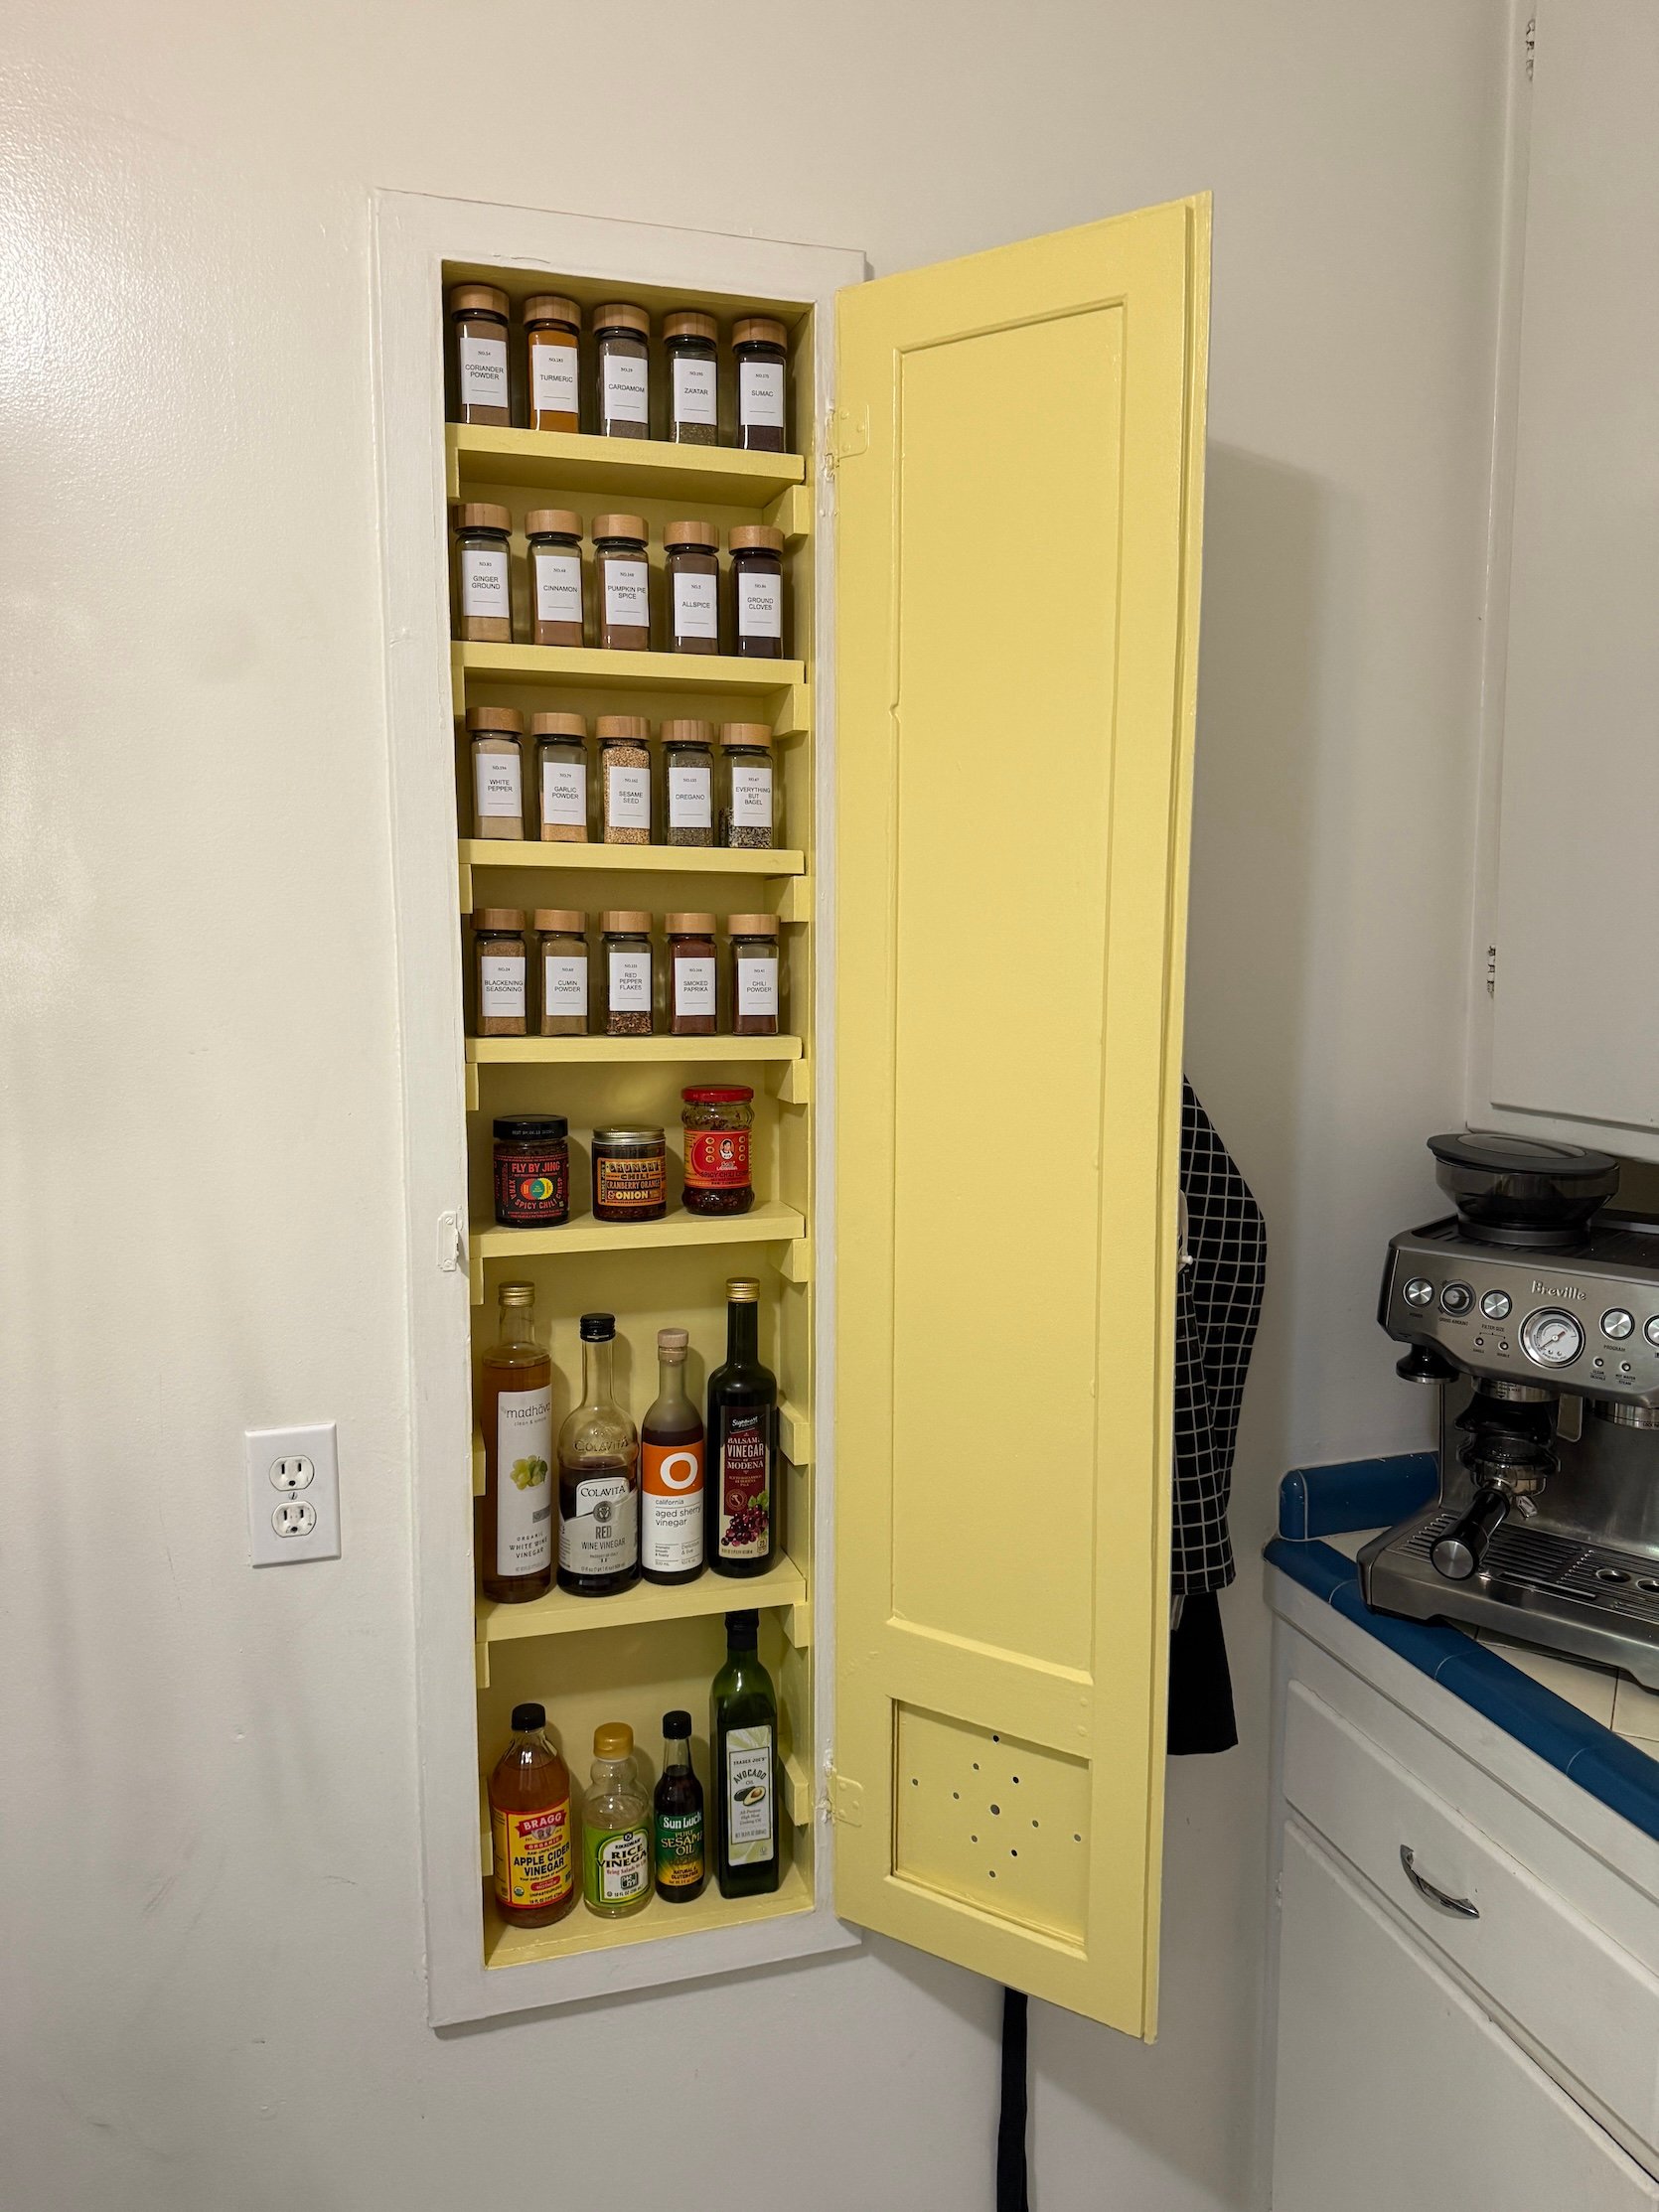
You’ll be able to see how I did it step-by-step right here and right here! I completely cherished this DIY, and it was insanely straightforward. Plus the pop of yellow goes with the yellow classic tile and makes me so completely happy (it’s my favourite shade!)
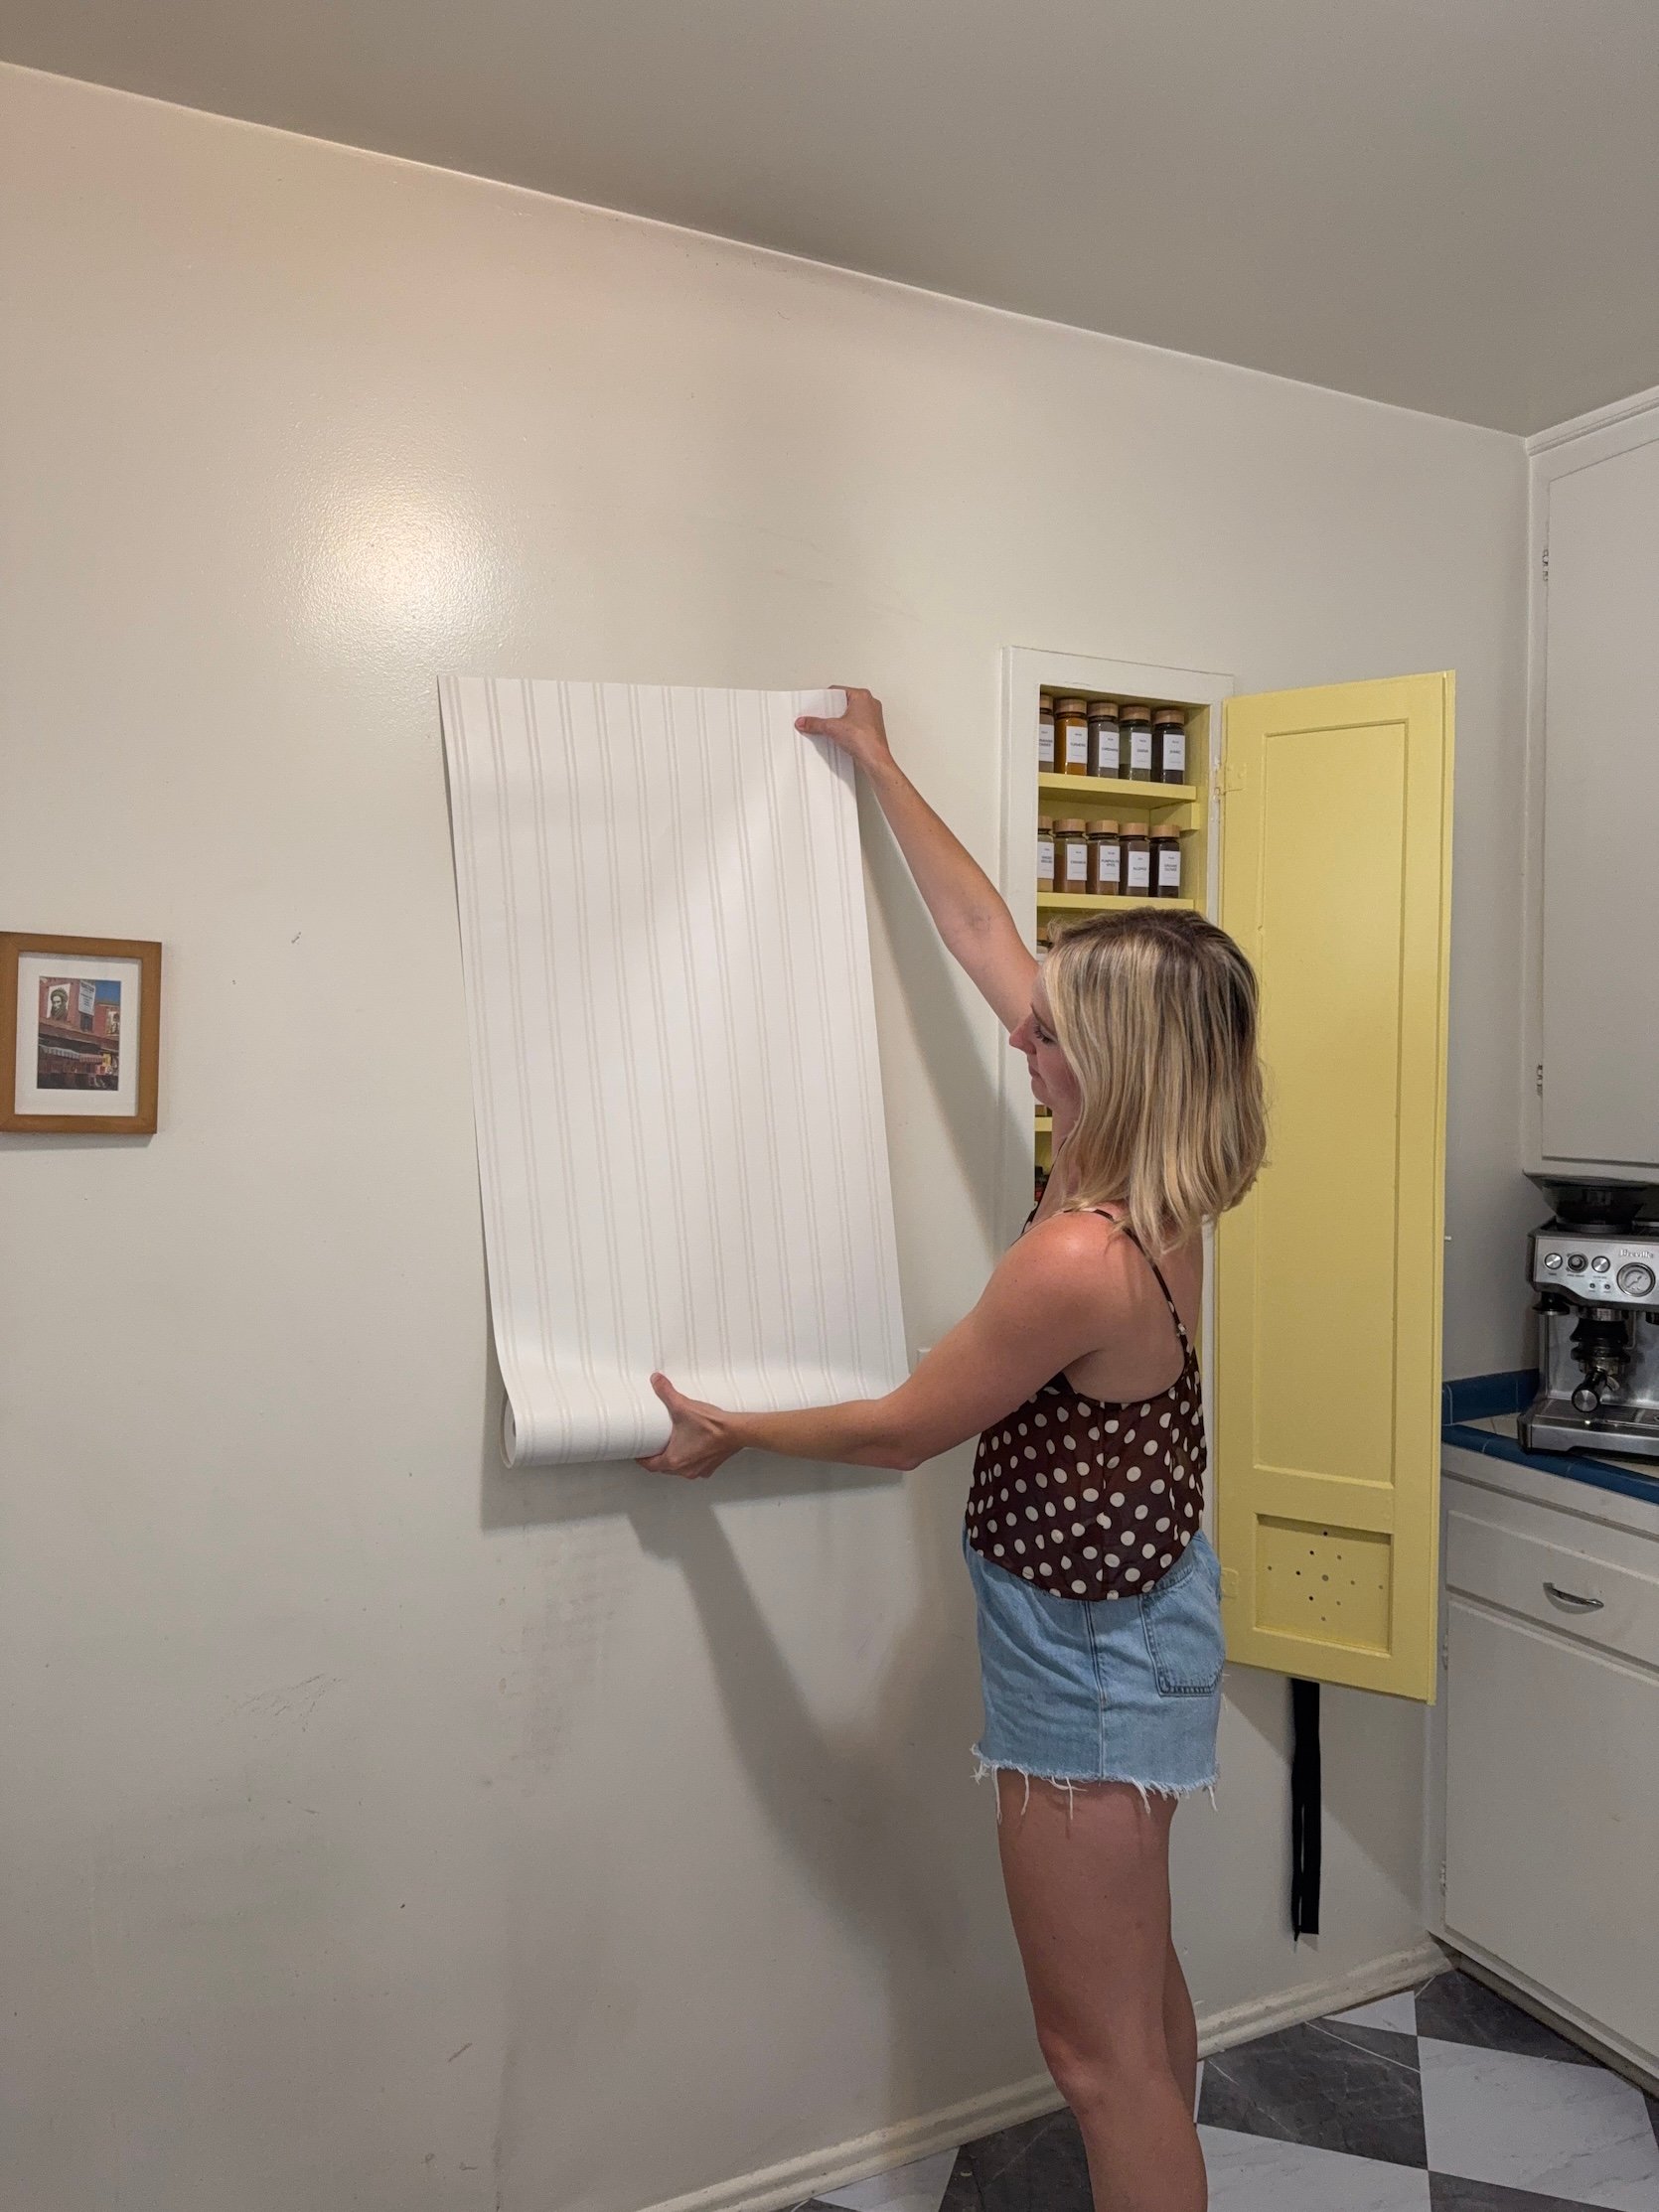
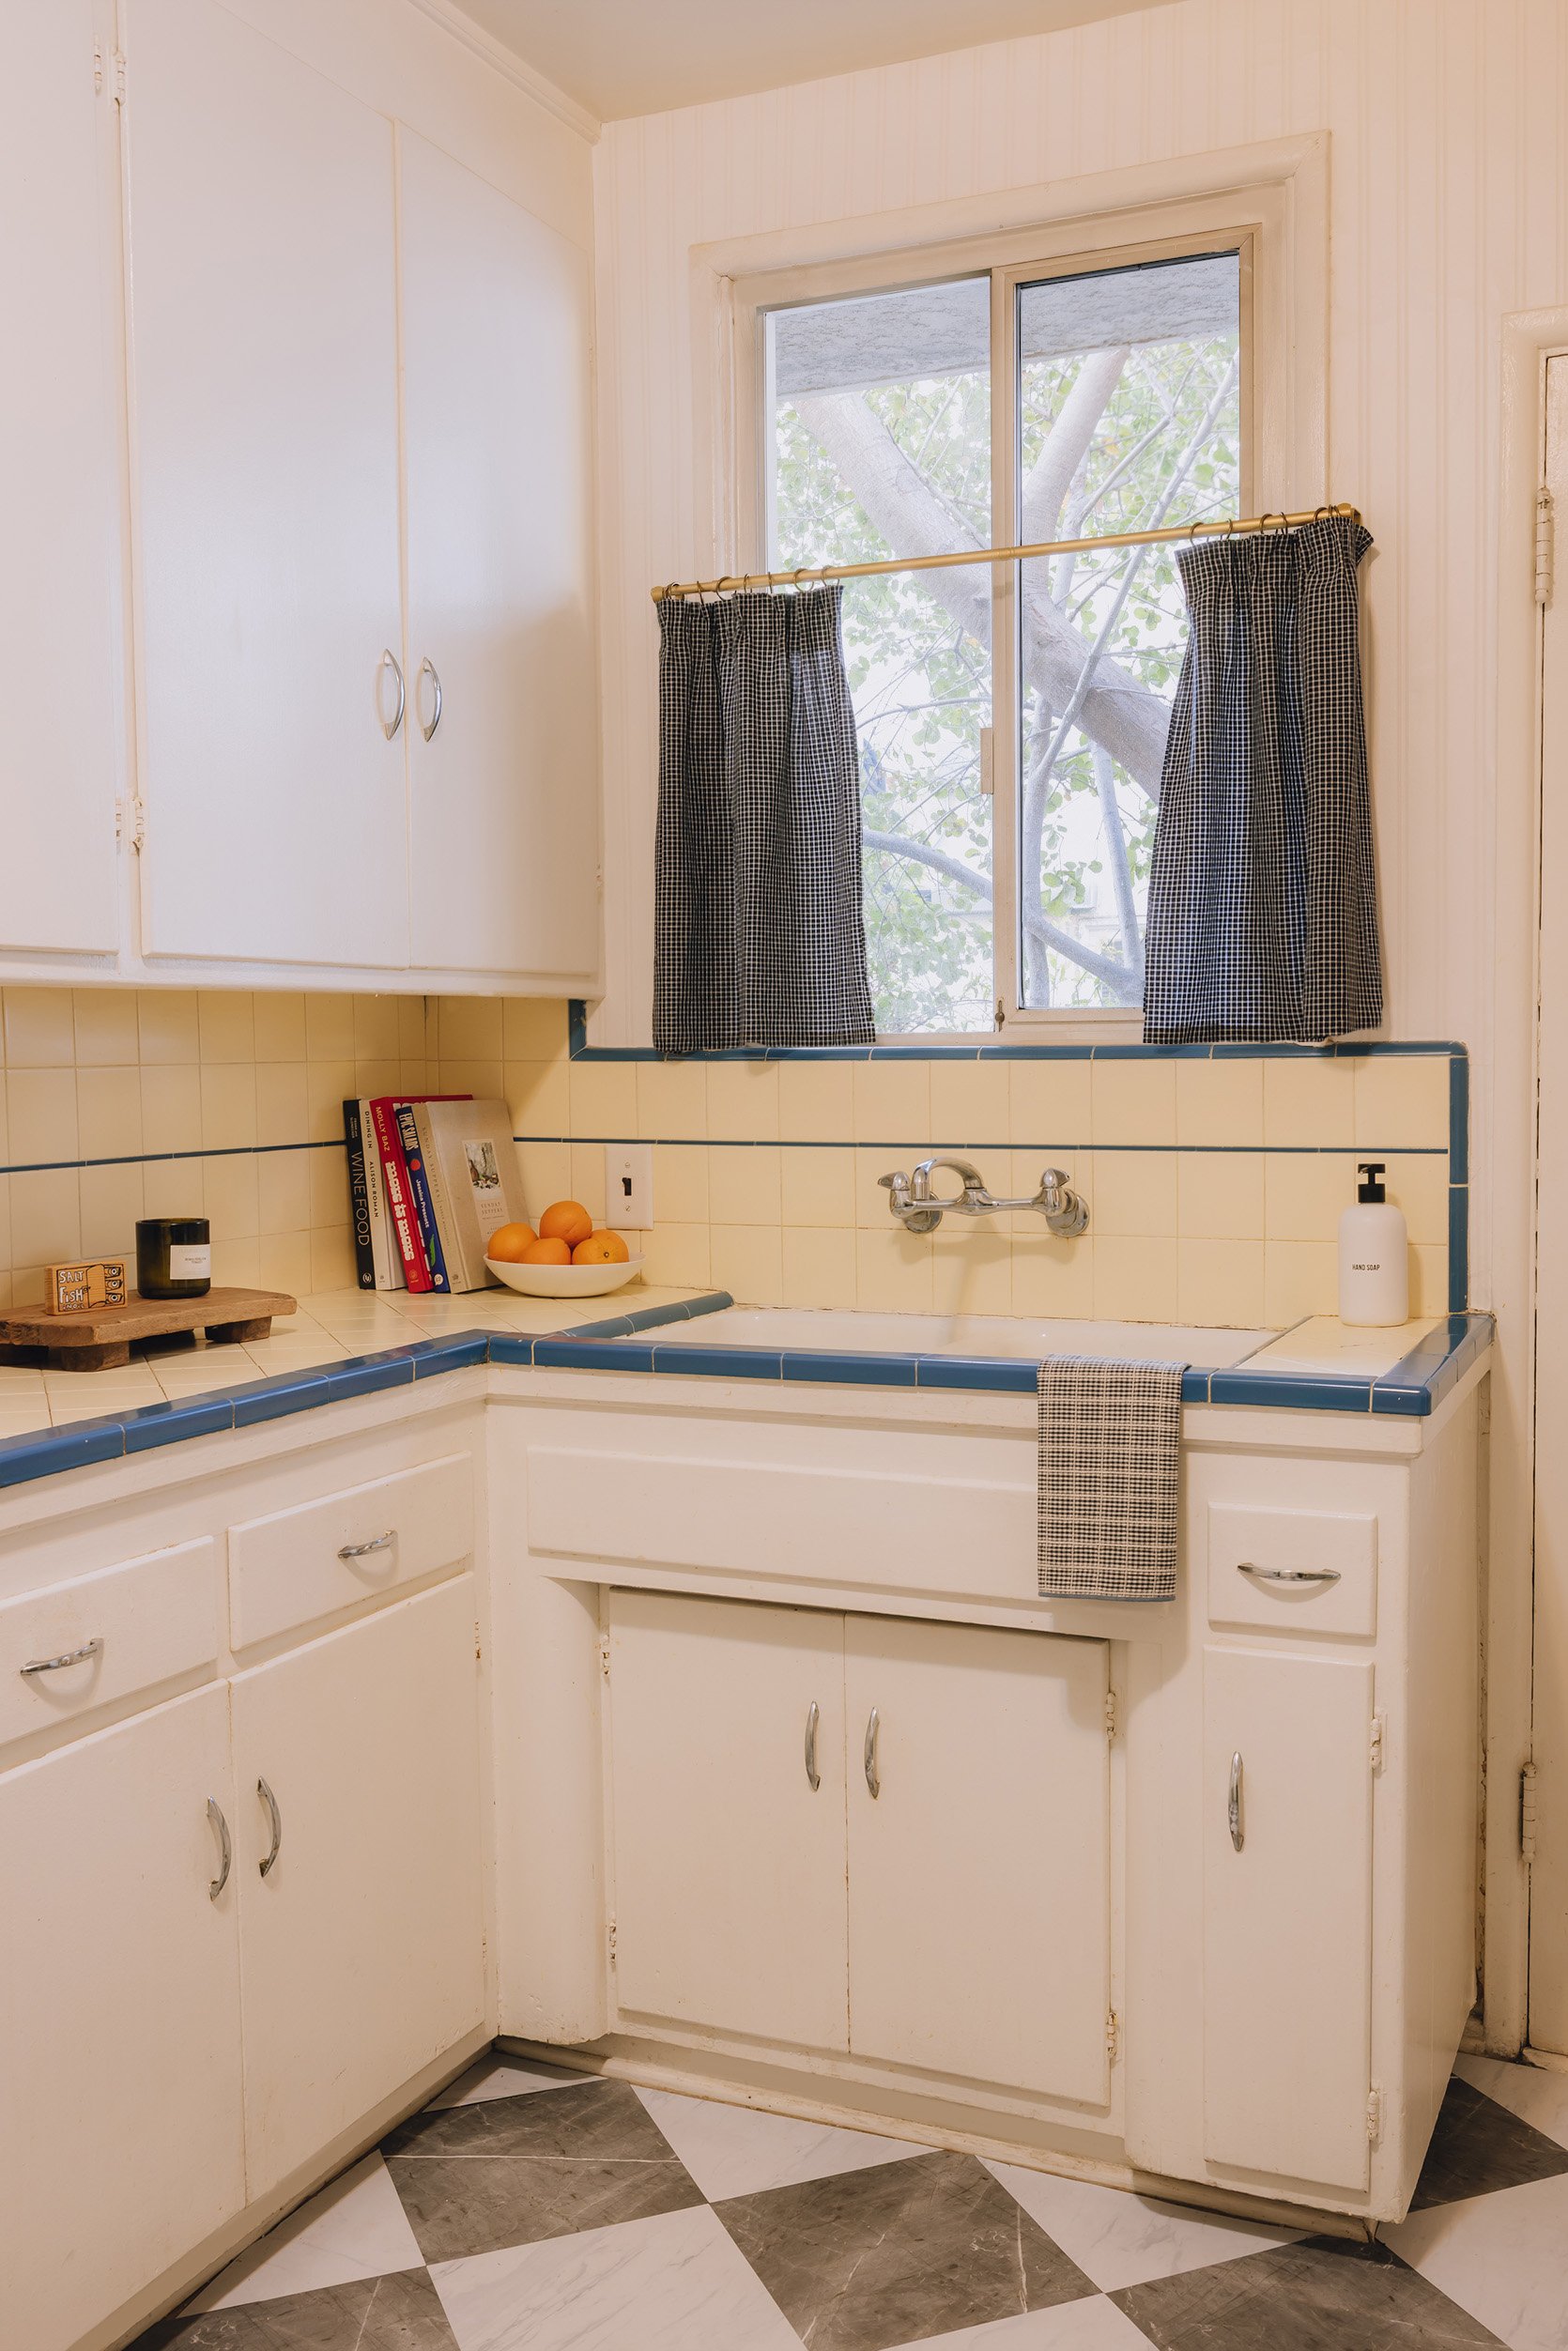
I attempted time and again utilizing a magic eraser to get that large stain on the wall with no actual luck of constructing it totally disappear (though it did assist). So my choices had been to color over it or wallpaper…so beadboard wallpaper it was! I discovered this one for $30 a roll, which isn’t a foul worth in any respect – plus it’s paintable!
Okay sufficient with the method pics…who desires to see some fairly reveal images!?! Jade’s boyfriend, Lyle, is an unbelievable photographer, so he came visiting to shoot the house, and I can’t wait one other second to share these images!! MOVE THAT BUS!
Wallpaper | Sconce | Paint Coloration | Flooring Tiles | Cookbook Stand | Bowl | Candle | Tea Towel
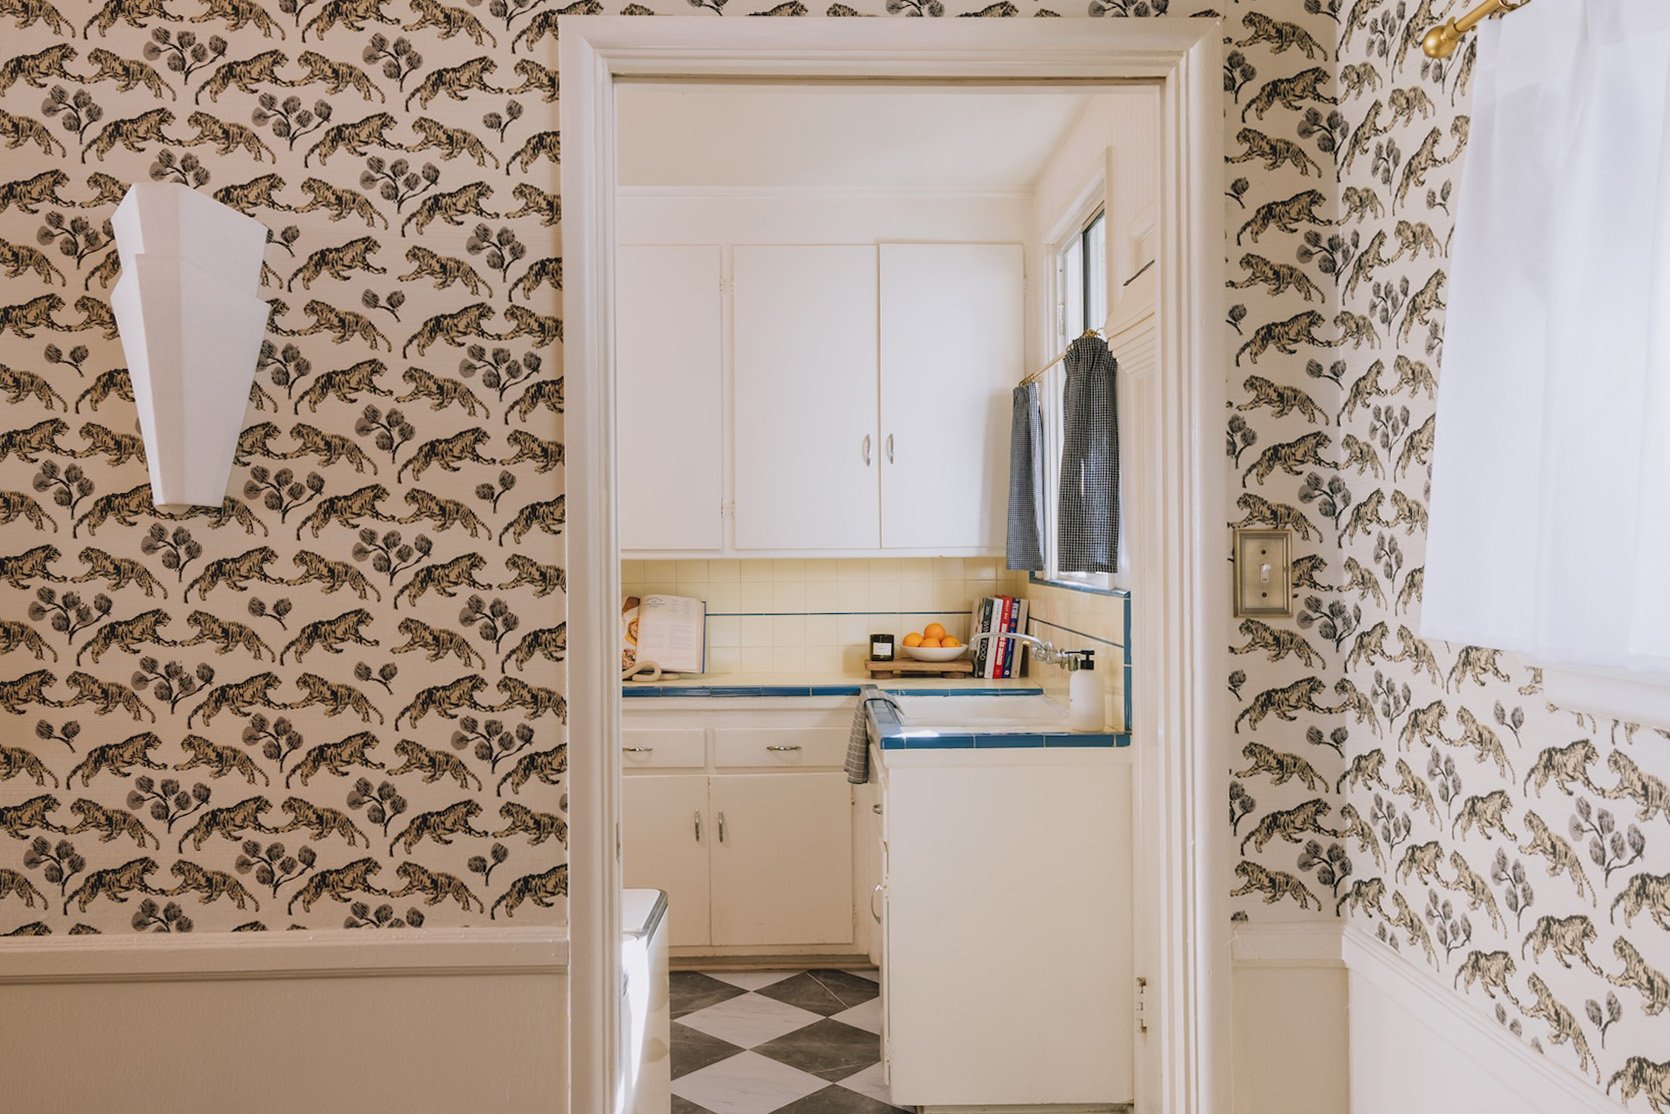
So to offer you a way of the place we’re within the house, the doorway to the kitchen is behind my eating room – which you’ll see in full right here in case you missed it!
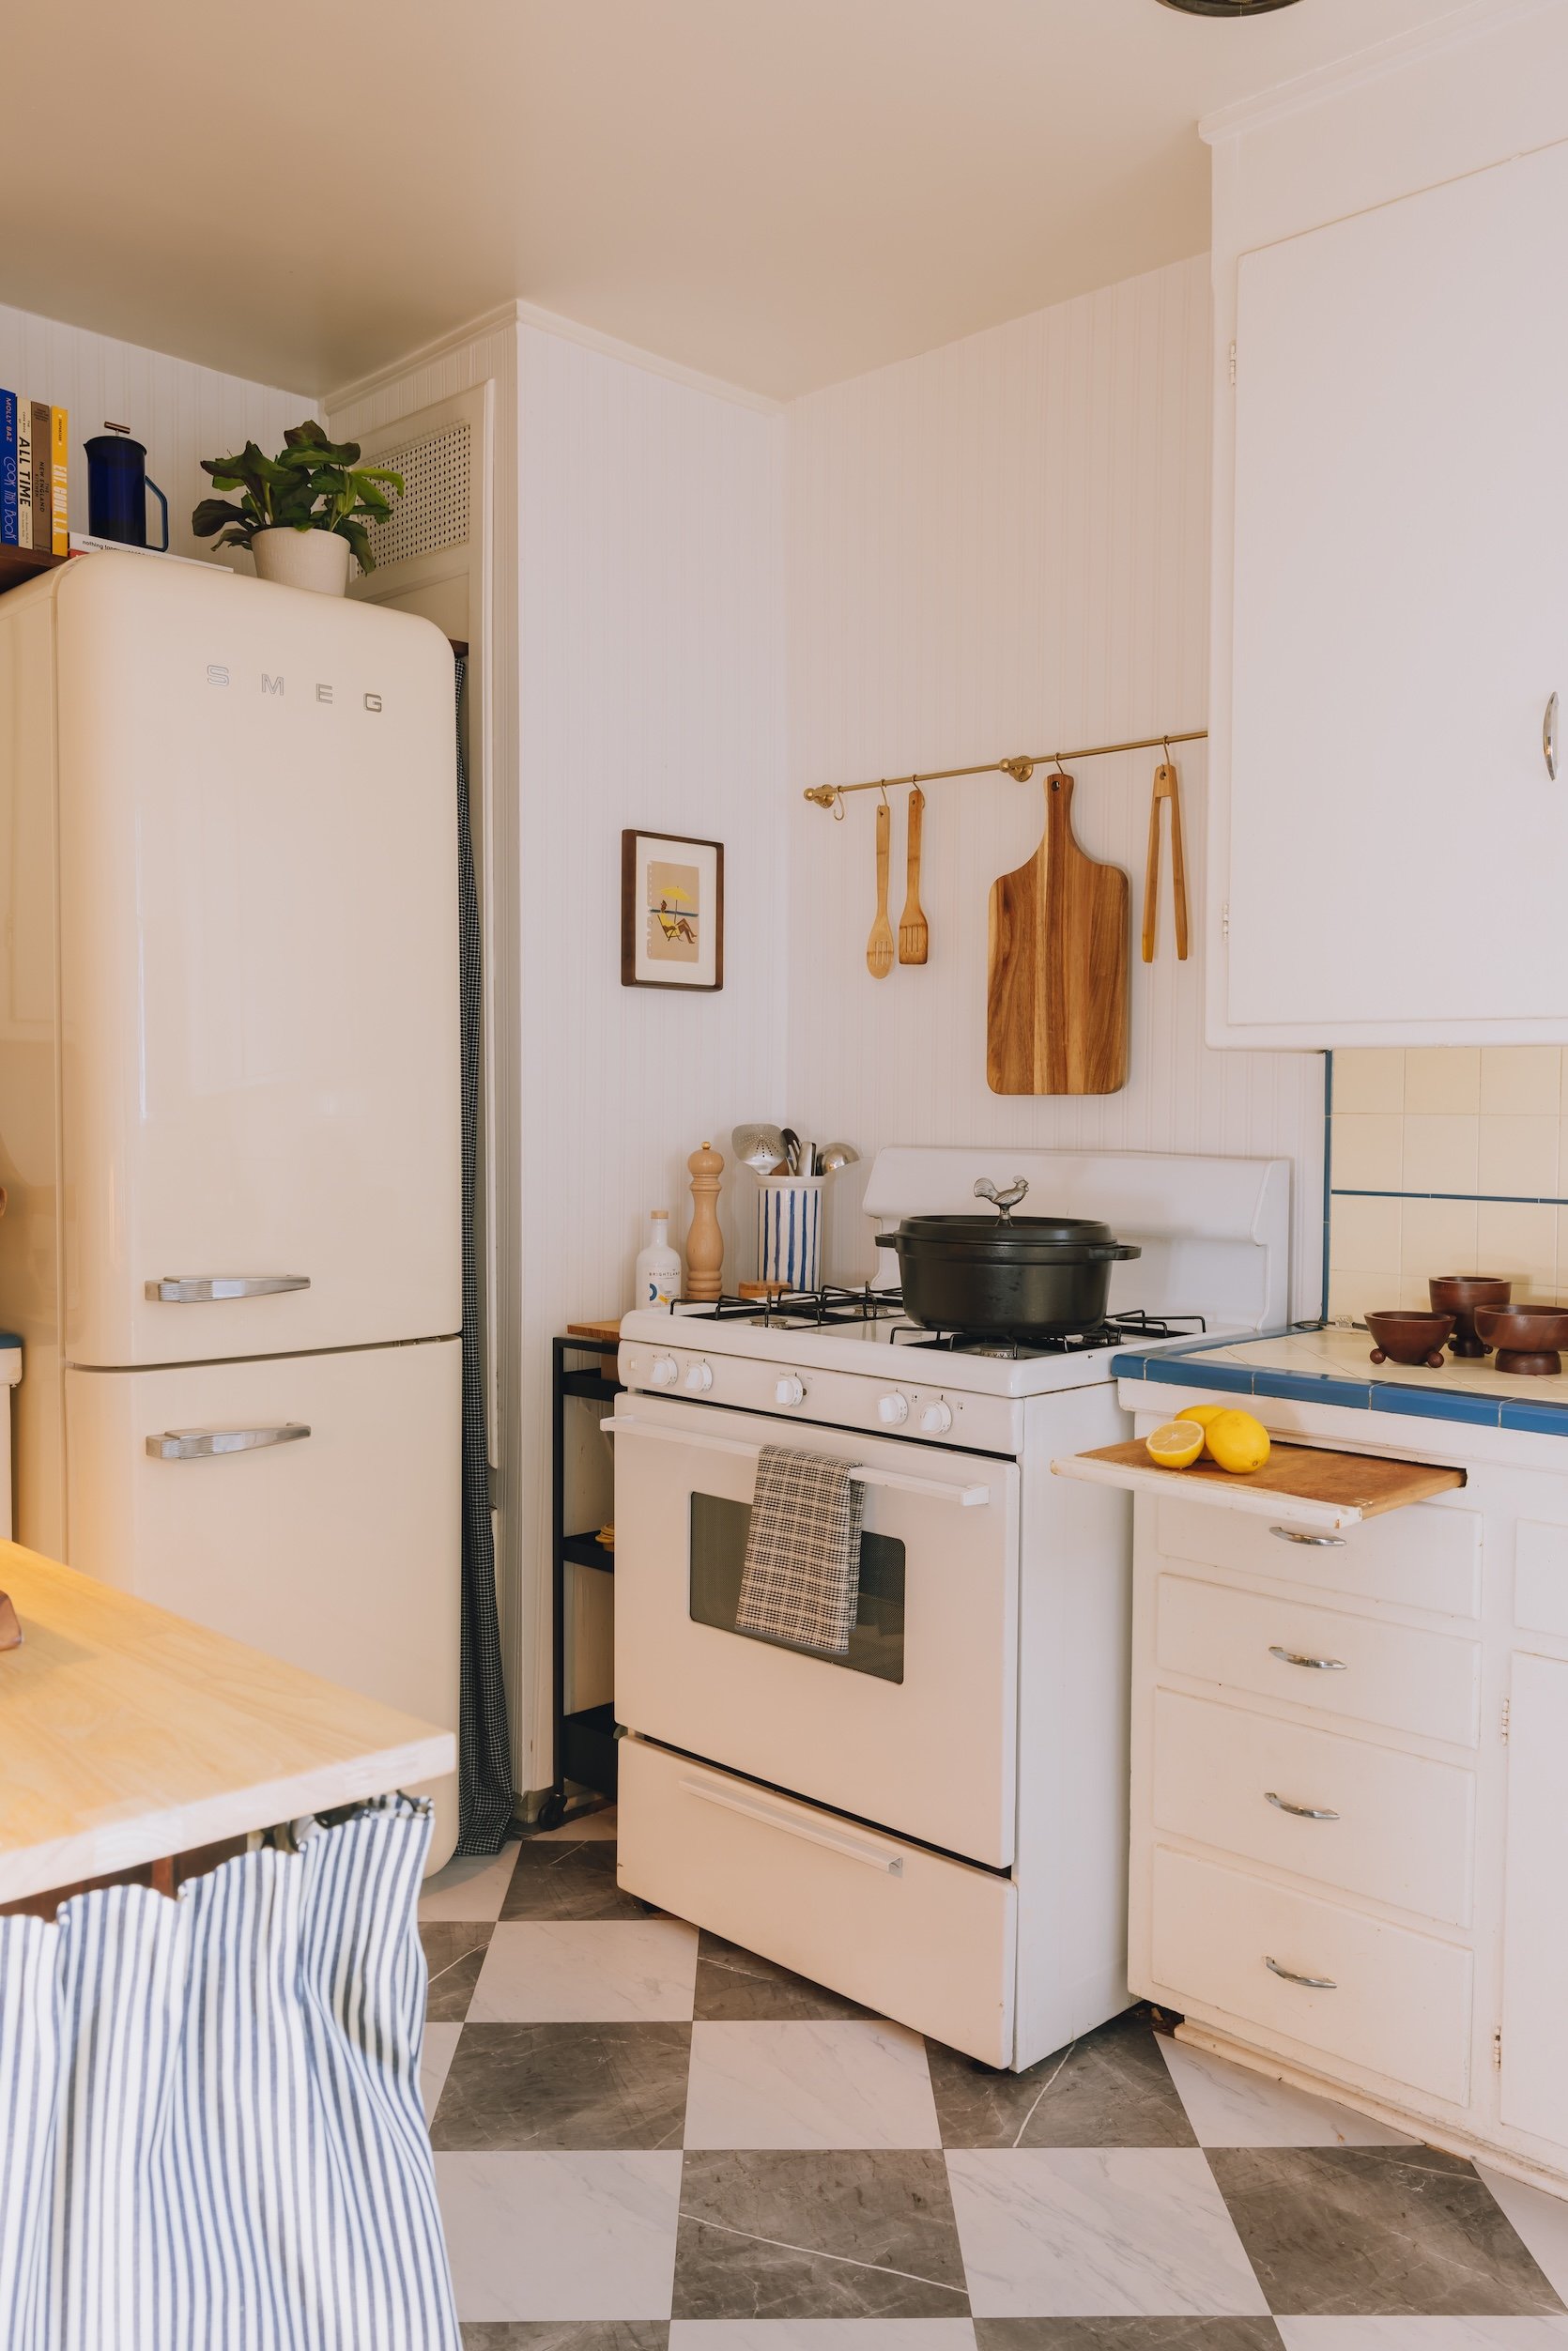
Flooring Tiles | Smeg Fridge | Tea Towel | Dutch Oven | Pot Rail | Pepper Grinder | Picket Bowls
Right here’s my completed kitchen!! That fridge nightmare ended up being SO price it, and I can’t wait to take it with me to my subsequent place and past. And see that little peep of a prep desk?! HOUSTON WE HAVE COUNTER SPACE! I didn’t find yourself altering the {hardware} or portray the cabinetry like I initially thought I’d (sooner or later in a rental, you gotta know when it’s not price it to spend the money and time) – each DIY I did in right here was so excessive affect and so price it and I truly love how gentle and vibrant the house is. It went from hell to cook dinner in to a heavenly place to cook dinner in!
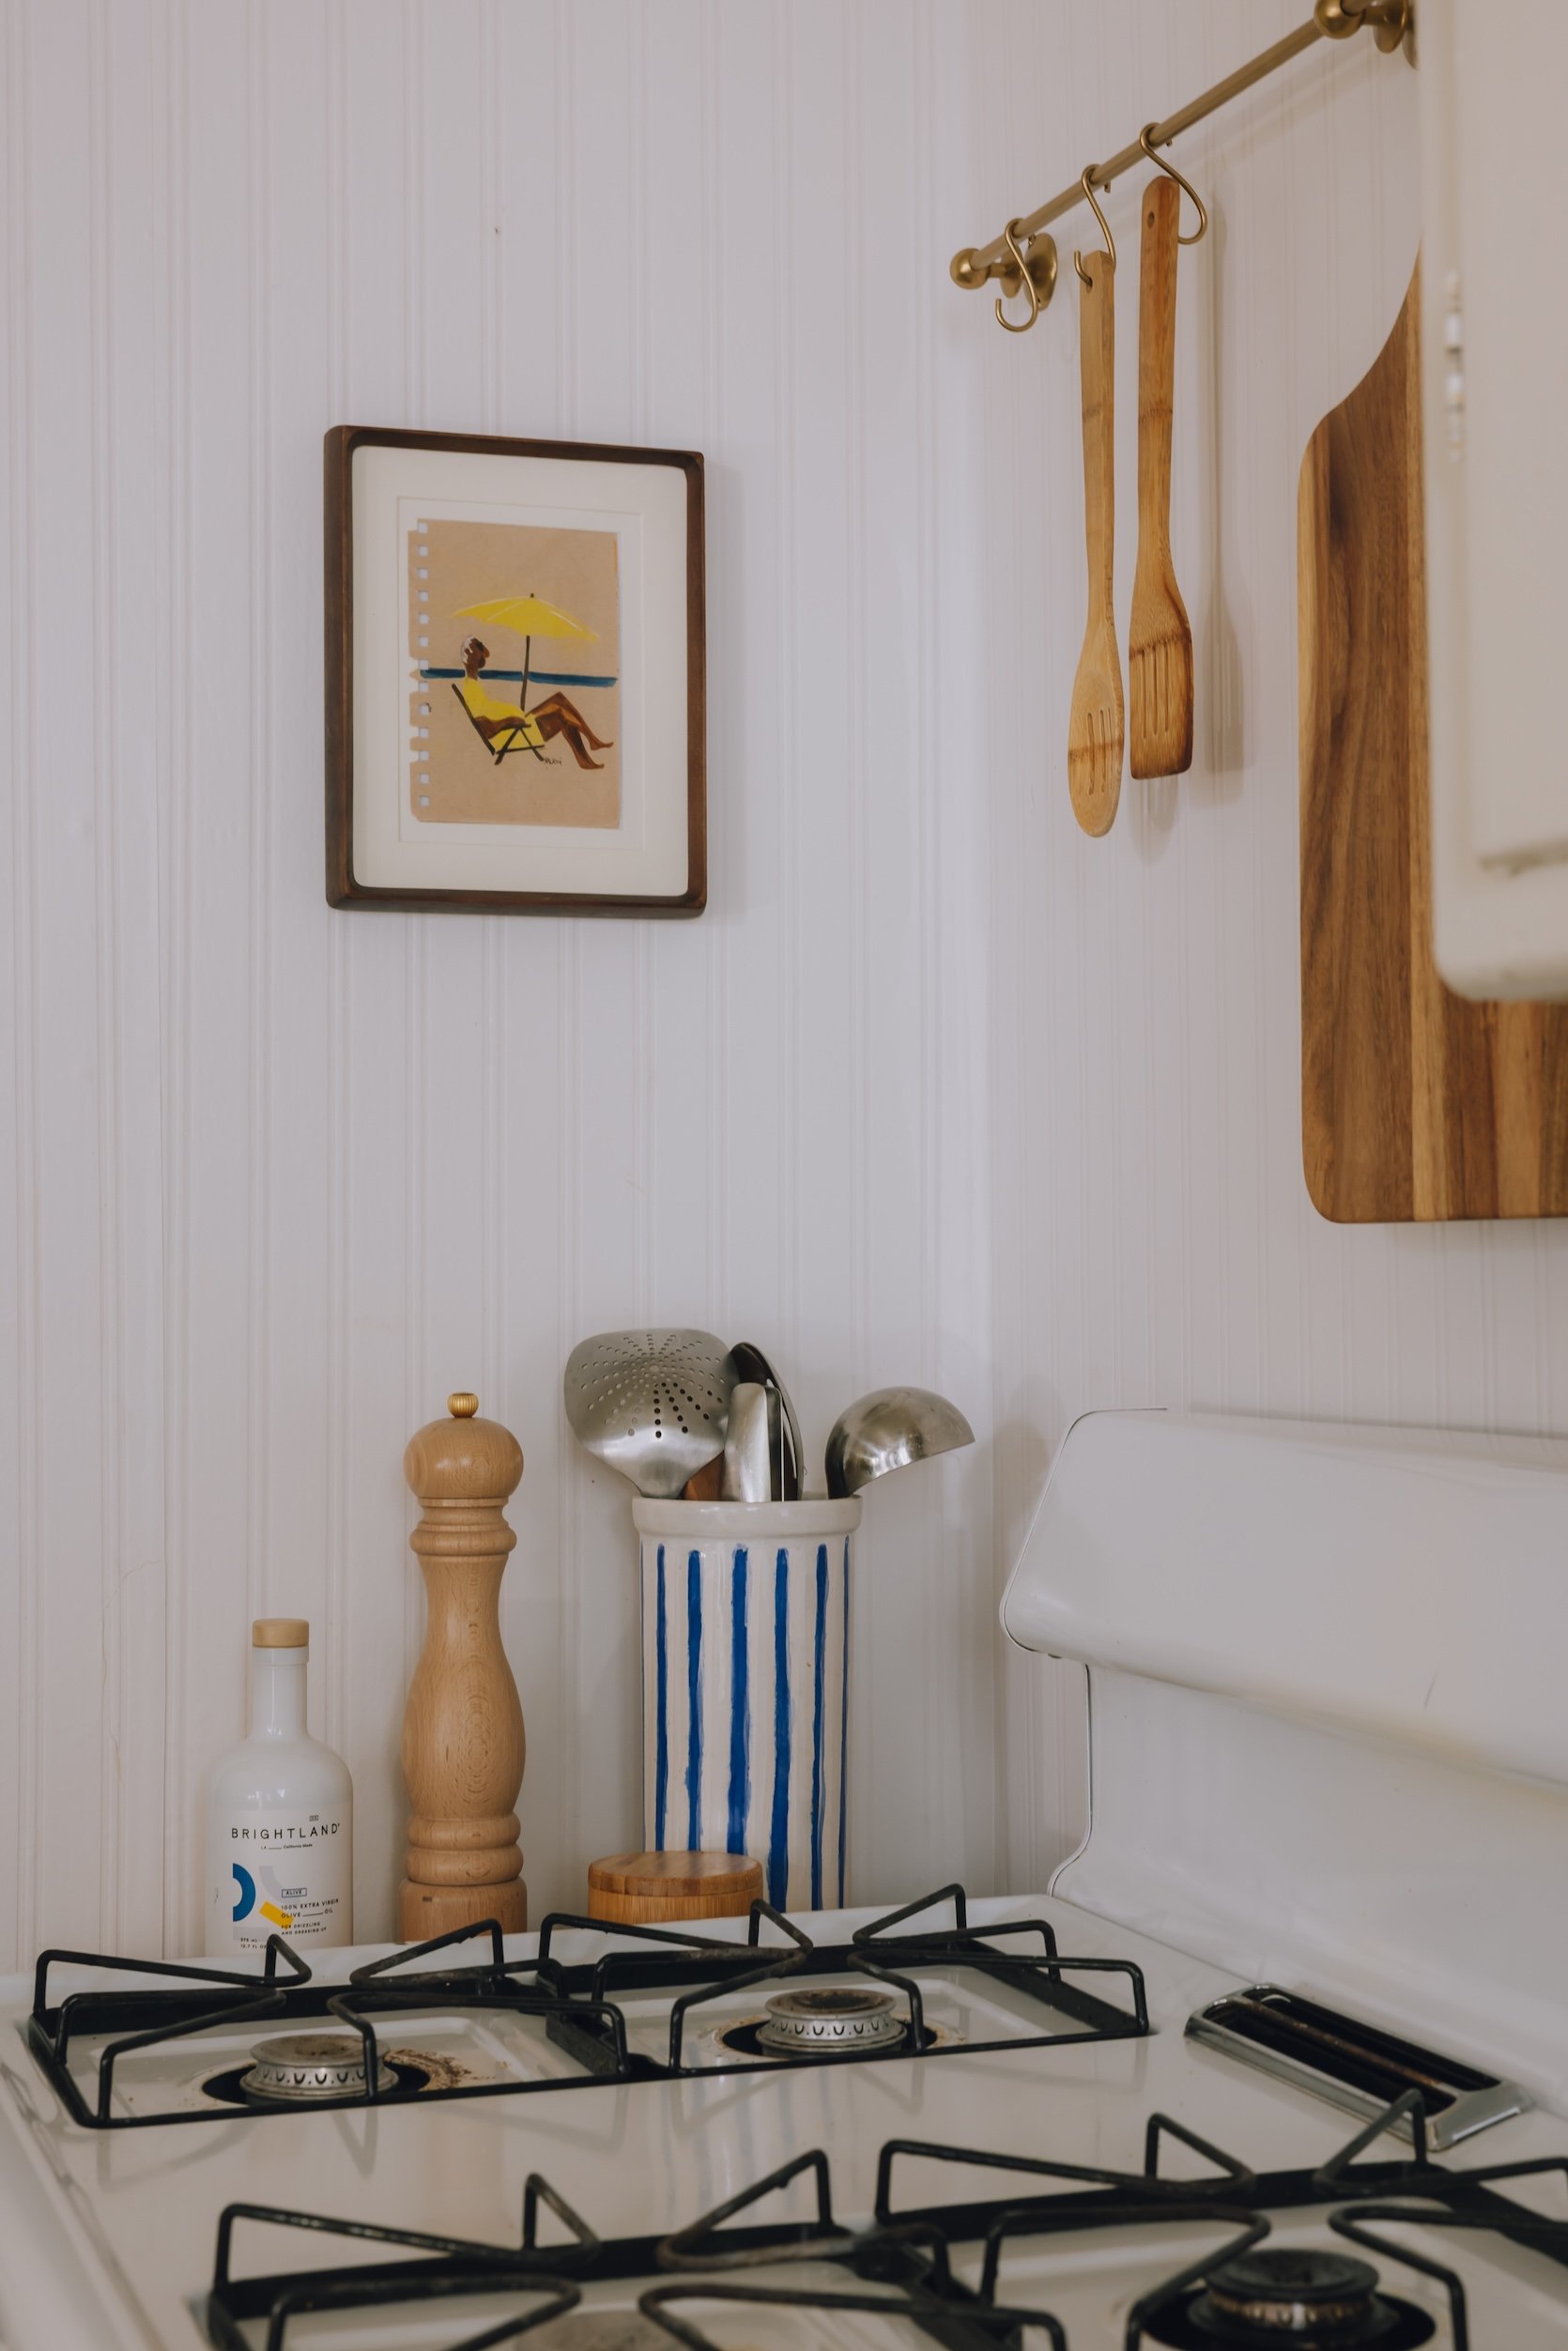
Right here’s a greater take a look at the beadboard wallpaper – it added SO a lot allure to the house, it was loopy!! And because it was pre-pasted, I simply needed to spray some water on the again, so it was tremendous straightforward to put in. Now let’s all focus our consideration on my favourite artwork piece, we could?? You would possibly know this already, however considered one of my favourite locations to search out artwork is the Sawdust Competition in Laguna Seashore – it may be hit and miss, however final time I went, I discovered this wonderful animator and artist who used to work for Cartoon Community named Mucci. He was promoting a few of his sketches and paintings from his sketchbook, and I got here throughout this one and completely fell in love. It was $100 for the piece, however because it was an unique and it spoke to me SO a lot, I knew it was price it, and I’ll cherish it ceaselessly.
Did you discover the little curtain within the first picture?? I made a tiny makeshift broom closet, haha! I hated the hole between the fridge and the random non-usable cupboard, so I used some leftover material from my DIY cafe curtains (that are by the sink on the opposite aspect…I’ll offer you a more in-depth take a look at these in a bit!)
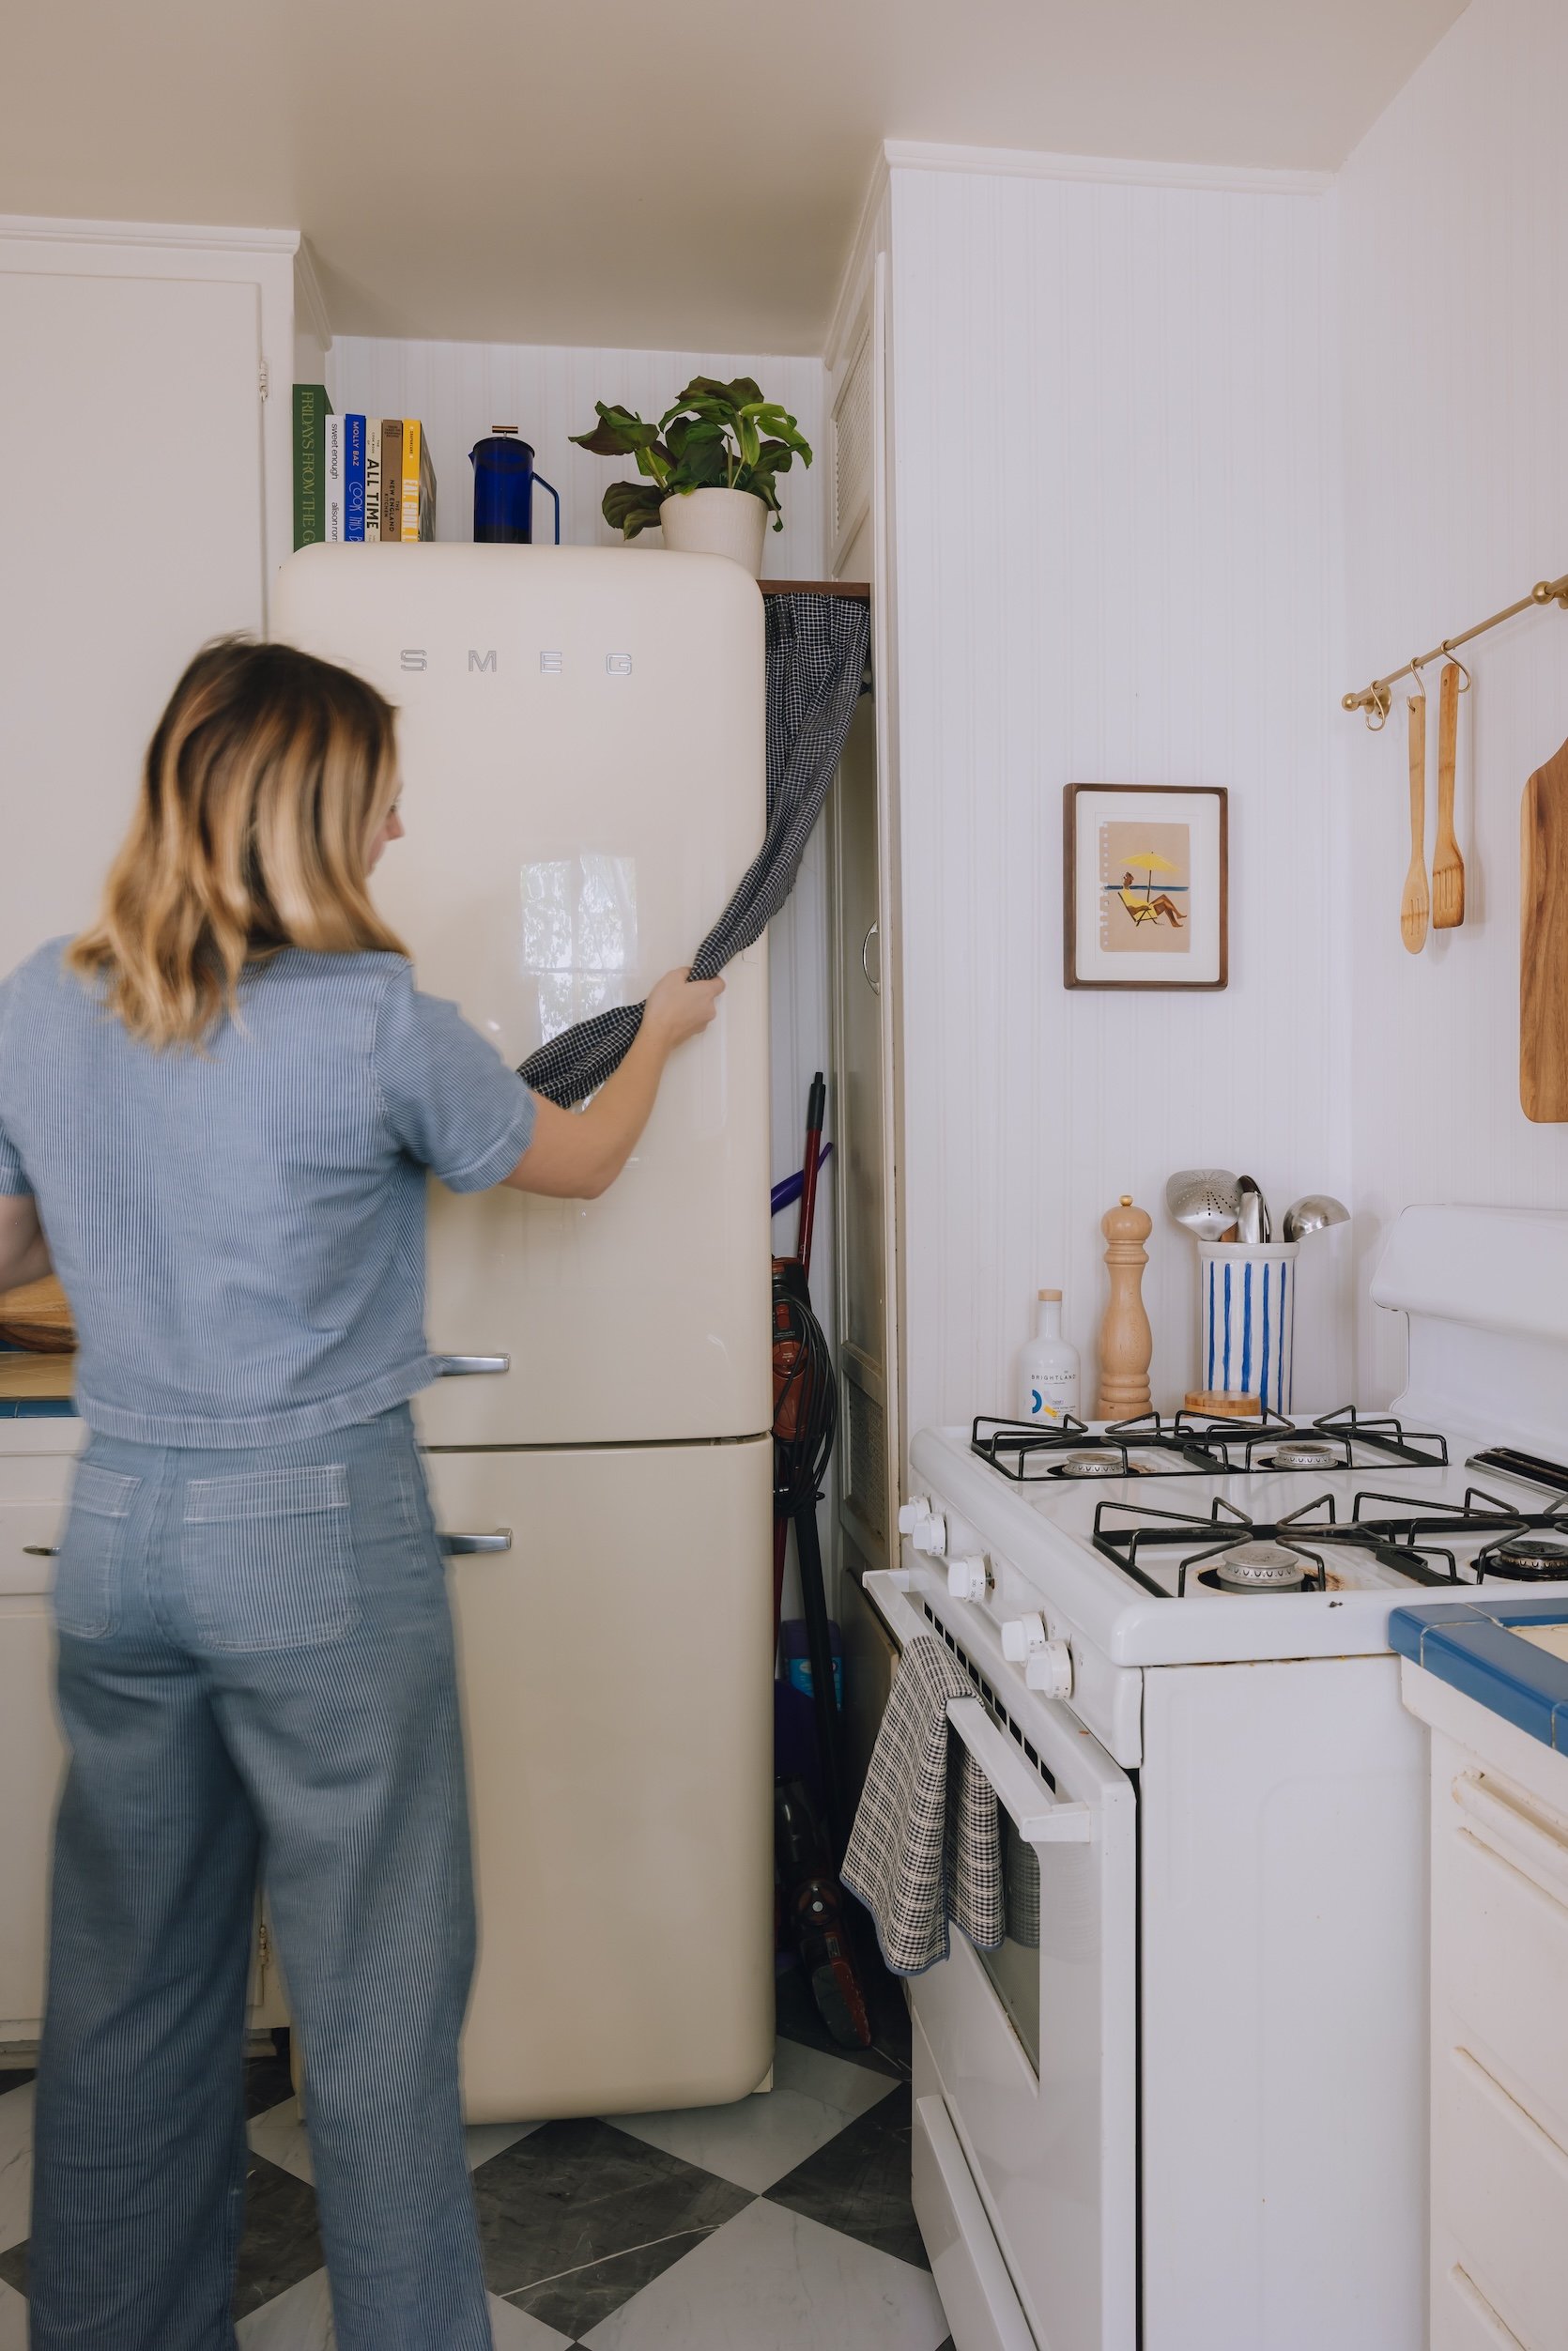
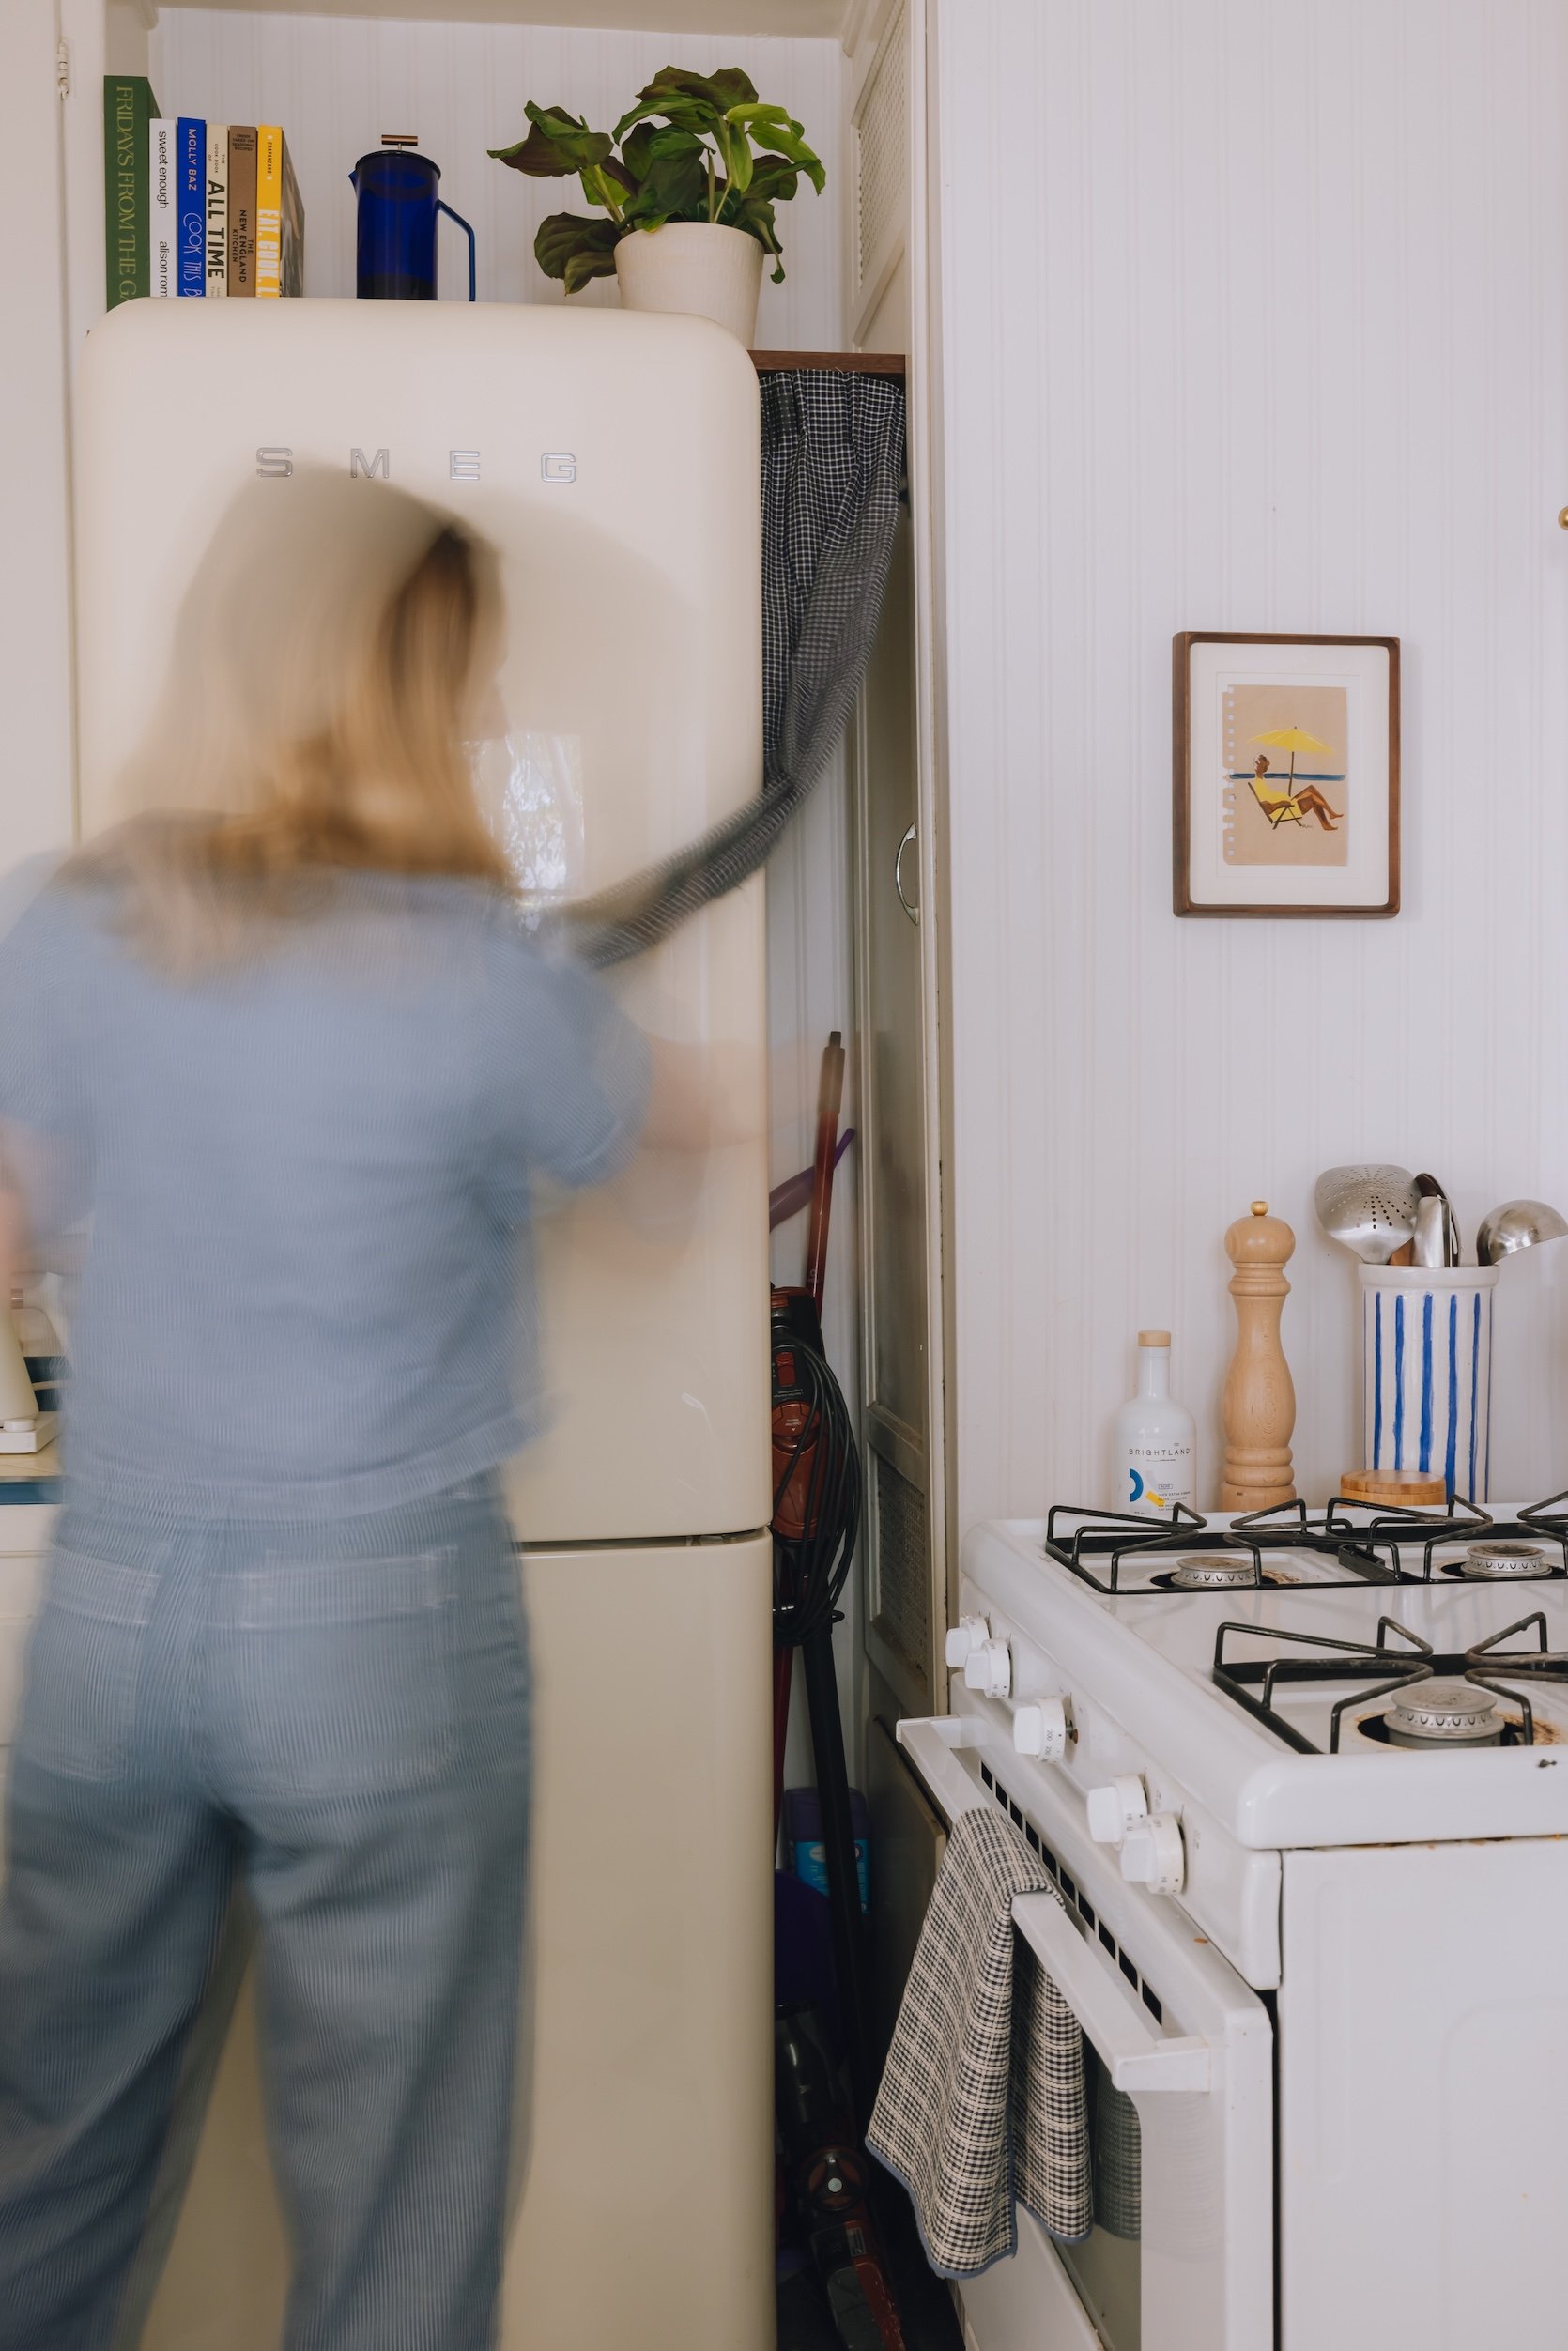
I wanted a spot to retailer my stick vacuum, broom, and mop since I, nicely, turned my coat/broom closet into a speakeasy (which was completely price it, btw).
Cafe Curtain Cloth | Curtain Rod | Curtain Rings
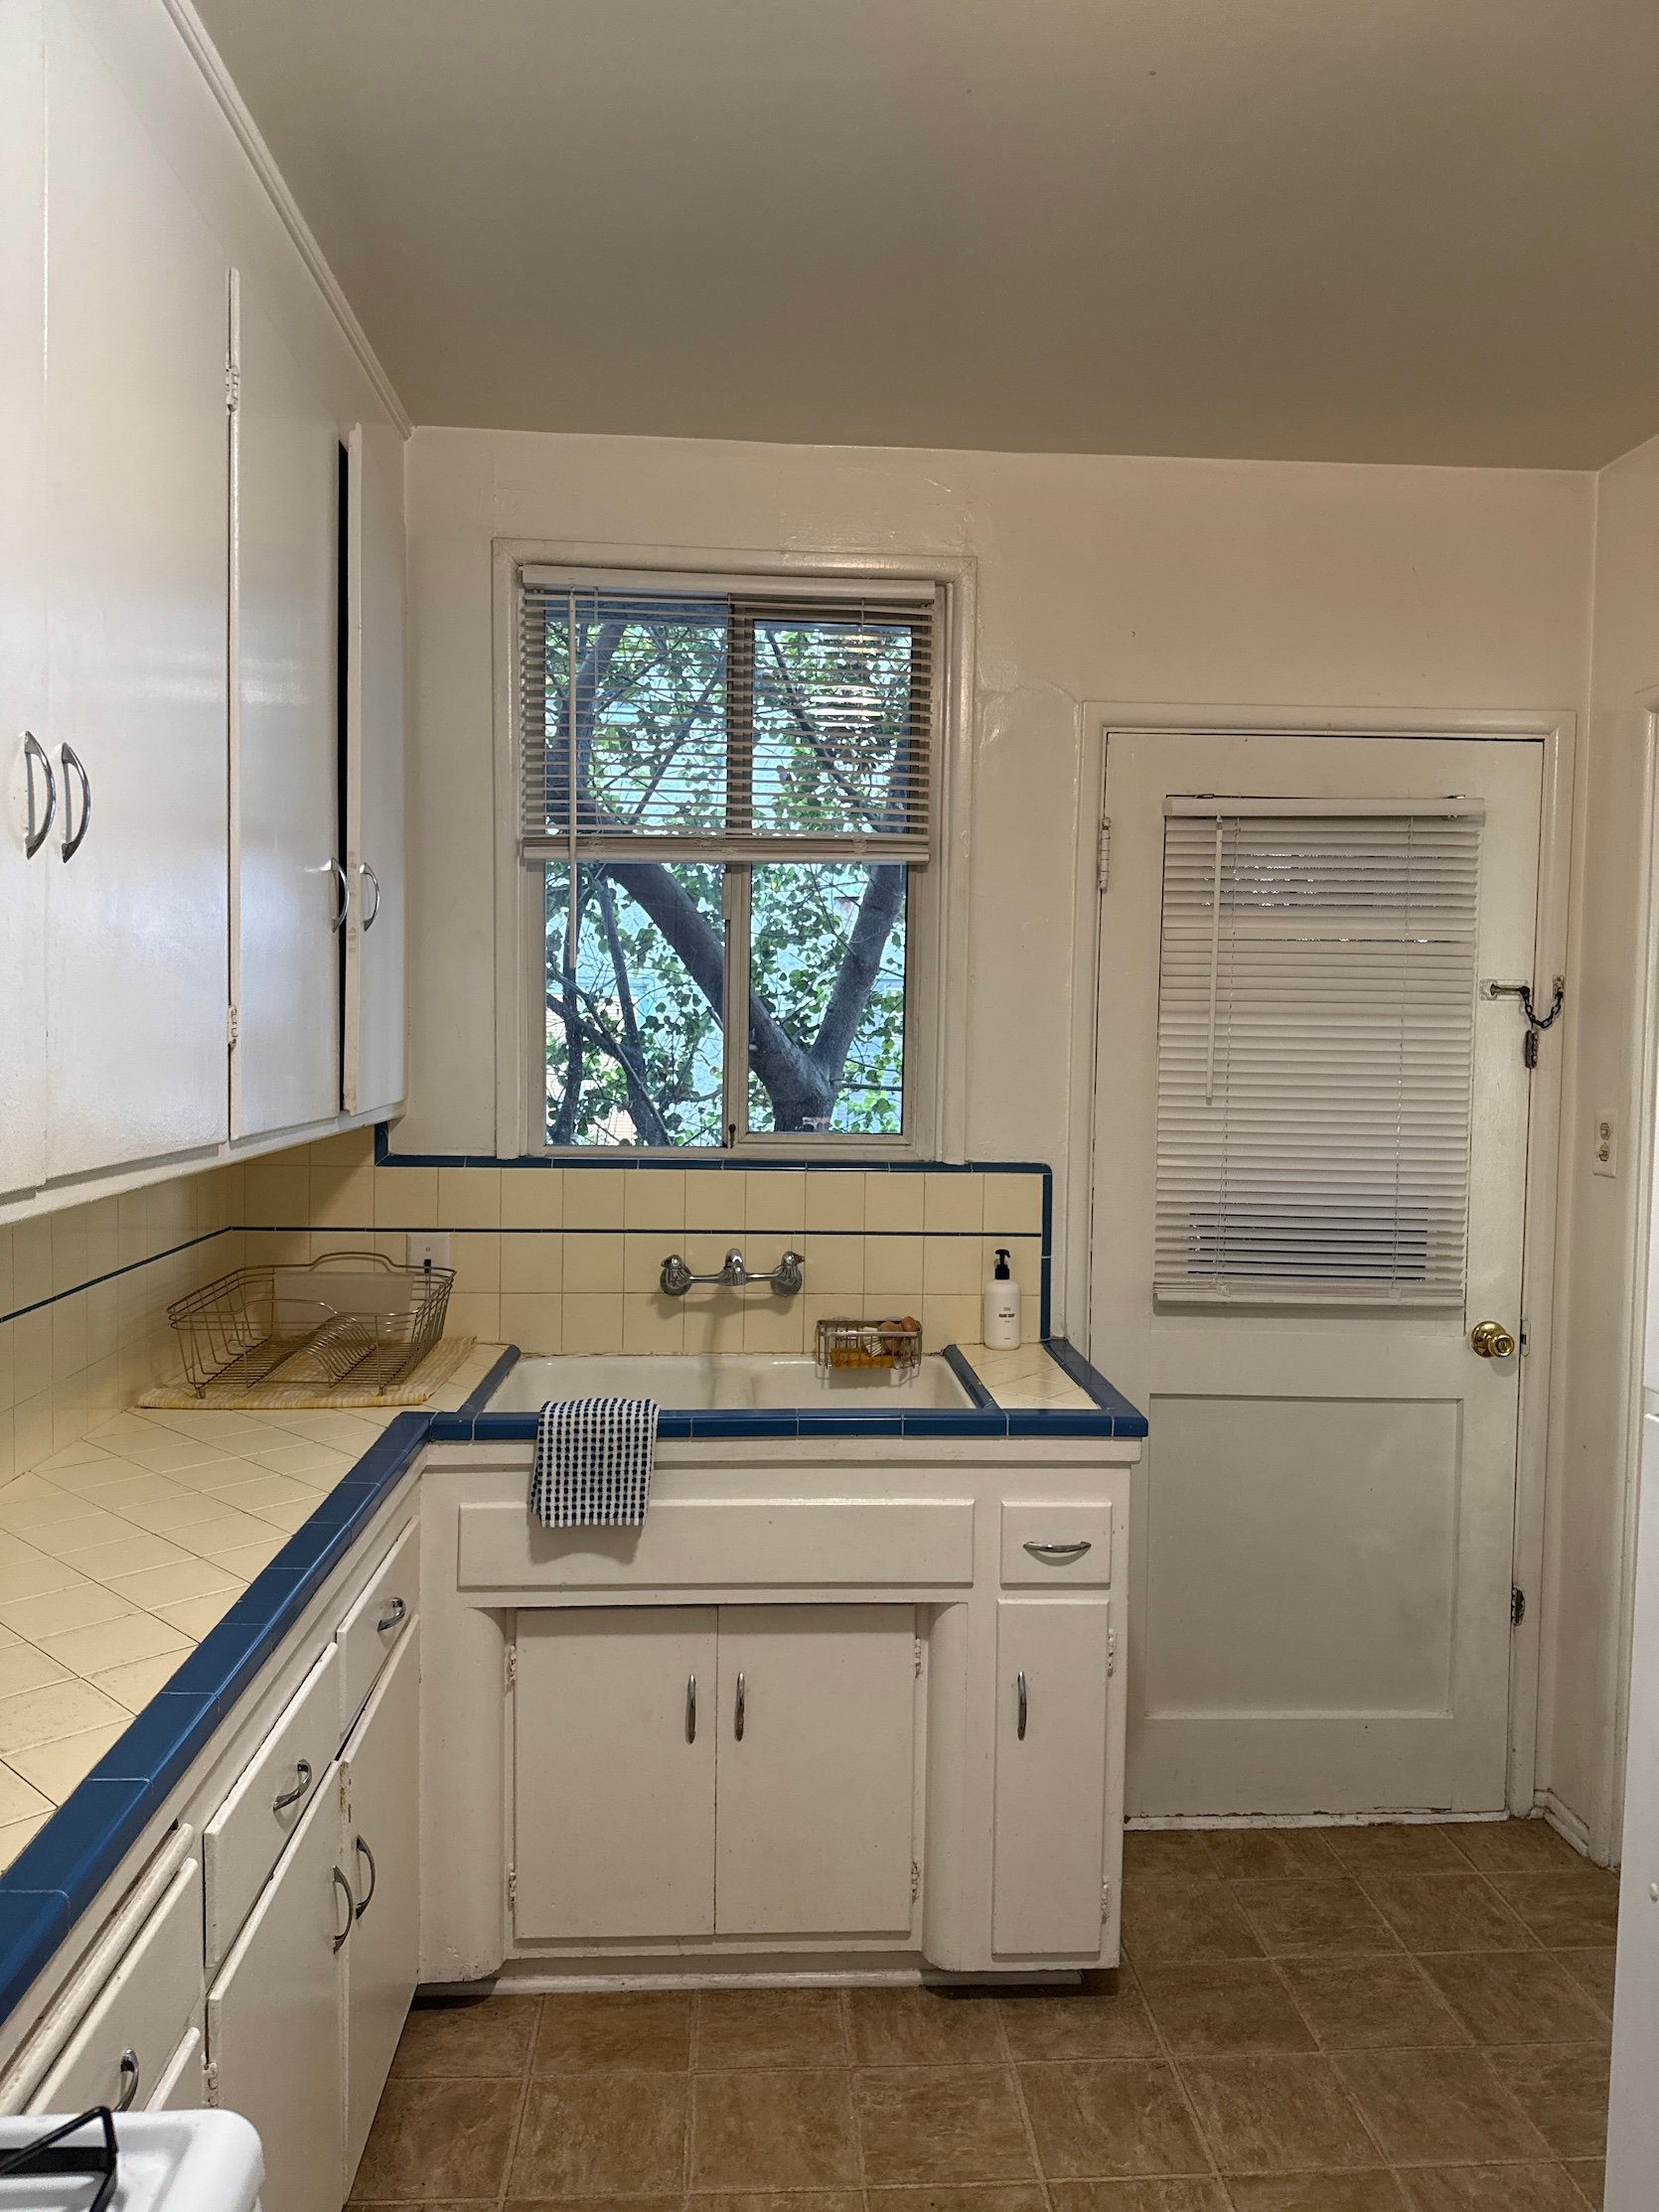
Right here’s a take a look at these DIY cafe curtains! In case you recall from the earlier than images, these had been horrendous, sticky little vinyl blinds, and I couldn’t have hated them extra. I additionally swapped those on the door window to roman shades, which you’ll see right here!
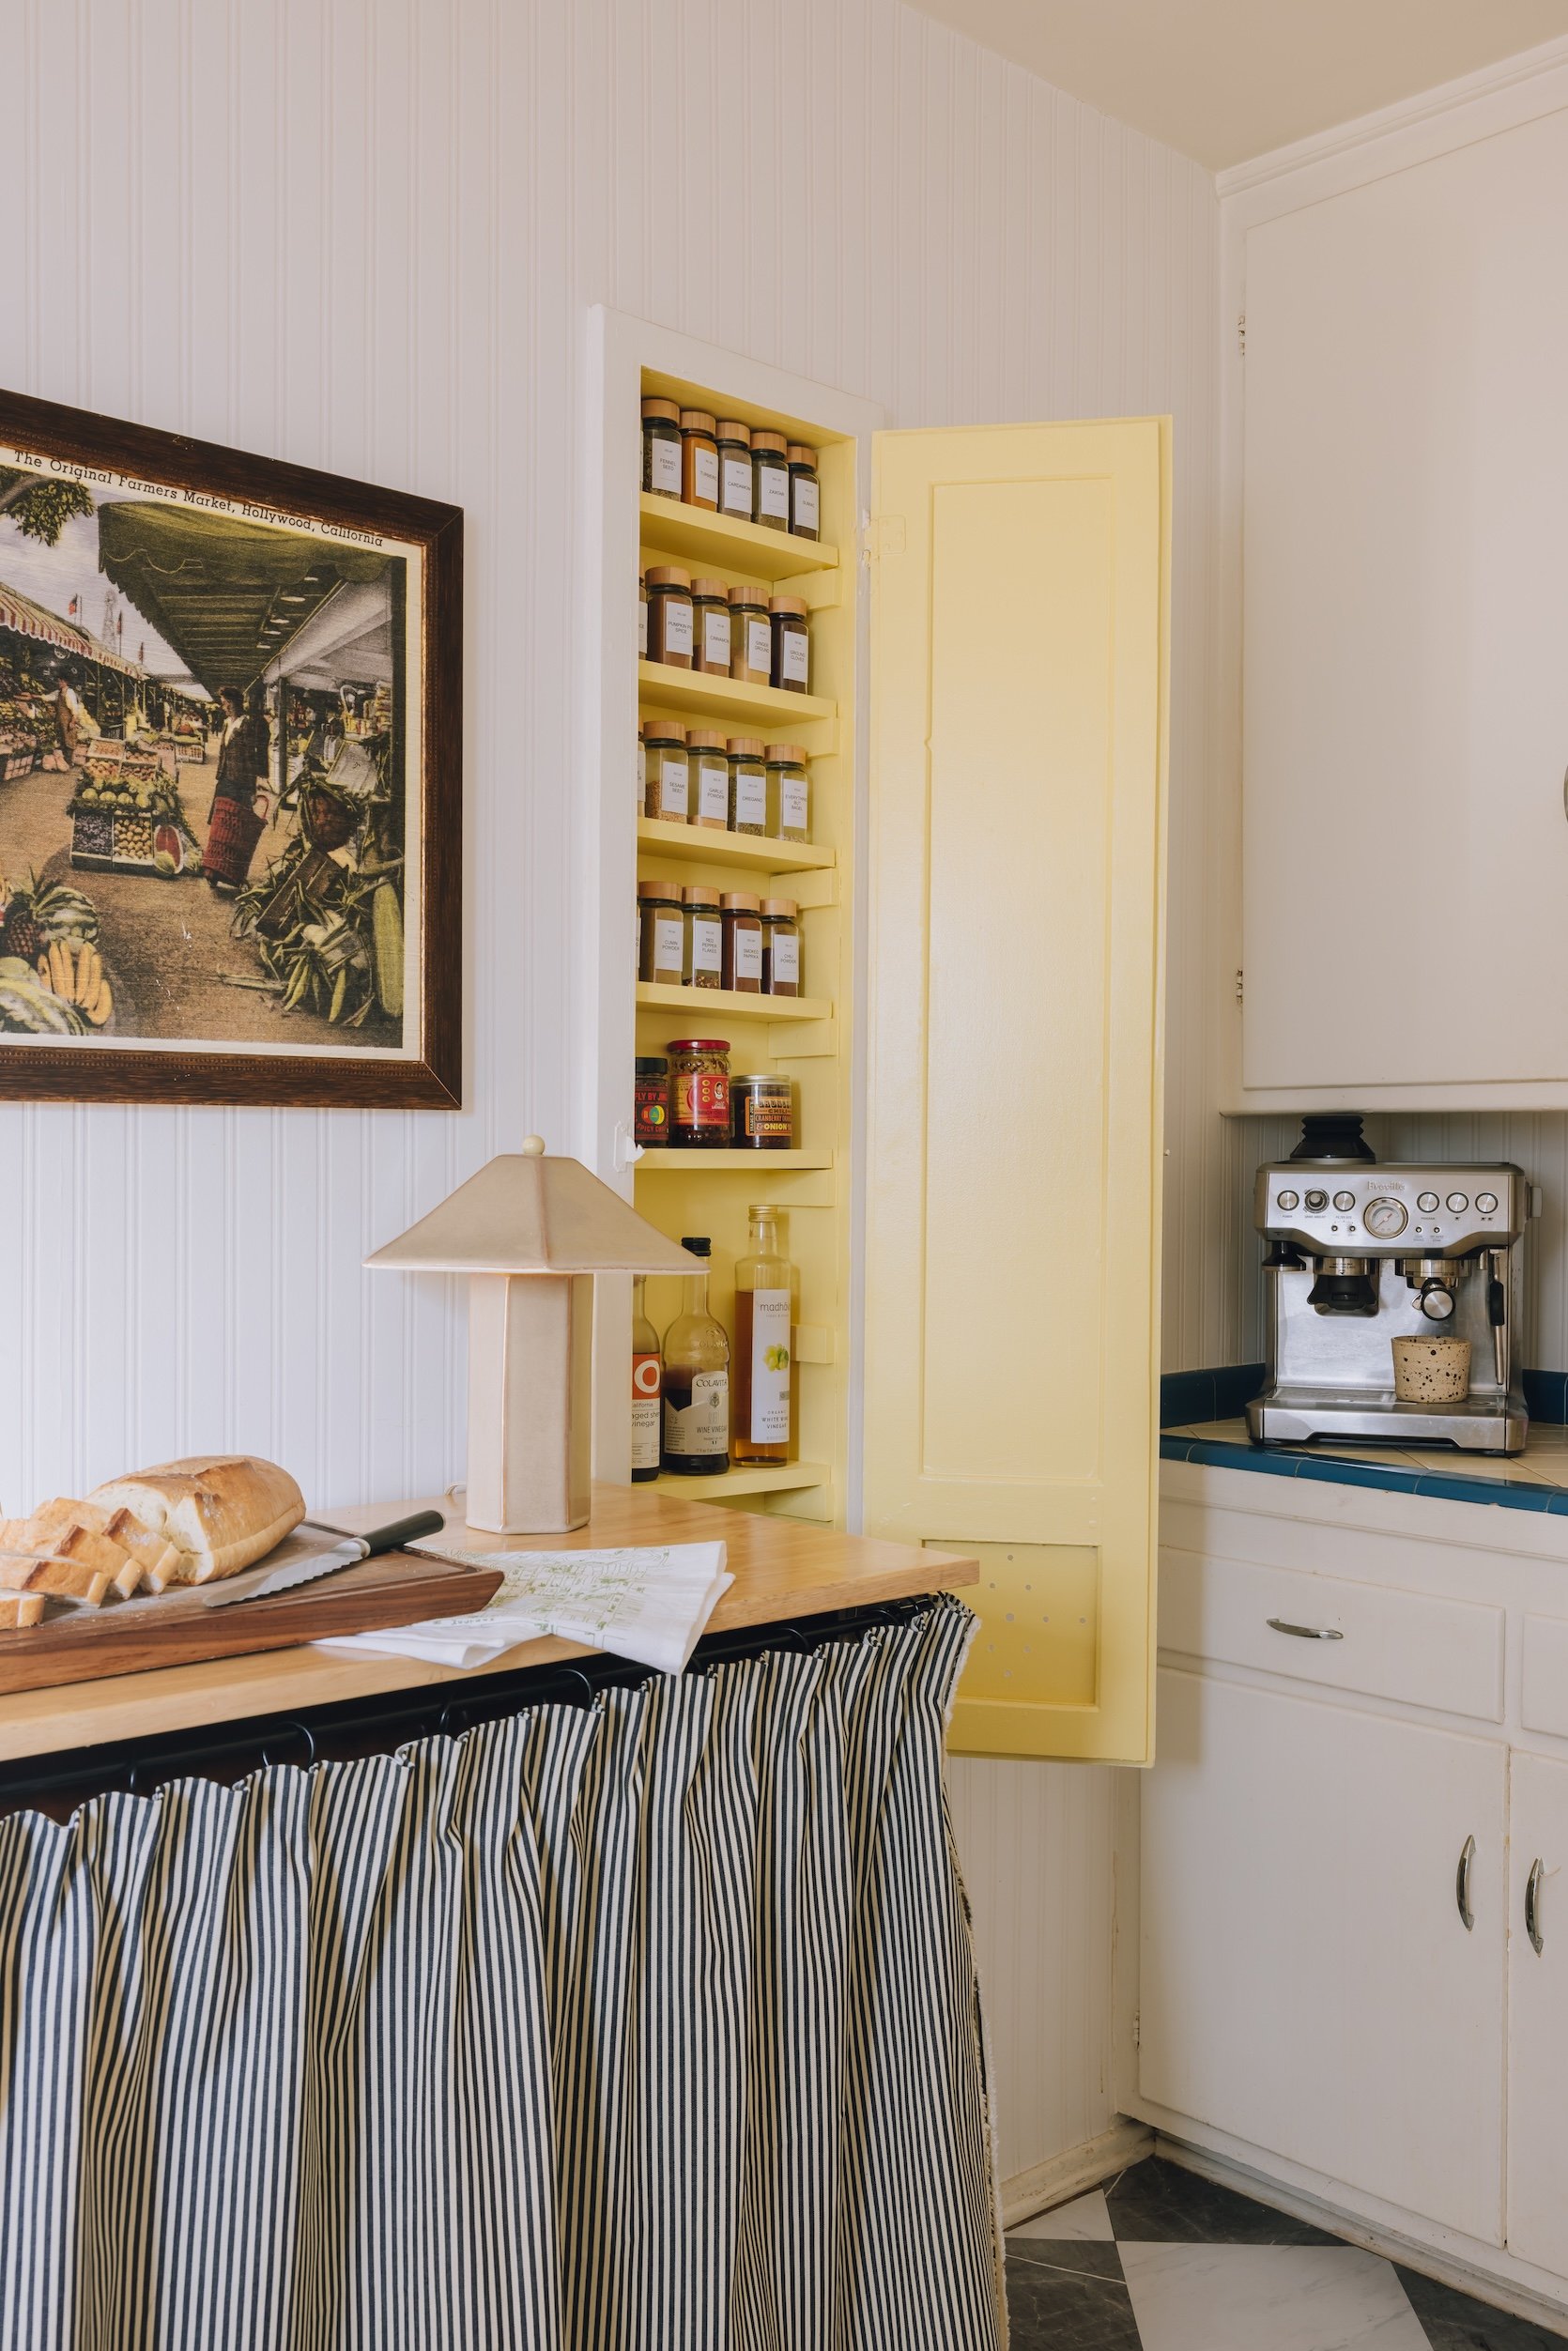
Spice Cupboard Paint Coloration | Spice Jars | Lamp | Slicing Board | Prep Desk | Skirt Cloth | Breville | Breville Single Dose Hopper
The spice cupboard at its peak!! I completely love how this turned out – the pop of shade makes me smile each single time I open it. I put in our beloved prep desk, which gained us the counter house I used to be dreaming of (I’ll get extra into the deets in a second), after which I put this classic grove farmer’s market artwork piece above it (which I scored for $40 bucks at a classic retailer!). I additionally love that this entire kitchen makeover made it so we are able to match our Breville over right here – though I did have to modify to this single-dose hopper (which is definitely means higher for bean freshness, I discovered), however primarily I did it so it might match underneath our low cupboards.
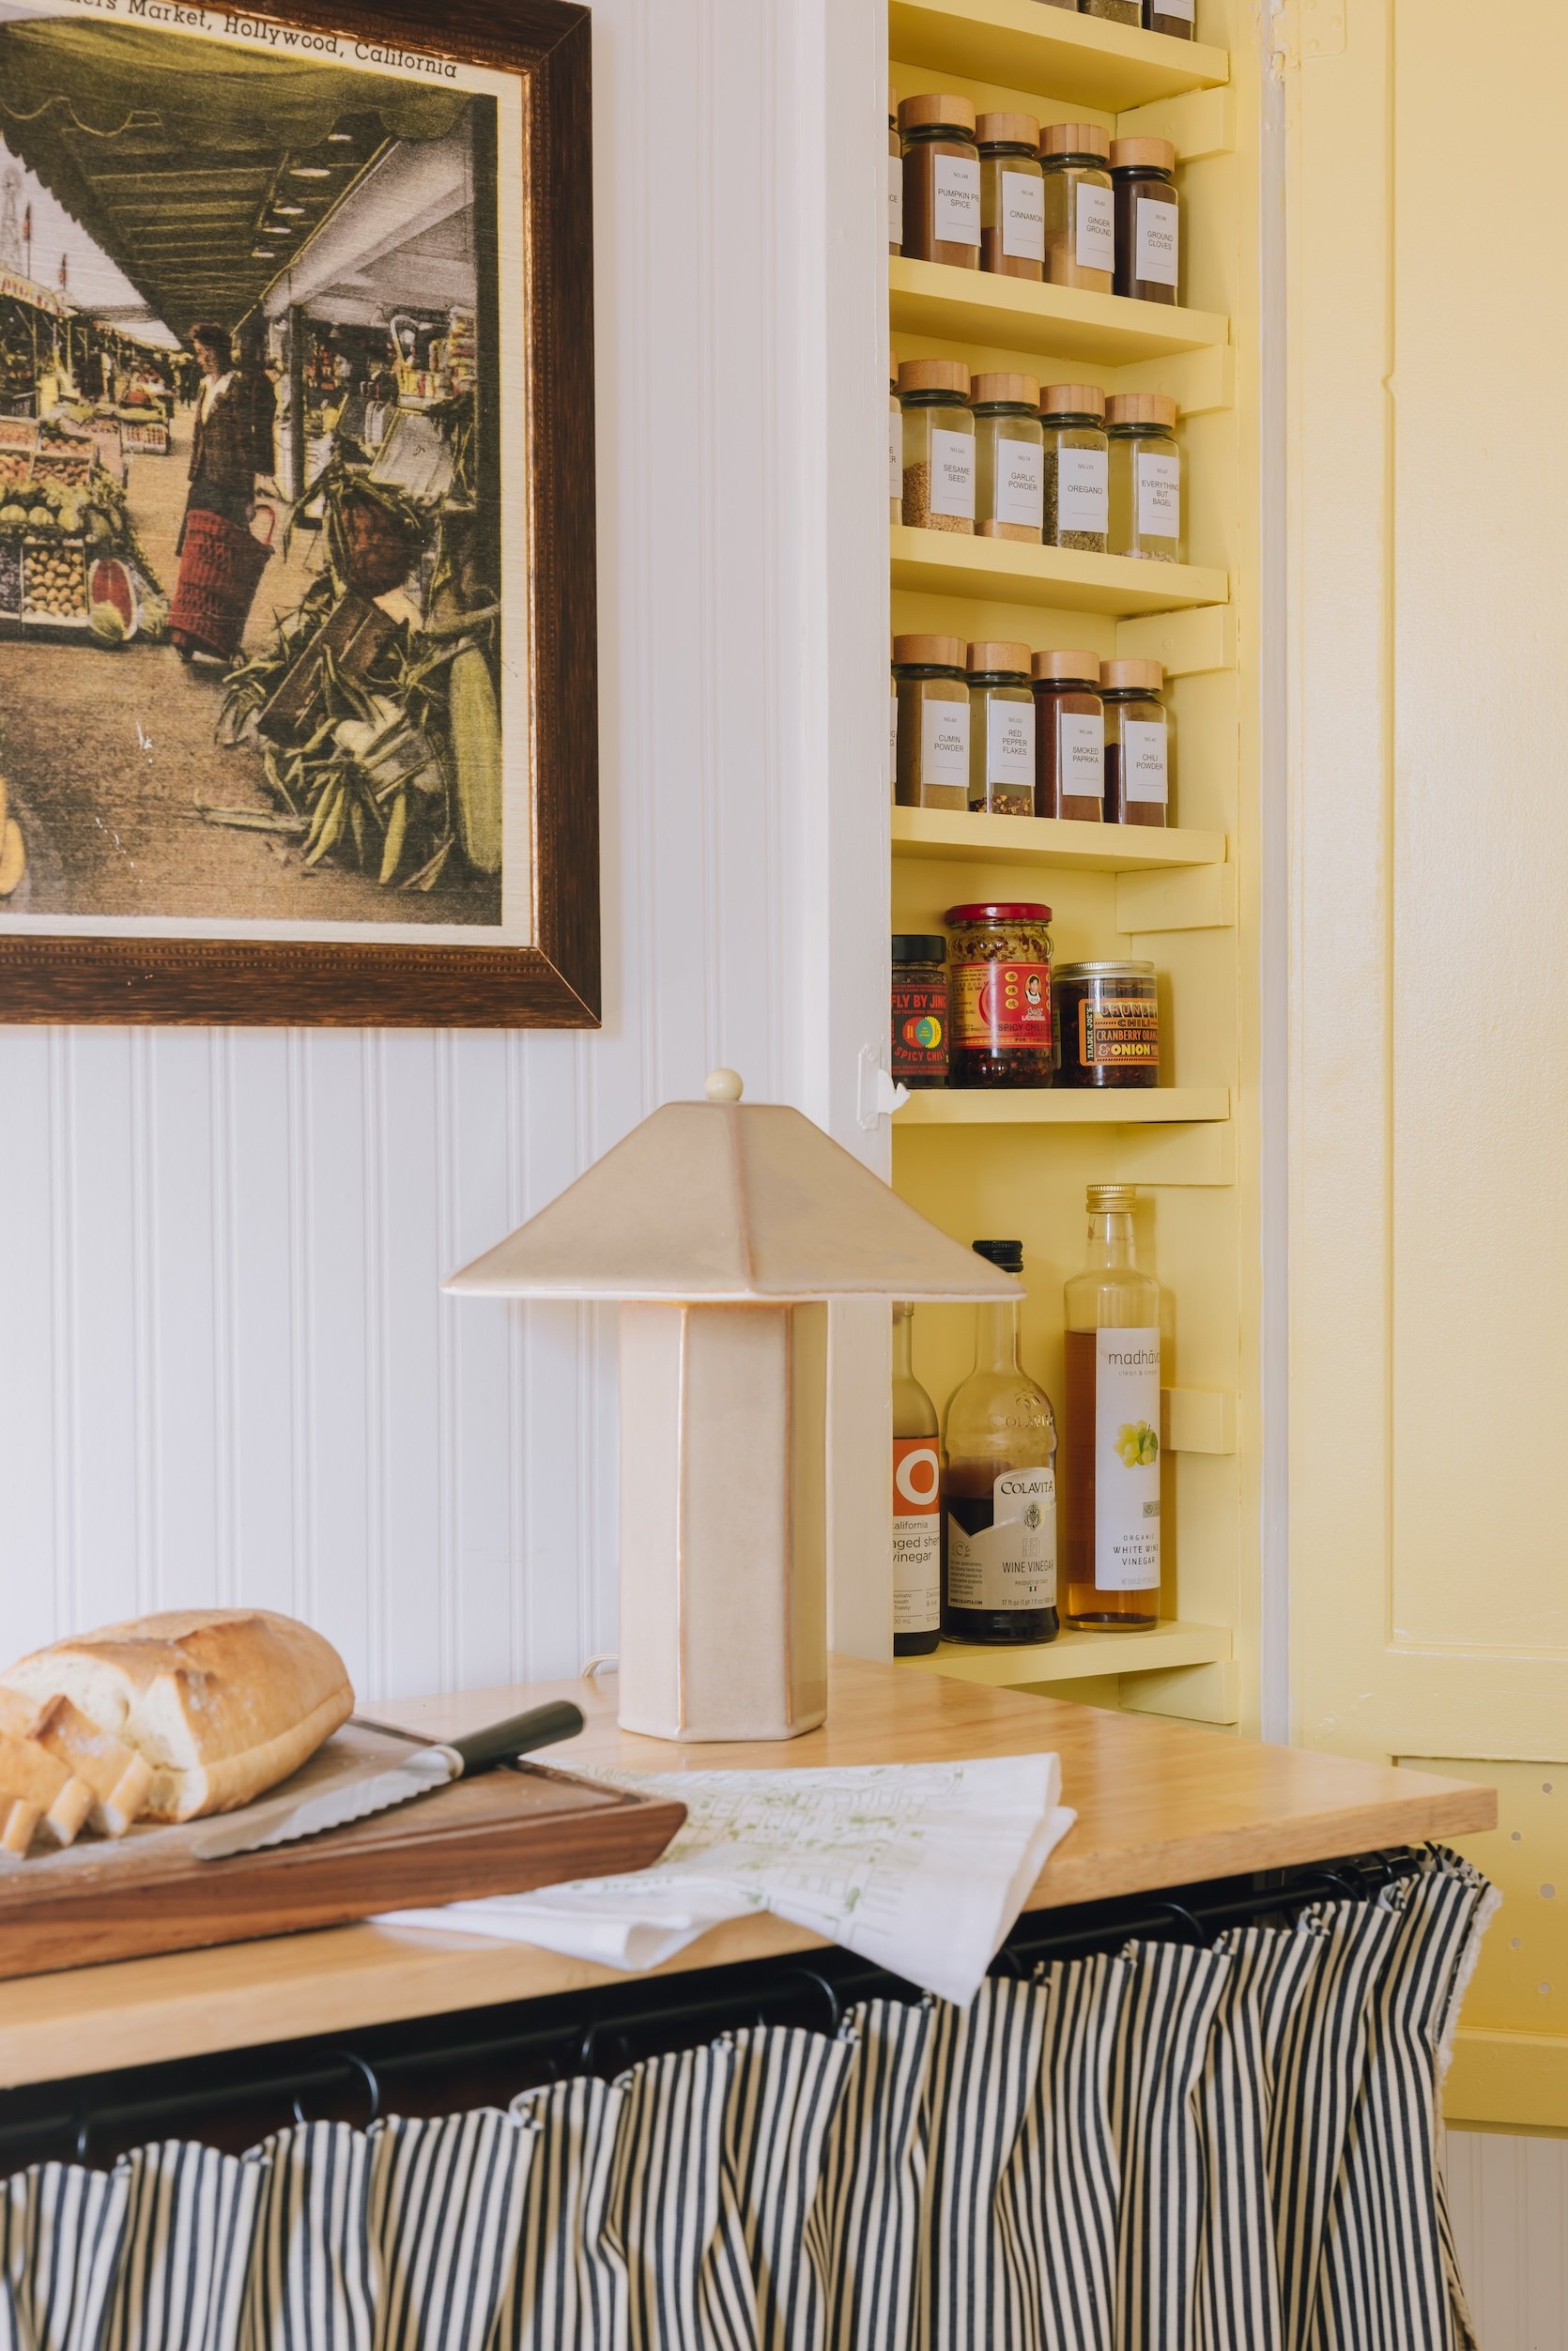
Additionally, that lamp is definitely from Goal, and it’s…so good. It is available in burgundy too, which is offered out all over the place, and persons are making an attempt to promote it for insane costs on FB market, which is loopy to me. However it’s cute, I’ll be trustworthy…
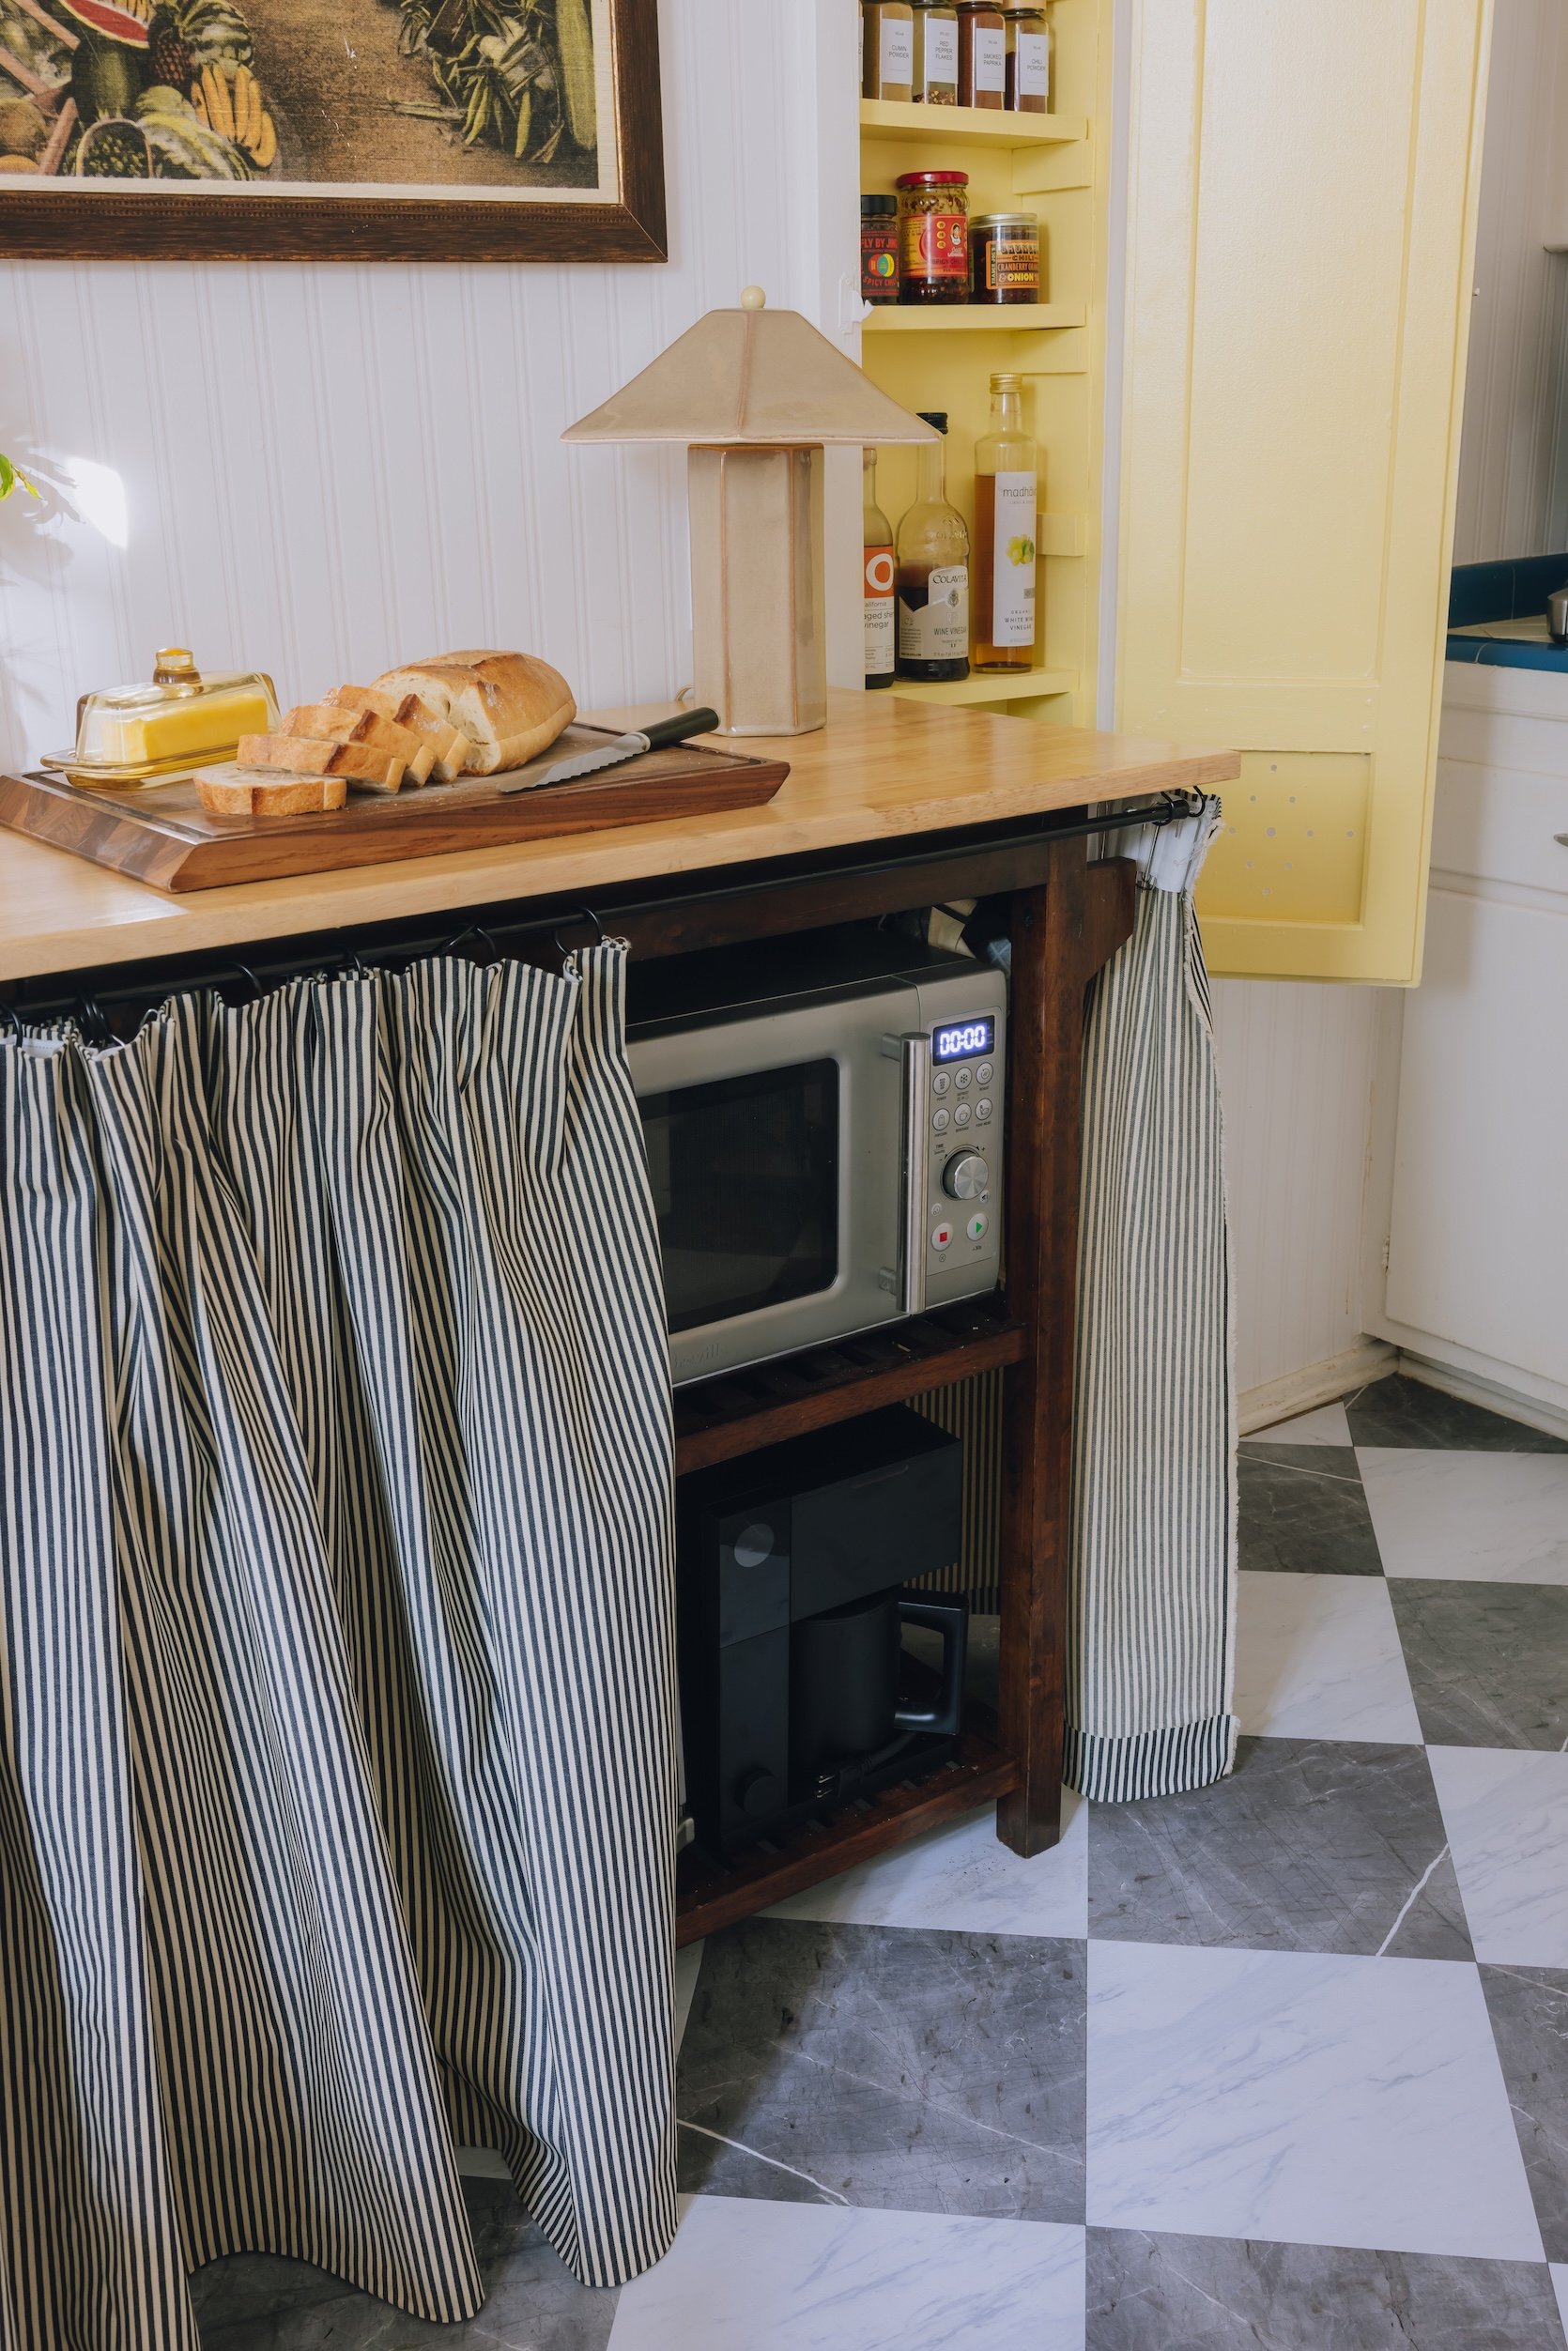
Prep Desk | Skirt Cloth | Fellow Espresso Maker | Pleat Tape | Curtain Rings | Rigidity Rod | C Hooks
I do know what you’re gonna ask…”However Mallory, the place did your microwave and toaster oven go!?” FEAST YER EYES! I discovered this tremendous inexpensive prep desk that was the proper dimension to retailer our cumbersome home equipment beneath, after which DIY’ed this skirt for it! I broke all of it down right here in the event you’re inquisitive about how precisely I did it. Scorching tip – I obtained glide tape to placed on prime of the rod, which made an enormous distinction in how the curtain rings slide on the adjustable rod (it’s additionally superior for curtain rods which can be adjustable!)
In order that’s every little thing I did to my rental kitchen!! I hope this impressed you and proved that even the ugliest areas in your house may be lovely with just a bit elbow grease!! (Properly and the Smeg actually helped too, haha). I’ll be revealing my rest room quickly too – which is the final house I’m going to share earlier than I transfer out of right here and in with my boyfriend (which is SO thrilling!!) I’ve cherished each second of residing right here, making this condo a house and sharing it with all of you. Thanks so a lot for studying this publish, and completely happy 2026! I’ll see you within the feedback 🙂
*Design by Mallory Wackerman
**Pictures by Lyle Nelson