


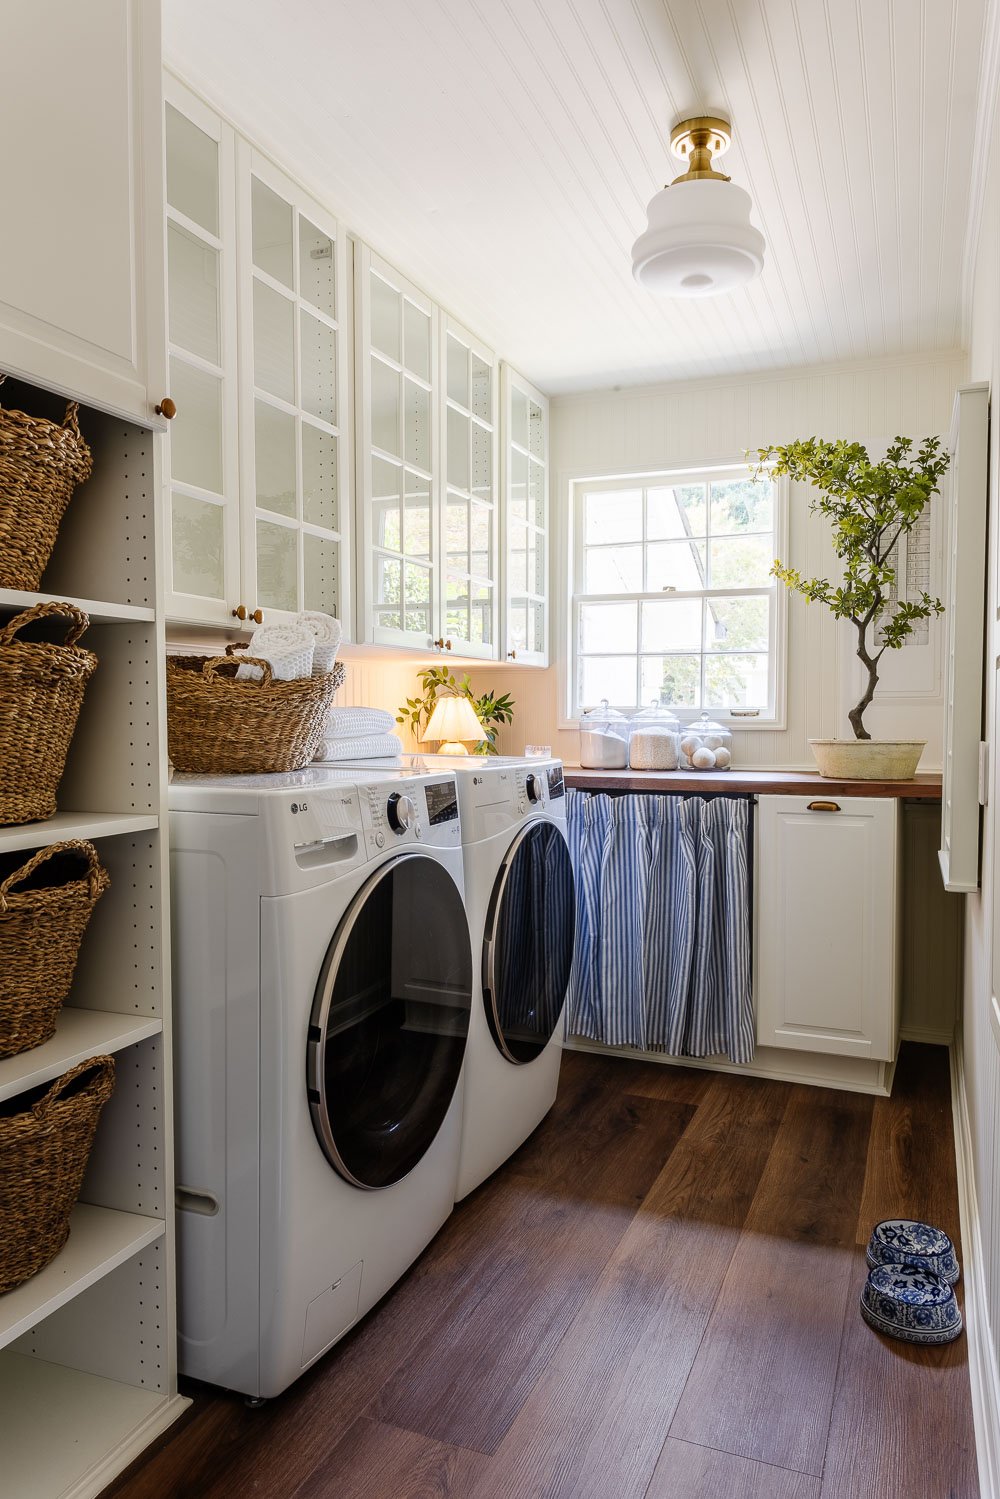
We’ve been plugging away on our laundry room makeover and I’m so excited with the way it’s coming alongside.
Between remodeling the structure, putting in beadboard on the partitions, laying down Stainmaster luxurious vinyl plank flooring in Olympia Oak, and placing in new IKEA cupboards, this room is de facto beginning to really feel intentional.
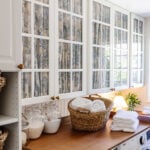
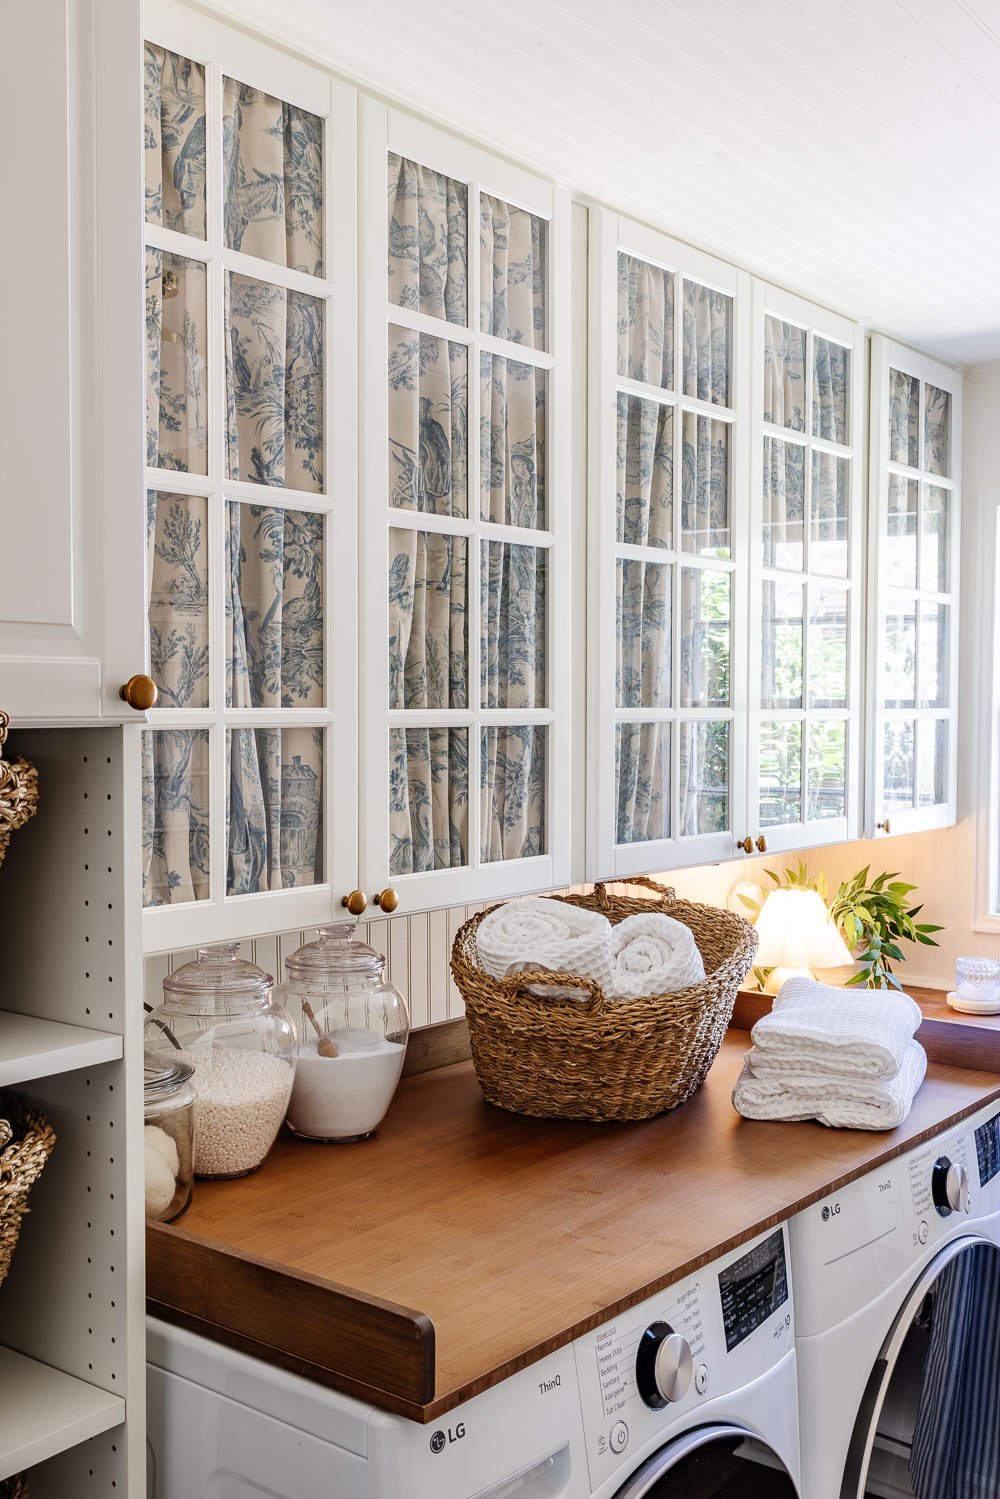
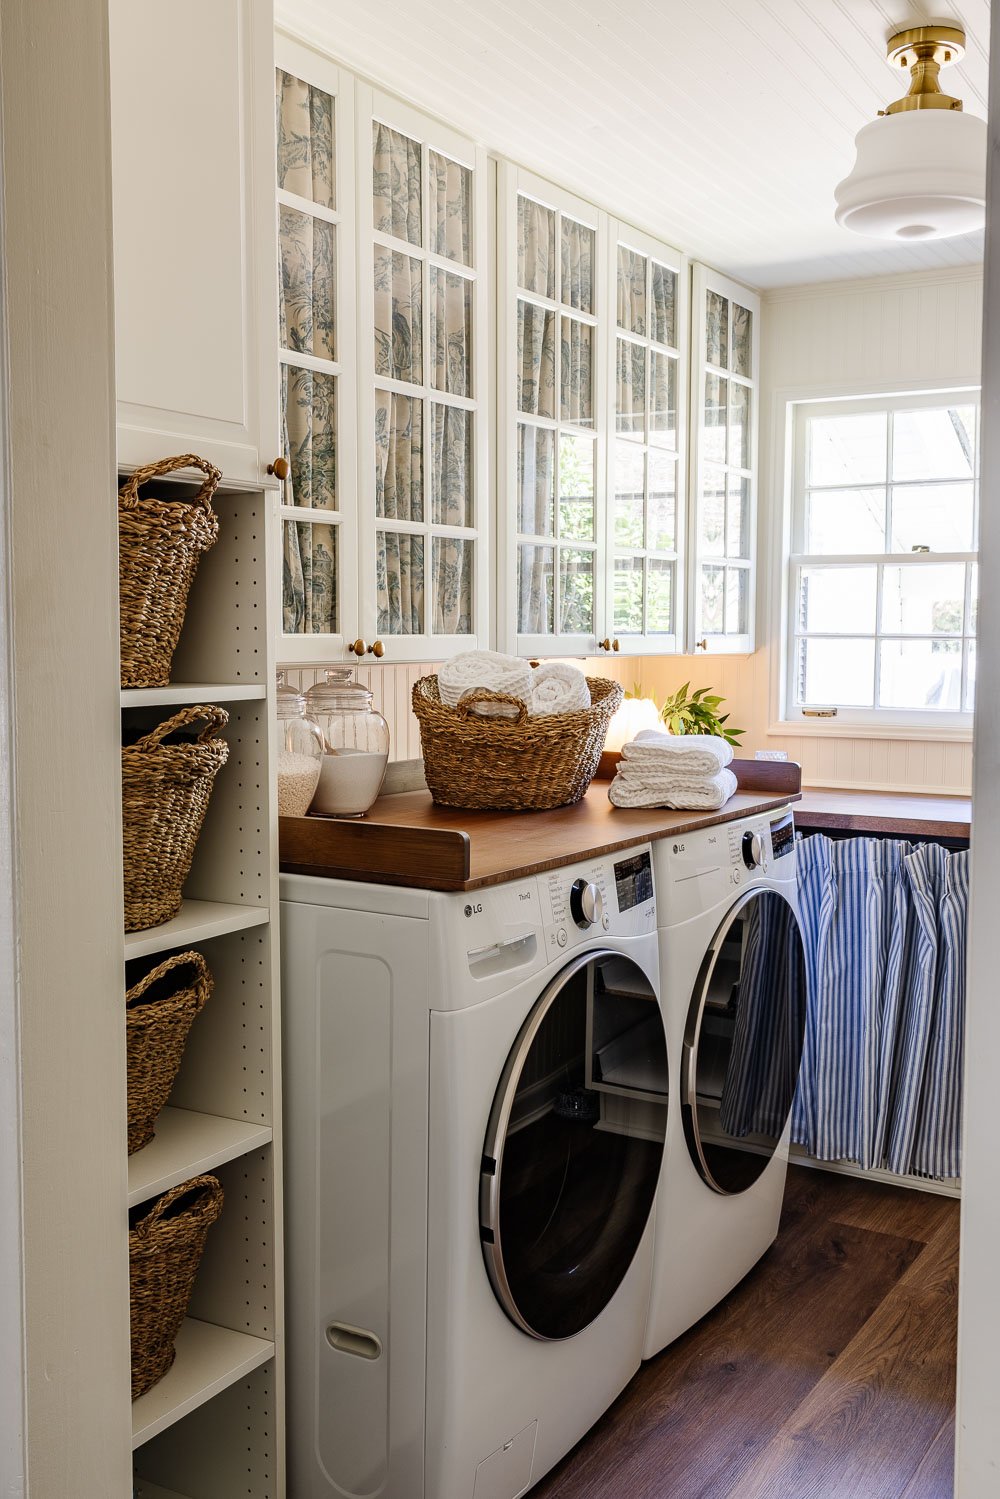
The glass doorways on the higher cupboards have been a should for me. I really like the ethereal, open really feel, however I additionally knew we’d need a strategy to disguise litter when essential. Cue this enjoyable little classic trick: including cupboard material panels behind the glass.
Associated: Tips on how to Cowl Glass Doorways With Window Movie
As an Amazon Affiliate, I earn from qualifying purchases. full disclosure
Why We Did This (and Why You May Love It Too)
Earlier than we get to steps, right here’s why this trick is my favourite:
- It hides litter behind glass with out dropping the visible lightness of glass doorways.
- You achieve the flexibility to swap materials when your temper or type modifications.
- It provides sample, shade, and character to what in any other case is likely to be a really plain wall of cupboards.
- It’s pretty easy, doesn’t require eradicating the glass, and is definitely reversible.

Associated: DIY Glass Closet Door Makeover With Vintage Mirror Movie
What You’ll Want
Right here’s a working supplies record (it’s possible you’ll discover equivalents relying on what you already personal):
Step-by-Step: Making Your Personal Glass + Cloth Cupboard Panels
Right here’s how we did ours in our laundry room, step-by-step.
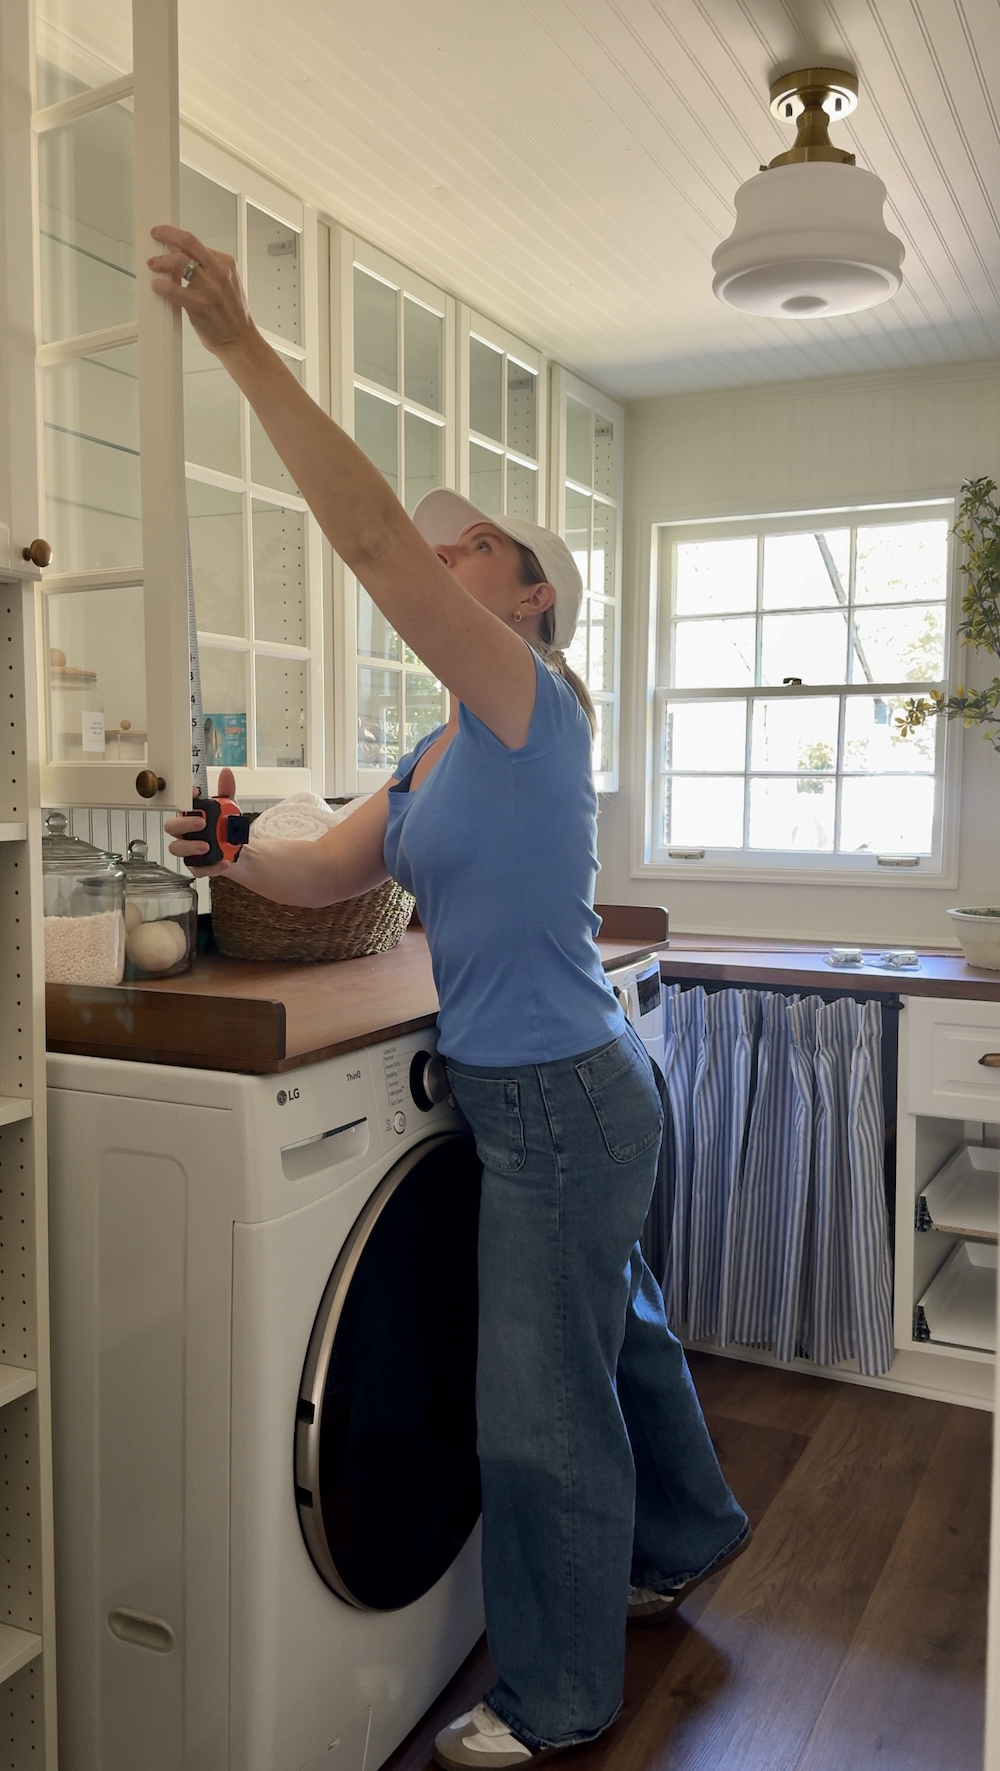
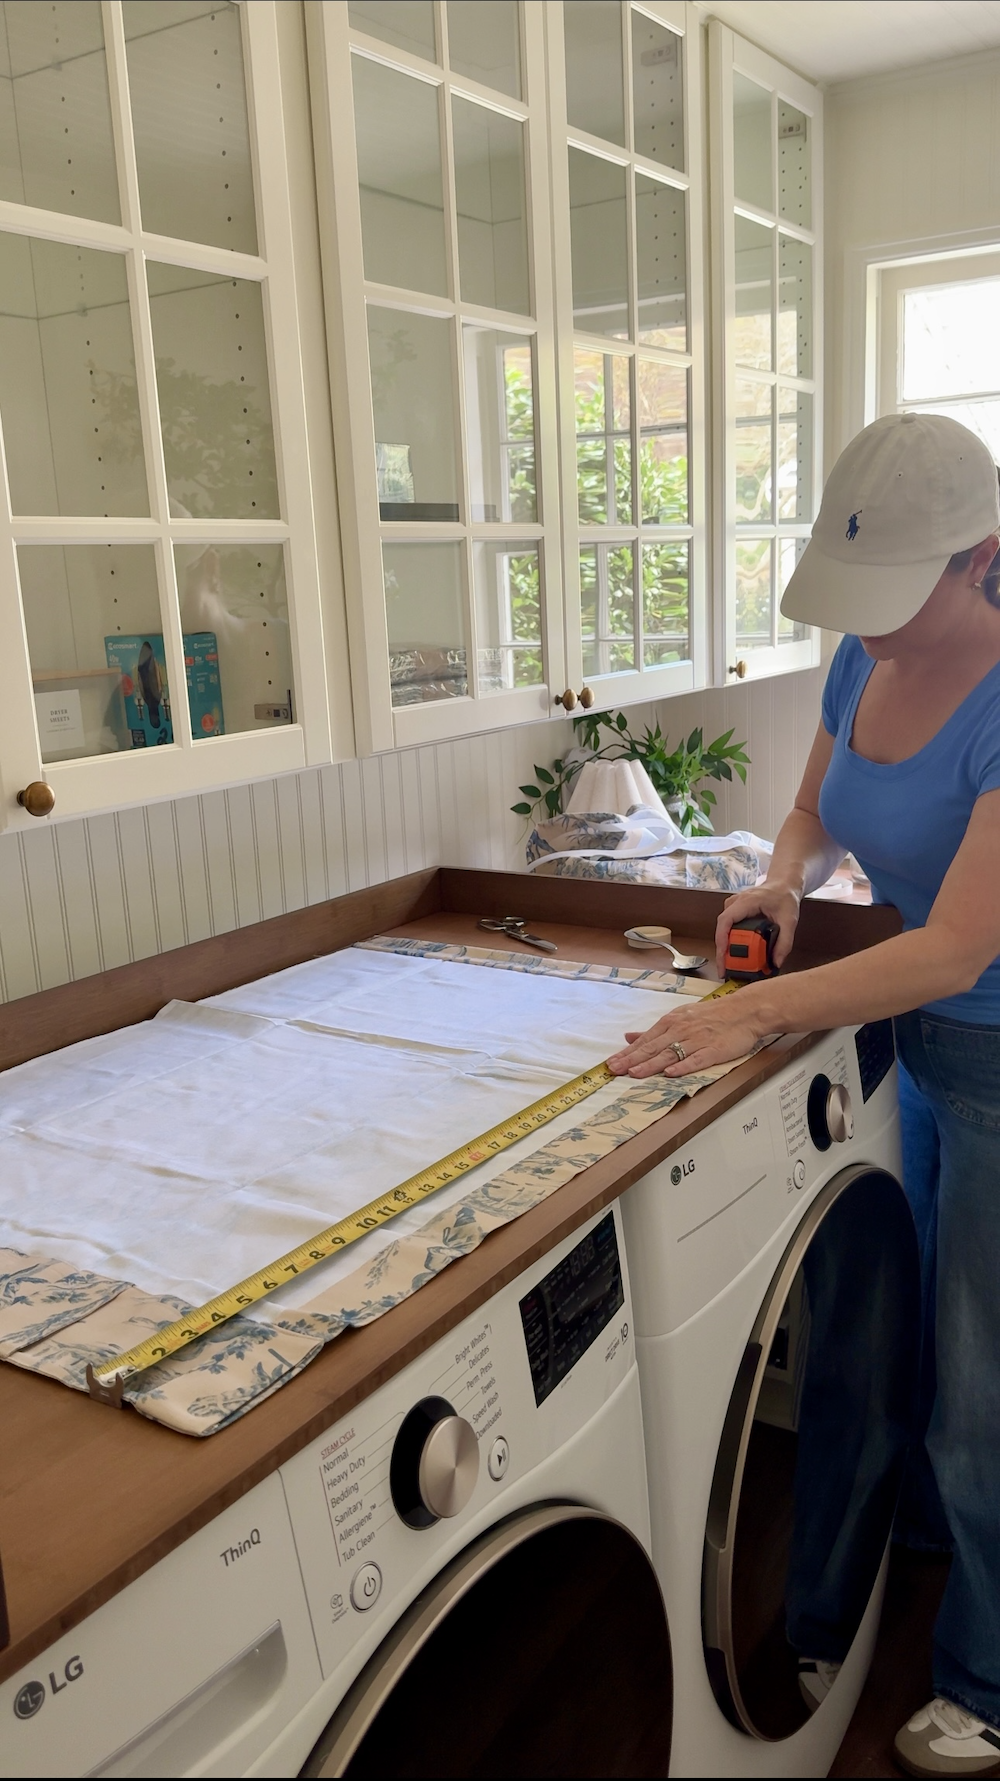
Step 1: Measure the present glass opening
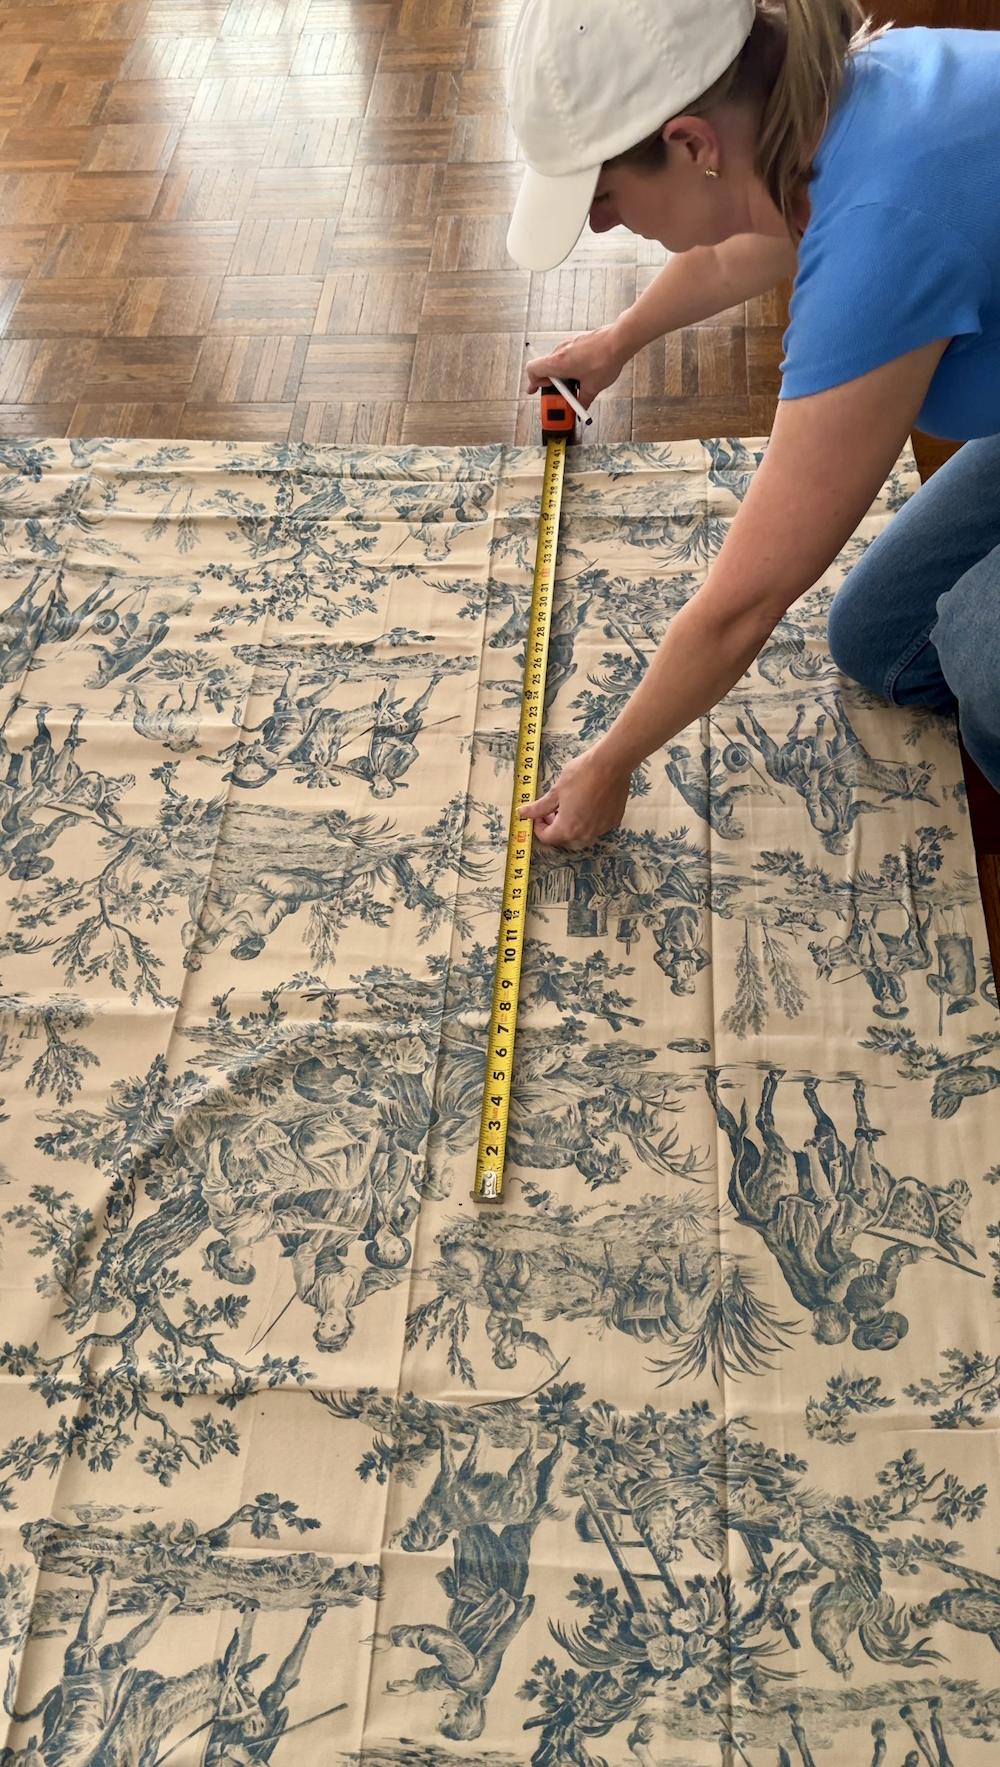
Measure the seen glass space, then plan your curtain to increase previous the glass on all 4 sides by about 1 1/2″ so the dowels are hidden when the door is shut. For width, multiply your completed width by 1.5–2× for comfortable gathers.
Instance: a 16″ completed width turns into 24-32″ reduce width.
Minimize your material right into a single lengthy panel to suit your cupboard door. Make sure your reduce measurement consists of:
- The completed dimensions (glass measurement 1 1/2″ past on all sides), and
- Additional for seams and the highest/backside channels (plan 1 1/2″ every)
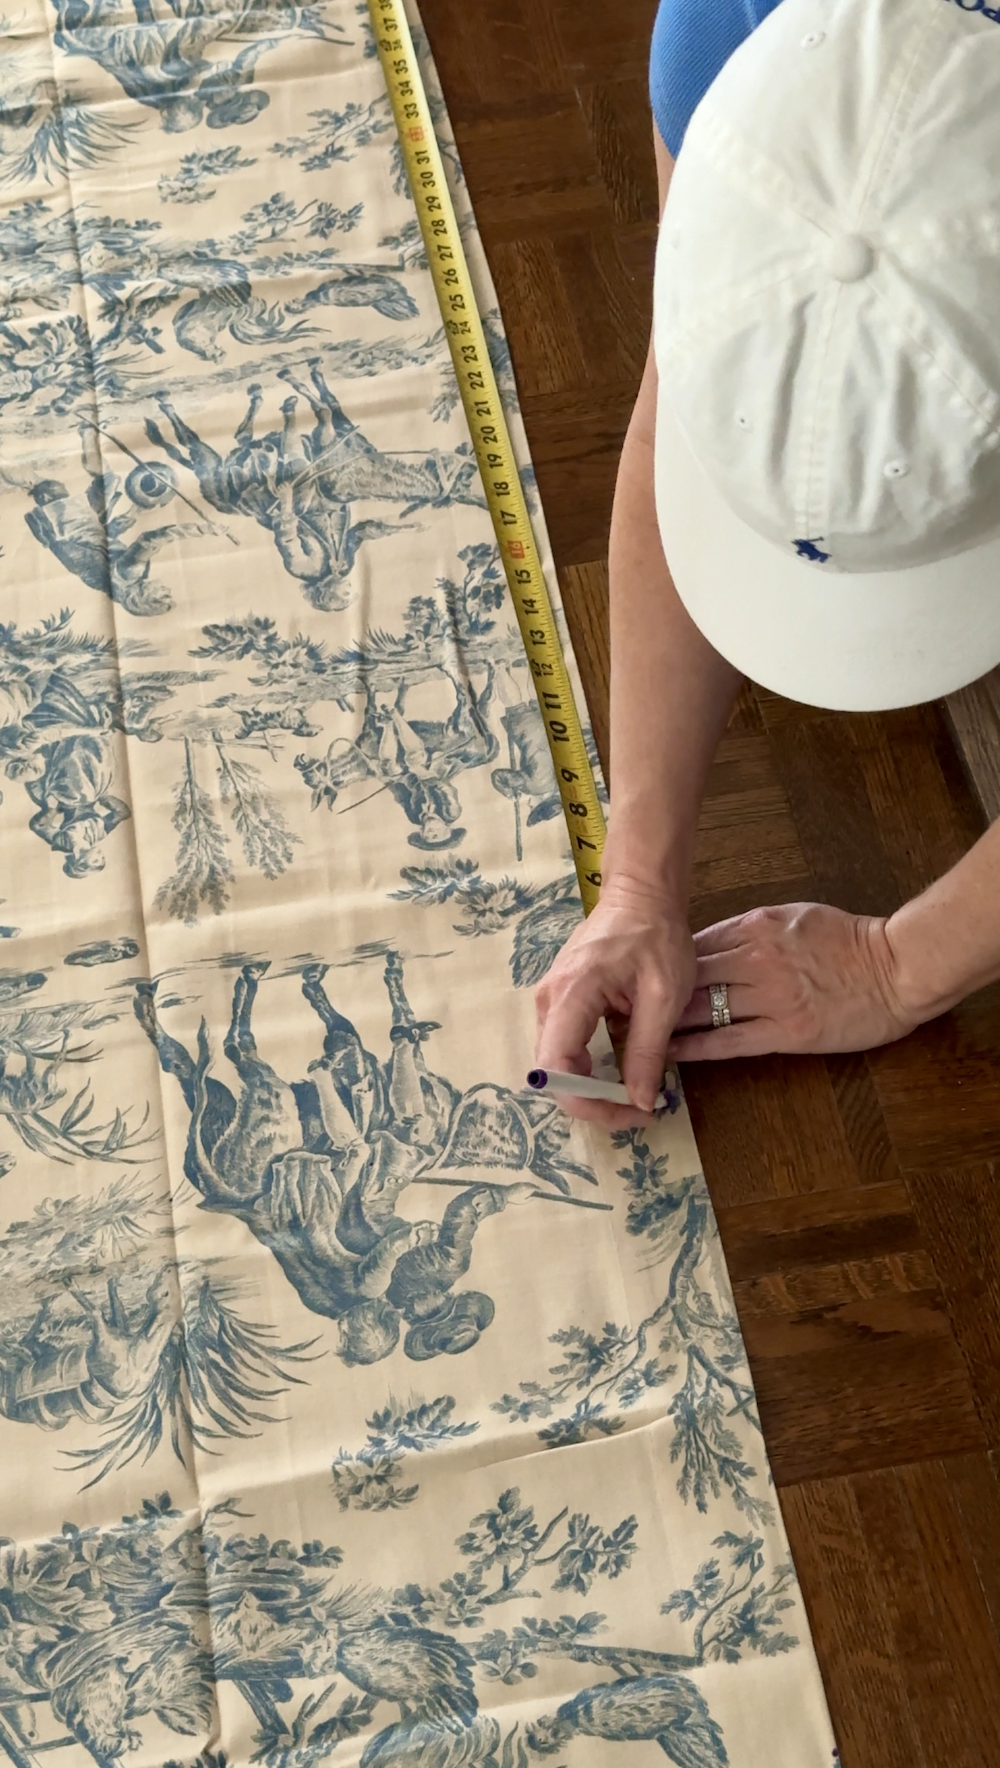
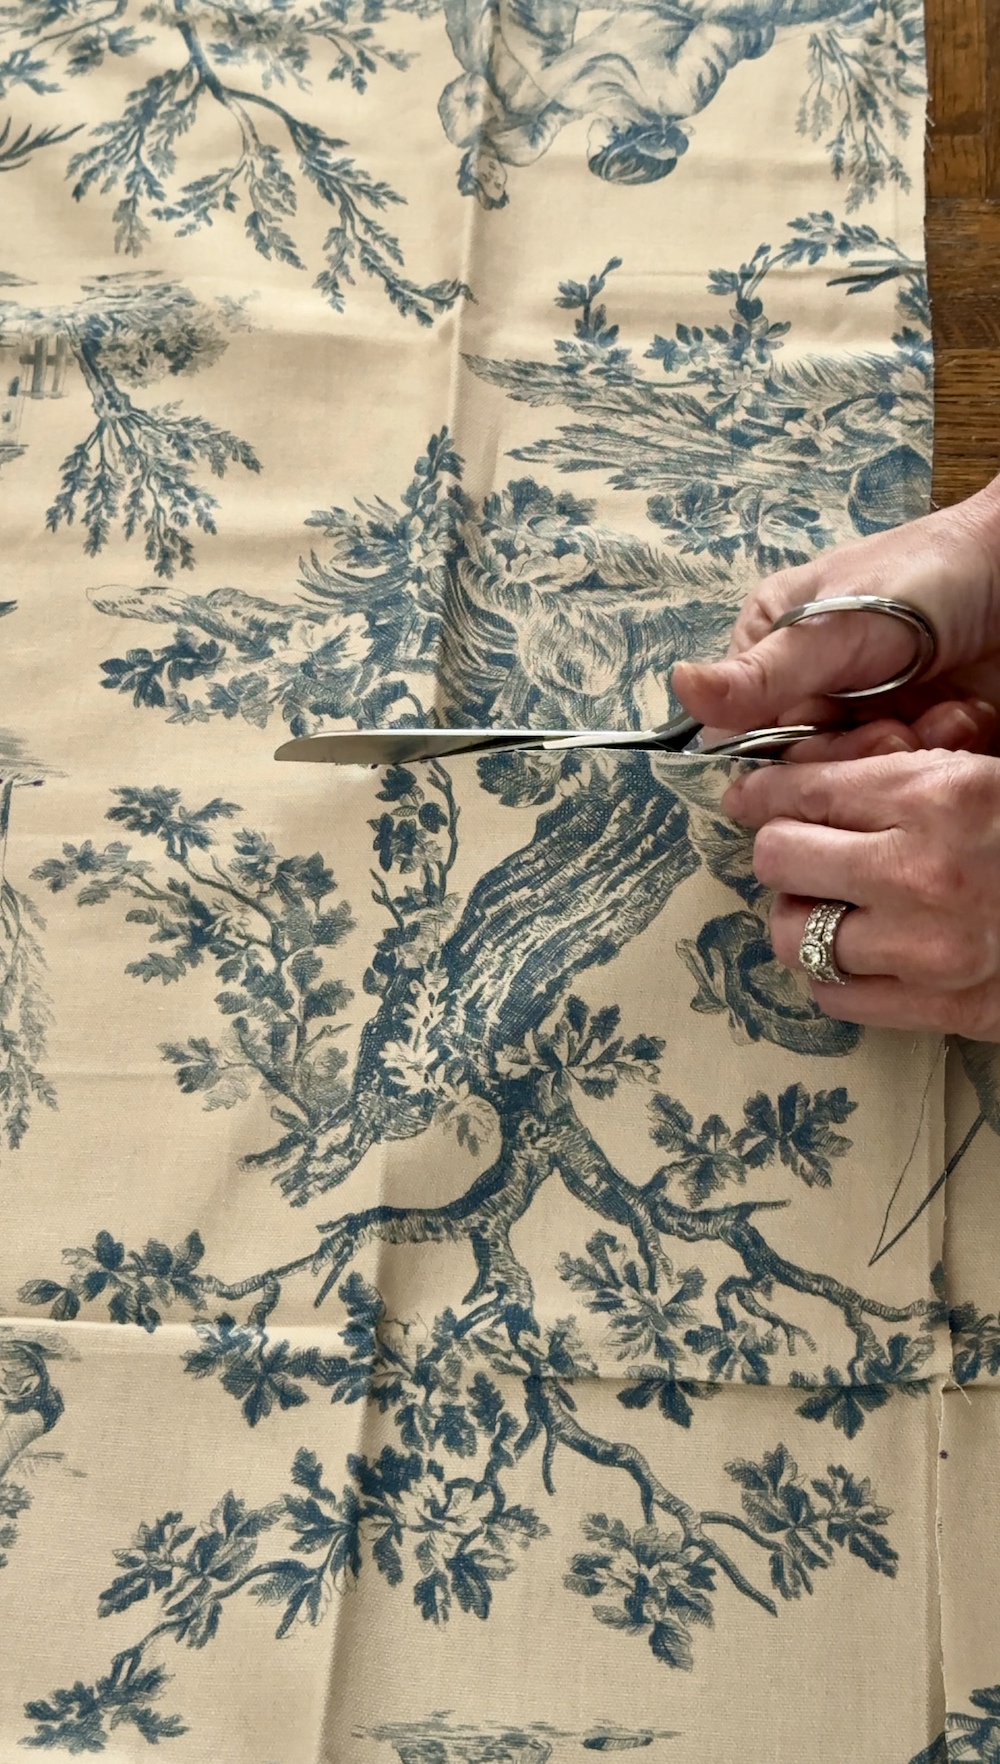
Step 3: Hem (fold and press) the edges
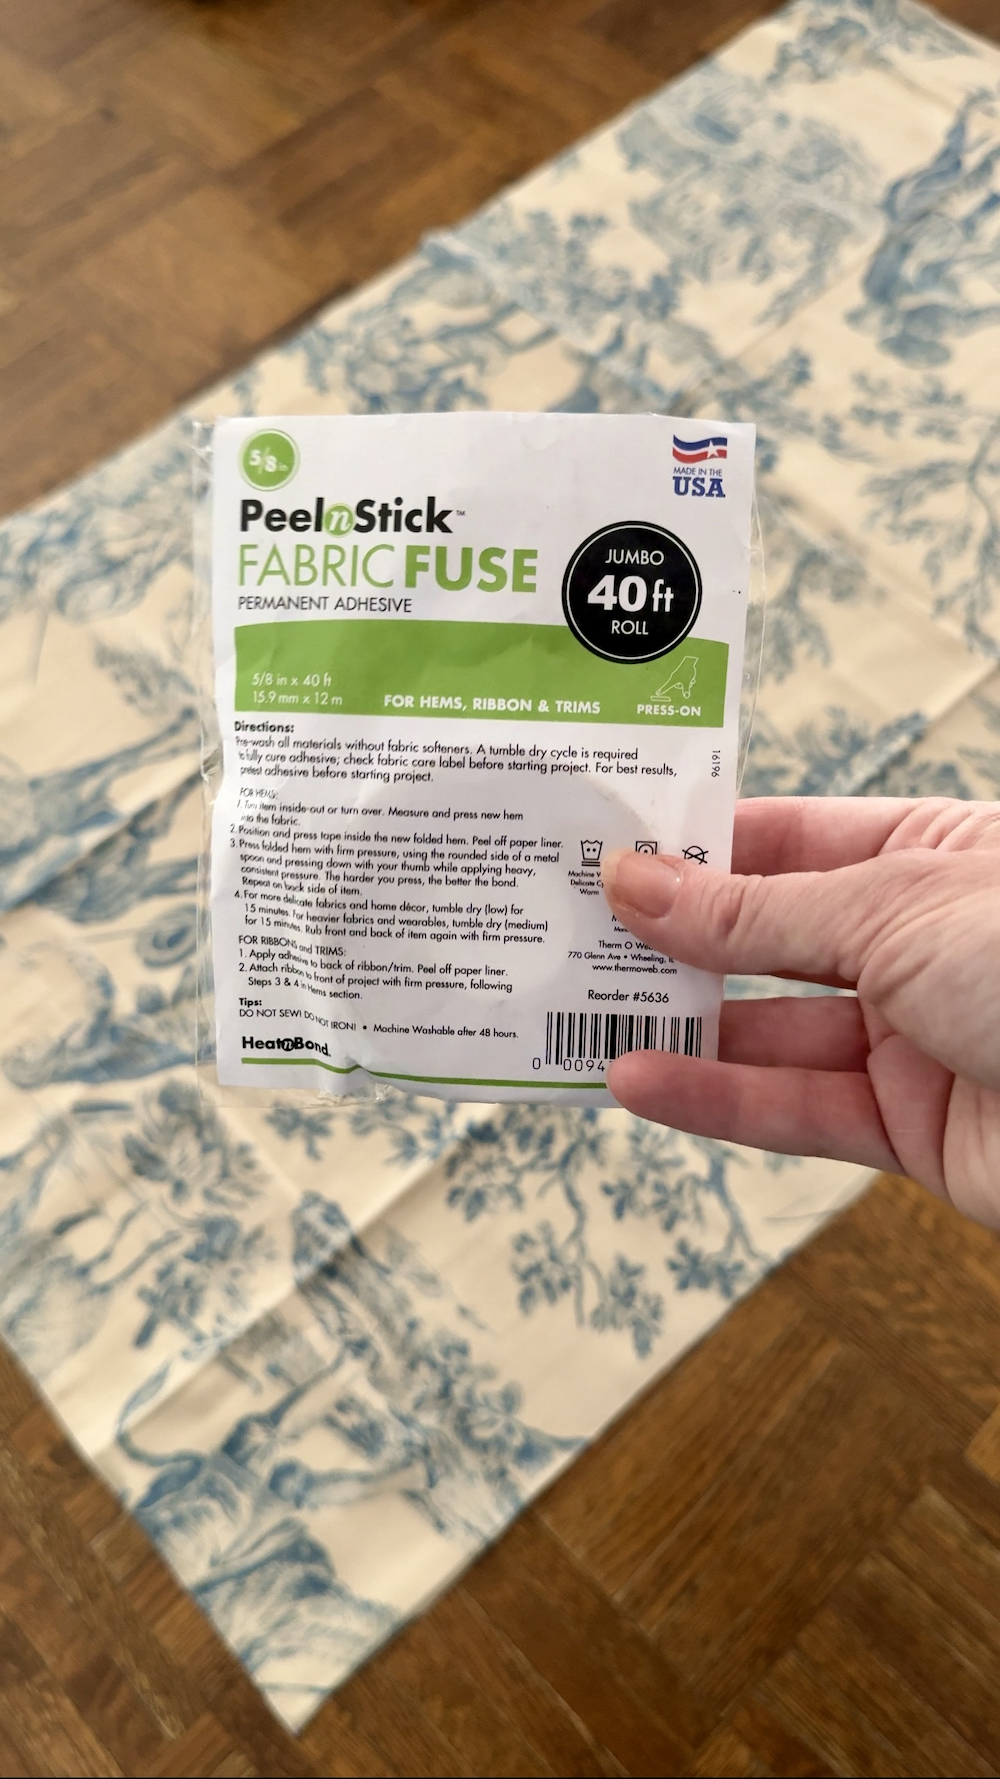
End the 2 lengthy facet edges first: Fold below ~¾″ and bond with the material fuse tape per bundle instructions. Use the steel spoon to firmly press the tape into place to bond it to the material.
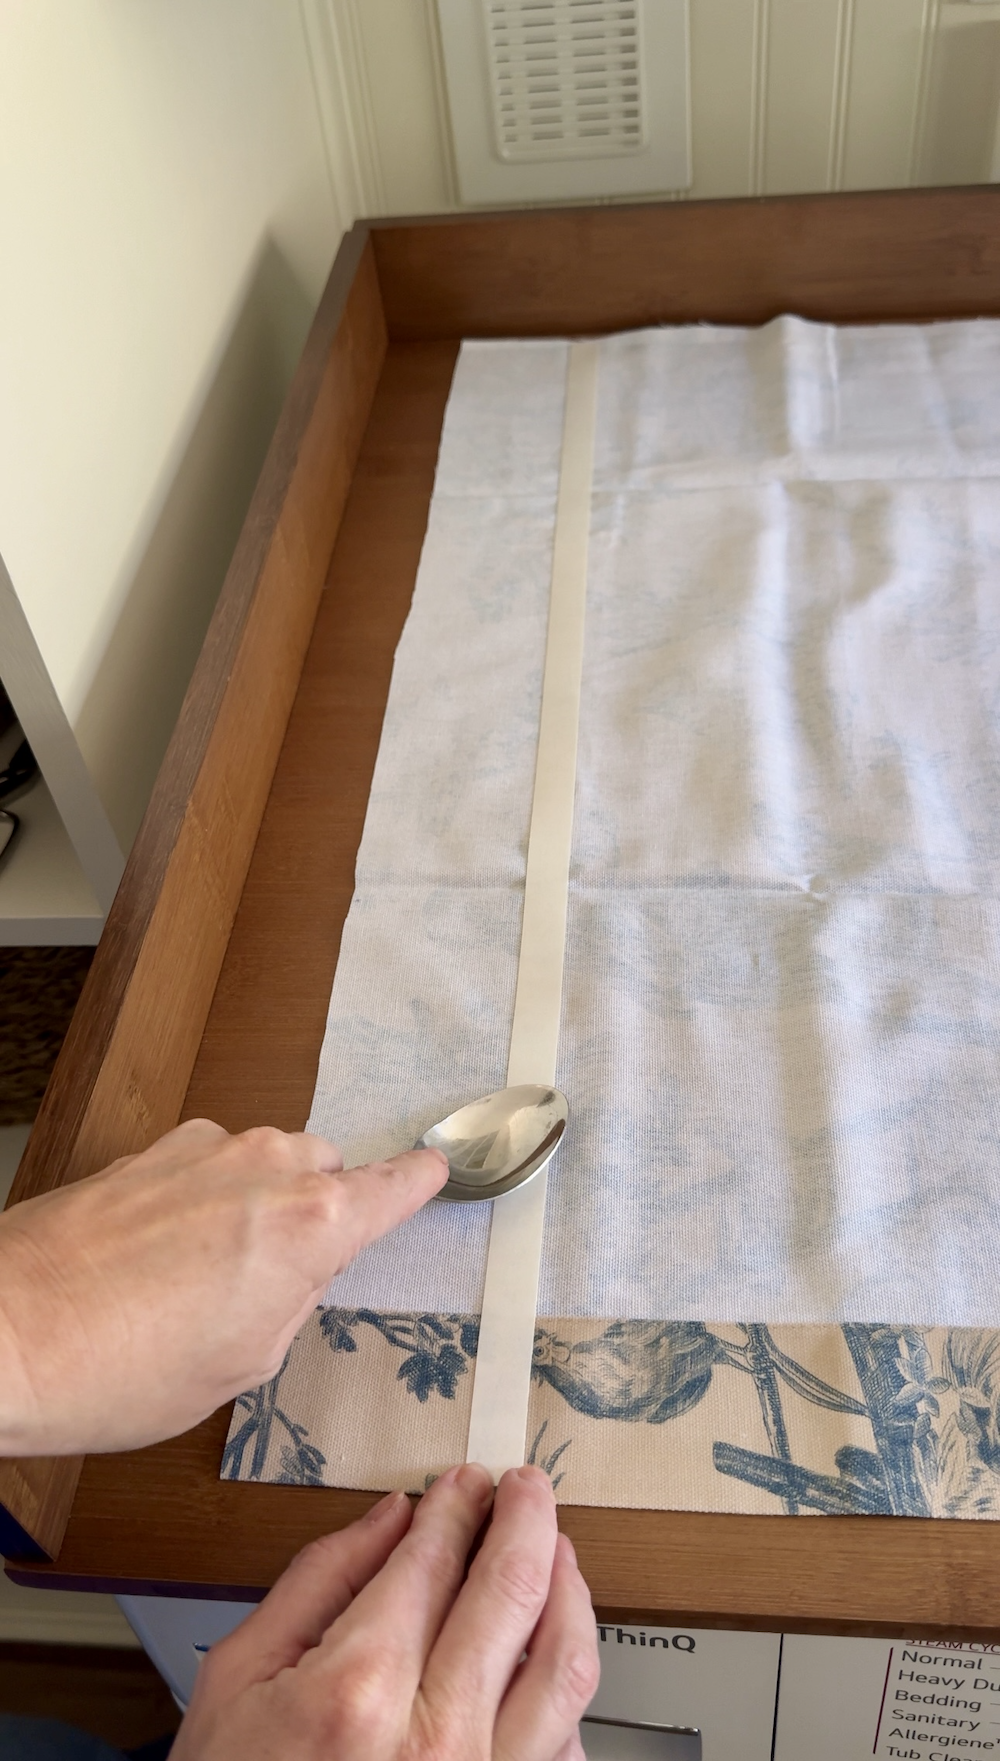
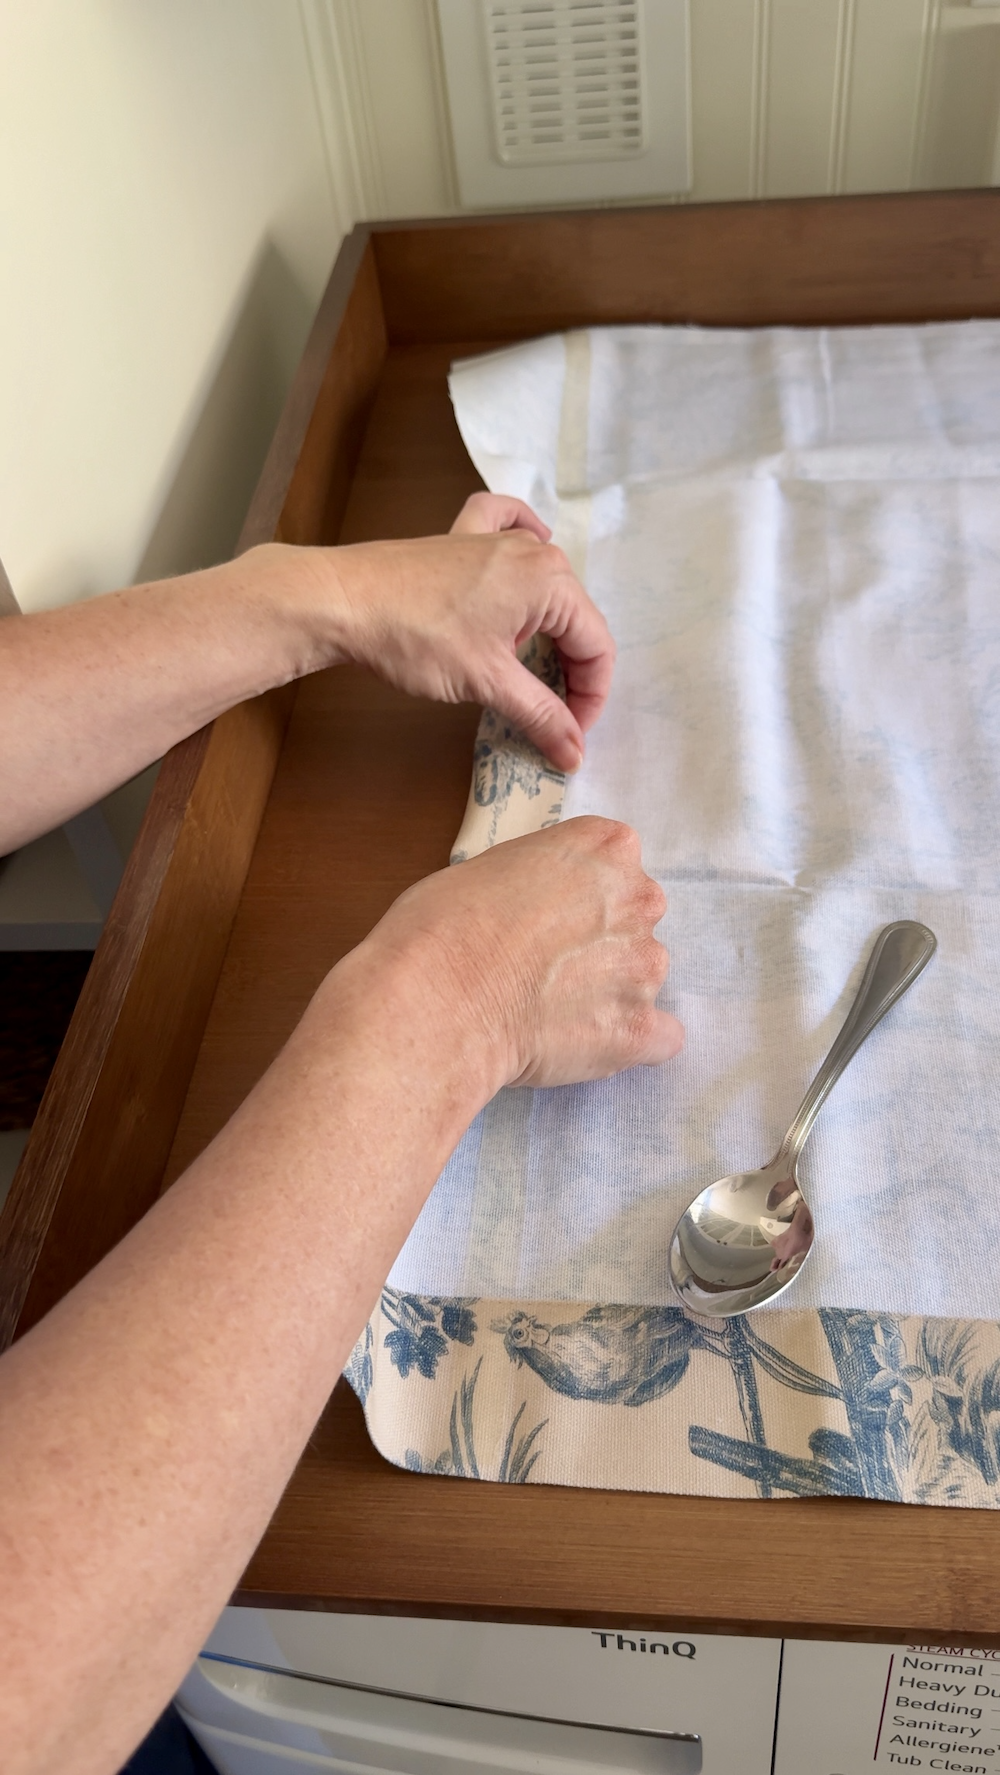
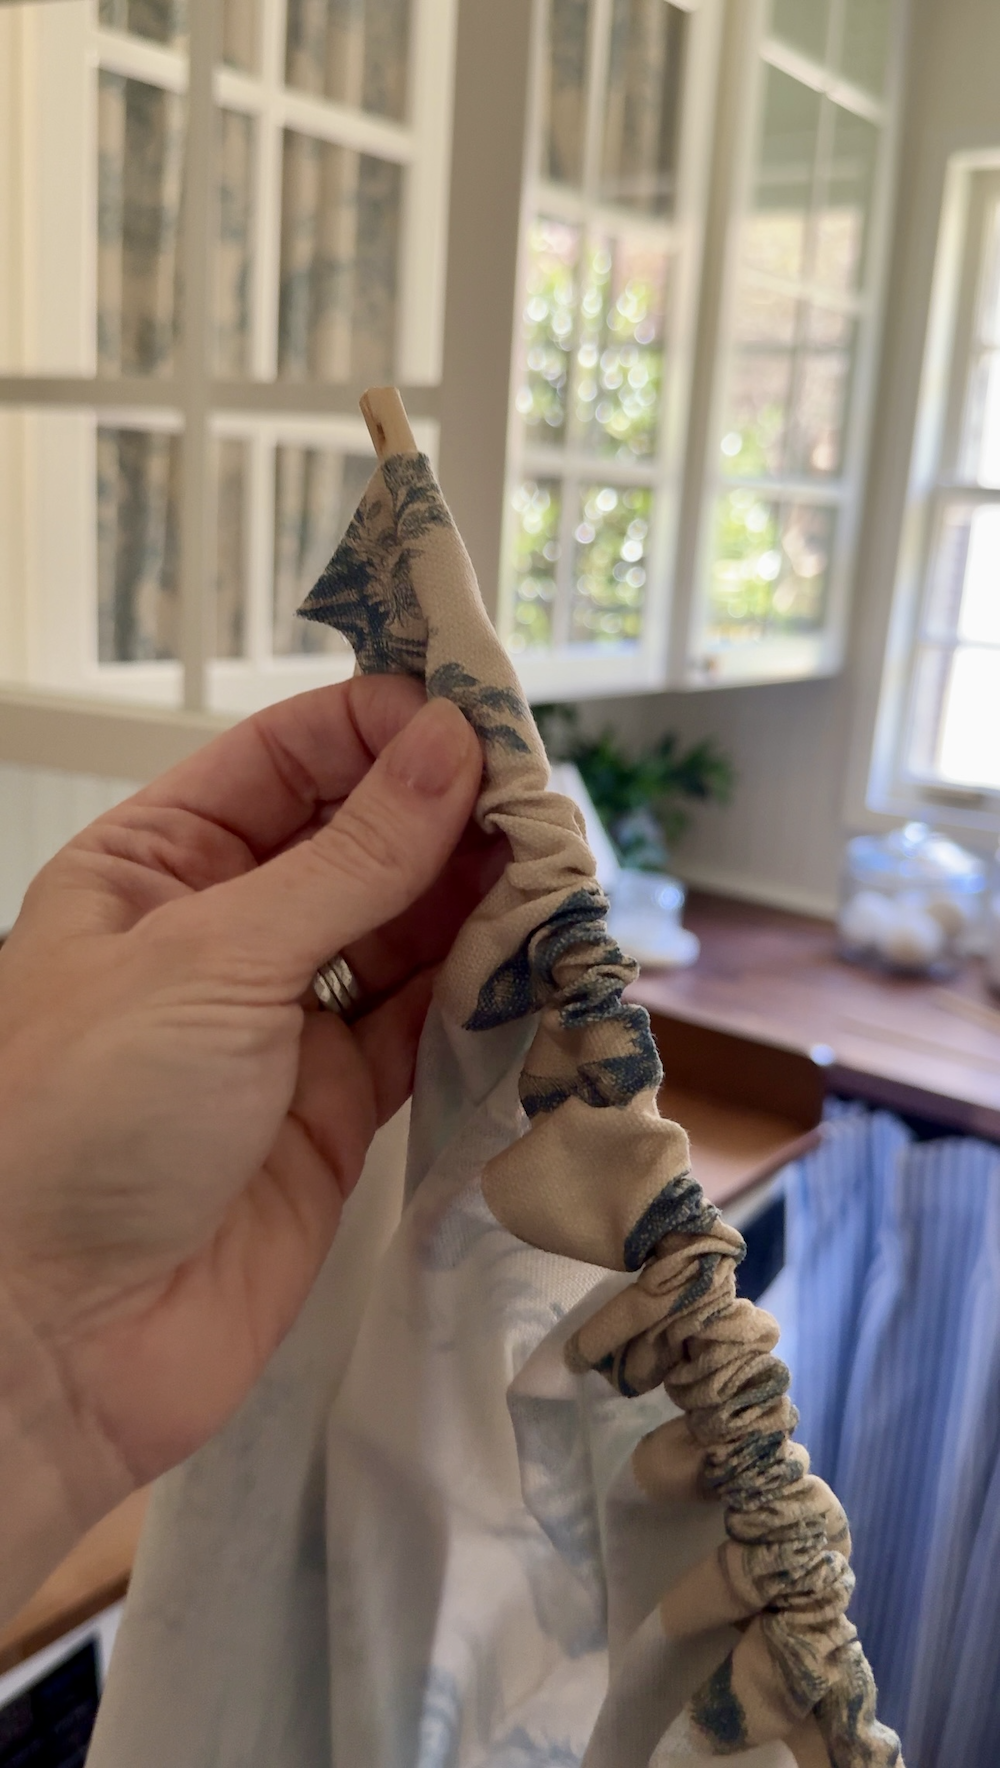
Step 4: Make the dowel channels (high and backside)
Create a neat channel on the high and backside of the material panel: Fold ½″, then one other 1″ and fuse with material fuse tape to type a sleeve.
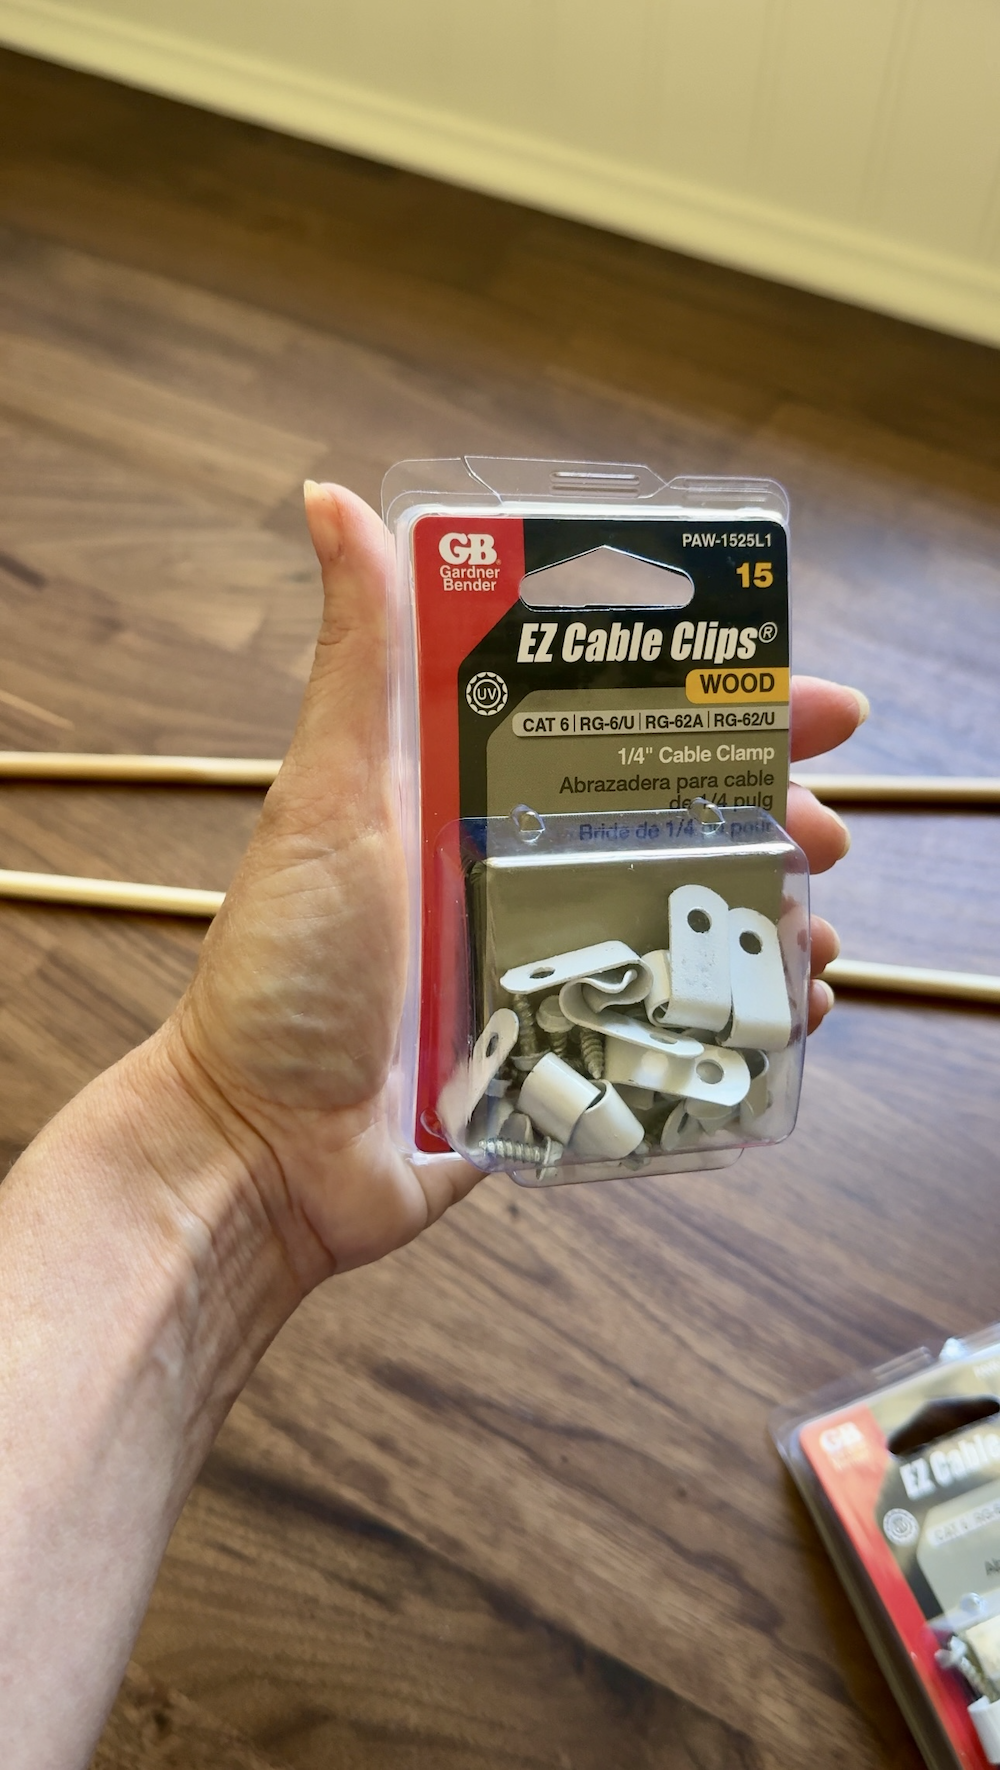
Step 5: Place your cable clips contained in the door body
Open the cupboard and mark cable clip places the identical distance away from the glass as your deliberate material overhang (ex: when you prolonged the curtain 1 1/2″ previous the glass, place the clips 1 1/2″ from the glass).
Pre-drill tiny pilot holes and screw within the cable clips on the very high and really backside contained in the wooden body. (In case your body received’t take screws, use a slim rigidity rod as a substitute.)
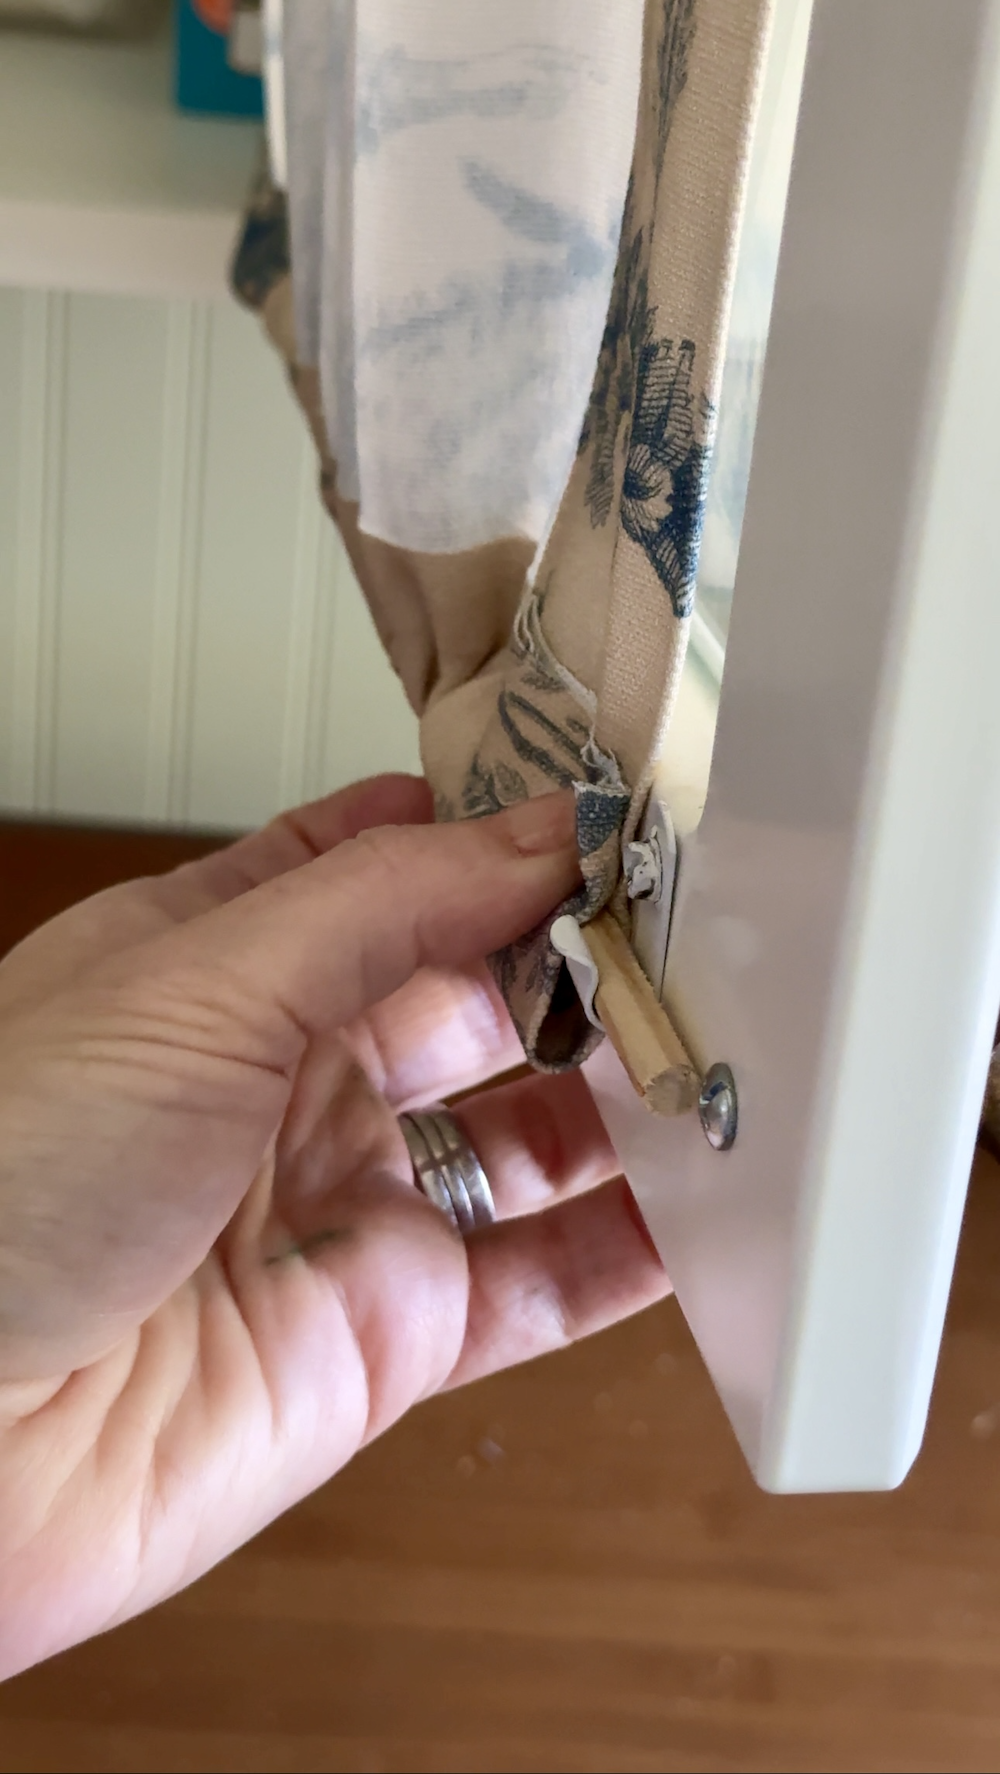
Step 6: Slide the material panel into the cupboard door body
- Gently slide the highest dowel (or high hem edge) into the highest retaining channel behind the wooden body.
- Then decrease the remainder of the panel down into the body, adjusting so the edges and backside align.
- For the underside dowel, slide it into the underside channel as effectively.
Step 7: Alter Cloth
- Verify that your material edge shouldn’t be pinched or dented by the clips.
- At this stage, regulate rigidity, flatten any wrinkles, and make sure full protection.

Step 8: Effective-tune & trim extra
- When you see small puckers or rolls, ease them out by loosening the dowel or shifting the panel barely.
- Trim any extra material throughout the body that may peek out when the door is open
- Shut the door gently and examine from totally different angles. You need even rigidity and no sagging.
Step 9: Repeat for all glass doorways and step again to admire!
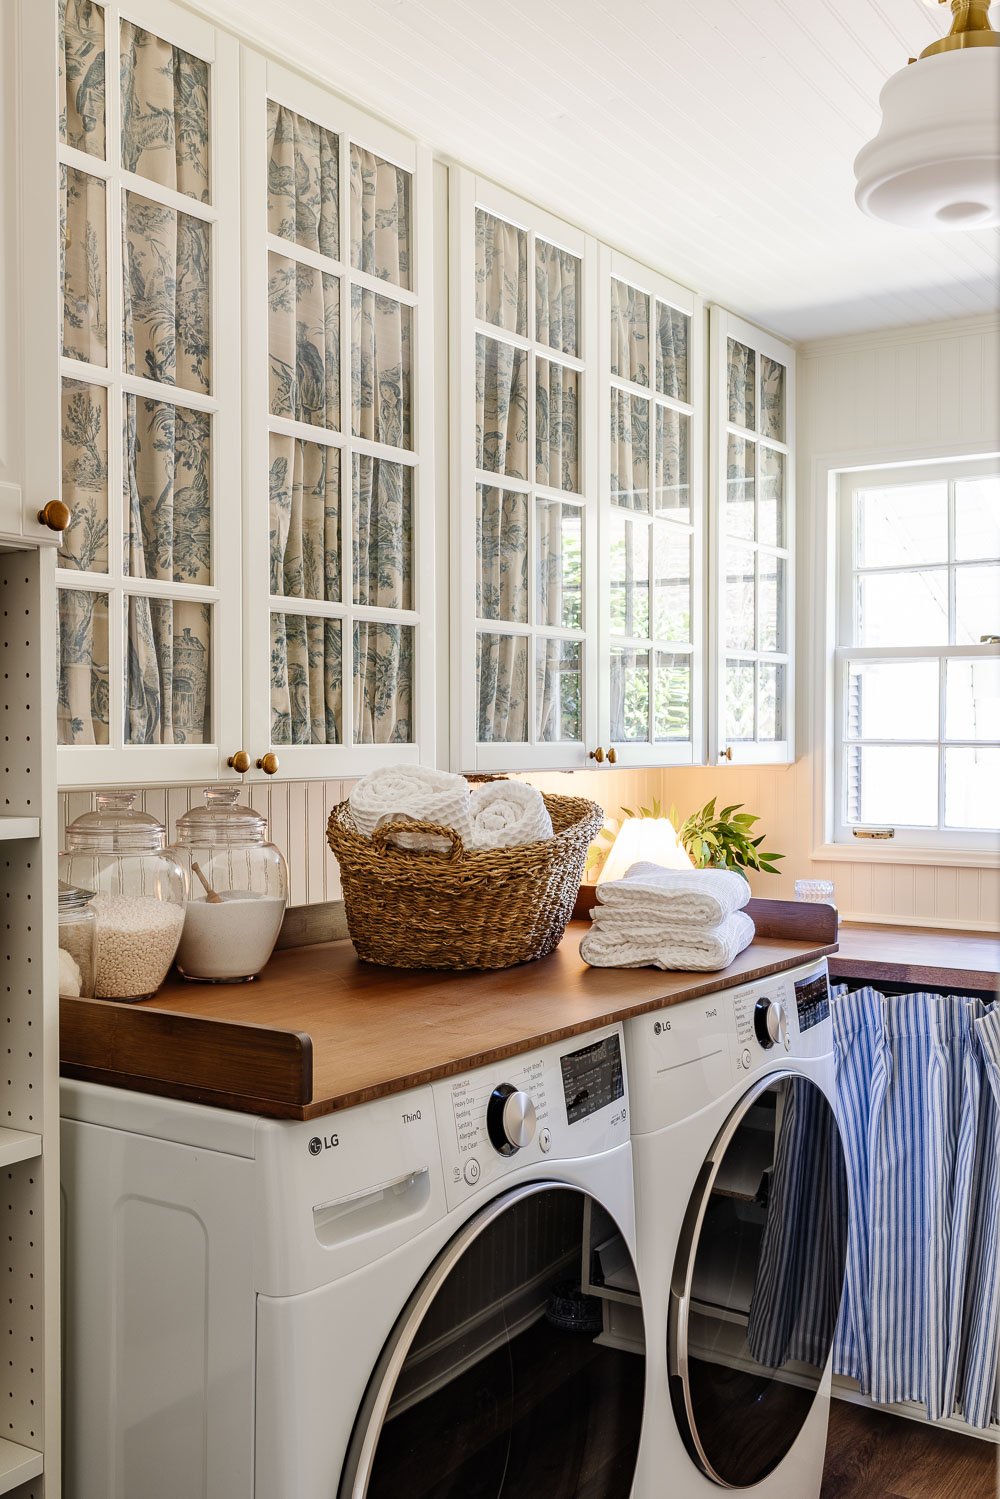
When you do one, the remaining go quicker. I took particular care in our laundry room to match the sample alignment and spacing so the entire wall feels cohesive.
It’s not completely excellent. I’m actually no seamstress. However I feel its imperfection is a part of the appeal.
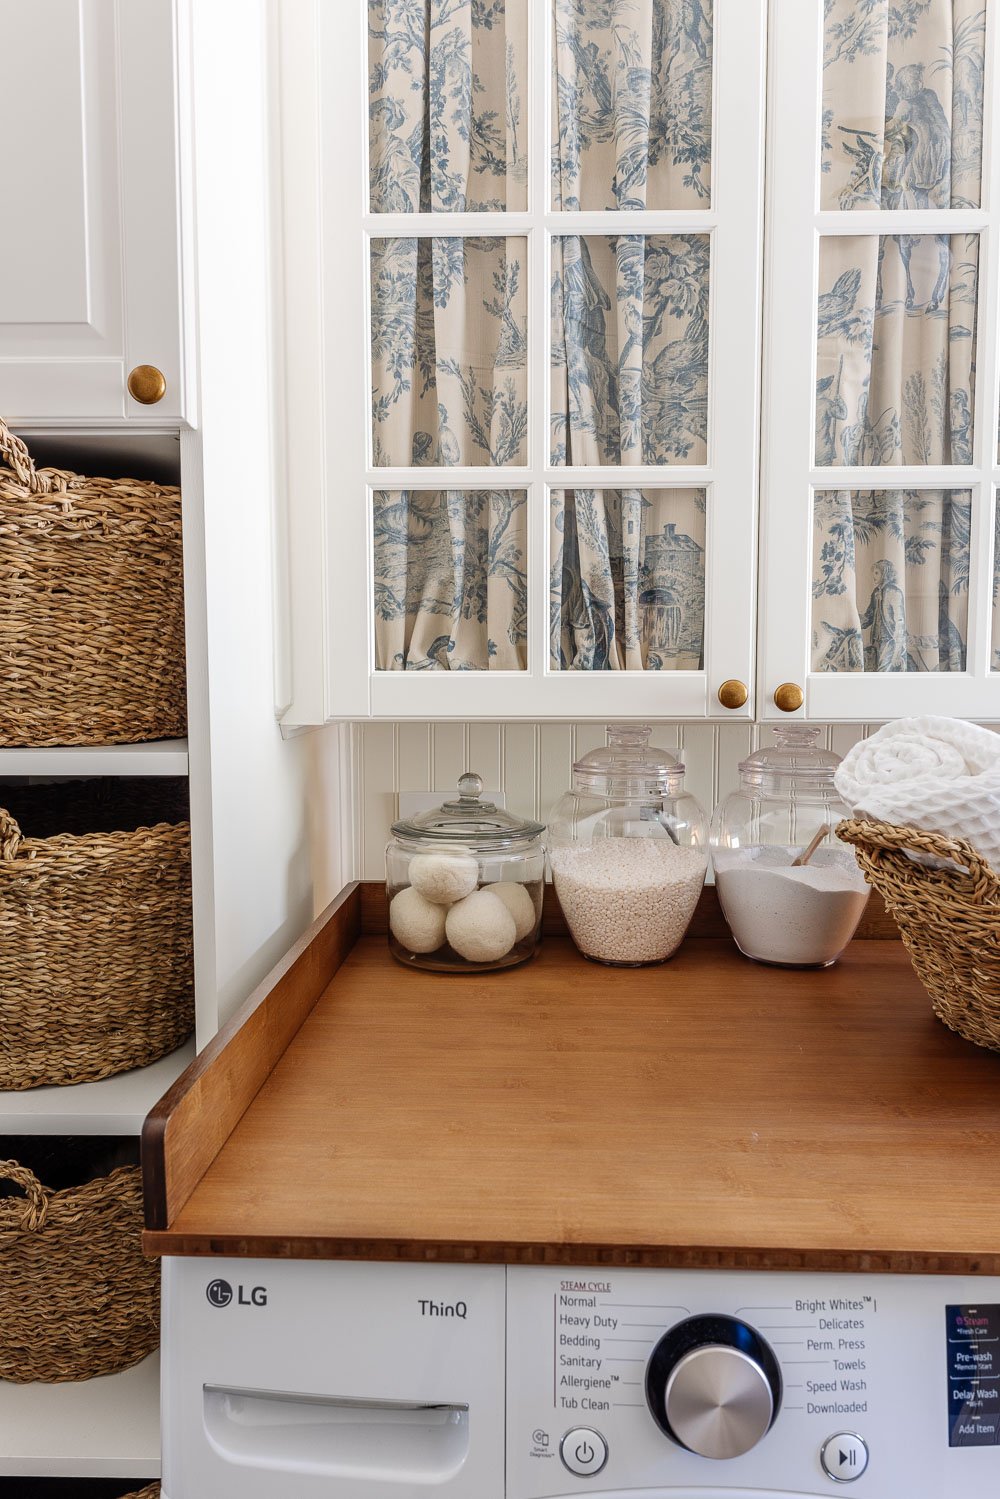
We added this detachable countertop and acrylic jars for detergent so now it’s trying even higher AND is extra useful.
Suggestions + Troubleshooting
- Select the precise material. Heavier materials will present texture and drape fantastically, however very thick ones could not slide simply within the body.
- Be light with clips. You don’t need to injury your material edges or break your cupboard door.
- Go away a tiny hole. About ⅛″ clearance helps keep away from friction.
- Check earlier than last trimming. Stay with the panel for a day or two and see the way it behaves earlier than reducing edges or locking the whole lot tight.
- When you can’t match dowels or rods, an easier technique is to affix small strips of self-adhesive Velcro to the within body and to the again of the material, so the panel simply “sticks” in place. (It’s reversible and straightforward, however offers you much less rigidity management.)
How It Performed Out in Our Laundry Room
In our laundry house, after putting in beadboard and laying the Stainmaster Olympia Oak vinyl plank flooring, the white IKEA cupboards felt nearly too crisp and flat. The glass doorways introduced in a little bit of visible curiosity, however I positively knew I’d need an “off swap” for litter.
This DIY cupboard material technique gave us the management: all of the appeal of glass doorways plus the flexibleness to cover what’s behind. The primary panel took possibly an 20 minutes (hemming, measuring, trial sliding), however the remaining went quicker.
Now once I open the laundry room door and see that wall of cupboards, it has character with refined texture and sample as a substitute of feeling sterile.
Additionally: as a result of it’s completely reversible, if someday I need clear glass all over the place, I simply pull out the material and it’s again to default.
Blue Toile Cloth | Detachable Countertop | Ticking Stripe Curtain | Detergent Jars | Baskets | Mini Lamp | Gentle Fixture | Waffle Towels | LVP Flooring
It offers me peace understanding that even once I’m not completely organized, the eyesore is gently masked.
When you do this, I’d love to listen to how your material selection turned out or see a photograph!
Extra DIY No Sew Venture Concepts

")

")


")
