


In my article in #318, on pp. 46–53, I present learn how to set up straight knife hinges, that are used with overlay doorways. Right here, I’ll clarify every part else it is advisable to know to put in the offset sort of knife hinges, that are used for inset doorways. There are a number of further steps concerned, however the course of isn’t any harder. I’ll be skipping over a few of the steps described in the primary article, so you’ll want to learn that one fastidiously earlier than working your method via this one.
|
|
|


To put in these hinges, you’ll want your case constructed and dry-fit, however not glued up, since you’ll assemble and disassemble it in the course of the hinge-mortising course of. Have your door constructed as properly. Make it outsized by 1/8 in. or so in width and top. If the case finally ends up in any respect out of sq., you’ll want further door materials for profitable becoming.
Template has an L-shaped opening
The template strategy I reveal in the primary article works simply as properly for these L-shaped offset hinges, although the template features a few extra elements. Additionally, due to the L-shaped hinge mortises, the template have to be flipped over to rout mortises in each ends of the door. Due to that, it has a fence groove on each faces.
It’s also possible to use the identical pattern-routing bit I utilized in the primary article—Amana’s No. 45475 3/8-in.-dia. flush-trim bit—which has a slight offset between the bearing and cutters. This must be factored in once you’re slicing the elements for the template. A set of dial calipers is indispensable for fine-tuning the match.
After slicing a check mortise with the template, minimize the shallow grooves for mounting the fence. Then type a tongue on the fence that matches the slot, and drill and countersink screw holes as earlier than.
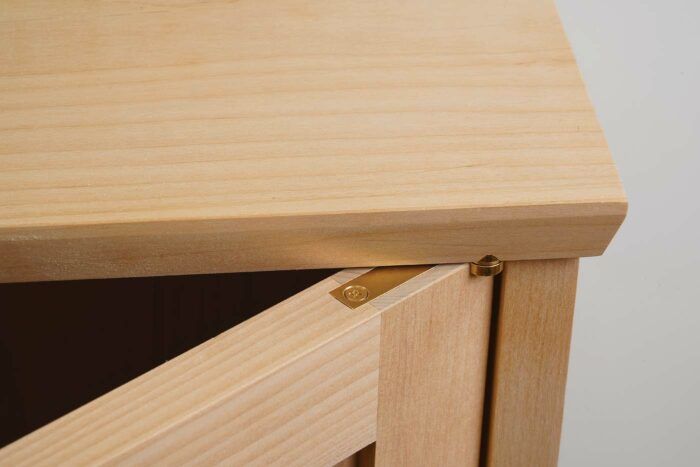
Be aware that the lengthy a part of the hinge won’t find yourself centered on the door’s thickness this time. What issues is that the pivot level of the hinge is centered on the entrance fringe of the door. This can be certain that the door features correctly with out binding.
Template for Correct Mortises
This template is a bit more advanced than the one for straight hinges. You’ll be slicing two strips out of your template board, and crosscutting and aligning these to create the L-shaped opening wanted right here.
|
|
|


Make a setup block for case mortises

|
|
|


|
|
|


 |
 |
As with the straight hinges, you’ll set up the case elements of those hinges first. And also you’ll use an analogous methodology to put out the hinge areas.
Once more, you’ll have to dry-fit the case and make a setup block the identical thickness because the door. Minimize hinge mortises at each ends of the block, with the template’s fence referenced off the identical face for every one. You’ll want to change the fence to the opposite face of the template to chop the second mortise.
Use the block to place one leaf of every hinge correctly on the highest and backside of the case, utilizing double-stick tape. Mark round every leaf to document its place, and you’re prepared to chop the case mortises. As earlier than, the fence comes off right here—to permit the template to succeed in the mortise areas—and also you’ll align it along with your pencil traces the identical method.

Glue up the case and match the door
When you’re pleased with how the hinges match into the case, you possibly can glue it up. When becoming the door to the case opening, go for a 1/32-in. hole on the highest, backside, and hinge edges (however not the latch edge simply but). Begin by trimming the door till it simply barely suits into the opening. A crosscut sled or observe noticed works properly right here. As you trim the underside edge, make sure that the hinge aspect of the door traces up parallel with the hinge aspect of the case. Subsequent, with the door sitting within the case on its backside edge, mark the highest edge, then trim it. The hinges have a built-in washer that creates a 1/32-in. hole between the door and the case, so if you happen to trim 1/16 in. from the highest edge at this level, you’ll get the specified 1/32-in. hole above and under the door, as soon as it’s resting on the hinges. Depart the latch aspect of the door untrimmed and tight at this level.
Minimize the door mortises and cling the door

|
|
|


You’re prepared to chop the hinge mortises within the door. The fence goes again on for this step—first on one face of the template, then the opposite. As soon as the hinge mortises are routed, their corners are squared, and pilot holes are drilled, you possibly can cling the door. Then mark the latch aspect of the door for that very same 1/32-in. hole, and airplane it for an ideal match.
I hope this encourages you to make use of knife hinges, which provide unmatched appears and efficiency. The template strategy eliminates the problem and threat normally related to these elegant hinges, leaving you to get pleasure from all of their advantages.
Nice Woodworking Advisable Merchandise

Glue Bottle
My favourite glue bottle is a ketchup dispenser. Cheap and you may minimize the tip to customise glue distribution. Should you all the time put the cap again on, it by no means clogs.
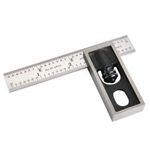
Starrett 4″ Double Sq.
Head is straightforward to take away, change, and lock down; narrowest blade, at 5⁄8 in., made it simpler to suit into tight locations; arduous to learn beneath vibrant lights.
WoodRiver 3″ Edgeband Spring Clamp
These spring clamps have massive 2″ jaws which might be excellent for deeper capability clamping, as properly an an elastic, that gives lateral clamping strain on edge banding, the place deeper clamps cannot attain.
Join eletters at the moment and get the most recent strategies and how-to from Nice Woodworking, plus particular affords.
Obtain FREE PDF
once you enter your e mail handle under.
")

")


")
