


I’ve daydreamed about shopping for a yard film set-up (projector, display screen, and so on) for a number of summers now. However the logistics and potential expense at all times stopped me… till final month!
And now I really feel foolish for ready, as a result of we pulled it off with simply 3 items of kit that price lower than $200 whole. That’s cheaper than the price of some projectors alone… or a number of household journeys to the movie show.
Along with not spending quite a bit, we additionally needed gear that may be straightforward to arrange. So on this publish we’ll cowl:
- The three objects we bought (one is non-obligatory!)
- The best way to arrange your out of doors film evening
- Ideas we realized alongside the best way
Tools For An Out of doors Film Night time
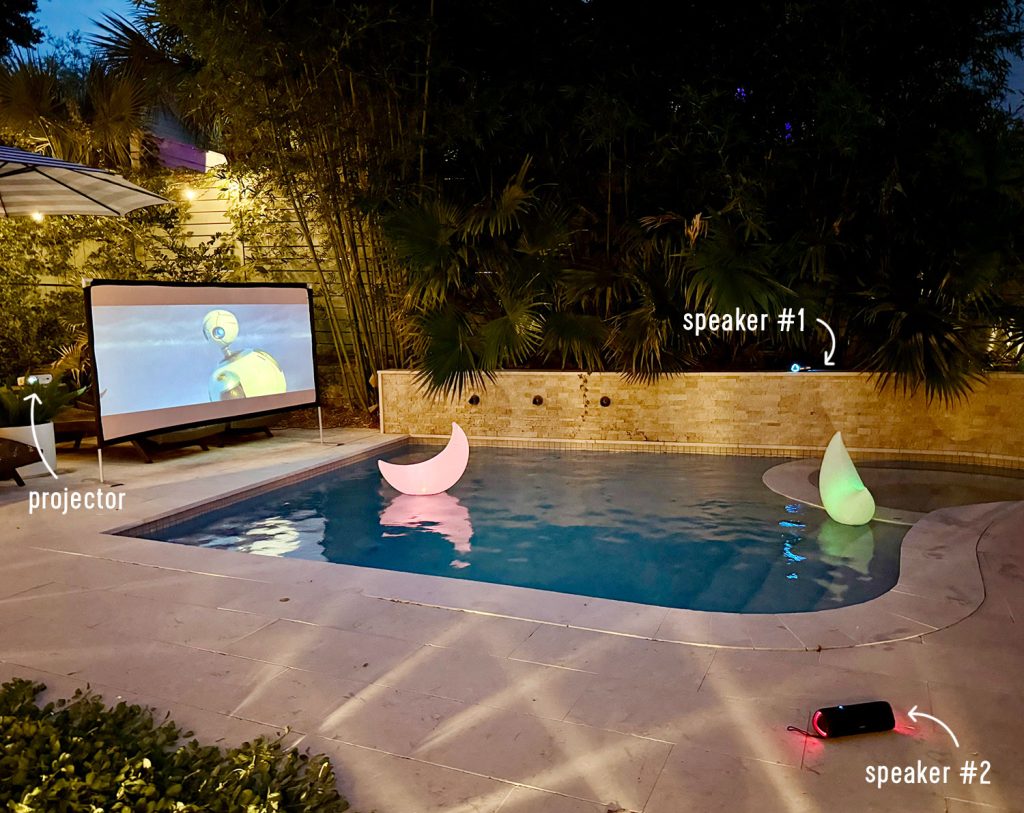
Listed here are the three items of kit we bought – and the way a lot we paid! – to set-up an outside cinema in our yard:
- Sensible Projector ($99)
- Collapsible Out of doors Film Display ($39)
- Bluetooth Audio system ($46 for two)*

*The audio system are non-obligatory as a result of the projector has built-in audio system. Nonetheless, connecting transportable audio system will provide you with extra flexibility over your setup, together with making a “encompass sound” impact.
You possibly can watch how briskly it’s to set every little thing up on this time-lapse video we filmed the opposite evening. I had the display screen assembled in lower than 3 minutes! Don’t fear, we nonetheless sped it up for you…
Be aware: It’s also possible to watch this video on YouTube
1. Sensible Projector
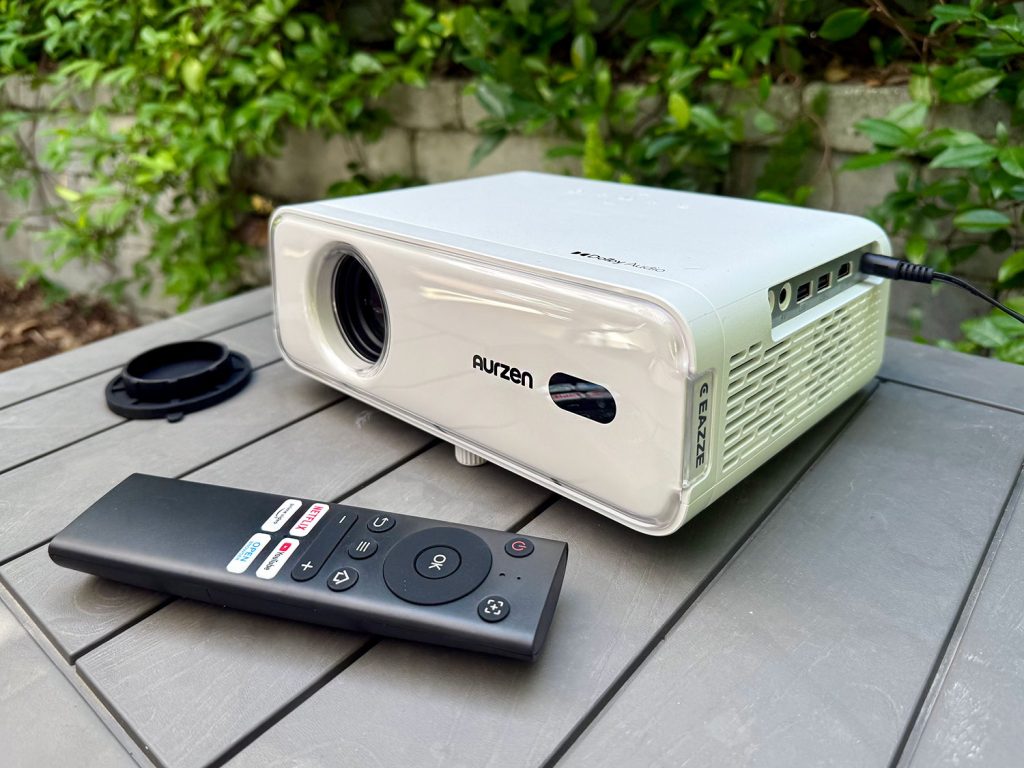
We selected the Aurzen EAZZE D1 Sensible Projector, which was marked down from $149 to $99 once we bought it. I got here throughout cheaper and pricier choices in my analysis, and landed on this middle-ground choice for a number of causes:
- It’s WiFi-enabled, that means it might probably stream providers like Netflix with out having to attach different cords or gadgets.
- It’s Bluetooth-enabled, permitting you to boost your audio expertise with exterior audio system.
- It auto-adjusts the image, that means issues like focus and keystoning (when the picture appears skewed) are adjusted for you. You possibly can manually alter them as effectively.
- It could mission from in entrance OR behind the display screen, which supplies you extra placement choices.
These 4 options have been essential as a result of I needed the setup to be versatile, low-stress, and never contain a variety of additional cords. And total, we’re EXTREMELY PLEASED with this buy. There are some minor drawbacks (which I’ll share within the “suggestions” part) however they’d be points with any projector, they usually’re straightforward to beat.
2. Collapsible Out of doors Film Display
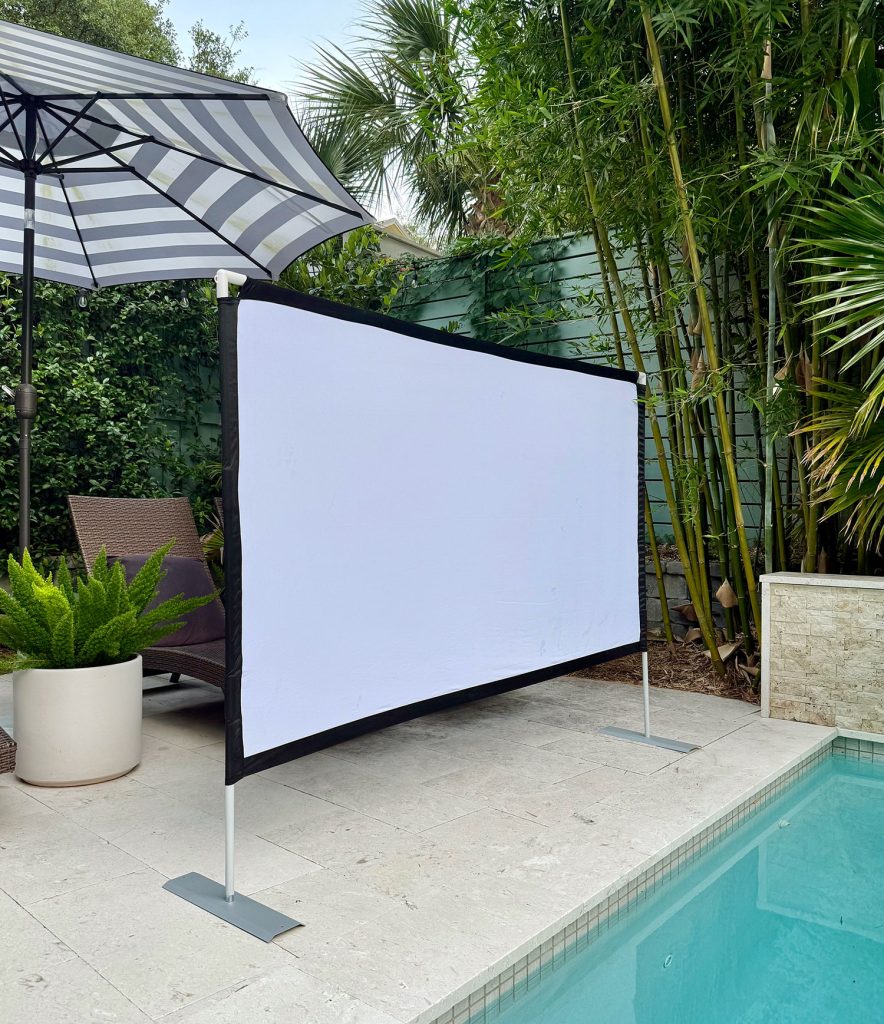
We thought of a DIY display screen comprised of PVC and a mattress sheet or drop material, however determined to “splurge” on this $39 out of doors projector display screen as an alternative. We selected the 80″ measurement (measured diagonally), nevertheless it additionally is available in 100″, 120″, and 150″ variations. Relying on gross sales, the bigger variations are typically cheaper! So simply go along with what you suppose will suit your house the very best.
We selected the sort of display screen as a result of:
- It’s freestanding, so no must put hooks or holes in your own home
- It’s simple to assemble
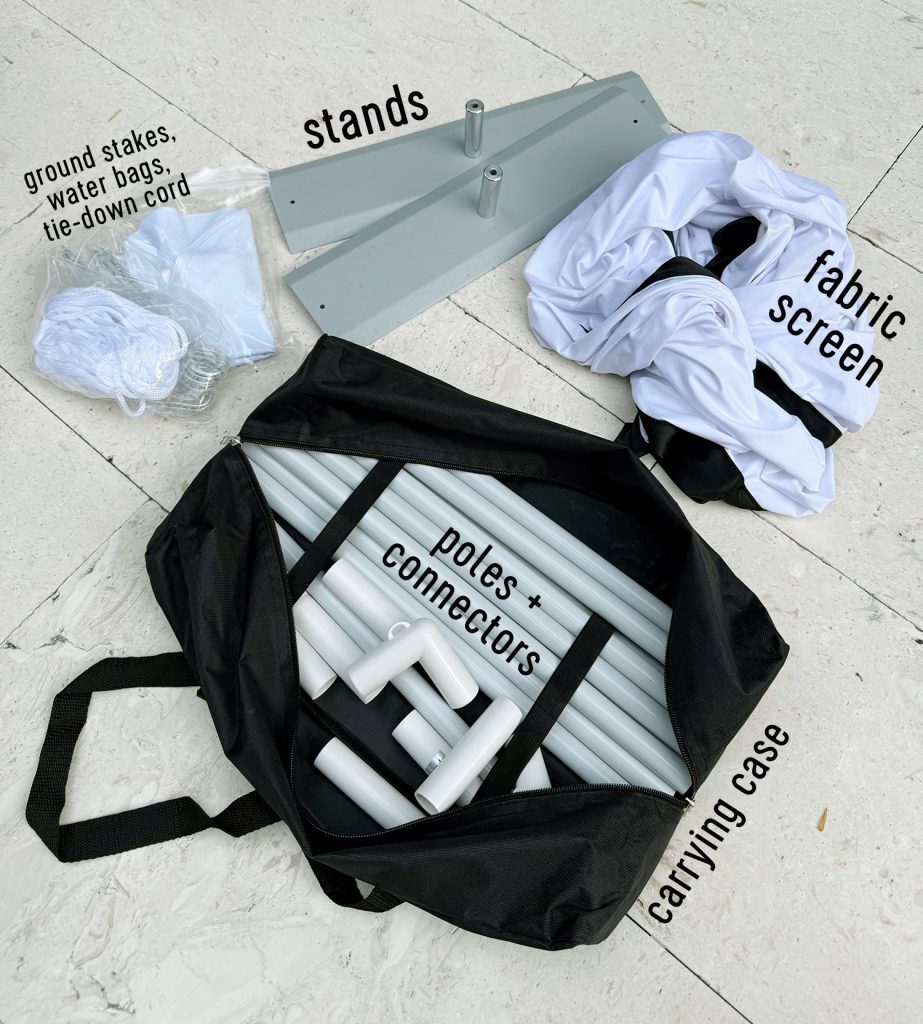
- It matches right into a zippered storage case when collapsed (see under)
- It additionally comes with floor stakes, water luggage, and tie-down cords to assist anchor it in place. We haven’t wanted any of those but.
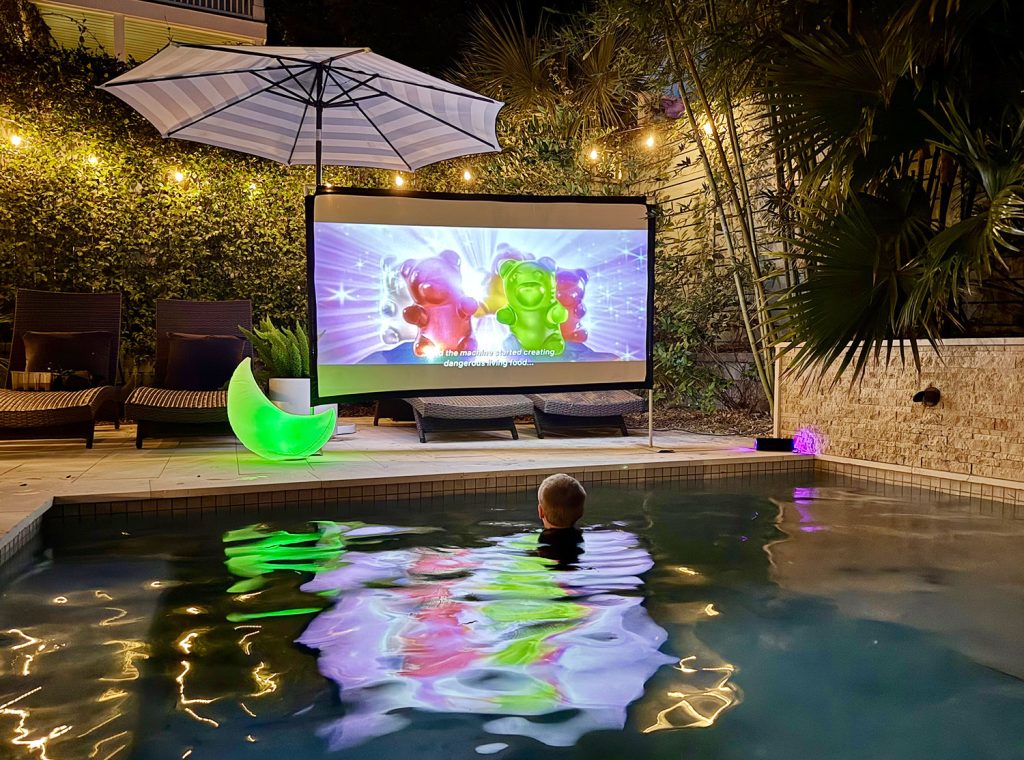
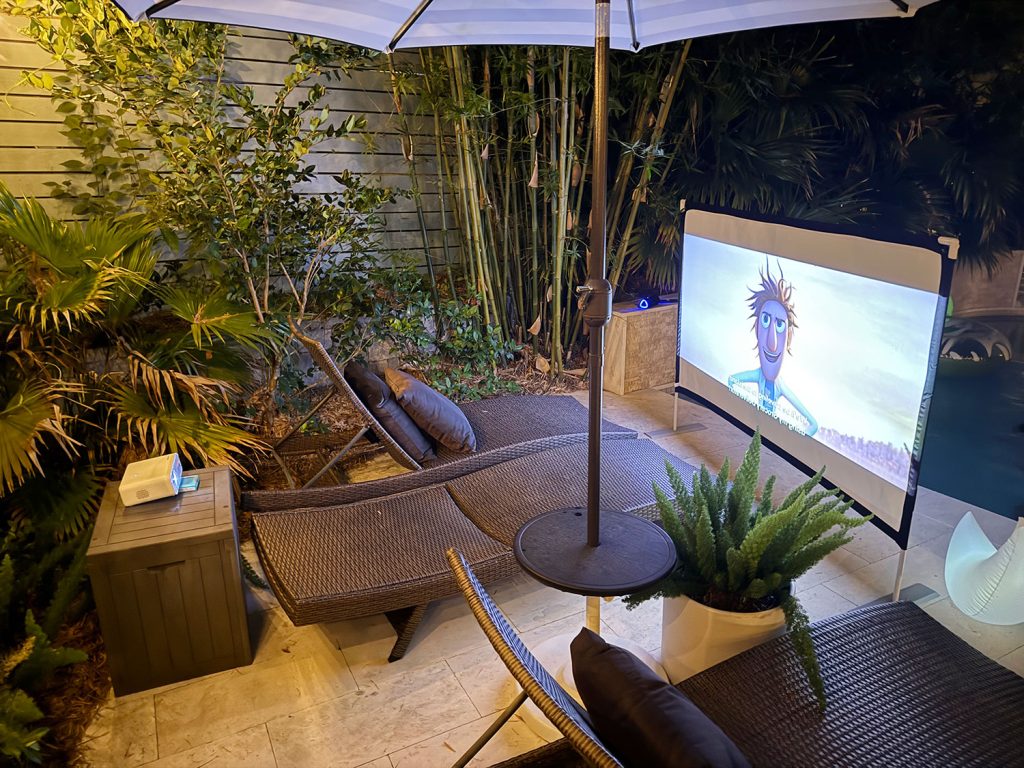
We had a number of concepts about the place we’d set every little thing up in our yard, and none concerned projecting onto a wall or floor the place we may dangle one thing. So having a freestanding display screen on a stand allowed us to simply check out a few preparations.
Plus, when the summer time months cross, we love the choice of positioning the display screen across the firepit as an alternative of the pool. I’m already enthusiastic about cozy motion pictures with blankets and a roaring fireplace!
3. Bluetooth Audio system
After our first few nights utilizing the built-in speaker on the projector, we determined to purchase two of these budget-friendly Bluetooth audio system ($23 every on the time). The built-in speaker wasn’t dangerous. In truth, it was fairly loud (and simply adjustable) – so these are positively not required.
Why’d we purchase them then? Conserving the projector inside earshot of the pool meant a better danger of it getting splashed, walked into, or stood in entrance of. So switching to wateproof Bluetooth audio system permits us to put the projector out of the best way, whereas not sacrificing our capability to listen to the film.
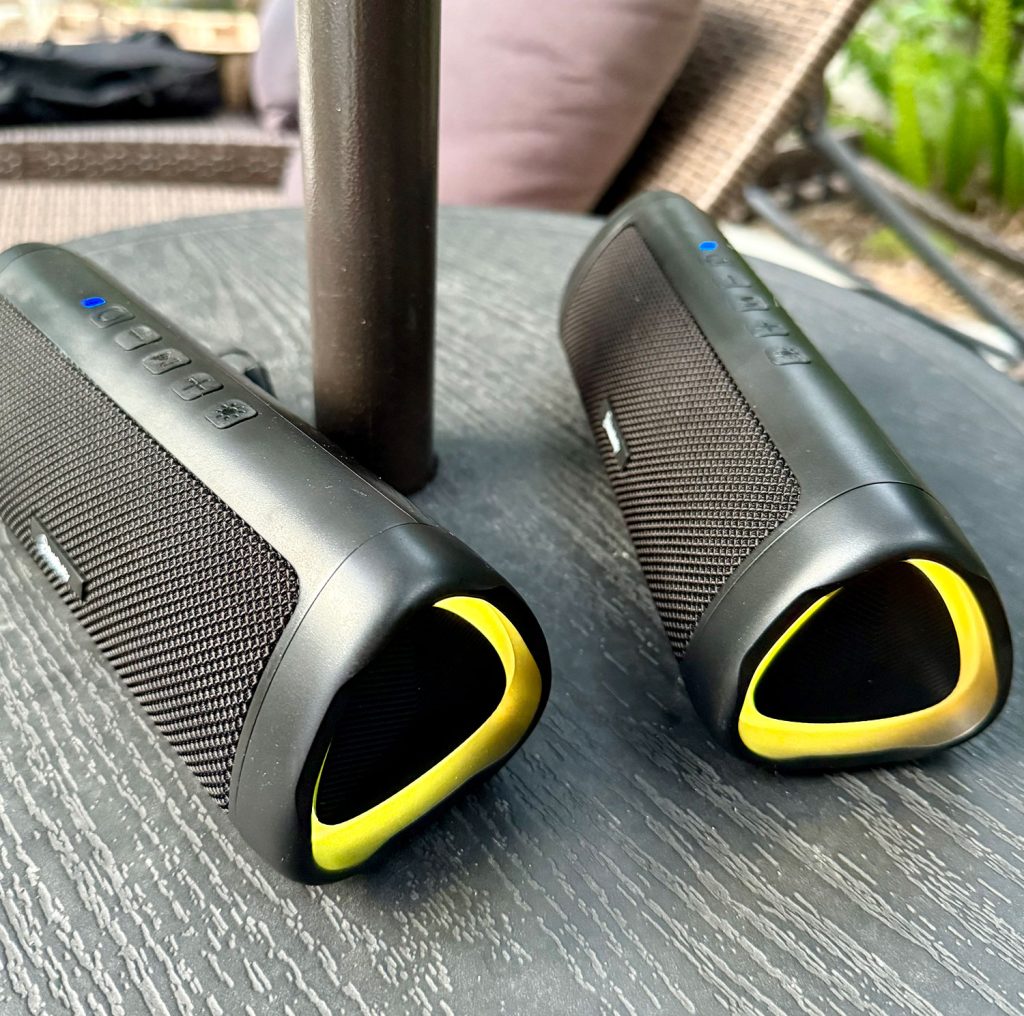
We selected these particular audio system as a result of they’ll pair with one another, that means we are able to create a encompass sound expertise (with out spending large cash on a Sonos system or one other extra expensive choice). In addition they give us a number of placement flexibility relying the place we’re and what we’re doing. For instance, we may transfer one subsequent to the new tub and even by the firepit if some persons are staying dry that evening.
One factor to notice is that connecting Bluetooth audio system disables the projector’s built-in audio system, so don’t anticipate it to be a 3rd sound supply on this set-up. Two audio system has been loads of us, in order that’s only a heads up!
Setting Up A Yard Film Night time
Our aim was to maintain the setup course of straightforward and painless, as a result of we knew something sophisticated would discourage us from truly utilizing it. So right here’s a fast rundown of what we do:
Step 1: Assemble The Film Display
First, you wish to set-up your display screen. That approach you’ll have your projection floor prepared when it comes time to regulate the image on the projector.
Display meeting takes lower than 5 minutes. It’s form of like placing up a tent – solely a lot simpler! The body is comprised of PVC pipes that pop along with the supplied connectors. Slide every part by way of the material sleeves on the sides of the display screen, join the corners, and set it onto the metallic stands. That’s it.
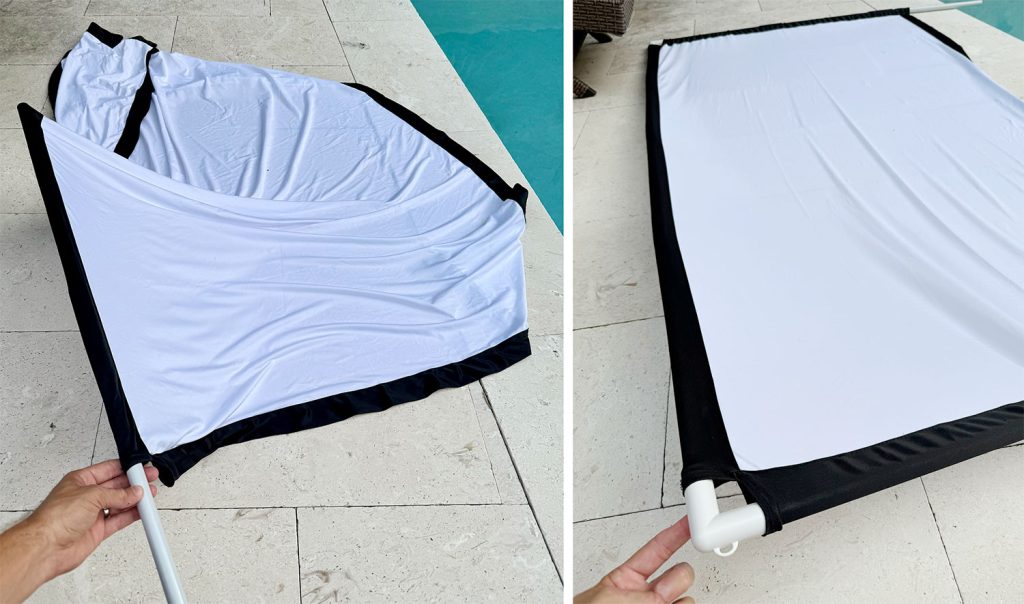
We left off one part of PVC on every vertical aspect in order that our display screen sits nearer to the pool degree. That’s why ours appears shorter than what’s pictured on-line. We discovered that to be the extra snug viewing from within the pool.
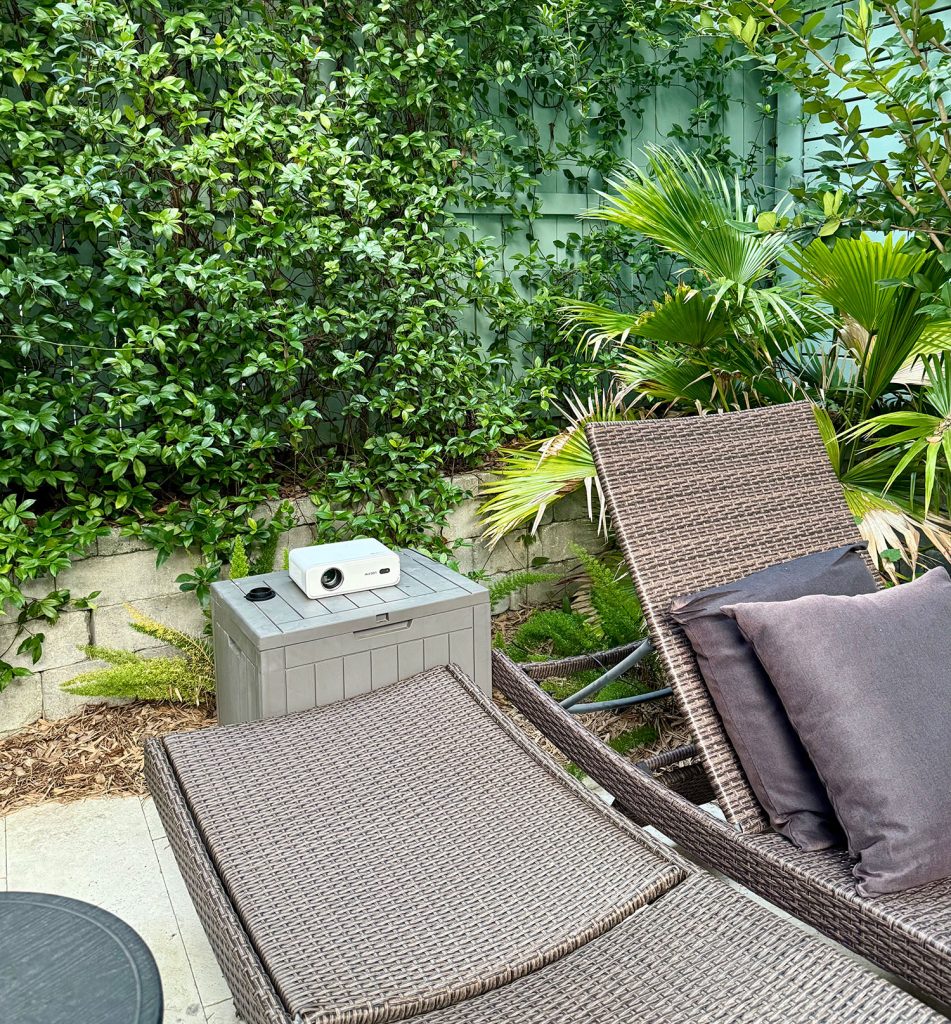
Step 2: Place & Energy Up Your Projector
Subsequent, discover a great spot to your projector. This can be simple for some, and tougher for others. However listed here are some issues to bear in mind:
- Know your energy supply (we use an extension wire plugged into an exterior outlet).
- Make sure that your cords don’t grow to be tripping hazards at midnight.
- Place the projector on an elevated, flat floor, like a aspect desk or sturdy field (we quickly transfer our pool toy storage field).
- There’s an adjustable foot beneath the entrance of projector, however you may additionally want a ebook or different object to angle it to the best peak.
- Contemplate projecting from behind your display screen to attenuate obstructions & hazards.
- Your projector does NOT should be precisely straight on, due to keystone correction within the settings. That is EXTREMELY HELPFUL!
As soon as it’s typically in the best spot, flip in your projector so you may calibrate every little thing extra exactly.
Step 3: Modify Your Image
The projector we purchased routinely adjusts focus and keystone as quickly because it activates. You possibly can reset or fine-tune these later if wanted, however we discovered this function to be very useful! It really works higher when it’s darkish sufficient exterior, so you could should be affected person.
If the projector doesn’t take you to a set-up menu, you may entry it within the high nook of the house display screen. Right here’s the place you’ll find essential settings like:
- Wifi Connection
- Bluetooth Pairing
- Zoom
- Entrance or Rear Projection (rear projection will mirror the picture)
- Keystone (guide changes OR redo the auto-adjustments)
- Focus (guide OR auto)
The projector comes with an ordinary distant management to navigate. Additionally, any time the projector detects that you just’ve shifted its placement, it’ll redo the auto-focus and auto-keystone. My solely criticism is that when that occurs, it undoes any guide settings (like zoom).
Step 4: Join Your Audio system
This step isn’t obligatory in case you’re utilizing the projector’s built-in audio system. However in case you’re connecting a Bluetooth speaker – like the pair we purchased – you’ll want to attach them to the projector from the Settings menu.

With these particular audio system, you’ll must pair them to one another earlier than pairing them to the projector. That’s the way you’ll be capable of obtain a “encompass sound” model by inserting every speaker on reverse sides of the viewing space.
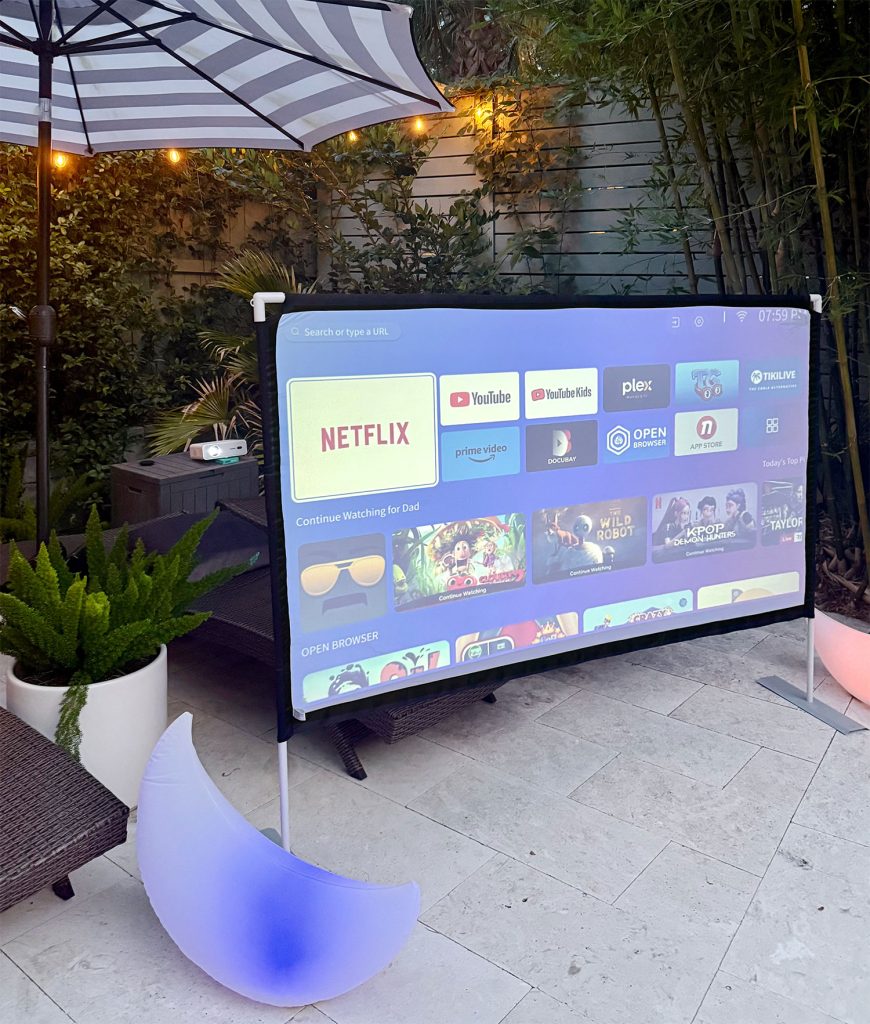
Step 5: Stream Your Film
Due to the projector’s built-in Wifi, you may simply signal into your Netflix, YouTube, or Prime Video accounts and stream straight from the projector.
Nonetheless, if you wish to stream from different providers like HBO Max, Hulu, Disney+, and so on, you’ll want to attach a separate machine (like your cellphone, laptop computer, Roku or Hearth TV stick). This is because of licensing restrictions, and the projector producer solely has authorization for Netflix, YouTube, and Prime Video. The projector has 2 USB ports and 1 HDMI port.

The projector comes with a brief HDMI cable, so you should utilize one thing like this $10 adapter wire to attach a laptop computer. You additionally might be able to display screen mirror some movies out of your cellphone, however we didn’t have luck with that.
Step 6: Get pleasure from!
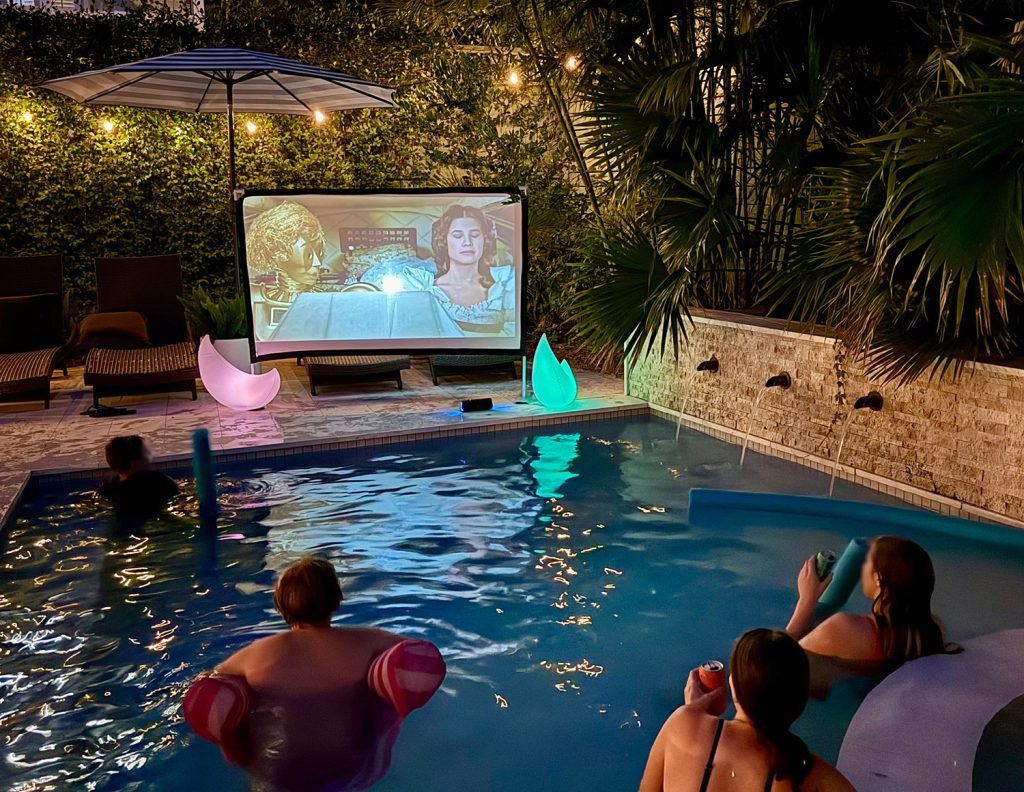
Seize your chairs, floats, drinks, popcorn, or no matter else and luxuriate in!
Step 7: Pack It Up!
Having the ability to break down shortly was one other large should for us. Particularly since we’re often drained by the tip of the night (can’t begin the film till it’s darkish, so film nights usually finish fairly late!). However we additionally don’t wish to go away stuff out in a single day to get moist or dewy.
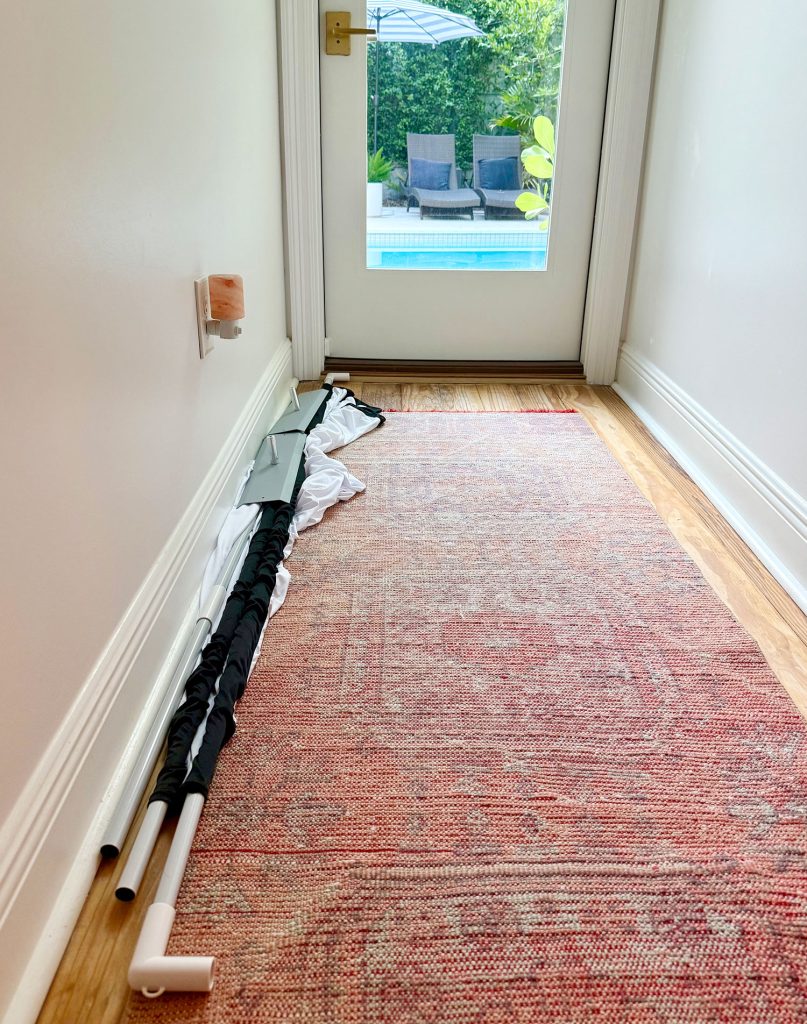
The projector is straightforward to place away – simply flip off and unplug! Identical with the audio system. The display screen takes somewhat extra time to disassemble and organize again into the carrying pouch, so we frequently simply pull the display screen aside on the corners so it may be tossed inside for the evening (proven under). Then within the morning we are able to rigorously pack it away once we’re extra awake!
It actually does collapse all the way down to be very small and simple to retailer. The whole lot matches properly in my closet when not in use.
All in all, we’d say set-up takes round quarter-hour (relying on how a lot futzing you must do along with your image) and fewer than 5 minutes to interrupt down.
Useful Ideas / Issues to Know
Right here are some things that we want we knew upfront about this out of doors film set-up.
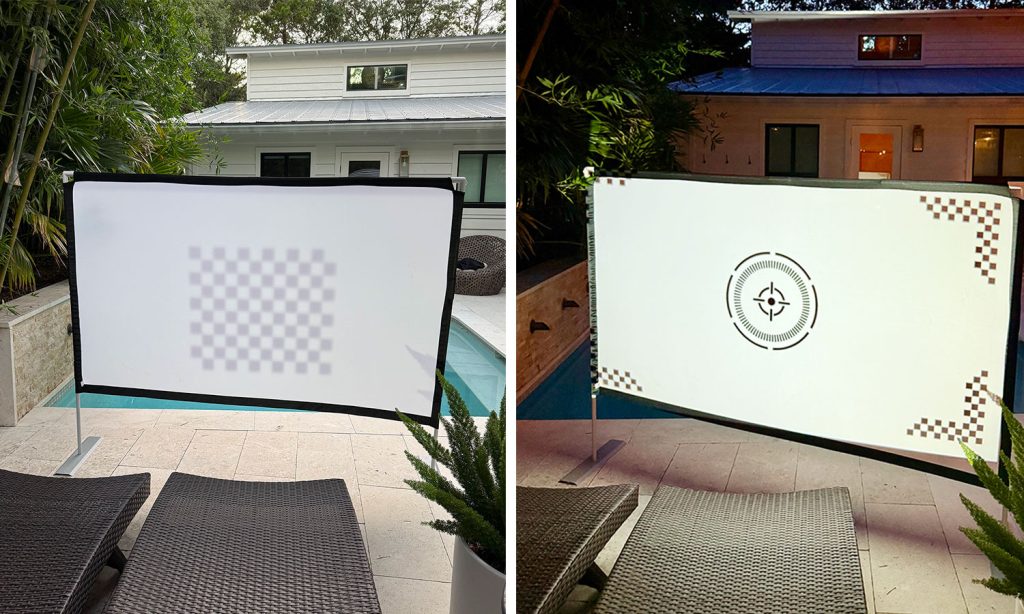
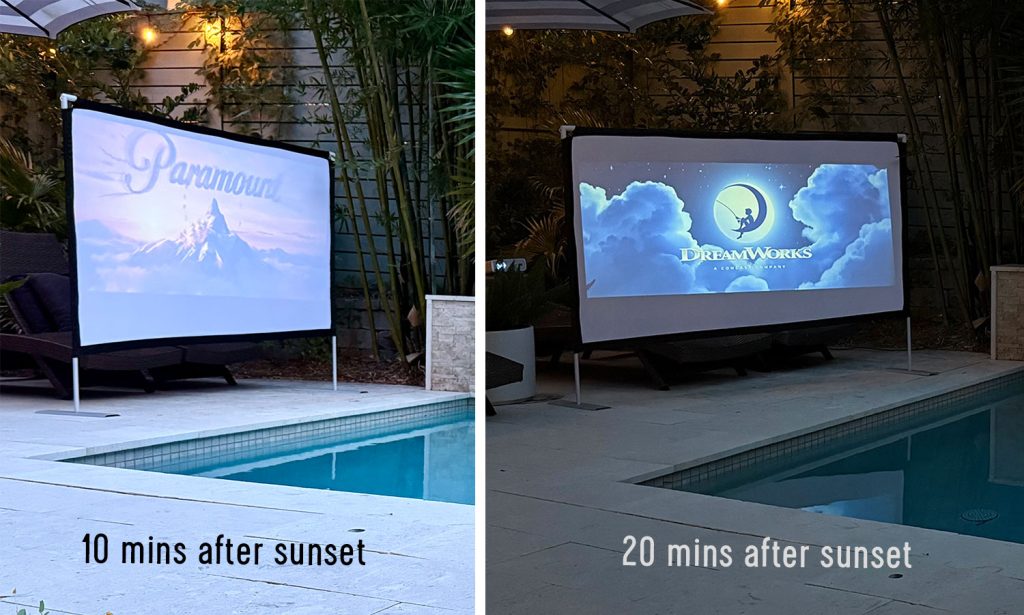
Await a darkish sky
With late summer time sunsets, it’s tempting to get began as quickly because the solar is down (if not sooner). However except your display screen sits beneath a coated porch, we propose ready for full darkness for the very best image expertise. Right here’s an thought of how a lot clearer the image is by simply ready 10 minutes.
Hold this – plus the size of your movie – in thoughts when planning your out of doors film evening. We have been out till almost 11pm the primary time!
The auto changes are useful, however not good
Whereas I’m actually grateful for the auto-focus and auto-keystone options, I often advantageous tune each manually. It’s pretty straightforward to do from the settings menu. When you make your guide changes, you could wish to flip off the automated options as a result of any motion – say somebody bumps into the projector or the wind blows your display screen over – will set off the auto-adjust and reset your guide settings.
Your first set-up is the slowest
Establishing took me about 40 minutes the primary time and perhaps 25 minutes the second time. However I’ve grow to be extra environment friendly every time as I refine my association & streamline my course of. You’ll be taught the very best spot to your projector, the right angle of your display screen, and optimum speaker placements over a number of film nights. So be affected person with your self. Now I’ve received it all the way down to about 10 minutes!
Be open to renting your film
The largest disadvantage to this projector will not be with the ability to stream providers like HBOMax, Peacock, or AppleTV. Sure, I can join my laptop computer by way of USB or HDMI adapter. However that’s an additional step (and additional cords) I’d reasonably not hassle with most nights. So even when I can entry a film without spending a dime on a type of providers, we often spend the $4 to hire it by way of one of many built-in apps like Amazon Prime or YouTube as an alternative.
Take into consideration seating choices / viewing angles
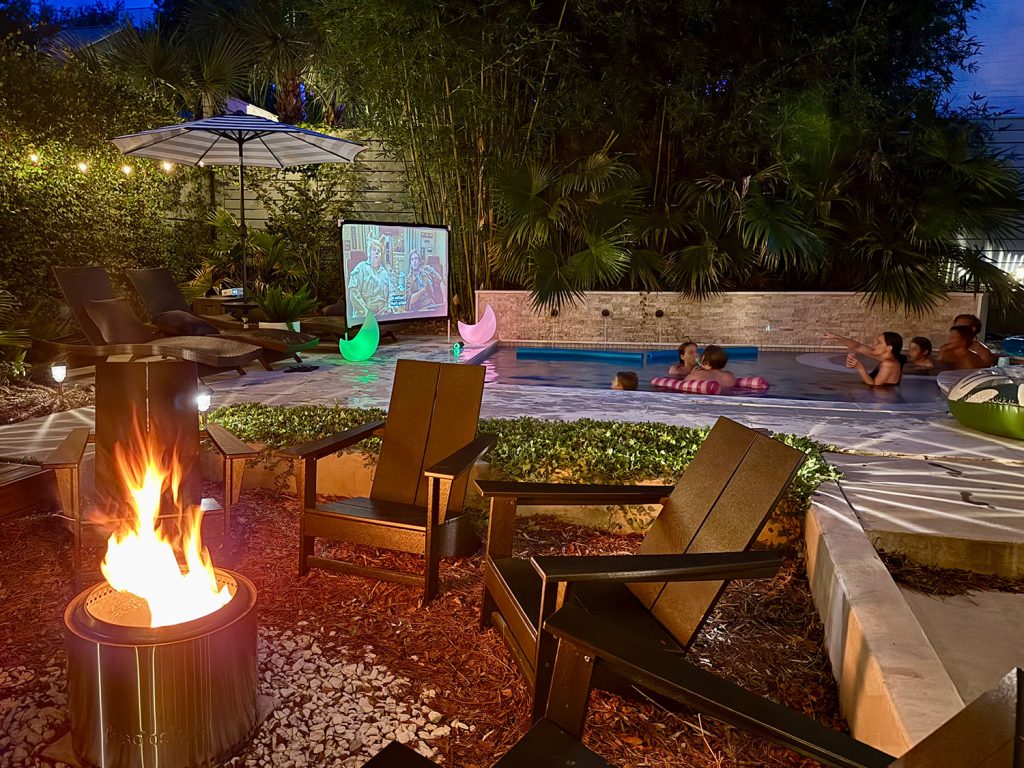
We’ve solely used this within the heat summer time months, so the pool has been the favourite viewing spot to this point. However we nonetheless angle the display screen so people can watch from dryer / hotter spots, like by the fireplace pit. Because the climate cools we’ll most likely transfer the display screen nearer to the fireplace (or sizzling tub!) and can carry out some cozy blankets to cuddle up with. Truly can’t look forward to that.
Thus far, the one remorse we’ve got will not be shopping for these provides a number of summers in the past!
Different Posts You May Get pleasure from
Listed here are some associated posts you may discover useful – from extra expertise we like to particulars on our yard pool makeover.
*This publish comprises affiliate hyperlinks, so we might earn a small fee once you make a purchase order by way of hyperlinks on our website at no further price to you.
")

")


")
