Decor-Ddecoraty
  • Home
  • DIY
  • Interior Design
  • Furniture
  • Home decor
SUBSCRIBE
Decor-Ddecoraty
Saturday, April 11, 2026
SUBSCRIBE
  • DIY
  • Interior Design
  • Furniture
  • Home decor
Decor-Ddecoraty
Decor-Ddecoraty
  • DIY
  • Interior Design
  • Furniture
  • Home decor
All Right Reserved. Designed and Developed by PenciDesign
Furniture

French Cleat Hanger Made with Carpet Trim

by Admin2010 September 19, 2025
written by Admin2010

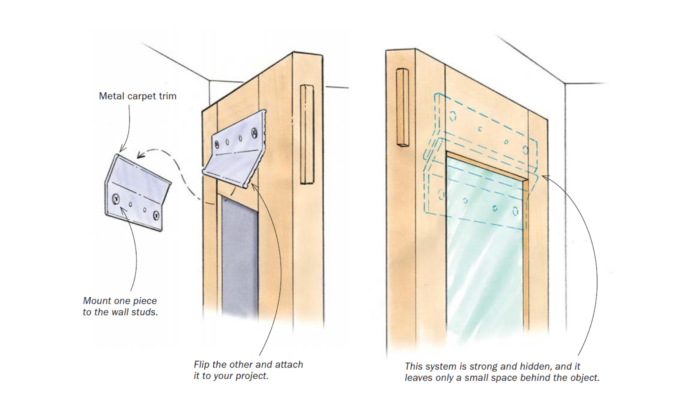
Synopsis: Aluminum carpet trim can be utilized as a wall hanger. Connect one piece to the wall and the opposite to no matter you’re hanging.

Carpet trim creates a hidden wall hanger

To hold a pair of heavy mirrors, I used aluminum carpet trim as a French cleat. Connect one piece to the wall (make sure to screw it into the studs) and the opposite to no matter you’re hanging. The metallic trim items maintain their cargo near the wall, which helps to maintain them hidden from view.—ALAN KUPCHELLA, Fairport, N.Y.

diagram of how to use aluminum Carpet Trim to make a French Cleat Hanger

Superb Woodworking Really useful Merchandise

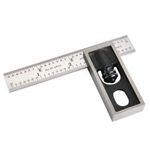
Starrett 4″ Double Sq.

Head is simple to take away, substitute, and lock down; narrowest blade, at 5⁄8 in., made it simpler to suit into tight locations; arduous to learn underneath vibrant lights.

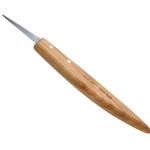
Pfiel Chip Carving Knife

Nice to make use of as a marking knife for laying out joinery and straightforward to sharpen.

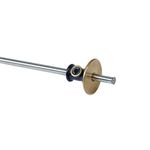
Veritas Commonplace Wheel Marking Gauge

The gauge may be very simple to set, because it has an inner O-ring to maintain mild however fixed friction on the rod. A really snug gauge to make use of.

Join eletters at the moment and get the newest strategies and how-to from Superb Woodworking, plus particular presents.


September 19, 2025 0 comments
0 FacebookTwitterPinterestEmail
Home Renovation

small galley kitchen doubles because the household examine

by Admin2010 September 19, 2025
written by Admin2010

creative spaces poketo takashi yanai kitchen ye rin mok photo 4

Architect Takashi Yanai’s Los Angeles kitchen is the scale of his purchasers’ walk-in closets. A associate at Ehrlich Yanai Rhee Chaney Architects (and a graduate of Harvard’s Faculty of Design), Yanai, who was born in Japan and grew up in Santa Monica, oversee’s the agency’s residential initiatives: he’s a grasp at designing clean-lined California dream homes which can be all about indoor-outdoor dwelling.

His personal lately reworked Nineteen Fifties ranch home, whereas way more modest in scope, is a microcosmos of the Yanai sensibility: Japanese formalism meets barefoot LA. We found Yanai’s place in Artistic Areas, the Poketo staff’s first guide: see LA Noir: Takashi Yanai’s Humble-Stylish Bungalow. At this time, we’re returning to take a better have a look at the kitchen and its classes in spatial economics and understated model.

Images by Ye Rin Mok, from Artistic Areas.

yanai and his wife, architect patricia rhee (also a partner at eyrc specializin 17
Above: Yanai and his spouse, architect Patricia Rhee (additionally a associate at EYRC specializing in civic and public areas) and their two kids have lived of their 1,500-square-foot home for eight years, and remained put whereas Yanai was reworking it—”we arrange a short lived kitchen within the storage,” he tells us.

After stripping the dwelling space to its naked bones, Yanai put up a partition completed with marine plywood that neatly divides the brand new kitchen from the lounge. And instead of what had been a “drained suburban kitchen,” he put in a single-sided galley utilizing parts from top-of-the-line German modular cabinetry firm Bulthaup. Yanai mixed these with a again storage wall of marine plywood, which conceals the fridge. And since the household was in want of a spot to work, as an alternative of constructing in a desk or island, he added a bookshelf and desk—a Danish-modern teak flip-top design by Peter Lovig Nielsen—and turned the opposite half of the room right into a examine. Sure, there’s additionally a eating desk with a view (see beneath).

the linoleum faced cabinets and stainless steel counter and sink are from bulth 18
Above: The linoleum-faced cupboards and stainless-steel counter and sink are from Bulthaup’s B3 line. “I opted to go with none handles, so the area has a minimal, sculptural high quality à la Donald Judd,” says Yanai. The tap is by Fantini.


September 19, 2025 0 comments
0 FacebookTwitterPinterestEmail
Furniture

Will You Disassemble My Furnishings For Removing?

by Admin2010 September 18, 2025
written by Admin2010


Will You Disassemble My Furnishings For Removing? | Furnishings Financial institution


Merchandise Measurement Calculator

Calculates the merchandise’s measurement in cubic inches or meters and returns a measurement class (Small, Medium, Massive, Cumbersome, Further Cumbersome)

div.av-section-color-overlay-wrap > div.container > div > div > div > part > div > p > a”,”do_default”:null,”cookie”:{“identify”:null}}}],”mobile_disabled”:null,”tablet_disabled”:null,”meta”:{“show”:{“responsive_min_width”:false,”responsive_max_width”:false,”position_bottom”:false,”position_right”:false,”position_left”:false,”stackable”:false,”overlay_disabled”:false,”scrollable_content”:false,”disable_reposition”:false,”measurement”:”medium”,”responsive_min_width_unit”:”px”,”responsive_max_width_unit”:”px”,”custom_width”:”640px”,”custom_width_unit”:false,”custom_height”:”380px”,”custom_height_unit”:false,”custom_height_auto”:false,”location”:”middle high”,”position_from_trigger”:false,”position_top”:”100″,”position_fixed”:false,”animation_type”:”fade”,”animation_speed”:”350″,”animation_origin”:”middle high”,”overlay_zindex”:”1999999998″,”zindex”:”1999999999″},”shut”:{“textual content”:””,”button_delay”:”0″,”overlay_click”:”true”,”esc_press”:false,”f4_press”:false},”click_open”:[]}}”>

div.flex_cell.no_margin.av_three_fifth.avia-builder-el-38.el_after_av_cell_one_fifth.el_before_av_cell_one_fifth > div > div.flex_column_table.av-equal-height-column-flextable > div.flex_column.av_one_fourth.flex_column_table_cell.av-equal-height-column.av-align-middle.av-zero-column-padding.first.avia-builder-el-41.el_after_av_hr.el_before_av_one_fourth > part > div > div > div.row.wcp-fgg-wrap > div”,”do_default”:null,”cookie”:{“identify”:null}}}],”mobile_disabled”:null,”tablet_disabled”:null,”meta”:{“show”:{“responsive_min_width”:false,”responsive_max_width”:false,”position_bottom”:false,”position_right”:false,”position_left”:false,”stackable”:false,”overlay_disabled”:false,”scrollable_content”:false,”disable_reposition”:false,”measurement”:”medium”,”responsive_min_width_unit”:”px”,”responsive_max_width_unit”:”px”,”custom_width”:”640px”,”custom_width_unit”:false,”custom_height”:”380px”,”custom_height_unit”:false,”custom_height_auto”:false,”location”:”middle high”,”position_from_trigger”:false,”position_top”:”100″,”position_fixed”:false,”animation_type”:”fade”,”animation_speed”:”350″,”animation_origin”:”middle high”,”overlay_zindex”:”1999999998″,”zindex”:”1999999999″},”shut”:{“textual content”:””,”button_delay”:”0″,”overlay_click”:false,”esc_press”:false,”f4_press”:false},”click_open”:[]}}”>

casalifecasalife

Casalife meets the demand of at the moment’s multi-functional life, providing furnishings and equipment that configure to go well with any area.

Casalife is proud to assist Furnishings Financial institution whose mandate it’s to facilitate gently-used furnishings being donated to those that are struggling financially to furnish their properties. It’s a cycle of giving and serving to, offering essentially the most weak people in society the means to create a house.

Go to Casalife’s web site

September 18, 2025 0 comments
0 FacebookTwitterPinterestEmail
Home Improvement

How To Construct A Bar In A Field In 14 Straightforward Steps!

by Admin2010 September 18, 2025
written by Admin2010

Let’s Construct A Bar In A Field

On this video, I’m going to indicate you how one can construct a bar in a field. Not solely is it nice for entertaining, it’s nice for small areas. It may be simply compact when not wanted however open up once you’re entertaining. Let me present it’s a must to construct it.

How To Construct A Bar In A Field In 14 Straightforward Steps!

Supplies I Used to Construct the Bar in a Field

Step 1: Constructing the Most important Physique of the Bar in a Field

I’m going to start out off by constructing the primary physique. I’m utilizing DAP weldwood wooden glue on each joint then a brad nailer to pin issues collectively. For materials, I’m utilizing an exterior grade MDF known as Armorite. Armortie is a dream to chop on the CNC so it’s my first selection for tasks I’ll be portray.

Step 2: Putting Trim Across the Edges of Every Physique Part

Subsequent I may lay the field I’m making over, overhanging the underside so the unit lays flat on the workbench. Then I crawled inside and laid down a bead of glue all alongside the sting. That is so I may pin on some trim. This might sound complicated for a second however you’ll see the way it all comes collectively shortly.

For proper now I solely positioned 4 items of trim on, and left a niche within the middle. That is so I may flip your complete factor over, once more transferring the unit to the sting so it lays flat, then utilized extra glue to the within of the overhanging trim boards. These trim boards will catch a panel that may finally develop into the entrance of the unit. Mine was a little bit tight nevertheless it was nothing a little bit stomping couldn’t repair. To carry it in place whereas the glue arrange, I used a number of pin nails all alongside the perimeter.

I want I’d have stood it up at this level to indicate you what I used to be doing, however I didn’t. So let me skip forward and provide you with a visible on the place I’m going with all of this. As soon as positioned on it’s backside, it won’t solely be capable to be rolled round, however the panel and trim will create a entrance, then what I do subsequent with a divider will create a sectioned off inside.

Screenshot 2023 03 03 152328

Step 3: Including Dividers Contained in the Bar in a Field

Now that you just see the place I’m going, lets return to including within the divider. It will create two inside cubbies so I positioned it proper within the middle. To keep away from measuring, I truly grabbed the cabinets that I already lower to size and used two to behave as spacers, setting one on the base and one on the high to ensure the divider was stepping into parallel. To pin it in place, I used my velocity sq. to mission down within the line of the sting. Not like typical MDF, Armorite doesn’t mushroom out or flake off when utilizing a nailer.

Screenshot 2023 03 03 152737

Step 4: Making the Bar in a Field Cellular

With that in, I moved to the facet of the unit to start out constructing a field. This would be the backside platform that may home the casters. I once more used wooden glue and brad nails to hitch issues collectively. BTW: I’ve a set of plans which have a lower record and materials record if you wish to construct your individual.

This field, I clamped to the underside facet of the unit in order that I may climb again on high of my workbench to safe it from the highest facet.

So far as mobility goes, I don’t anticipate to maneuver this factor loads so I solely placed on two mounted casters. Nevertheless, another choice is to placed on 4 swiveling casters that will provide you with extra mobility. I positioned my two mounted casters on one facet then what I’ll name a foot on the opposite. This foot is simply lengthy sufficient in order that when the unit is sitting flat, the casters don’t contact the bottom. It will make sure the bar can’t roll round till I tilt it barely up on one finish and intentional wheel it the place I need to go. Whereas laughing after all.

Screenshot 2023 03 03 153315

Step 5: Ending the Entrance Trim and Including Cabinets

Comfortable with the bar in a field physique upright, now I can end out the entrance trim. This is so simple as chopping the items to size then gluing and nailing them in place. I carried the underside proper trim piece to my home and forgot it, so simply picture that in place as effectively.

Now lets go to the within of the unit and add in some cabinets. Be mindful you might add as many or as few as you needed however I personally solely needed one shelf per facet. My plan for retaining issues from falling over is to run small steel tubing throughout the entrance. I made all my location marks utilizing a sq. then counterbored with a drill bit simply barely bigger than the tubing. On the middle divider, I made a by way of gap. This fashion, as soon as performed, I may feed the tubing in from the left, undergo the middle, and go into the correct wall.

I’ll glue these in later however for now, I left them dry and moved on to creating the doorways. Which is a very comparable course of to creating the bar in a field physique.

Screenshot 2023 03 03 153717
Screenshot 2023 03 03 154247

Step 6: Making the Doorways

I began by constructing a field utilizing wooden glue and brad nails. Then I lined the sting with a bead of extra wooden glue so as to add on trim. Once more, this trim will finally be the present face you see. So proper now I’m constructing it the wrong way up. However by doing it this fashion, I’m in a position to flip it over and simply insert the entrance panel in order that it’s captured to this trim and flush to the entrance. You simply have to ensure it’s seated down all the best way once you’re securing it.

Screenshot 2023 03 03 154437

Step 7: Including Cabinets to the Doorways

Subsequent I did the identical course of that I did to the physique by including in cabinets the place I needed them, should you use my plans you may actually use my dimensions which match normal bottles, or you may regulate them to retailer the gadgets you’re trying to shelve. After including within the cabling, I added on an adjustable foot.

So when the wings fold out, this foot will be capable to drop all the way down to the bottom and lock into place. To do that, I began by drilling two by way of holes for carriage bolts. As soon as put by way of the foot’s slots, I added a wing nut to the within to provide me a locking function. The wonderful thing about that is even when the bar is on barely uneven floor, it gained’t matter as a result of every wing will be capable to drop it’s foot down independently of the opposite.

Whereas I had the door on my workbench, I DAPed and caulked every part. I’m utilizing Platumn Patch by Dap to fill in any of the nail holes or seams that may present on the face. Then for the caulk I used Alex’s Quick Dry.

After doing it as soon as, I repeated all of it once more to construct a second. Ensuring they had been mirrored to one another and never equivalent!

Screenshot 2023 03 03 154547 1
Screenshot 2023 03 03 155236

Step 8: Hanging the Wings onto the Physique of the Bar in a Field

Issues are wanting proper, so lets cling them on the physique! I used a small spacer to relaxation on the platform of the physique to set the door on and create the clearance wanted. I attempted to drop the foot down to carry it’s place. Didn’t work, so I as an alternative hooked my foot on the underside and simply made positive to have my drill prepared. I prefer to pre drill for the smaller screws that include the hinges nevertheless it’s actually so simple as pre drilling then attaching with screws.

After repeating on the opposite facet, I’ll now present you what I received. I’ll stand on the opposite facet of the bar to not impede your view, however the thought is I may have a consolidated footprint when not in use, however then simply flip out a door, drop the foot. Then flip out the opposite wing, and drop the foot….once I do need to use it. Cool.

Screenshot 2023 03 03 155533

Step 9: Constructing a Prime to the Bar in a Field Physique

Now let me work on a high. I went with two layers of the identical materials that this whole unit is constructed from which is an exterior rated MDF known as Armorite. You may get 1” thick Armorite however 1/2” is manner simpler and cheaper to come up with so I lower then glued two items collectively to create the 1” thickness.

Armorite Suggestions and Tips

Since I found Armorite final 12 months, you’ve been seeing use it increasingly for tasks the place common MDF merely wouldn’t be an possibility. To have an exterior rated MDF actually is a recreation changer. Even when getting moist, it doesn’t swell and fall an element, it’s unimaginable to machine coming proper off being lower good and easy, and it has Zinc borate in it to withstand termites and different insets. I’ll go away you a hyperlink to find Armorite close to you.

Screenshot 2023 03 03 160812

Step 10: Increasing the Prime of the Bar in a Field

To accommodate the physique increasing by the doorways folding out, I additionally want the highest to one way or the other increase out. That’s the place these cool little hinges are available, they’re known as flap hinges. They’re kinda difficult to drill for as a result of they’re solely a portion of a circle so you may’t use a whole forester bit like you may on common cupboard hinges. Nevertheless, a easy fence on the drill press solves this concern.

I set the fence in order that a lot of the bit was going into the fabric however the remaining was going into the fence. Then I’d use the hinge itself to gauge the depth. As soon as I repeated this on two sections, I may screw the hinges in place and check it out.

Okay so the concept Is to position the 2 sections on the middle, proper on high in order that when they’re folded in, it’s good and compact. However then I can flip them out to increase. After positioning the highest sections squarely, I pre drilled then secured with screws. I didn’t like how the doorways may very well be set at any angles, so I added in a cease block to dictate the precise place. Good and easy.

Screenshot 2023 03 03 161843

Step 11: Portray the Prime of the Bar in a Field

I even have a whole video outlining the correct option to paint MDF so I’ll hyperlink to that video for you. For the highest I selected a black laminate which could be a little tedious to use however is definitely fairly easy. Very first thing to know is you need to band the sides first. I lower an enormous sheet into small strips which might be barely outsized.

To use it, you employ one thing known as contact cement. It’s historically bought in a can which you could brush on however Dap has truly come out with a sprig kind that I really like. I exploit cardboard as a backer to catch the overspray.

When utilizing contact cement you must apply it to each surfaces that can be adhered collectively. You possibly can see I exploit an assortment of trash to gather the overspray. Then in contrast to wooden glue, you truly let the surfaces dry till the cement is cheesy, that is wherever from 3-10 minutes relying on local weather, then you definately push them collectively. A curler is a superb software to have round to use strain however you should use something that gained’t scuff the floor.

Screenshot 2023 03 03 162823

Step 12: Putting Edging on the Face of the Bar in a Field

After getting all the sides banded, then you definately repeat on the faces. I truly needed the 2 middle items to be seamless so after biscuit becoming a member of them collectively and screwing them all the way down to the physique of the unit, I repeated by spraying each the MDF and the laminate, ensuring to get the sides very well coated.

The rationale you need to go away the piece outsized is as a result of it’s manner simpler to make use of a flush trim bit and router to make it completely flush after the very fact, than attempting to align two items completely match for one another. Once more apply strain with something that gained’t scuff the floor. Haha.

One last item to notice, as soon as the surfaces are involved with one another, they don’t come an element simply. Once more, it isn’t like wooden glue the place you may slip it round after the very fact. So be sure to prefer it earlier than you stick it.

Screenshot 2023 03 03 162944

Step 13: Pre-drilling For and Including Door Hinges

Final thing I wanted to do was drill for the hinges. To forestall the forester bit from strolling round on you once you begin drilling, you first need to predrill with a small drill bit. Then to forestall the sting and the face of the laminate from tearing out, I clamped a board in place. I used my glue cauls on the sting and a jig with a by way of gap for the bit on the highest. As soon as the tip of the forester bit discovered my pre drill, I clamped the jig in place and drilled down till the depth was right for the hinge to be flush. When you break by way of the laminate, you may take away the jig.

Screenshot 2023 03 03 163818

Step 14: Attaching the Wings to End the Bar in a Field!

Subsequent, the second pair of wings might be connected and I’ll name this mission performed!

I ended up including a deal with to the facet to assist tilt it up and transfer it. That is what it appears like when it’s compact and stowed away, however then to make use of it I simply must fold out the door and drop the foot. Fold out this door, and drop it’s foot. Fold out one high, and two high, and the bar is formally open. So that you can see it from the bartenders facet, I put two barrel bolts on the doorways to maintain them shut. On the within there may be loads of space for storing for bottles or shakers or glasses.

Truly, glasses are in all probability a foul thought in case your unit will truly be moved loads however I see retaining mine full through the good seasons then I’ll empty it and stow it away through the actually chilly season.

Screenshot 2023 03 03 165151

Factor I Utilized in The Bar in a Field Construct:

September 18, 2025 0 comments
0 FacebookTwitterPinterestEmail
DIY Home Decor

A Noble Endeavor | Stone Cottage Dwelling

by Admin2010 September 18, 2025
written by Admin2010

“Making a contented house is a noble endeavor.” Deborah Needleman from The Completely Imperfect Dwelling

This quote grabbed my consideration the primary time I heard it and has turn out to be a part of my pondering in direction of the creation and use of a house. For a few years, once we had been on the brink of host a cocktail party I labored arduous to make the home as good as attainable. Every little thing cleaned, all laundry executed, all ironing executed, all dishes executed… dusting, vacuuming, freshly fluffed pillows earlier than visitors arrived… and infrequently I’d have labored myself as much as a nervous anticipation that took a while to relax after they arrived. I wasn’t in a position to be as current and useful as I might’ve been.

However over time, and plenty of remodels, DIYs, and dinners later, I’ve come to see issues otherwise.

A cheerful dwelling just isn’t an ideal dwelling.
It’s not a company-ready dwelling.
It is probably not a quiet dwelling (although some days, we’d want it had been).

It’s a house that welcomes. That nourishes. That exudes grace.

“Hospitality just isn’t about impressing folks. It’s about loving & serving them.”

Once we first started transforming our dwelling, and I bear in mind the various occasions we postpone entertaining as a result of issues had been messy. I imagined I’d host as soon as all the things was “completed.” As soon as the cupboards had been painted and the curtains sewn and the flooring refinished. However as time handed, and buddies saved exhibiting up, and I noticed: life wasn’t ready for good.

So I discovered to host mid-project. With drop cloths folded within the nook. With trim nonetheless ready to be caulked. With half painted partitions, and a dated kitchen.

You understand what I seen? Nobody minded. In reality, they stayed longer. They laughed louder. The home wasn’t intimidating—it was actual. And you recognize what else? The mid-project standing sparked some fantastic conversations! I had no concept that internet hosting within the midst of a transform would give others the liberty & braveness to do the identical of their properties!

Listed here are my objectives for internet hosting now-a-days:

  • A clear area. Assume cared for, not spotless. A wiped counter, a swept flooring, a freshly cleaned rest room, a lit candle.
  • Consolation. Sufficient chairs for everybody (this hasn’t at all times occurred, however I attempt). Further throws on the couch. Cushions that invite lingering. Sufficient lighting (no gloomy corners), and clearly set out areas. Company really feel uncomfortable in the event that they don’t know what to do, or what is anticipated of them. Present them the place to put their footwear, purses, the crockpot meal they introduced, the place the serving line is…
  • Scrumptious, easy meals. Nothing fussy. Simply hearty, heat, and shared.
  • A peaceful, gracious welcome. A smile on the door. No apologies for the unfinished (visitors take their cues from you – should you’re comfortable with issues, they’re). Simply an invite to come back in, get pleasure from, and relaxation.

A Be aware to the Homemaker

In the event you’re in the course of a renovation, otherwise you’re slowly DIY-ing your approach via a room, otherwise you’ve simply bought laundry piled up and initiatives in progress, be inspired. You aren’t behind. You might be constructing one thing good. Making a contented house is the next calling than making an ideal dwelling. That’s noble. That’s sufficient.

Have you ever discovered your self ready on your dwelling to be “prepared” earlier than internet hosting? What helped you embrace imperfection and open your own home anyway? I’d love to listen to your ideas within the feedback.

Till subsequent time, take care,

Rachel

September 18, 2025 0 comments
0 FacebookTwitterPinterestEmail
Furniture

Corissa Enneking Groups Up with Sofa Potatoes to Fin – Sofa Potatoes Furnishings

by Admin2010 September 18, 2025
written by Admin2010

Searching for furnishings could be a actual battle, particularly when you’re plus-size. That is why we’re so excited to have teamed up with Corissa Enneking, the pressure behind the weblog FatGirlFlow, to assist her get a brand new sofa.

FatGirlFlow is a weblog born out of Enneking’s want to share something from plus-size vogue to easily loving her physique. She challenges poisonous views and the stigmas behind being fats in a fatphobic society. Many others have discovered consolation in her weblog and found a group of plus-size individuals who encounter issues in a society that’s not structured to create space for them. 

On this weblog submit, we’ll hear from Enneking about why she selected Sofa Potatoes and what her expertise was like in deciding on which sofa to take residence to their companion J, and their many furry buddies.

Why Select Sofa Potatoes As Your Furnishings Retailer?

“At first of February, I began reaching out to corporations that I felt aligned with what I advocate for. My companion, J, obtained this nice chair that they use daily, so I began trying into the place they purchased it. I remembered that they advised me that it was a spot in Austin, so I began sleuthing on the web—like taking a look at all these web sites looking for this chair. I occurred upon Sofa Potatoes, and I used to be like, ‘Okay, Sofa Potatoes, initially, is the cutest title. What higher title to align with plus-size individuals?'”


What Is Most Vital to You When Searching for a Plus-Dimension Sofa?

“The idea of a sofa for plus-size individuals is, whether or not or not it’s a good product. That’s a giant dedication and I really feel like that scares lots of manufacturers. This plus-size market is able to throw its cash at individuals, they’re determined to be seen and catered to.

Normally doing testing to determine what the load restrict is, isn’t a viable factor. I truly don’t assume {that a} particular weight restrict is important. I feel there are methods to speak about sturdiness and longevity with out citing weight.”

The Chosen Sofa

There are a number of choices at Sofa Potatoes that will work for plus-sized individuals. Corissa and their companion, J, selected the Mesa leather-based nook sectional in Tribeca cream. 

the best plus-size couches in austin

This sectional is a mid-century trendy lover’s dream, nevertheless it additionally hits all of the factors of what makes a sectional appropriate for plus-size consolation.

  • The Mesa sectional has stable block ft, not the same old tapered leg look a number of mid-century trendy sofas boast.
  • On our couch consolation scale of 1-5 (5 being the firmest), we charge it a 3. Which means this sectional is comparatively straightforward to stand up and off of, which is essential for these with bodily restrictions. 
  • The seat depth is at 24″, making it a deep sufficient seat for plus-size individuals to really feel appropriately accommodated. The Mesa has certainly one of our deepest seats.


Sofa Potatoes Create House

We need to thank Corissa Enneking for taking the time to share her story with us. We hope that this submit encourages extra plus-sized individuals to put money into high quality items of furnishings that match each their physique and their model preferences—and present them simply how straightforward it may be once they store with Sofa Potatoes!

“For those who’re a plus-size particular person, you’re oftentimes feeling such as you’re taking over a lot house. The world simply isn’t made for you more often than not.”

Enneking hopes that her collaboration with Sofa Potatoes will encourage extra corporations to supply merchandise particularly designed for plus-size individuals in order that they don’t must endure via uncomfortable furnishings any longer.

For those who do not already, comply with Corissa Enneking on Instagram, and take a look at their weblog, FatGirlFlow.com.


September 18, 2025 0 comments
0 FacebookTwitterPinterestEmail
Home making

Over 100 Printable Pumpkin Carving Patterns

by Admin2010 September 18, 2025
written by Admin2010

Sharing is caring!

Halloween is getting nearer, and it’s time to begin eager about carving your pumpkins. This pumpkin carving useful resource information has 100’s of printable pumpkin carving patterns. Whether or not you need to do a primary pumpkin design or a really in-depth design, you’ll discover it on this record.

From Disney pumpkin carving to enjoyable and foolish faces, you’re certain to discover a free pumpkin carving sample to like and use down under!

Carving pumpkins is all the time a ton of enjoyable! However generally, all of us want just a little little bit of assist in the creativity division. This record of concepts is simply the reply you’re searching for!

And in case you don’t need to lower up the pumpkins, this record of no-carve pumpkin concepts is nice for little ones!

How do I decide the proper pumpkin?

The most effective methods to seek out an superior pumpkin is to go to the pumpkin patch. It’s the easiest way to get an actual pumpkin and help an area small enterprise, too! (and don’t fear – in case you don’t have a pumpkin patch close by, getting a pumpkin on the native grocery retailer is a good concept as properly!) 

The proper pumpkin may be totally different for every individual, however if you wish to carve, a bigger pumpkin with a flatter backside works finest. That manner, you possibly can full the straightforward steps to carve your pumpkin. 

This publish accommodates affiliate hyperlinks, which implies I earn a fee when something is purchased. That is at no further value to you. 

Store My Homeschool Room:

The next homeschool picks of mine may be discovered on Etsy. Merely click on the picture that pursuits you – sure, they do comprise affiliate hyperlinks.

What do I have to carve a pumpkin? 

You’ll want pumpkin carving instruments and the free stencils listed under! Just remember to put down newspaper and even do the household exercise out on the entrance porch so that there’s much less mess to scrub up. 

Seize your pumpkin carving package, and get began! Don’t overlook to make use of a bowl to place the pumpkin seeds in as a way to roast them later. 


What are good pumpkin carving concepts for the Halloween season? 

There are such a lot of free pumpkin carving patterns and concepts on the market! The children may do a haunted home, lantern faces, Harry Potter characters, traditional film characters like Minnie Mouse or Snow White, something Whats up Kitty, Star Wars decals, and even Cruella de Vil! 

The enjoyable half about making traditional designs is that anybody can create Halloween masterpieces. All you want are some free Halloween stencils, just a little additional assist from the adults, and your entire household becoming a member of in on the enjoyable. That is how Halloween traditions get began – and any concept is a good concept. 

If in case you have just a little child which might be too younger to carve pumpkins, have them scoop out the within of the pumpkin. This can be a good concept for them to be part of the exercise, and it’s a good concept for a newbie carver! 

Fal Printables

Image of a set of fall-themed preschool activity sheets, including maze, scavenger hunt, memory game, and do-a-dot pages. The cover reads Fall Coloring Activities for Preschoolers. A badge indicates there are 100 pages. The background is a wooden surface.
Cover image of a preschool math activity book titled Fall Math Activities for Preschool, featuring worksheets on tens frames, counting, measuring, and more. An orange banner with the text 20 Pages adorns the corner, perfect for integrating Fall Coloring Activities for Preschoolers.
An image of a Mom Planner Printable Pack featuring a checkered orange theme perfect for fall. The cover and six sample pages include Chore Chart, Budget Planner, Fall Menu Plan and Shopping List, Daily Planner, Weekly Planner, and Monthly Planner. This pack offers 25 thoughtfully designed pages.

Extra Pumpkin-Themed Enjoyable

TBC The Best Crafts Paint Sticks,12 ClassicGuirnd 12PCS Colored Masking Tape, Kids ArtMelissa & Doug Mini-Sketch Spiral-Bound Pad (6Crayola Super Art Coloring Kit (100+ Pcs),FUNZBO Arts and Crafts Supplies for KidsCrayola Twistables Colored Pencil Set (50ct), No


How can I protect carved pumpkins for just a little bit longer?

To maintain your carved pumpkins from turning into mushy monsters too quickly, listed below are some tried-and-true suggestions. With these methods, you possibly can often stretch a carved pumpkin’s life to about 5–10 days (generally just a little longer if the climate’s cool).

Clear totally earlier than carving

  • Wash the skin with gentle cleaning soap and water.
  • Scoop out each little bit of pulp and stringy insides—much less gunk = slower mould development.

Give it a bleach bathtub

  • Combine 1 tablespoon bleach per quart of water.
  • Submerge the pumpkin (or spray it inside and outside). This kills micro organism and mould spores.

Dry fully

  • Moisture speeds rot. Let it dry absolutely earlier than displaying.

Seal it up

  • Rub petroleum jelly, vegetable oil, and even clear spray sealant on the lower edges to sluggish shriveling.

Preserve it cool

  • Warmth is a pumpkin’s worst enemy. Show within the shade in the course of the day.
  • If temps are heat, convey it inside at night time or refrigerate it when not on show.

Hydrate when wanted

  • In case your jack-o’-lantern begins to shrivel, soak it in a chilly water bathtub for just a few hours to rehydrate.

Keep away from candles inside

  • Warmth from flames hurries up rotting. Use LED lights as a substitute.

Printable Pumpkin Carving Patterns

Pumpkin carving isn’t only for youngsters. Take a while as a household to carve pumpkins with these carving templates.

1

FREE Stencil Printables (Elsa, Anna, Olaf, Kristoff)

FREE Stencil Printables (Elsa, Anna, Olaf, Kristoff)

Flip Halloween right into a Frozen wonderland with these Free Elsa and Anna Pumpkin Carving Templates.

See it right here

2

Pumpkin Carving Patterns

Pumpkin Carving Patterns

There may be over 65 Halloween Carving Printables, you’ll discover one thing for everybody.

See it right here

3

Frankenweenie Pumpkin Carving Template

Frankenweenie Pumpkin Carving Template

This can be a tremendous enjoyable Disney character to carve!

See it right here

4

Dog Pumpkin Carving Templates

Canine Pumpkin Carving Templates

Excellent for pup followers!

See it right here

5

Disney Pumpkin Carving Templates

Disney Pumpkin Carving Templates

There are over 100+ choices on this one!

See it right here

6

Disney Pumpkin Carvings

Disney Pumpkin Carvings

You will discover enjoyable concepts right here, together with Mickey Mouse!

See it right here

These printable pumpkin carving patterns are assured to show your pumpkins from boring to extraordinary. Which of those printable pumpkin patterns caught your eye?

Sharing is caring!

September 18, 2025 0 comments
0 FacebookTwitterPinterestEmail
Home Renovation

My Current Classic Haul – Extra Artwork At all times

by Admin2010 September 18, 2025
written by Admin2010

I actually strive to not step foot in an vintage mall/classic retailer if I don’t have a photograph shoot/room reveal arising – it’s simply too harmful. I will discover one thing, and it’s not essential to maintain hoarding if I don’t suppose I’ve a spot for one thing instantly (proper???).

However…not too long ago Brian and I have been on our biking journey within the San Juan Islands, and we popped right into a classic store, Smorgasbord on Orcas Island, and I might have left with way more if I had the room in my carry-on. It was so good. And the proprietor, Melanie (I feel!!), was a reader, which made me really feel good (she has nice style and was very cool). I wished the whole lot, so I got here dwelling with some “souvenirs” to memorialize the journey. I additionally like to consider it as my obligation to verify these actually good shops and sellers keep in enterprise, particularly if their costs are wonderful (so honest). Right here’s what I got here dwelling with (along with a number of different current finds)

vintage haul

This watercolor got here from an property on the island, and I assumed it was the proper piece to remind me of this journey (which was tremendous particular with Brian). I can at all times discover a place for extra artwork (particularly this dimension), and I feel I’m going to hold it in my rest room. Not sure if I wish to reframe it in a darker wooden, possibly even with a inexperienced matte, however we’ll see if/after I get to it.

Brian and I each actually beloved this wood dealt with piece – we thought it could be the proper serviette holder for our eating desk (or exterior).

As if I wanted extra wood items, however these are so good and have been such a great worth, and simple to pack. The wood dish is ideal for a nightstand or rest room for jewellery, and the blended candlesticks are completely eclectic and particular. Sure, a hoard, but additionally a fantastic reward?

I couldn’t go up this stunning footed inexperienced piece of pottery, clearly. I feel it was $22 and simply felt each actually particular and simple to type with.

Okay, now these weren’t from Smorgasborg. I wanted artwork for my brother’s household room reveal, and it wanted to be moody with hits of burgundy (in an ideal world). So I texted Purl and stated, “Any cool artwork for this room?” and despatched him a photograph of it. He had a grouping of those, unframed, and I selected these three. He framed them in easy wooden, which is ideal, and we hung them vertically on the wall collectively. I actually love all three. After framing, they ended up being $330 for all three, which I felt was honest for each unique artwork and the framing labor/provides.

This man (and the lamp under) I purchased for myself on Mom’s Day at Monticello Vintage Mall, which additionally sells mimosas 🙂 I feel it was below $20 (I hope, lol, I truly suppose it might need been $12?) and I’m undecided when/the place it’s going to make its debut, however it’s quirky and bizarre and funky, so clearly I had to purchase it.

Now THIS lamp is fairly unimaginable. It wasn’t low cost ($120), however I figured if I have been in Italy and I stumbled upon it for that worth, I might purchase it, so why not save the cash on the flight/transport?? Let me know when you need assistance rationalizing something classic – it’s an actual ability. I nonetheless need to get it rewired, which is able to probably price greater than the price of the lamp, so I’m ready til I do know the place it’ll go however it jogged my memory of the colourful Tiffany lamp in our kitchen that I’m completely obsessive about so I really feel assured that I can discover a place so as to add one other colourful lamp that actually delights the eyes.

I LOVE this little piece of artwork and acquired it for myself. It’s easy, with good texture and simple to include into plenty of my gallery partitions which have extra summary work in them. It’s by designer Anastasia Ratia.

Final however not least, one other piece of artwork by Purl, a neighborhood artist whom I’ve commissioned for my espresso desk, my corbels, and my outsized paintbrush and pencil from. He’s an artist who can do something, truthfully. I like the colours and the odd sense of steadiness.

What’s your favourite piece????

*Pictures by Kaitlin Inexperienced


September 18, 2025 0 comments
0 FacebookTwitterPinterestEmail
Home Improvement

What Is Warmth Pump Defrost Mode? How It Works and When To Fear

by Admin2010 September 18, 2025
written by Admin2010

  • A warmth pump’s defrost mode quickly reverses the heating cycle, switching to cooling mode to heat the outside coil and soften any collected frost.
  • The defrost cycle usually lasts between 5 and quarter-hour—longer or continuous cycles point out larger issues.
  • Take note of adjustments in how your warmth pump runs, equivalent to uncommon noises, a scarcity of heat air within the dwelling, or a frozen outside unit.

Your warmth pump retains your house comfy through the use of refrigerant to switch warmth from the cooler outside air into your house throughout winter. In summer time, it reverses this course of, eradicating warmth out of your indoor air and releasing it outdoors to maintain your house cool.

When temperatures outdoors drop, defrost mode retains your warmth pump from freezing over. That is an computerized, built-in function that quickly reverses the usual cycle to soften frost. By blowing cool air, the outside coils warmth up, melting the frost. 

Whereas defrost mode is normally innocent, it may possibly trigger issues if it runs too lengthy, too typically, or fails to activate. On this information, we cowl how defrost mode works and how one can spot issues when your warmth pump isn’t working appropriately. 

lennox hvac unit outside

HVAC Set up

Usually, you’ll pay between $5,540 and $10,980 for an HVAC unit, set up prices, and elimination of your outdated unit.


Get Quote

trane furnace costtrane furnace cost

Furnace Alternative

You possibly can count on to pay between $4,000 and $7,000, together with set up, outdated furnace elimination, and labor.


Get Quote

trane heat pump costtrane heat pump cost

Warmth Pump Set up

You’ll doubtless pay between $3,000 and $35,000, however most owners spend between $5,800 and $7,500.


Get Quote


How Defrost Mode Works

Defrost mode makes use of good sensors and controls to keep up a snug temperature in your house, even with chilly outdoors temperatures.

Sensing the Frost

Defrost mode activates robotically as quickly because it senses frost on the coils. 

“Even when it’s chilly outdoors, a warmth pump extracts warmth from the outside air to heat your house,” mentioned Danny Pen, president at New Period Plumbing & HVAC, primarily based in Dracut, Massachusetts. “When the climate is damp and very chilly, moisture within the air collects on the outside coils and freezes. Frost on the coils is a very regular factor for a warmth pump in winter, and defrost mode activates robotically to soften that frost and hold the system operating. Similar to a fridge often runs a defrost cycle to forestall ice buildup contained in the freezer, a warmth pump does the identical.”

Switching to Reverse Cycle

Through the defrost cycle, the warmth pump warms the outside coil to soften collected ice. Because the ice melts, it typically turns to water after which evaporates, which might create seen steam rising from the unit — that is regular and signifies the system is working correctly.

Auxiliary Warmth Kicks In

Whereas your warmth pump switches into cooling mode to defrost itself, don’t fear about your house’s temperature dropping. An environment friendly warmth pump will proceed to heat your house, or depend on auxiliary heating sources to maintain your house cozy throughout chilly temperatures.

Returning to Heating Mode

After the defrost mode completes, your warmth pump will return to its commonplace heating mode. Throughout freezing temperatures, it’s going to proceed to cycle between defrosting and heating modes to maintain your house as comfy as attainable whereas stopping frost buildup.


How Lengthy Ought to Defrost Mode Final?

Defrost mode usually lasts between 5 and quarter-hour — simply lengthy sufficient to soften frost on the outside coils with a heat refrigerant. Throughout frigid intervals, defrost mode will occur each 30 to 90 minutes. Nonetheless, should you discover that your warmth pump system is frequently in defrost mode or lined in ice regardless of getting into defrost mode, contact an HVAC skilled instantly, as one thing is probably going malfunctioning. 


Indicators of a Defrost Drawback

Questioning when you have a defrost drawback? The next indicators point out that you could be need to converse with an HVAC skilled about your warmth pump: 

  • System is blowing chilly air inside for prolonged intervals (or solely chilly air and no warmth)
  • Unusually loud hissing or clicking noises throughout the cycle
  • Out of doors unit is frozen strong with no indicators of melting
  • Defrost mode runs repeatedly or each 10 to twenty minutes
  • Indoor temperature fluctuations
  • Sudden larger power prices
  • Warmth pump stops working fully (particularly throughout a chilly snap)

What Causes Warmth Pump Defrost Points?

Warmth pump defrost points are attributable to a variety of things, together with damaged elements and clogged coils:

  • Defective defrost sensor or thermostat: In case your warmth pump isn’t sensing the temperature precisely, it received’t enter defrost mode appropriately. 
  • Damaged fan motor: In case your warmth pump’s fan isn’t engaged or the blades are operating within the improper route, the system received’t have the ability to defrost successfully.
  • Clogged or soiled coils: Clogged or soiled coils scale back your warmth pump’s means to work and defrost itself. Grass, pet hair, particles, and grime are sometimes the culprits. 
  • Low refrigerant ranges: Refrigerant flows by means of the warmth pump, heating and cooling the air and sustaining the specified temperature in your house. Should you discover that your house isn’t heat or cool sufficient, low refrigerant could be the explanation. 

Should you suspect your warmth pump is experiencing any of those points, schedule an inspection with an HVAC skilled to have your system evaluated and repaired. Any uncommon conduct means you need to contact a professional for your loved ones’s consolation and security.


Stopping Defrost Cycle Issues

To stop issues together with your warmth pump’s defrost cycle, begin by clearing the outside unit of leaves, snow, and particles. Don’t cowl your warmth pump within the winter — this prevents correct airflow for warmth extraction. As an alternative, protect it from snow and water by inserting it underneath the eaves, underneath a snow protect, or beneath a deck.

Schedule annual upkeep to test sensors, refrigerant, and coil cleanliness. Likewise, tackle any points rapidly. Don’t anticipate small repairs or points to turn out to be larger, warranting a full-blown HVAC set up. You may also converse together with your HVAC technician about cold-climate upgrades, equivalent to dual-fuel techniques or higher controls, to maintain your warmth pump working effectively in freezing temperatures. 

At present’s House owner Tip

We suggest upkeep each one to 2 years, however test your pump’s producer specs.


Lastly, you need to put together your warmth pump for every season. Examine your producer’s information to make sure the present settings are optimum for the time of 12 months. The information might suggest sure upkeep duties for various seasons.


Is Warmth Pump Defrost Mode Dangerous for Effectivity?

A warmth pump’s defrost mode isn’t dangerous for effectivity total. It could trigger a slight dip in effectivity, nevertheless it’s a crucial a part of correct operation.

“Warmth pump defrost mode is important however can quickly scale back effectivity as a result of the system switches to a backup warmth supply (typically electrical resistance) to forestall freezing,” mentioned Omero Flores, CEO of American AC & Heating, primarily based in Harlingen, Texas. “Nonetheless, it’s nonetheless extra environment friendly than older oil or gasoline techniques, particularly when mixed with a contemporary thermostat and correct upkeep.”


Subsequent Steps

Your warmth pump defrost mode is a traditional, important perform that stops your warmth pump from freezing over throughout chilly climate. Nonetheless, if it fails to activate or runs repeatedly, this factors to a deeper concern, equivalent to damaged followers or defective temperature sensors.

Begin by checking the skin unit and eradicating any snow or plant particles. Then, study the warmth pump and hear and search for something out of the atypical, equivalent to uncommon sounds. If the coils are frozen over, contact a HVAC skilled instantly to have your warmth pump and HVAC system examined.

At present’s House owner Tip

Converse together with your HVAC skilled about potential tax credit score financial savings when upgrading, repairing, or putting in a brand new HVAC system.


An HVAC technician can examine the sensors, coils, and refrigerant ranges. Taking good care of a minor drawback now can prevent a number of frustration and cash down the road, so don’t wait to name in an expert.


FAQs About Warmth Pump Defrost

How typically ought to my warmth pump go into defrost mode?

Your warmth pump ought to enter defrost mode when the outside coils drop beneath 32°F. Condensation freezes on the coils, forming a layer of frost. Your warmth pump will robotically enter defrost mode to soften the ice on the coils with a heat refrigerant.


Why is my warmth pump blowing chilly air in winter?

Your warmth pump might blow chilly air within the winter, even when it’s in heating mode, throughout the defrost cycle. The defrost cycle prevents frost buildup on the outside coils. Whereas it quickly reduces effectivity, it’s higher for the general consolation of your house.

In case your warmth pump frequently blows chilly air, seek the advice of an HVAC technician, as it might want repairs.


Can I manually set off or disable defrost mode?

Relying in your warmth pump, you could possibly set off defrost mode. Nonetheless, we suggest that you’ve a HVAC service technician have a look at your warmth pump and set off defrost mode for diagnostic functions first to make sure nothing is improper.


Is it dangerous if frost is build up on my warmth pump?

If frost is build up in your warmth pump, it might be malfunctioning resulting from wiring points, low refrigerant ranges, or defective temperature sensors. Seek the advice of with an HVAC contractor to have your warmth pump assessed and repaired, and don’t use your warmth pump if it’s closely frozen.


What ought to I do if my outside unit is frozen strong?

Instantly cease utilizing your warmth pump if the outside unit is frozen strong. Guarantee you’ve got a backup heating system in place to maintain your house heat. Then, name and schedule an appointment with an HVAC skilled to have your warmth pump assessed.


September 18, 2025 0 comments
0 FacebookTwitterPinterestEmail
DIY

White Chocolate Pumpkin Candies

by Admin2010 September 18, 2025
written by Admin2010

Pumpkin pie lovers, it’s important to strive these white chocolate pumpkin candies this fall. They’re scrumptious and make an ideal hostess reward for fall events / Thanksgiving.

white chocolate candy cups with pumpkin pie filling insidewhite chocolate candy cups with pumpkin pie filling inside

Pumpkin pie is actually one in every of my favourite fall desserts. My grandma used to make it yearly and it was a kind of issues that I simply all the time regarded ahead to. And after I received older, I might often make pumpkin pie by myself. However now that I’ve a household of my very own, I by no means make it as a result of (sadly) I’m the one one in my fam who really likes pumpkin pie.

That’s how these yummy pumpkin candies happened. Means simpler to make than a complete pie, however with the identical vibe in a bitesize deal with. Much like these chocolate marshmallow cups, which I additionally love this time of 12 months. Click on via for the autumn recipe.

stacked pumpkin candy cups on a marble counterstacked pumpkin candy cups on a marble counter

White Chocolate Pumpkin Sweet Cups 

Elements

  • 1 cup graham crackers (about 6 crackers) finely grounded
  • 1/3 cup of pumpkin puree
  • 2 oz softened cream cheese
  • 1/4 cup powdered sugar
  • 1/4 tsp pumpkin spice
  • 22 oz white chocolate chips

Easy methods to Make White Chocolate Pumpkin Candies

1. Put together muffin tin.

Place mini sweet cup paper liners in a 24 depend mini-muffin tin.

2. Combine (virtually) the whole lot and chill.

Combine collectively softened cream cheese, powdered sugar, pumpkin puree, pumpkin spice and floor up graham crackers. Place combination in fridge for half-hour to sit back.

3. Roll into balls.

As soon as combination is chilled and set, roll 1 teaspoon of the combination into balls (there needs to be 24) and place on parchment paper.

In case you discover the combination to be too sticky, you’ll be able to add extra grounded graham crackers.

4. Soften the chocolate and add to muffin tin.

Soften the white chocolate (utilizing a double broiler or microwave, stirring alongside the best way). Unfold 1 teaspoon into the underside of every lined muffin cup.

Faucet the pan gently on the floor in order that it’s evenly unfold. Place in freezer for a couple of minutes to permit chocolate to harden.

5. Add pumpkin combination and extra chocolate.

As soon as bottoms are set, place on pumpkin cream cheese ball into every cup and flattened together with your fingers.

Cowl pumpkin balls with melted chocolate till you have got a easy and even prime. Once more, faucet the pan gently on the floor in order that it’s evenly unfold over the pumpkin.

Set within the freezer for 5-10 minutes to harden the chocolate. 

homemade pumpkin pie candy cups on marble counterhomemade pumpkin pie candy cups on marble counter

pile of white chocolate pumpkin pie candy cups overhead and broken into piecespile of white chocolate pumpkin pie candy cups overhead and broken into pieces

pumpkin pie candy cups with white chocolate laid out on a marble countertoppumpkin pie candy cups with white chocolate laid out on a marble countertop

Recipe Emma Spear
Pictures Brittni Mehlhoff

What different flavors do you suppose could be good for these sweet cups? They’re really easy to make, I plan to make extra. So, I’d love your recommendations.

Easy methods to Make White Chocolate Pumpkin Candies

Brittni

Pumpkin pie is actually one in every of my favourite fall desserts. My grandma used to make it yearly and it was a kind of issues that I simply all the time regarded ahead to. And after I received older, I might often make pumpkin pie by myself. However now that I’ve a household of my very own, I by no means make it as a result of (sadly) I am the one one in my fam who really likes pumpkin pie.

That is how these yummy pumpkin candies happened. Means simpler to make than a complete pie, however with the identical vibe in a bitesize deal with. Much like these chocolate marshmallow cups, which I additionally love this time of 12 months. Click on via for the autumn recipe.

  • 1 cup graham crackers about 6 crackers finely grounded
  • ⅓ cup of pumpkin puree
  • 2 oz softened cream cheese
  • ¼ cup powdered sugar
  • ¼ tsp pumpkin spice
  • 22 oz white chocolate chips

Combine (virtually) the whole lot and chill.

  • Combine collectively softened cream cheese, powdered sugar, pumpkin puree, pumpkin spice and floor up graham crackers. Place combination in fridge for half-hour to sit back.

Roll into balls.

  • As soon as combination is chilled and set, roll 1 teaspoon of the combination into balls (there needs to be 24) and place on parchment paper. In case you discover the combination to be too sticky, you’ll be able to add extra grounded graham crackers.

Soften the chocolate and add to muffin tin.

  • Soften the white chocolate (utilizing a double broiler or microwave, stirring alongside the best way). Unfold 1 teaspoon into the underside of every lined muffin cup. Faucet the pan gently on the floor in order that it’s evenly unfold. Place in freezer for a couple of minutes to permit chocolate to harden.

Add pumpkin combination and extra chocolate.

  • As soon as bottoms are set, place on pumpkin cream cheese ball into every cup and flattened together with your fingers. Cowl pumpkin balls with melted chocolate till you have got a easy and even prime. Once more, faucet the pan gently on the floor in order that it’s evenly unfold over the pumpkin. Set within the freezer for 5-10 minutes to harden the chocolate.

September 18, 2025 0 comments
0 FacebookTwitterPinterestEmail
Newer Posts
Older Posts

Recent Posts

Welcome to DdecoratyTech. We are The Technology Experts – and we’re here to help you buy, use and enjoy the tech that you live with every day.

Recent Comments

  1. A WordPress Commenter on Inventive Nook: Origami Tulip Tutorial

Recent Posts

  • Spring Inexperienced & Blue Adorning Concepts

    March 22, 2026
  • The Hyperlink Up: Em’s 3 Easter Gown Recs, Arlyn’s Excellent Cool “Mother” Purse, And Some Cute Reasonably priced Decor

    March 22, 2026
  • Design a Wardrobe That Grows With You

    March 22, 2026

Banner add

Promotion Image

Get latest news

Quick links

  • About Us
  • Contact Us
  • Privacy Policy
  • Terms and Conditions
  • Featured posts

Share creativity

Autumn vintage still life with fallen leaves, candles and a knitted blanket. Autumn atmosphere concept

Recent posts

Spring Inexperienced & Blue Adorning Concepts
The Hyperlink Up: Em’s 3 Easter Gown Recs, Arlyn’s Excellent Cool “Mother” Purse, And Some Cute Reasonably priced Decor
Design a Wardrobe That Grows With You
Top Posts
Spring Inexperienced & Blue Adorning Concepts
The Hyperlink Up: Em’s 3 Easter Gown Recs,...
Design a Wardrobe That Grows With You
Are you able to flip any home right...
Trapezoidal Psychedelica – FineWoodworking
Kitchen of the Week: A Residing-Room-Impressed Minimalist Kitchen...

@2024 – All Right Reserved. ddecoraty

Decor-Ddecoraty
  • About Us
  • Contact Us
  • Privacy Policy
  • Terms and Conditions
Decor-Ddecoraty
  • About Us
  • Contact Us
  • Privacy Policy
  • Terms and Conditions
@2024 - All Right Reserved. ddecoraty by ddecoraty

Adblock Detected

Please support us by disabling your AdBlocker extension from your browsers for our website.