

")
Yesterday was my first workday on the studio lavatory, and as is sort of at all times the case when beginning a brand new venture, I bumped into some issues. However not less than I made some progress, so I’m on the right track. 😀
My fundamental objectives yesterday had been to (1) clear out the toilet and take away the entire stuff that was mendacity round on the countertop and ground, and (2) get the partitions to the purpose the place I might begin mudding the tough areas left behind after I eliminated the chair rail and tile.
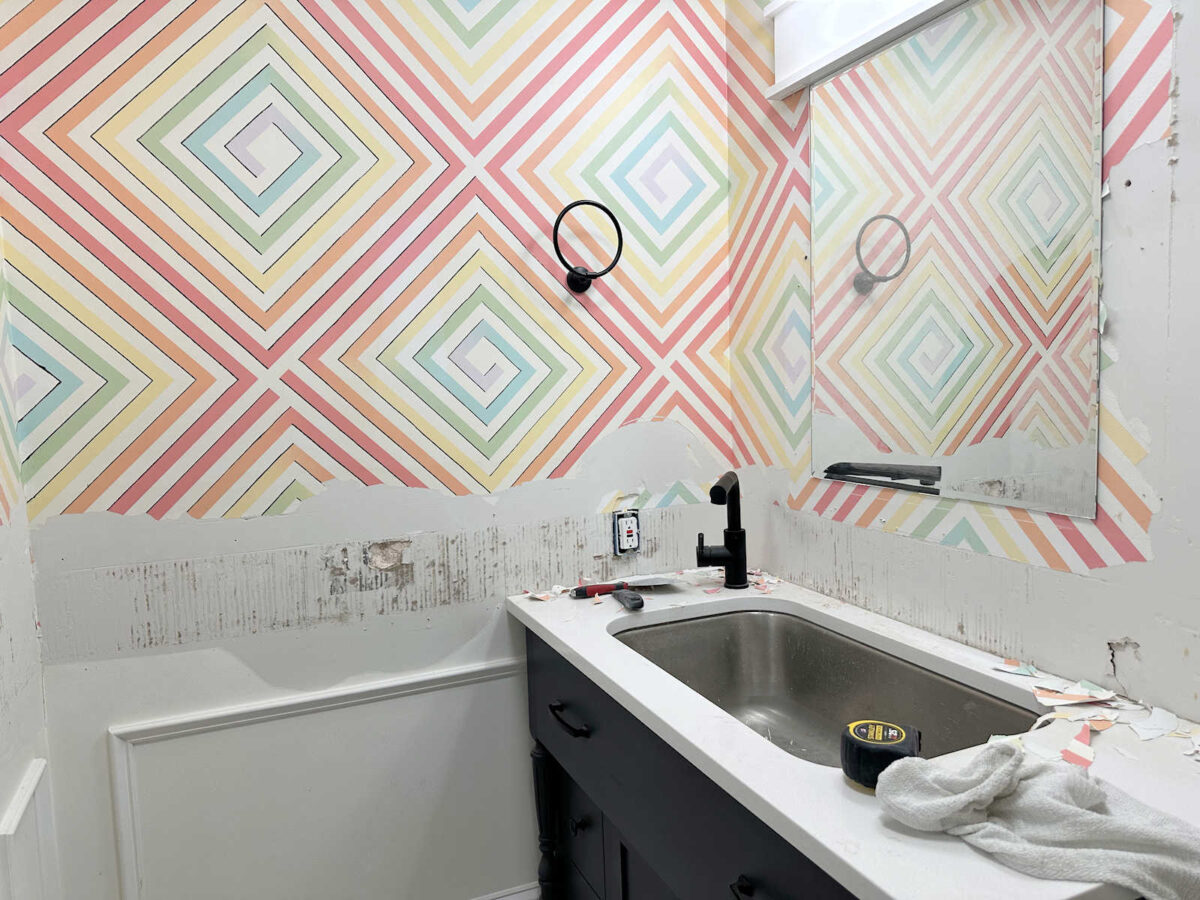
I had put in the tile utilizing these sticky pads as an alternative of mortar, and getting these off of the wall induced injury to the drywall. All the best way across the room, it took off the primer and paint layer, leaving the primer and paint layer that remained very free and jagged. So I wanted to get that smoothed out in order that I might put drywall mud over it. That course of went pretty properly on this space…
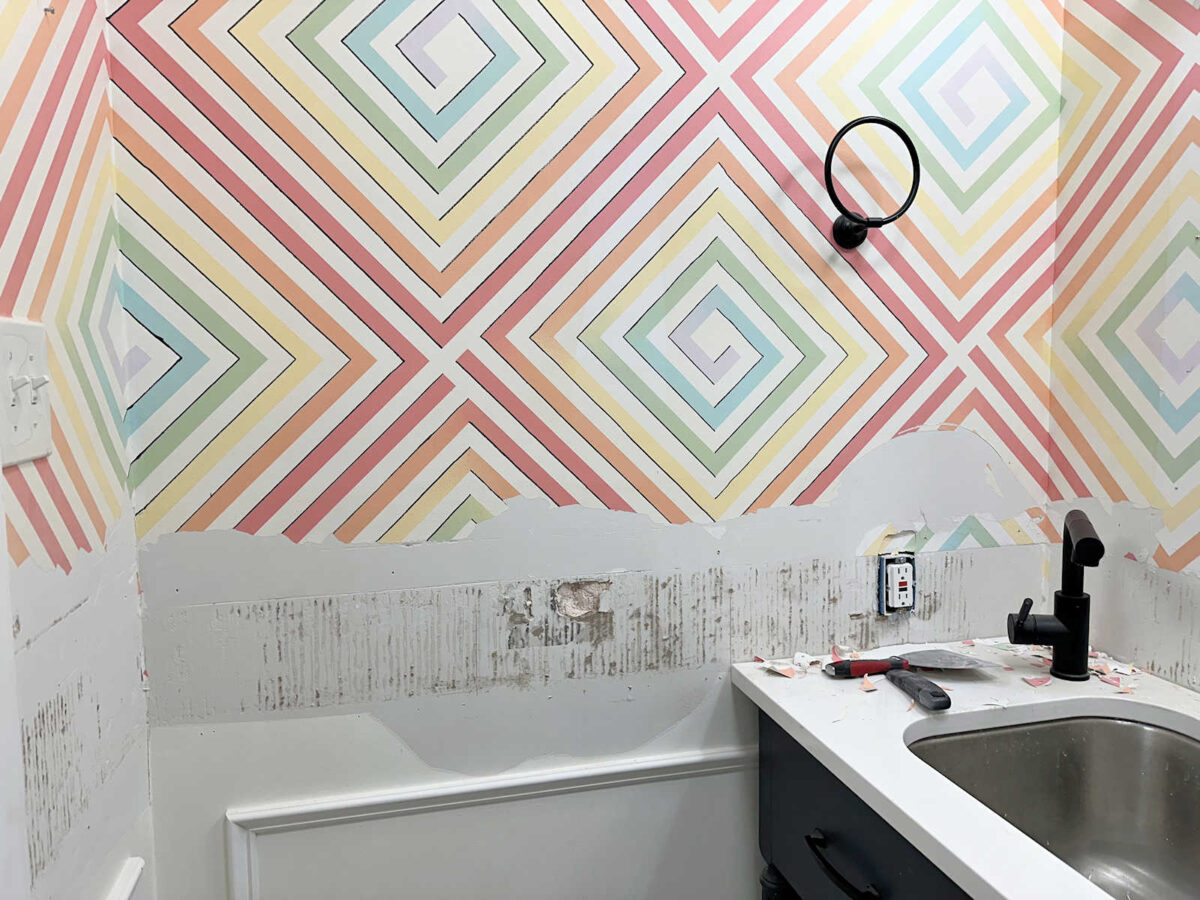
I used to be utilizing a 6-inch metallic drywall knife to do that, and after I acquired to this wall, the primer and paint layer got here off like I used to be eradicating wallpaper. I’m a bit obsessive in the case of peeling issues, so I simply stored scraping and peeling, and earlier than I knew it, I had peeled this a lot off of the wall.
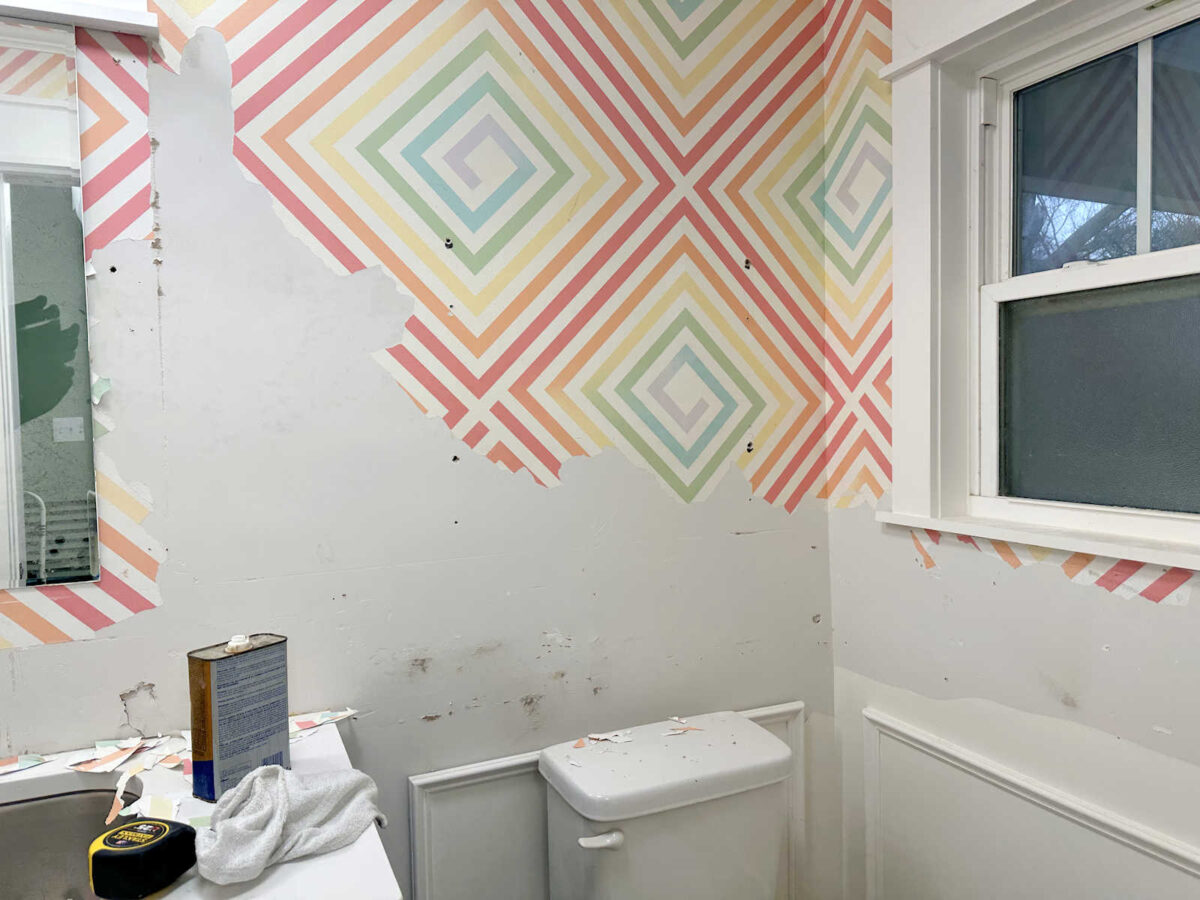
I might have stored going. I wished to maintain going as a result of, once more, I’ve this bizarre obsession with issues that peel off simply. However I spotted that if I didn’t discover a stopping level, I’d spend the subsequent week peeling these partitions, and that might be an enormous waste of time. I simply wanted to a stopping level the place the entire edges had been flat and adhered to the wall in order that I can mud over the perimeters. I believe I lastly have the entire edges to that time now, and I’ll be mudding the room at this time. My purpose is to get the partitions sanded, primed, and prepared for wallpaper by the top of the day at this time.
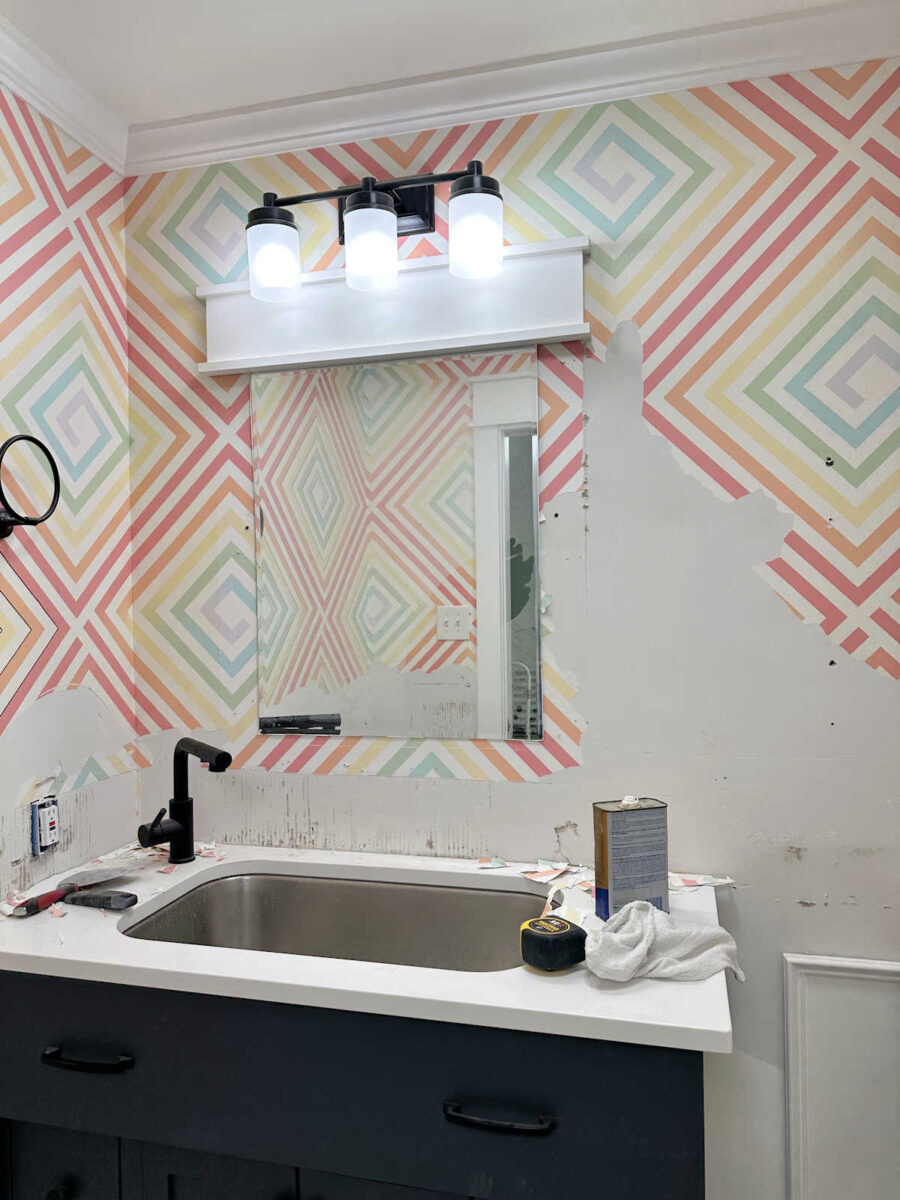
I bumped into an issue with the mirror, although. I can not get this factor off of the wall.
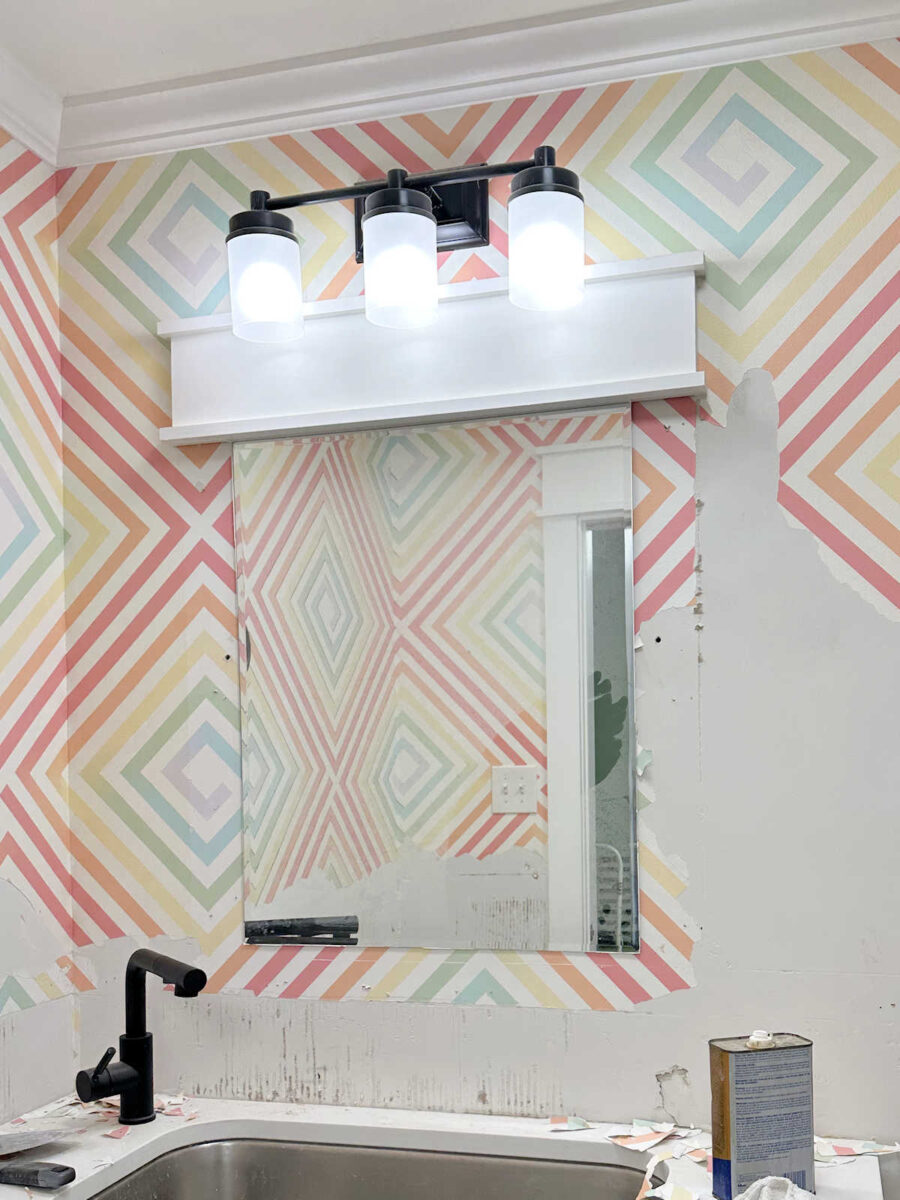
I used to put in all the pieces — each single piece of trim — with building adhesive. I realized a few years in the past that utilizing building adhesive on all the pieces is a large waste of money and time, and if I ever wished to take away the trim, it destroyed the drywall. However clearly, I didn’t be taught that lesson with mirrors.
I do know I used mirror mastic to connect this to the wall, and evidently, I used a complete tube of it for this small mirror. I can’t get this factor to budge in any respect. I’m not involved about breaking the mirror since I received’t be reusing it. So I wasn’t even being light with it. However regardless of how a lot I pried, and it doesn’t matter what I used to shove between the wall and the mirror to separate the 2, I couldn’t make any headway on it. So in case you have any recommendation on learn how to take away a mirror that’s glued to the wall with mirror mastic, I’d love to listen to it!
One design resolution that I nonetheless must work out is learn how to transition from the wainscoting to the wallpaper. On this unique lavatory design, I used a row of tiles. They supplied a backsplash for the sink space, after which I carried them across the room as an accent.
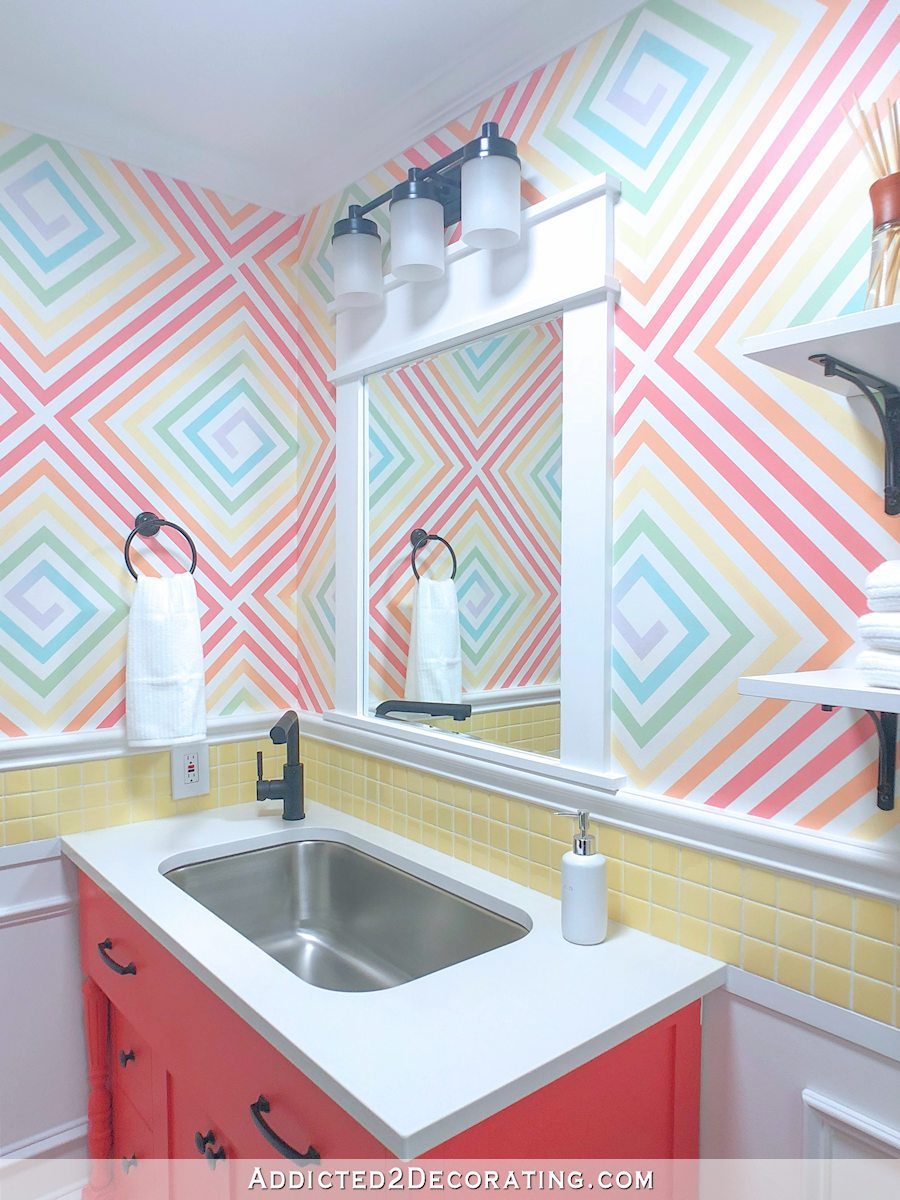
However I can’t even think about utilizing tiles with this wallpaper. I don’t suppose there’s any type of tile that might look good with this wallpaper coated in squares.
Sq. tiles like I had earlier than actually wouldn’t work. That might be squares with squares, and that’s overkill. Rectangle tiles wouldn’t work, both. I thought of utilizing white penny tiles with white grout, however when I attempt to image that in my thoughts, I believe it could be method too busy additionally.
So I believe I’ll finish utilizing wooden. Initially, I assumed that utilizing wooden won’t be the most effective concept since will probably be a backsplash across the sink space, however folks use wainscoting behind and round sinks in loos on a regular basis. It’s really quite common. And it’s actually the one possibility I believe will work with the wallpaper. I think about ending off the highest of the wainscoting to look much like the wainscoting on this lavatory. (Photograph from Houzz. Rest room by Rachael Liberman Design, LLC.)
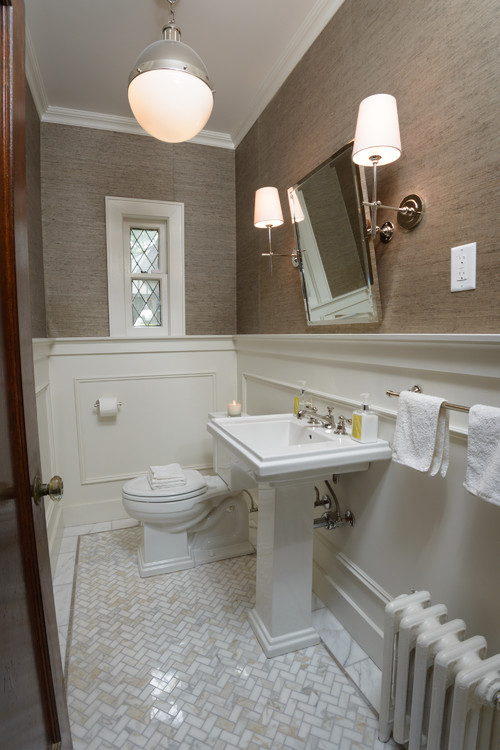
Photograph by Rachael Liberman Design LLC – Uncover powder room design inspiration
However in my lavatory, that prime large piece of lumber will sit proper on prime of the countertop. I can envision that, and I believe it’s the one possibility that can end off the highest of the wainscoting with out being too busy and competing with the wallpaper.
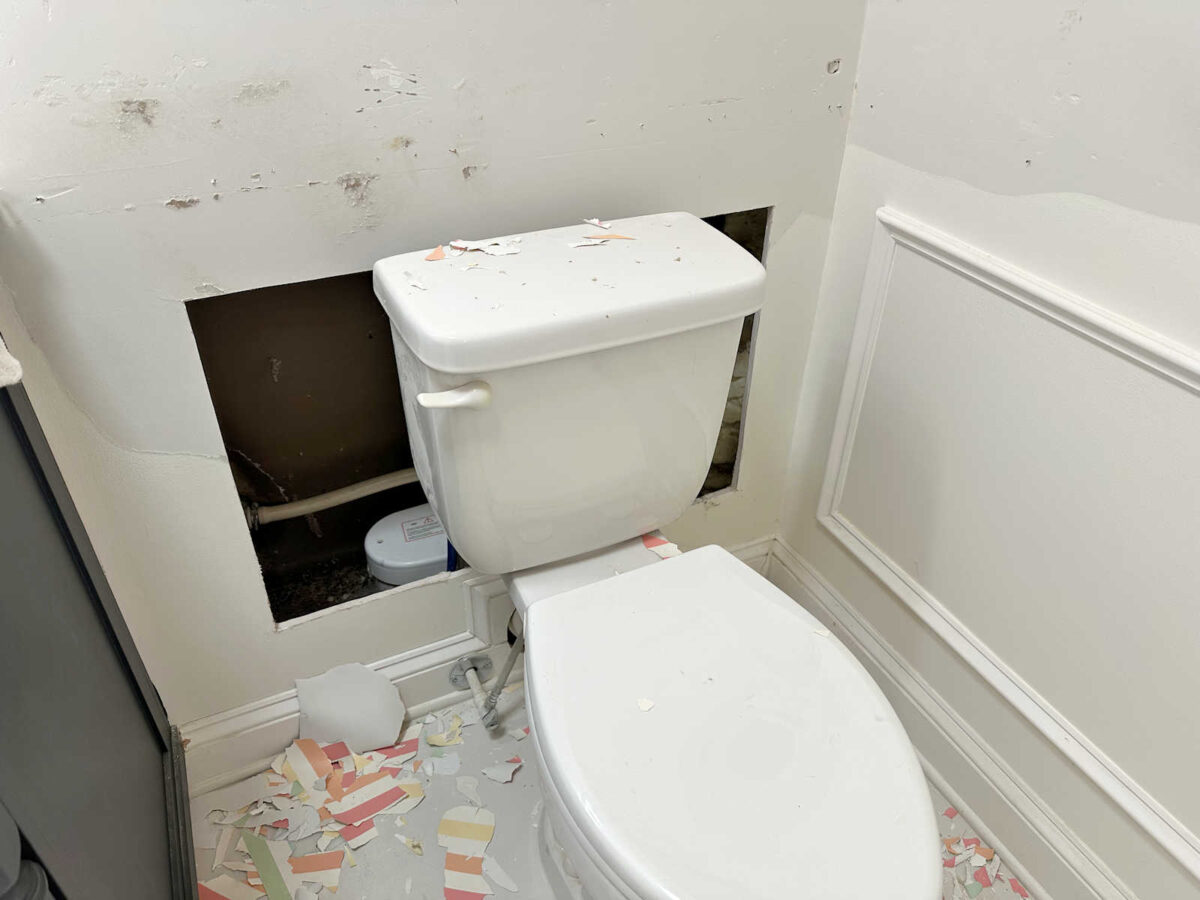
The image body molding has to remain precisely the place it’s. I don’t have the choice of constructing it taller or swapping it out for one thing completely different as a result of the entire motive I added image body molding to this room is to disguise the detachable panel behind the bathroom.
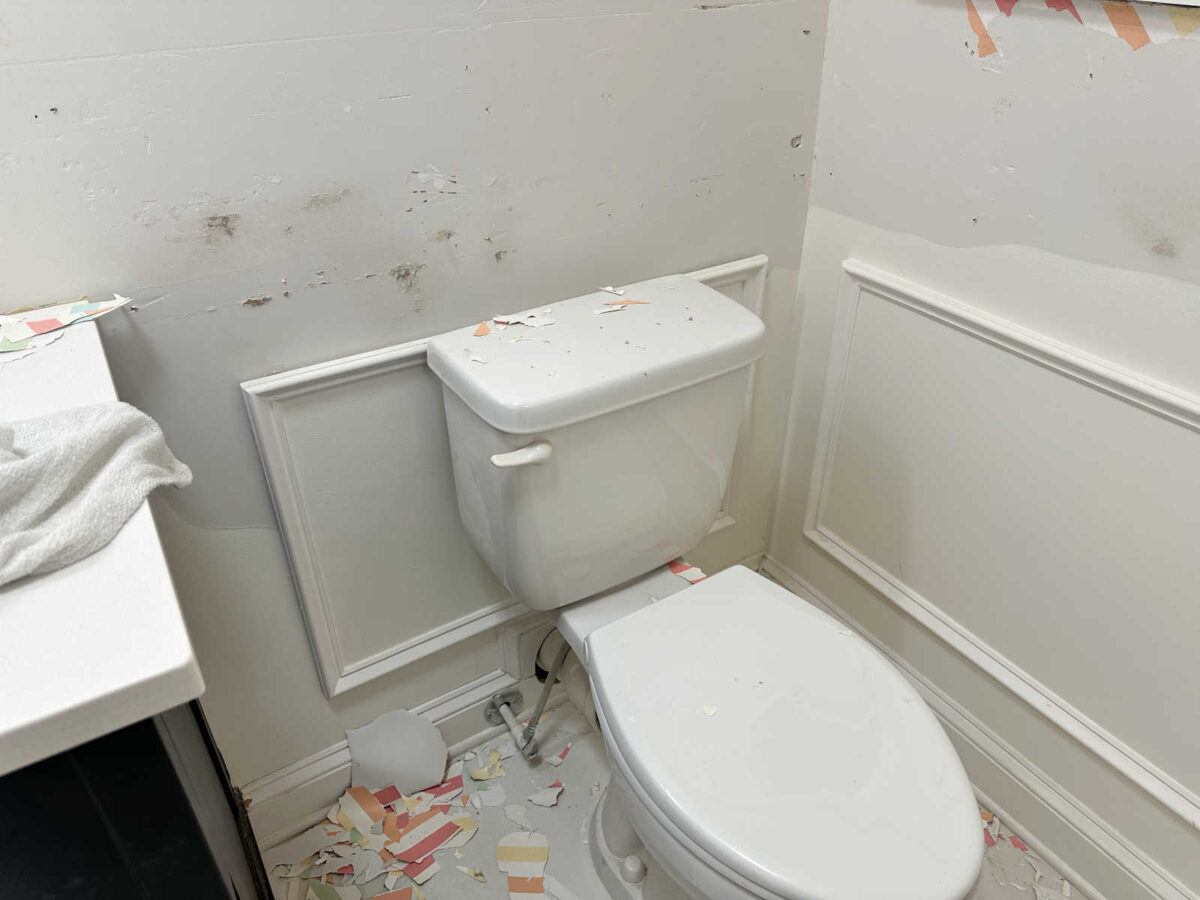
That panel is detachable to entry the pump behind the bathroom. So the image body molding has to remain, and it has to remain precisely the place it’s.
In order that’s the progress and the plan for now. And now that I’ve the partitions scraped and prepared for drywall mud, I’m hoping to make a number of progress in right here over the weekend. I’m anxious to get that wallpaper up!!
Extra About My Studio Rest room
see all studio
lavatory diy initiatives
learn all studio
lavatory weblog posts

Addicted 2 Adorning is the place I share my DIY and adorning journey as I transform and beautify the 1948 fixer higher that my husband, Matt, and I purchased in 2013. Matt has M.S. and is unable to do bodily work, so I do the vast majority of the work on the home on my own. You possibly can be taught extra about me right here.
")

")


")
