


After I was learning design at San Diego State College, I noticed a grad pupil utilizing a router on the lathe to make good cylinders for a sculpture of an enormous coat hanger. He constructed a easy field out of scraps and clamped it to the lathe, with the router driving on high. I noticed the jig only for a second in passing, however it caught with me.
In a while I constructed considered one of my very own, refining it for shaping furnishings legs, each straight and tapered. In comparison with utilizing conventional turning instruments, the jig makes it simpler to create straight, uniform cylinders. Benefiting from the indexing perform within the lathe’s headstock, I additionally use the jig to rout the mortises wanted to affix these legs to rails. Tenon the rails, add a high, and also you’ve bought a beautiful desk.
I’ll focus right here on the jig I exploit to make and mortise desk legs. Just by utilizing completely different router bits, the identical jig can be utilized to make sliding dovetail joints in legs, or so as to add ornamental fluting or beading alongside their size. I even have a model of the jig that makes an enormous, spherical base for a stool. To reap the benefits of the jig’s joinery-cutting skills, you’ll want an indexing characteristic in your lathe, however most lathes have them.
The jig proven right here was made to suit my lathe, router, and the 29-in.-long legs I used to be making. Due to the best way the tailstock of a lathe can slide into the jig field an extra 4 in. or 5 in., you’ll have the ability to use the identical jig to make considerably shorter legs than it was designed for. You may also slide the jig backwards and forwards alongside the lathe mattress to entry completely different components of a leg, which turns out to be useful at instances. That mentioned, to leap down from eating desk–measurement to finish desk–measurement legs, for instance, you’ll must construct a special jig.
Easy anatomy

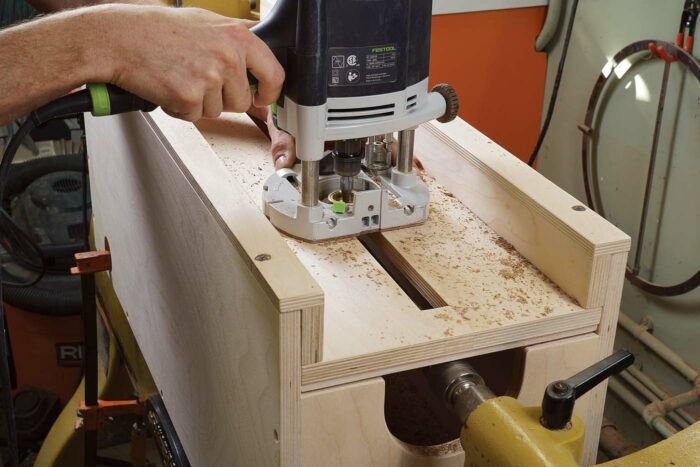
The jig is absolutely simply a big field that’s clamped to the lathe, with a detachable high plate that guides the router. The field has an extended cleat on the backside that matches between the methods of the lathe mattress, centering it and permitting it to slip facet to facet if wanted, and holes in its sides for clamping it to the mattress.
|
|
|


The highest plate attaches to the jig with straight or tapered brackets—tapered ones for shaping the primary a part of the leg, and straight ones for turning the straight high part of the leg and for routing the mortises. If don’t need your legs to have a straight part on the high, run the taper all the best way up. The joinery will nonetheless work positive.
By the best way, the jig field catches nearly the entire chips from turning and mortising, leaving you minimal cleanup.

The size of the jig is decided by the size of the legs you want (and restricted in fact by the utmost distance between your headstock and tailstock). Begin with the leg size after which add 4 in. to get the size of your jig field.
The edges of the field have to be excessive sufficient to accommodate the biggest spindle turnings you intend to make. I didn’t assume I might need to make spindles any bigger than 4 in. dia., so I added 3 in. to the peak of the lathe’s facilities (from lathe mattress to lathe facilities) to accommodate a 2-in. spindle radius plus the highest plate. The back and front panels have to be shorter than the facet panels to permit the highest plate to drop down into the jig field.

The within of the jig must be broad sufficient to accommodate the router you’ll be utilizing, together with its handles, if they’re low sufficient to get in the best way. You could possibly flip the handles sideways to suit the router within the field, however that may be problematic for 2 causes: First, the handles will run into the headstock, limiting the router’s journey. Second, you don’t actually need to rotate the router when mortising; if the bushing isn’t completely centered, rotating the router will create inaccurate mortises.
The L-shaped brackets, each tapered and straight, connect to the highest edges of the field to carry the highest plate. Measurement the straight brackets so the router can get as shut as doable to the work. This can allow you to maximize the depth of the mortises. To determine the taper angle and plan the joinery, I make full-size leg drawings for every mission I do.
The jig may be saved and used for a lot of future units of legs. So quite than simply driving screws to carry the brackets on the highest edges of the field and the highest plate to the brackets, I exploit threaded inserts and flat-head machine screws, creating a way more sturdy attachment system.

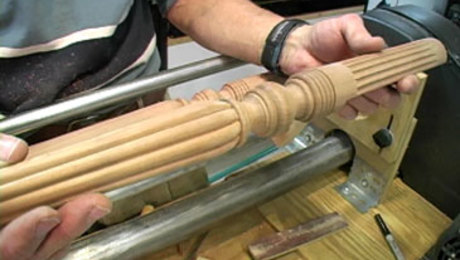
Turning the legs

Reduce the leg blanks not less than 1/2 in. extralong. When mounting them on the lathe, put what you wish to be the highest finish of every clean closest to the headstock, the place the spur heart will hold it extrasecure for mortising. Then connect the tapered brackets to the highest plate of the jig so the heaviest minimize will likely be close to the tailstock.
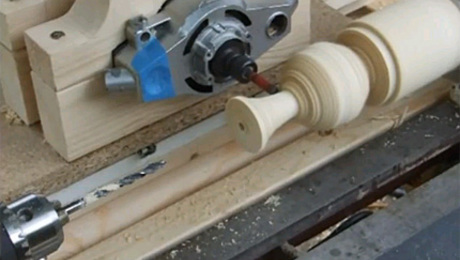
After attempting quite a lot of straight bits for turning the legs, I’ve discovered that approach issues greater than the bit you employ, so long as it’s sharp. I exploit the identical 3/8-in.-dia. spiral bit for shaping the legs and chopping the deep mortises.
 |
 |
Sluggish and regular wins the race—Set the lathe to roughly 400 rpm, transfer the router slowly and steadily from left to proper to make certain you aren’t climb-cutting, and don’t plunge greater than 1/8 in. at a time.

For those who go too quick or minimize too deep, the leg will vibrate and also you’ll get deep chatter marks. You may take away these with subsequent passes in case you gradual the lathe and the feed charge.

If you get near the ultimate diameter on the tip of the leg, make a light-weight closing cross, 1/32 in. deep or so. Then make one other gradual cross on the similar depth to assist take away extra milling marks. Now set the depth cease in your plunge router so you’ll be able to return to the identical depth on subsequent legs.
 |
 |
Taper the entire legs earlier than transferring on to mortising. If you need a straight part on the high of every leg (as I often do), commerce the tapered brackets for the straight ones and mill these sections now.
Sand with a block—The router will go away milling marks on the legs irrespective of how cautious you might be, however these sand away simply.

I exploit spray adhesive to connect 80-grit paper to an extended MDF block. The block ensures that the legs keep straight as I sand them. As soon as the router marks are gone, I maintain strips of sandpaper in my fingers to easy the floor additional, sanding calmly up via 220 grit.
Mortising with the jig
One of many nice issues about this jig-and-router setup is the way it additionally cuts the mortises you’ll want for becoming a member of legs to rails.
 |
 |
When sizing and positioning stops to restrict the size of the mortises, you’ll must account for the bushing offset. Just one cease is required for the shallow mortises, that are open on the high of the leg, however I go away not less than 9/16 in. of stable wooden above the deep mortise to make certain the leg doesn’t crack below stress.
Since I exploit the identical 3/8-in. up-spiral bit for turning the legs and chopping the deep mortises, the bit/bushing setup is identical for these steps. Be certain that the leg is safe on the drive heart earlier than mortising; tighten the tailstock if it isn’t. You may also use a four-jaw lathe chuck for extra safety.

Every leg will get two mortises, 90° aside, and I wish to sneak up on the depth so the mortises meet at a pointy nook contained in the leg. Lock the indexing pin for every mortise, and make a sequence of sunshine passes, roughly 1/8 in. every time.

To chop the shallow pockets that home the complete thickness of the rails, I alternate the three/8-in. bit for a 3/4-in.-dia. straight bit.

Becoming rails to the legs
Step one is to mill the rails to suit snugly within the shallow a part of the mortises. Creep up on the precise thickness, test-fitting the rails within the shallow pockets as you go.

The underside finish of the pockets will likely be rounded from the router bit, so I simply around the bottoms of my rails on the router desk to suit the rounded pockets. However you might additionally go away the rails square-edged after which sq. the underside ends of the pockets with some fast chisel work. The highest of the rails reaches proper to the highest of the legs.
 |
 |
Reduce the tenons utilizing no matter methodology you like, however be certain they’re centered on the thickness of the rails. Lastly, you’ll must spherical the highest and backside of the tenons to suit into the routed mortises. I do that with a rasp.

Likelihood Coalter is a woodworking teacher at Palomar School in San Marcos, Calif.

Nice Woodworking Really helpful Merchandise

Double Sided Tape
A skinny woven core makes XFasten tape sturdy but not too thick (0.008 in.), and helps it maintain powerfully with out being tough to peel off.
CrushGrind Pepper Mill Mechanism
Matt Monaco designs his pepper mills to simply accept the CrushGrind mill mechanism, which he likes as a result of it doesn’t require drilling via the highest of the mill’s cap and having {hardware} uncovered on high.
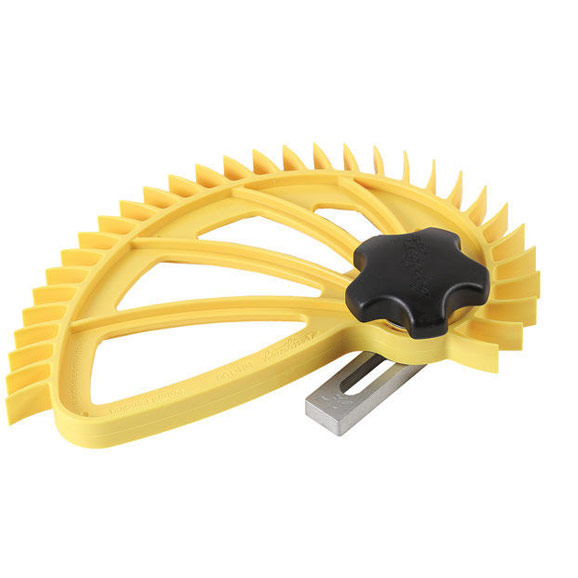
Hedgehog featherboards
The Hedgehog’s distinctive spiral form and single knob make it straightforward to arrange and quick to regulate.
Join eletters in the present day and get the most recent strategies and how-to from Nice Woodworking, plus particular presents.
")

")


")
