


The sew and flip methodology is certainly one of my favourite piecing methods. It’s easy, fast, and ideal for including a little bit of dimension to your quilt with out the trouble of working with bias edges. Whether or not you need to create flying geese, snowball corners, or add star factors, this methodology is a go-to for quilters of all ranges. For this tutorial, I’ll stroll you thru the method utilizing the rectangle-and-square method, together with suggestions for reaching exact outcomes each time.

Need an ad-free, printable copy of this tutorial? Scroll to the underside of this publish for extra particulars!
Why Use the Sew and Flip Methodology?
This methodology lets you simply incorporate diagonal designs by including squares onto corners of bigger items. It minimizes material stretching, which is usually a concern with bias seams. Plus, it’s versatile—you need to use it for borders, star factors, or create secondary designs like diamonds or geometric patterns. With just some easy steps, you’ll remodel rectangles and squares into distinctive angled blocks that add curiosity to your quilts.
Supplies

Step-by-Step: The way to Sew and Flip with Rectangles and Squares
Step 1: Minimize Your Cloth
- One 6.5” x 3.5” rectangle (for the bottom).
- Two 3.5” x 3.5” squares (for the corners).
Step 2: Mark Your Diagonal Traces
Make a rectangle block with diagonal corners utilizing this method—splendid for including angles in star blocks or creating enjoyable snowball results.vDraw a diagonal line on the again of every sq. from nook to nook. Notice: I favor a effective line water erasable pen for this. This can be your stitching information. In case you favor to skip the marking step, use a Inventive Grids Nook Clipper to pre-trim the corners as a substitute. See directions that include this ruler.


Step 3: Align and Sew
Place a 3.5″ sq. on one nook of the rectangle, proper sides collectively, with the diagonal line pointing throughout the nook. Sew utilizing a scant ¼” seam allowance. For extra on reaching exact seams, see my 1/4″ Seam Allowance publish on the significance of utilizing a scant quarter inch seam allowance. Professional Tip: Sew simply outdoors the drawn line—this small adjustment accounts for the thickness of your pen mark and thread. It additionally ensures your block doesn’t find yourself too small.

Step 4: Trim and Press
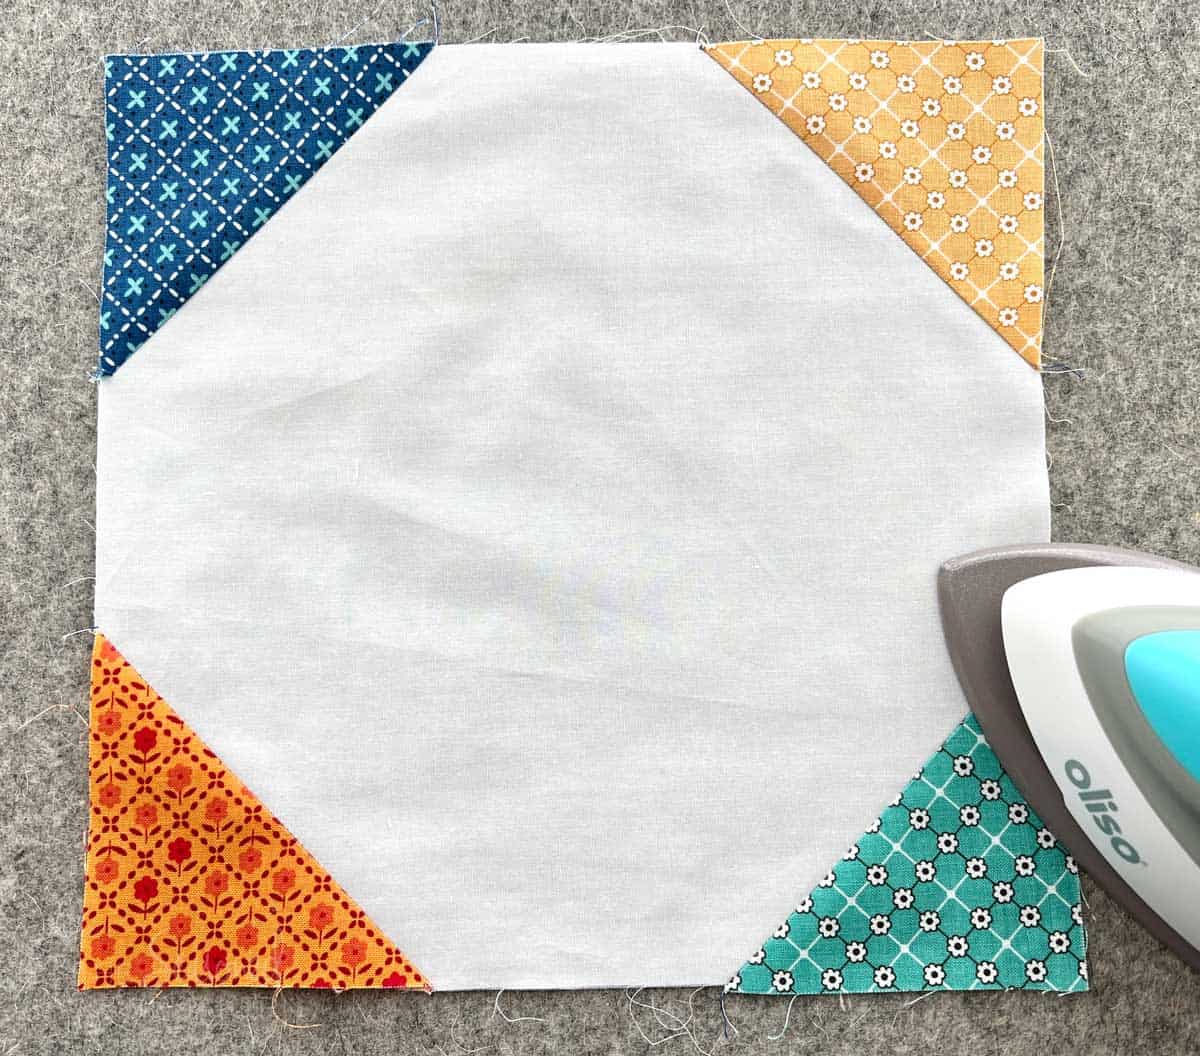
Trim the surplus material ¼” away from the seam, and put aside the additional triangle. Notice: Hold the discarded triangles for a future venture! Press the sewn sq. to create a triangle on the nook of the rectangle. Urgent Tip: Press seams towards the triangle for smoother outcomes and lowered bulk.


Step 5: Make a Flying Geese Block
Use this methodology for creating exact flying geese. Place the second 3.5″ sq. on the other nook of the rectangle. Sew alongside the diagonal line, trim the surplus, and press in the direction of nook. With each corners full, you’ll have good flying geese!


Sensible Suggestions for Precision
- Trimming for Accuracy: Utilizing a BlocLoc ruler helps you lock into the seams and trim precisely. This makes an enormous distinction, particularly in the event you’re piecing a number of models collectively.
- Keep away from Bulk: Be conscious when urgent seams and press in the direction of the nook.
- Pre-trimming to Save Time: Pre-trimming with instruments just like the Inventive Grids Nook Clipper can velocity issues up and remove the necessity for repeated markings.
Inventive Methods to Use Sew and Flip
This method works superbly for snowball corners, star factors, or secondary designs like diamonds. It’s additionally a implausible method to incorporate leftover material scraps into smaller tasks like desk runners or mug rugs. You’ll be able to even apply it to borders, including visible curiosity with out complicating your design.
Specialty Ruler Tip
Use a BlocLoc Ruler after flipping open your material to make sure that the stitched triangle lies completely flat. The grooves of the BlocLoc ruler lock onto seams, serving to you trim any extra material with out shifting.
A Few Design Concepts for Sew and Flip
The rectangle-and-square methodology opens the door to many inventive design potentialities:
- Snowball Corners: Add a diagonal sq. to every nook of a giant block for a smooth, rounded impact.
- Star Factors: Use rectangles with sew and flip corners to create star factors for conventional star quilts.
- Diamond-Impressed Blocks: Alternate rectangle models with sew and flip corners to type diamond patterns throughout your quilt high.
Conclusion
The rectangle-and-square model of the sew and flip methodology is a flexible method to introduce angled strains into your quilt blocks. With slightly apply and the proper instruments you’ll discover that this method is each straightforward and enjoyable. It’s good for snowball blocks, star factors, and extra intricate designs.
Now it’s time to collect your material, heat up your stitching machine, and do this method! Don’t overlook to verify tutorials on Seasoned Homemaker for extra inspiration and useful suggestions.
Click on the button under to find out about an ad-free, printable copy of this tutorialad-free, printable copy of this tutorial? Scroll to the underside of this publish for extra particulars!

")

")


")
