


Make spring sweeter with Flower Pot Cupcakes! Take pleasure in layers of brownies, pudding, and Oreos topped with playful bunny-themed designs everybody will love. This put up might include affiliate hyperlinks.
Flower pot cupcakes are a artistic and pleasant deal with that’ll brighten up any celebration. Whether or not you are planning for a birthday, a themed occasion, or simply in search of a enjoyable exercise to get pleasure from with youngsters, these edible “flowerpots” are as pleasant to make as they’re to eat. They mix playful designs with scrumptious layers for a dessert that actually stands out.
Why You will Love It
They’re an Cute Showstopper
Flower Pot Cupcakes should not only a dessert—they’re a dialog piece! The colourful designs mimic actual flower pots, making them a feast for the eyes earlier than they’re ever eaten.
Good for Any Event
From springtime brunches to tea events, these cupcakes deliver a particular contact to any occasion. You’ll be able to customise them to match seasonal decor or a particular theme. They’re versatile sufficient to characteristic on the dessert desk at a birthday celebration or shine as a stand-alone reward.
Straightforward and Enjoyable to Customise
What’s even higher than having fun with a cute dessert? Making it your personal! Personalizing Flower Pot Cupcakes is a breeze. Change up the colours, add edible decorations, or attempt a brand new taste mixture. The choices are as countless as your creativeness!
Add edible flowers to cups with these Sunflower Cookies with Sweet Ladybugs.
Child-Pleasant Leisure
These cupcakes are a success with youngsters and adults alike. Little ones can have a blast serving to to assemble and embellish them. As a no-fail addition to household actions, they mix baking, crafting, and snacking into one fun-filled afternoon.
No Design Expertise Required
Suppose you want superior adorning abilities to nail the flowerpot look? In no way! With easy instruments and substances, you may create edible masterpieces that appear to be they got here from a bakery.
Professional tip: Use skinny plastic cups for shaping the chocolate pots—it makes the method hassle-free and ensures excellent outcomes.
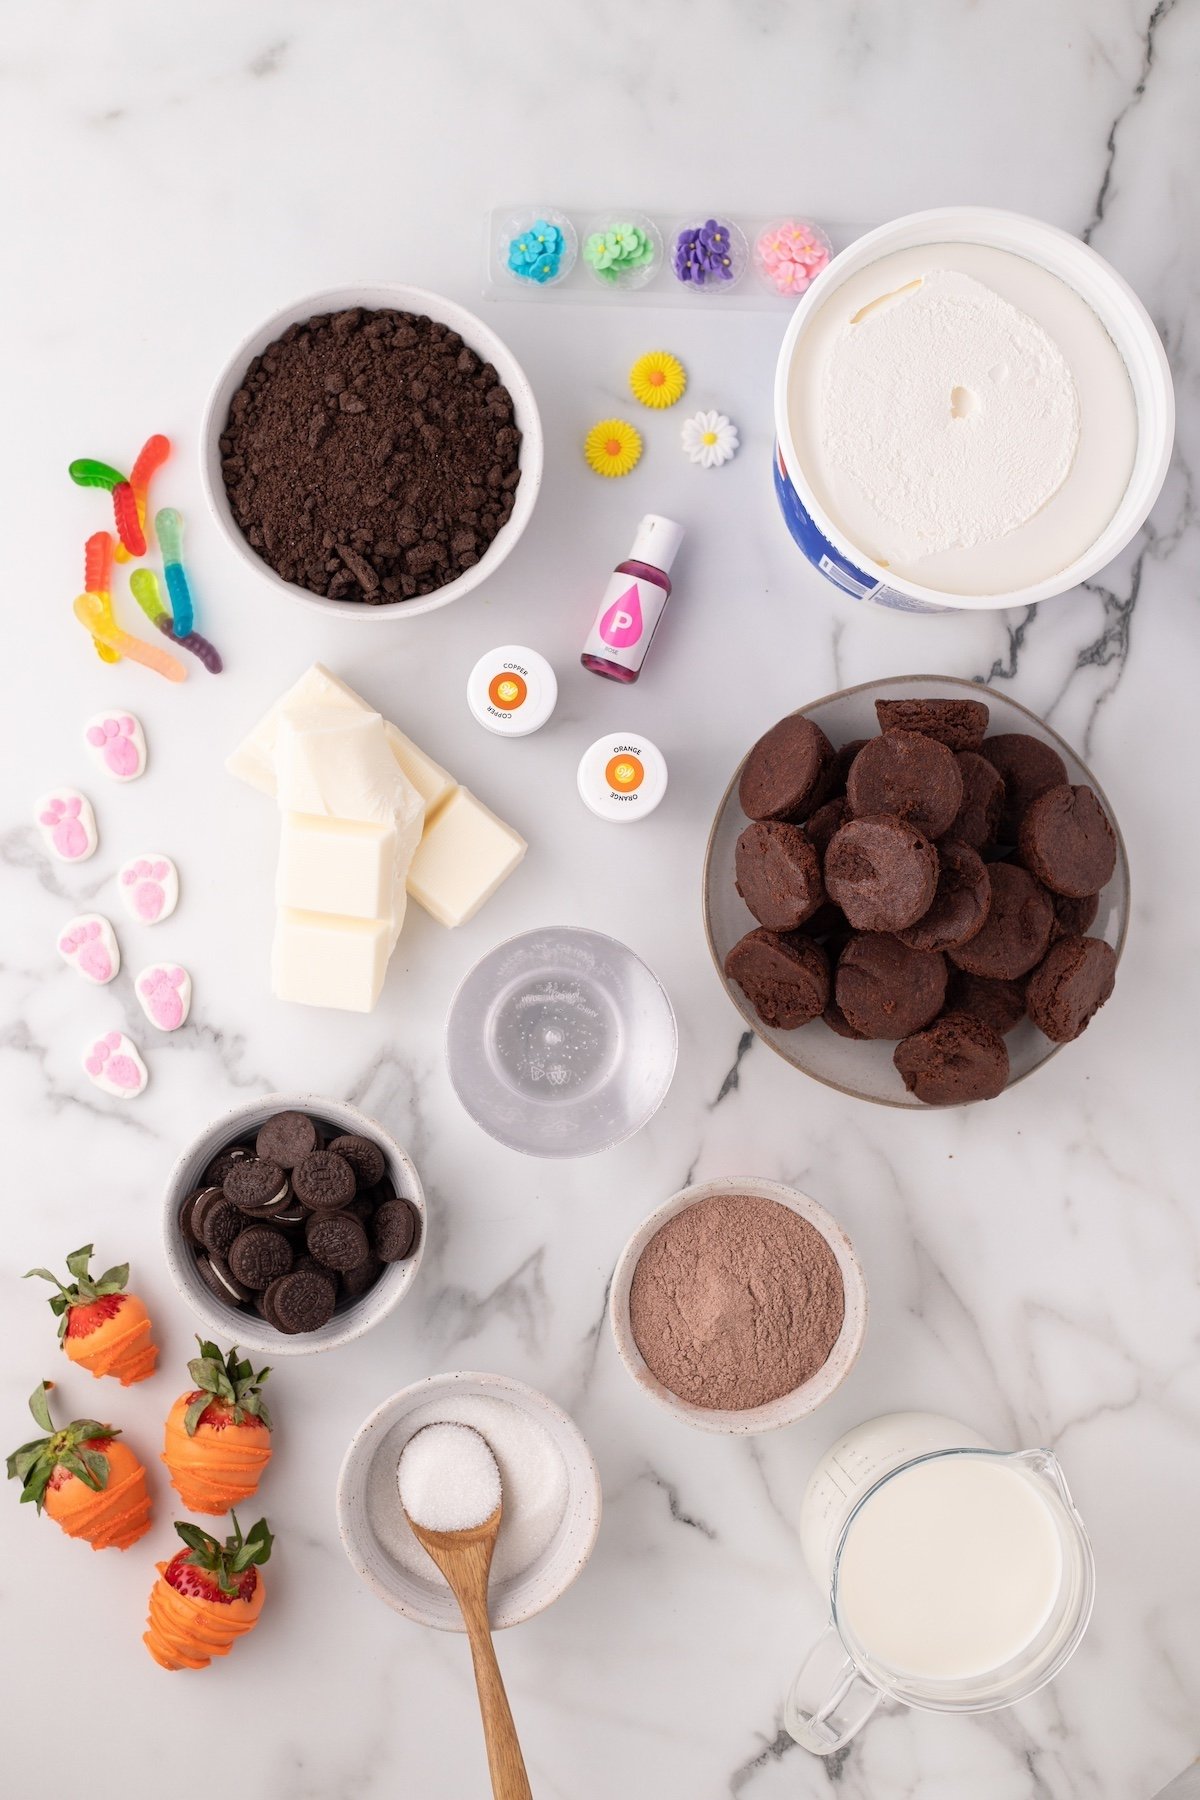
Substances
Tips on how to Make Cute Flower Pot Cupcakes
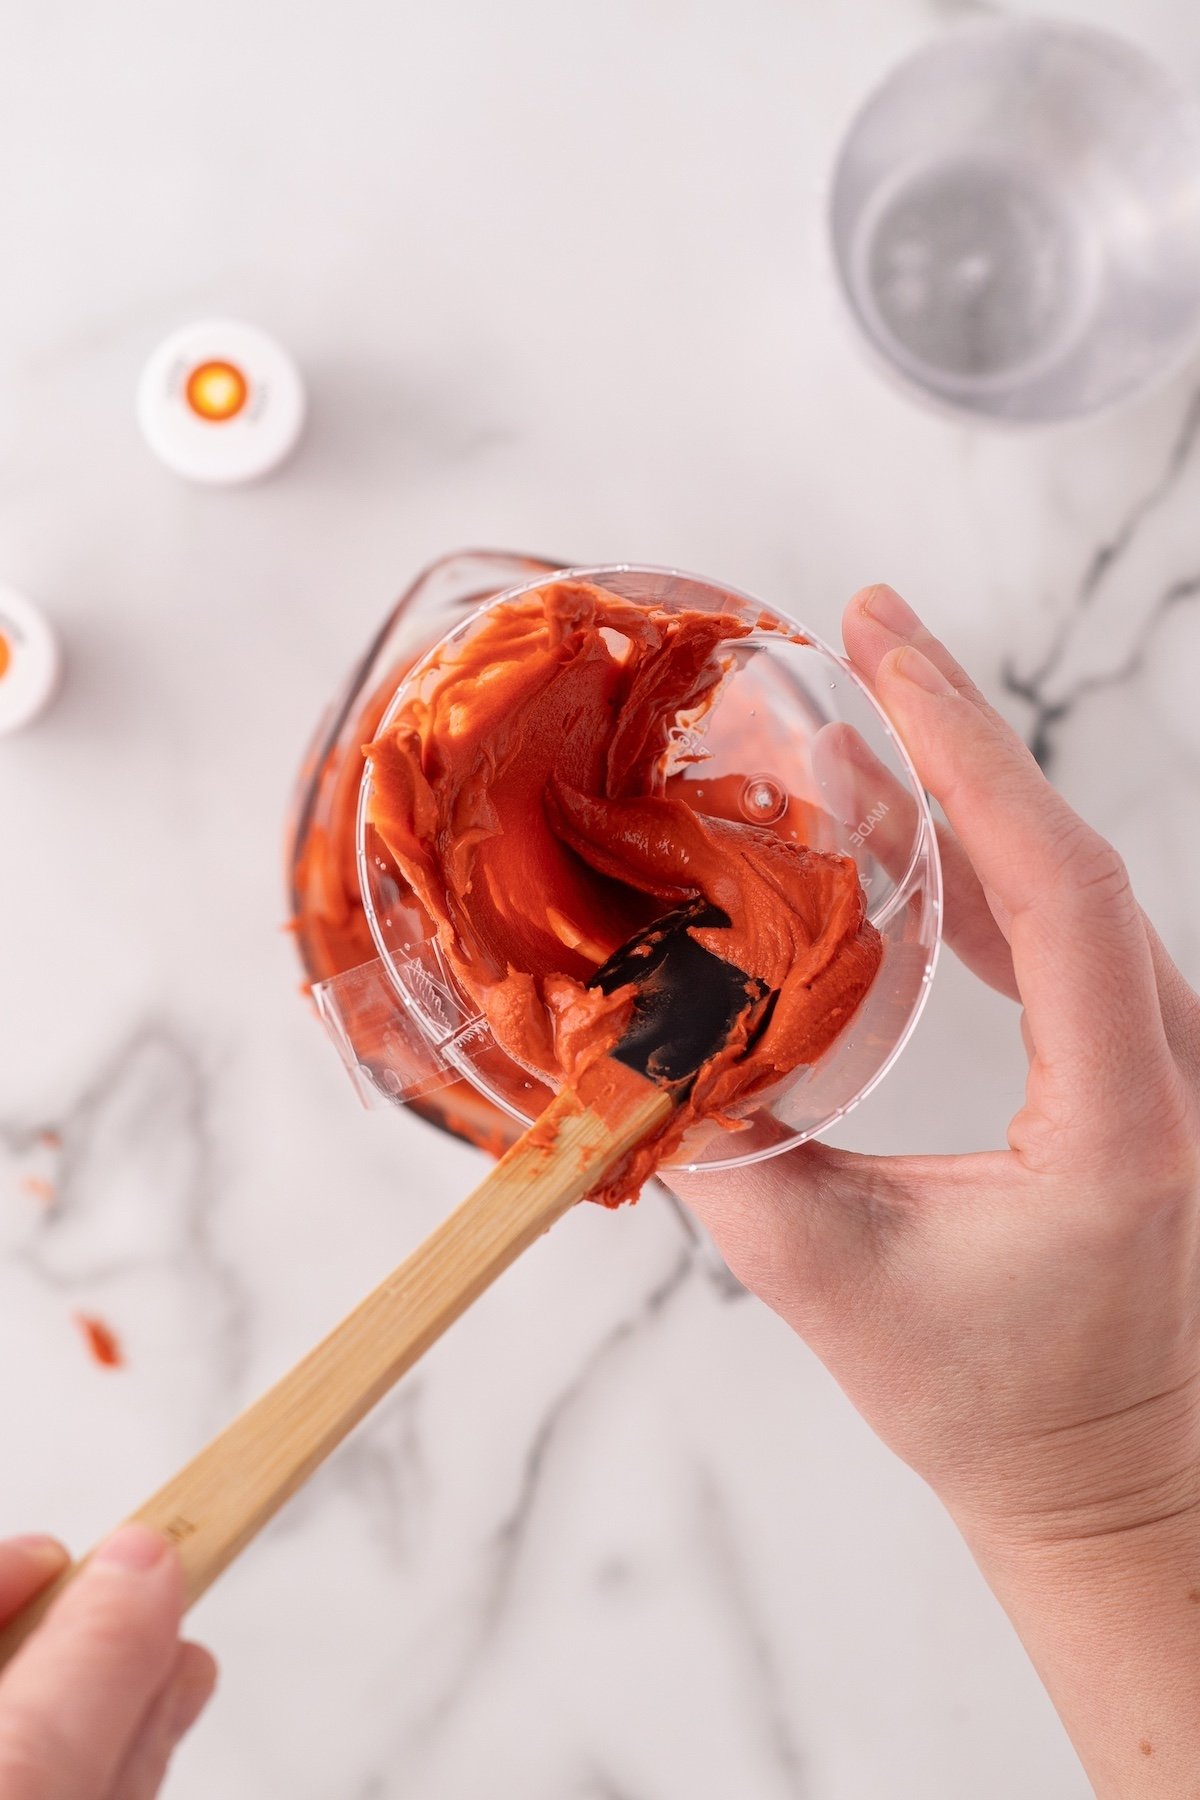
Soften the almond bark in a microwave-safe bowl. Warmth in 30-second bursts, stirring every time, till easy.
Add 3 drops of copper gel coloring, 1-2 drops of orange gel coloring, and a couple of teaspoons of coconut oil to the melted almond bark. Combine properly to get that terracotta coloration in your flowerpot.

Make the Chocolate Shells
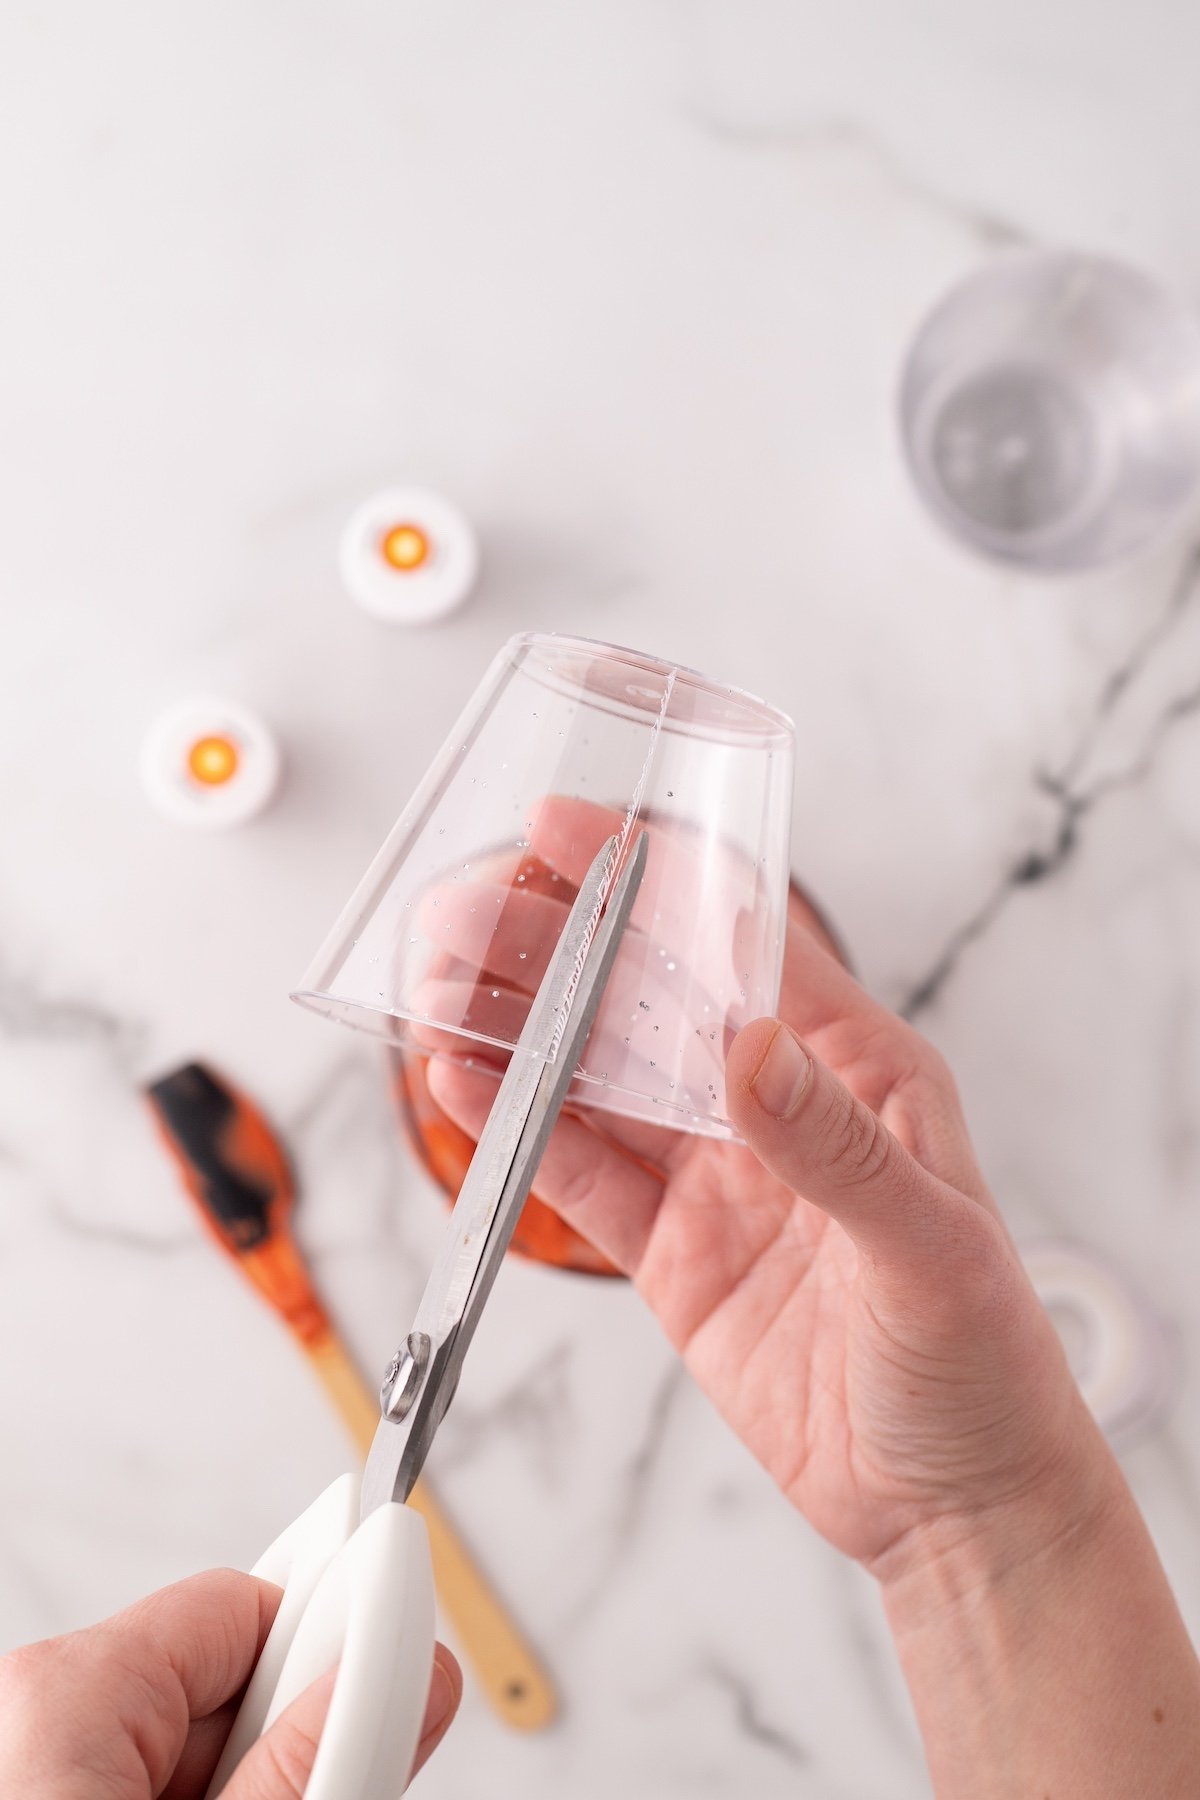
Lower a straight line down the facet of a plastic cup. Place a bit of tape on the skin to carry it collectively and preserve the chocolate from leaking. This makes it simpler to take away the chocolate later.
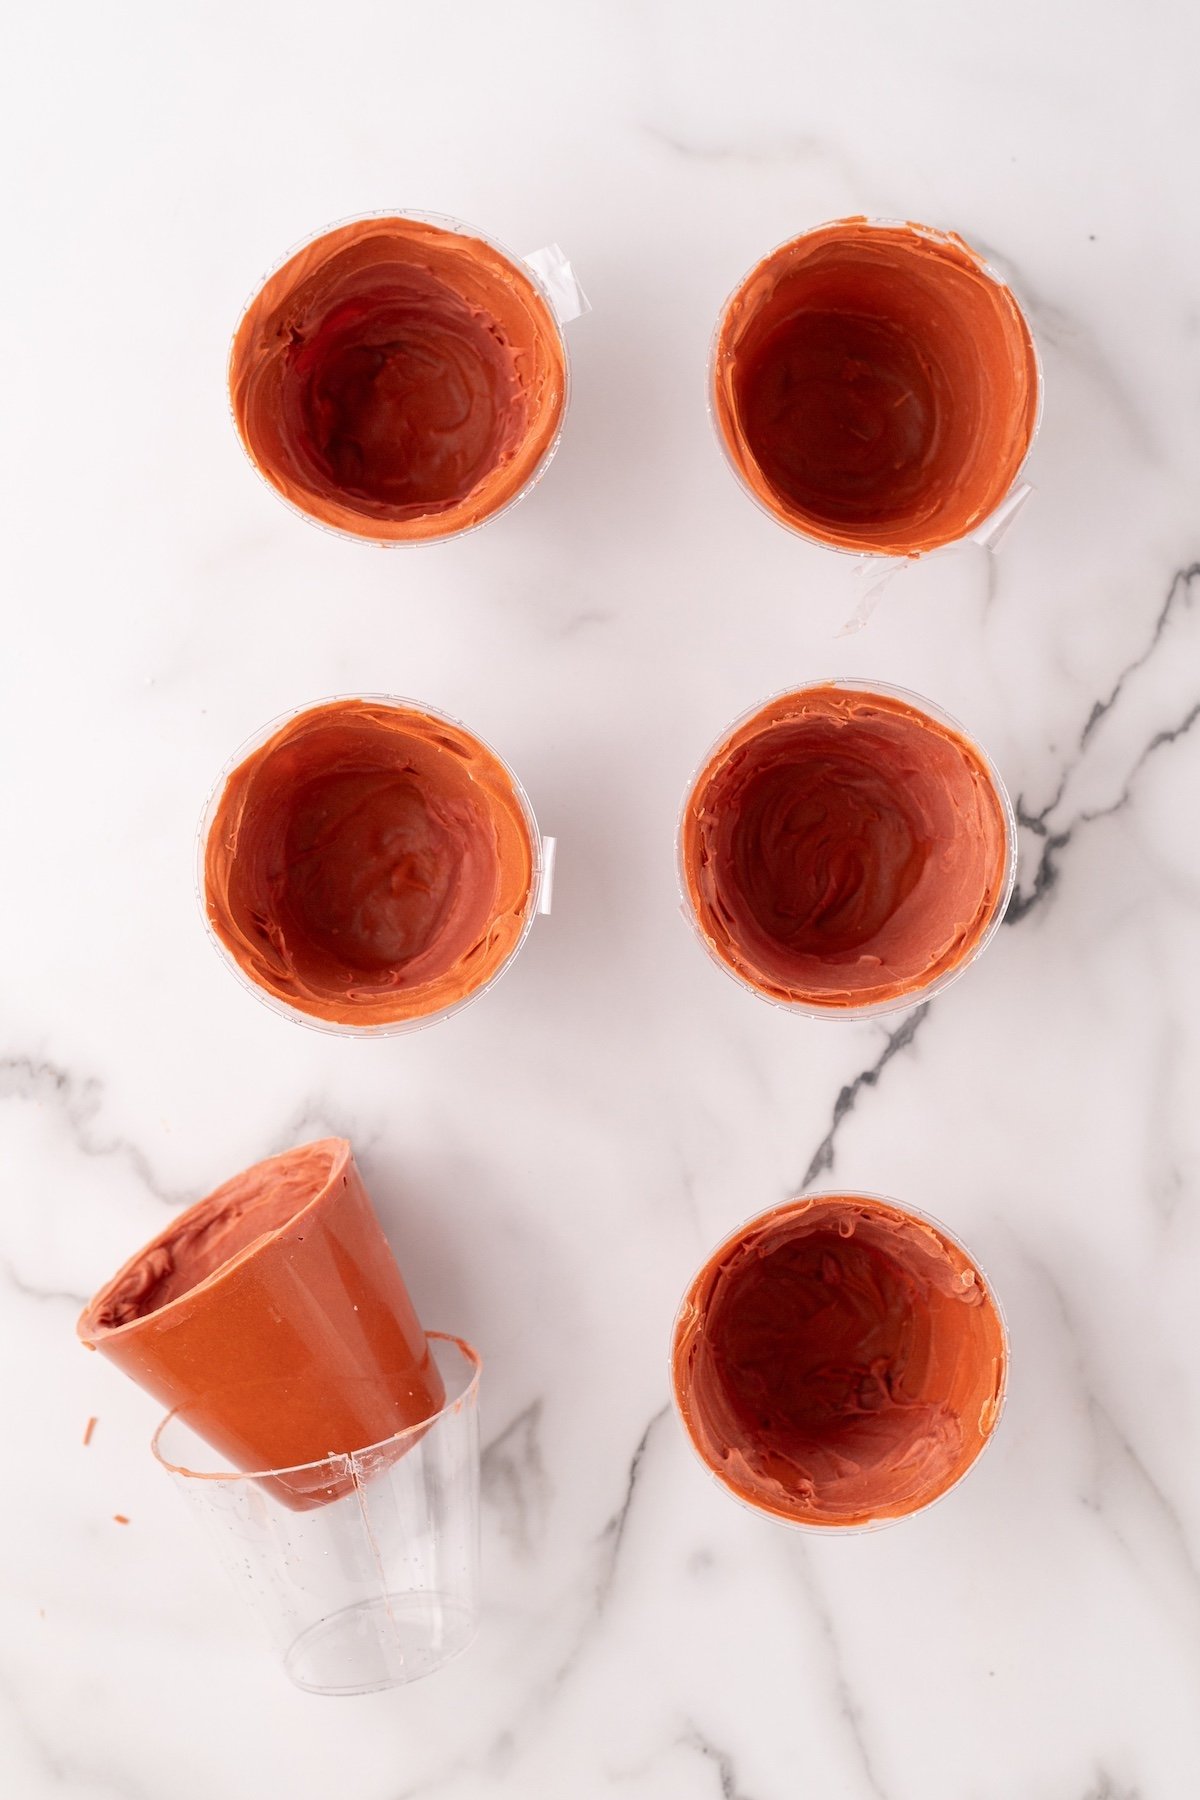
Pour a number of tablespoons of melted chocolate into the cup. Swirl it round to coat the whole inside evenly. Tilt the cup as wanted to get full protection.
Flip the cups the wrong way up on a baking sheet lined with parchment paper. Place them within the fridge for about quarter-hour or till agency.
Repeat the method so as to add one other layer of chocolate. This helps create a thicker, sturdier shell.
As soon as the chocolate hardens, fastidiously peel away the plastic cup. Take away the tape first, then gently pull the cup off the shell.
Make the Pudding Combination
In a mixing bowl, whisk the pudding combine and milk till the pudding thickens, about 5 minutes.
Fold in Cool Whip and crushed mini Oreos till mixed for a creamy, barely crunchy texture.
Switch the pudding combination right into a piping bag for simple meeting.
Assemble the Flowerpots
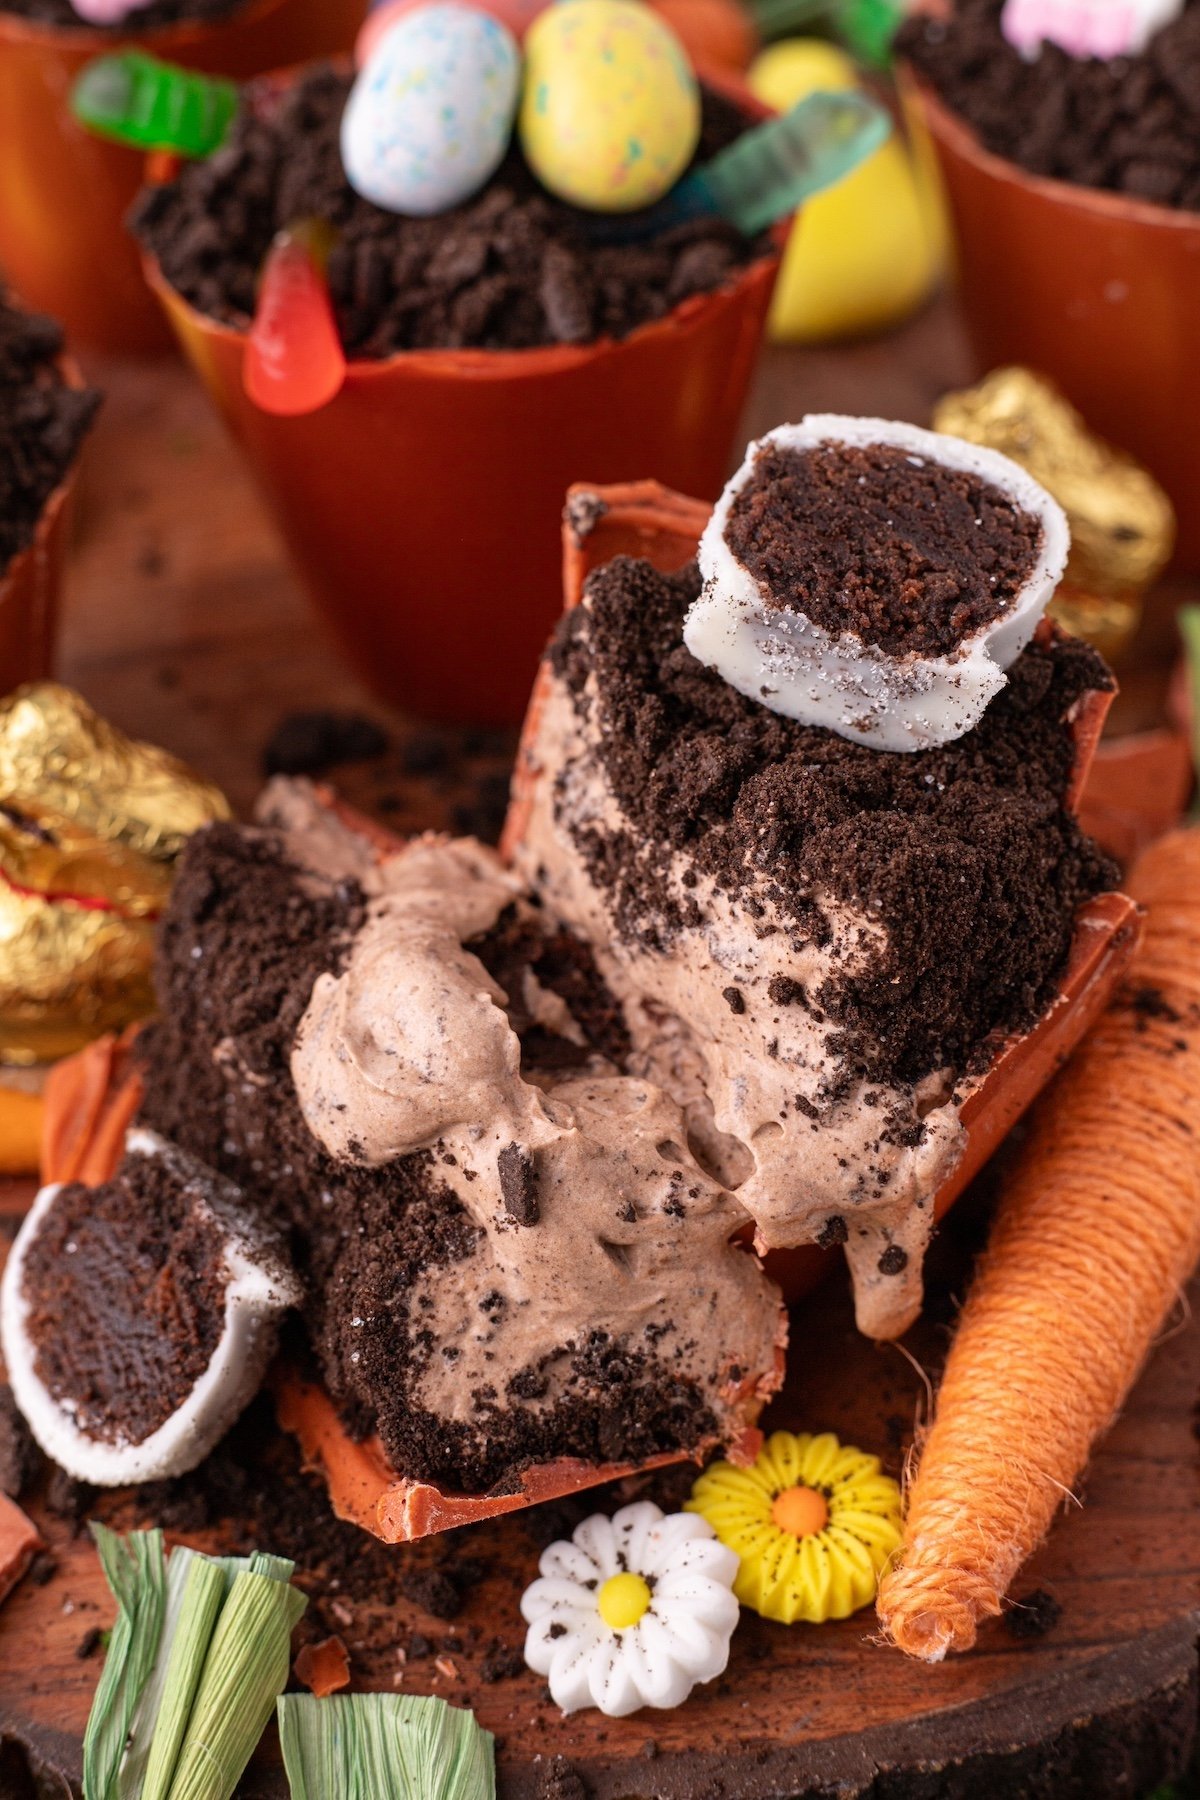
Place a brownie chunk on the backside of every chocolate shell.
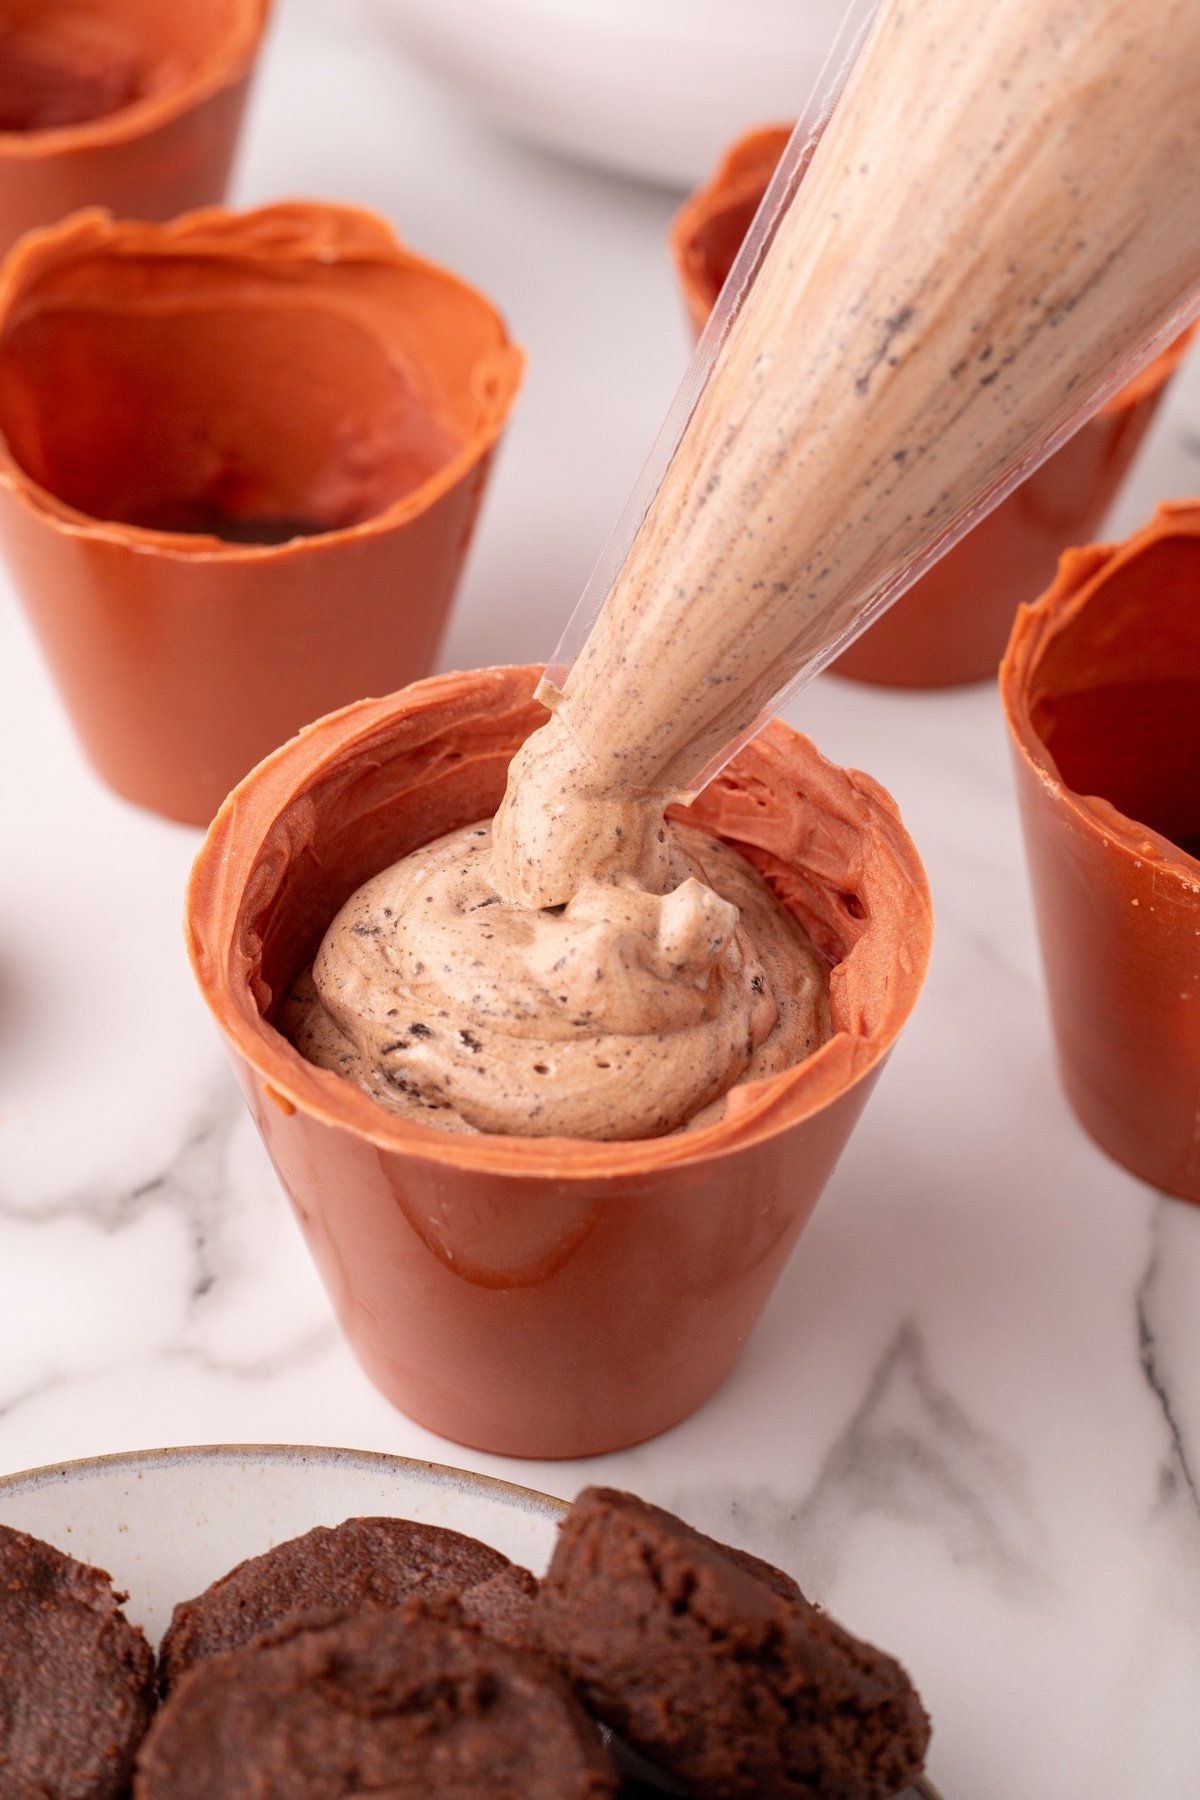
Pipe the pudding combination over the brownie, filling the shell nearly to the highest.
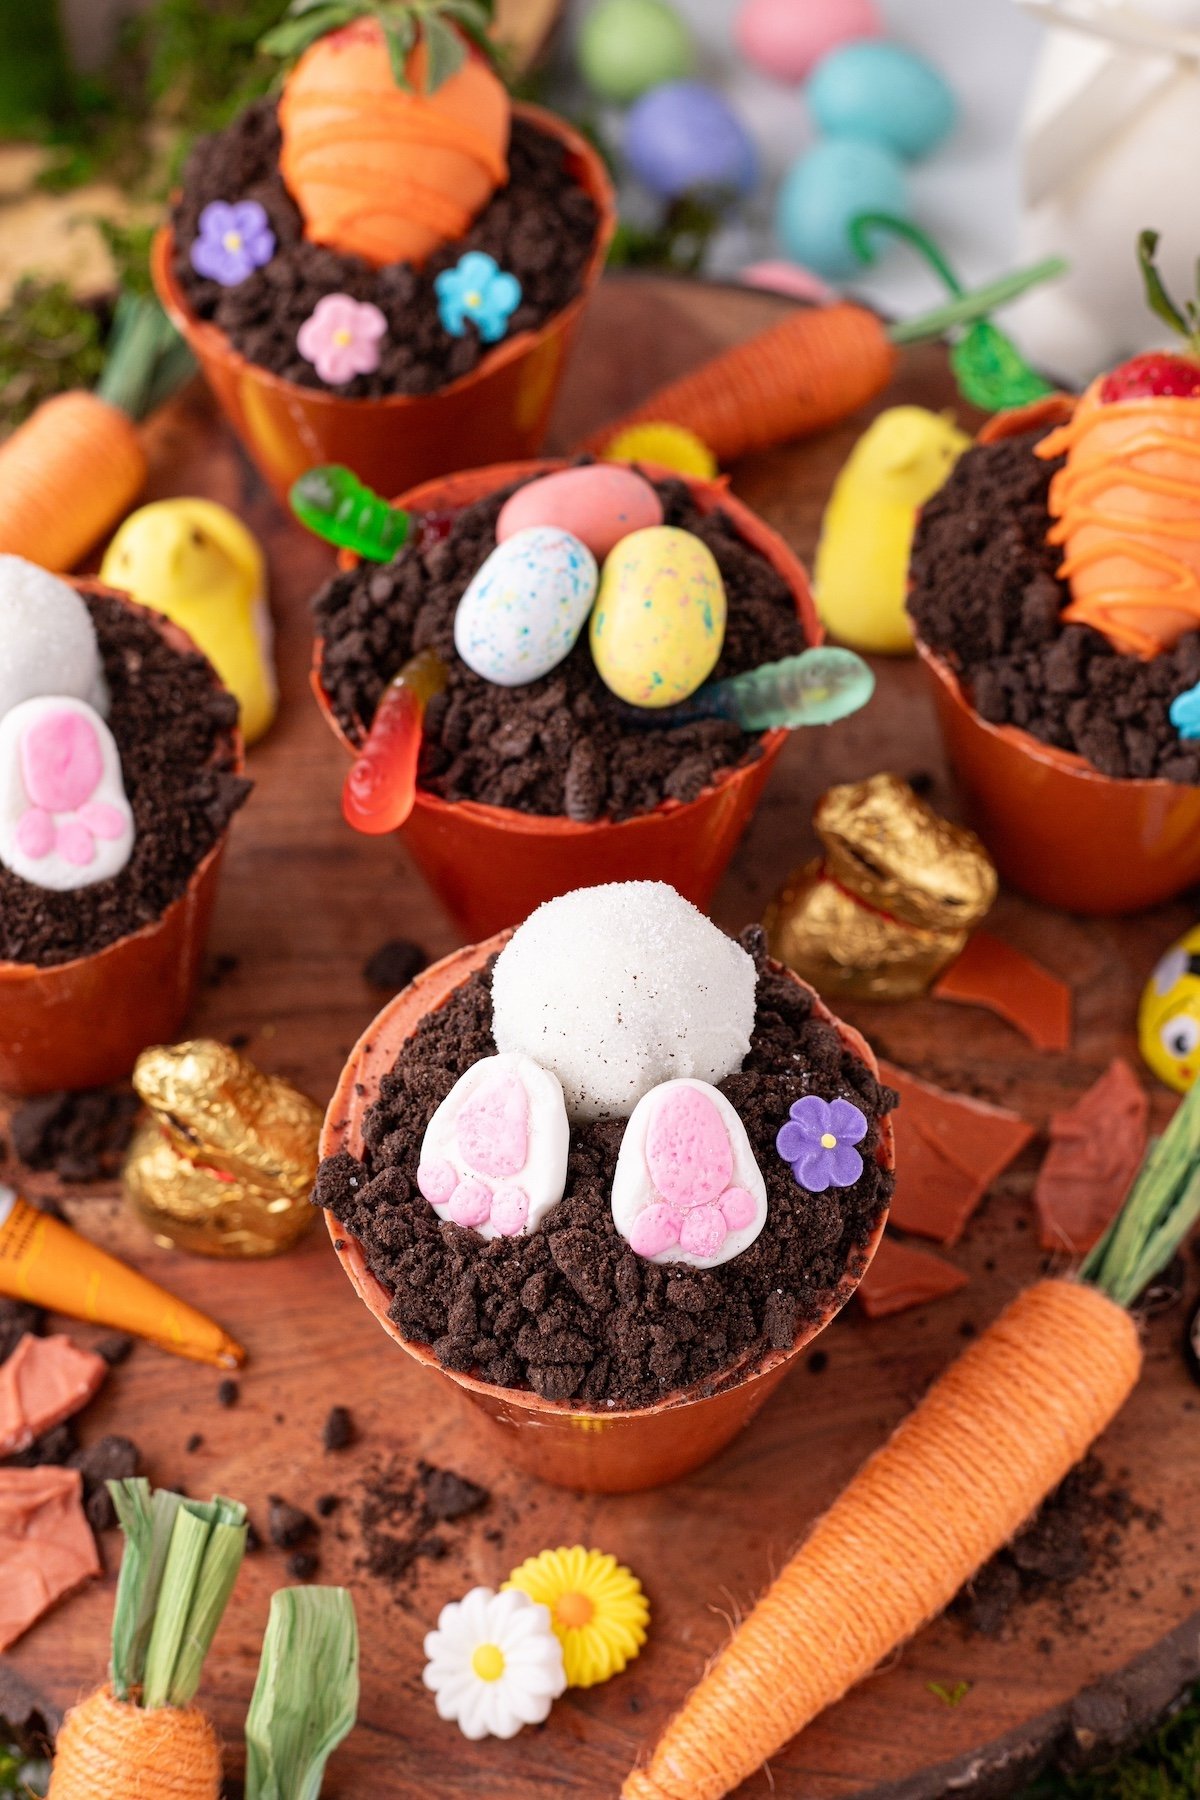
Sprinkle crushed Oreos on prime to appear to be grime.
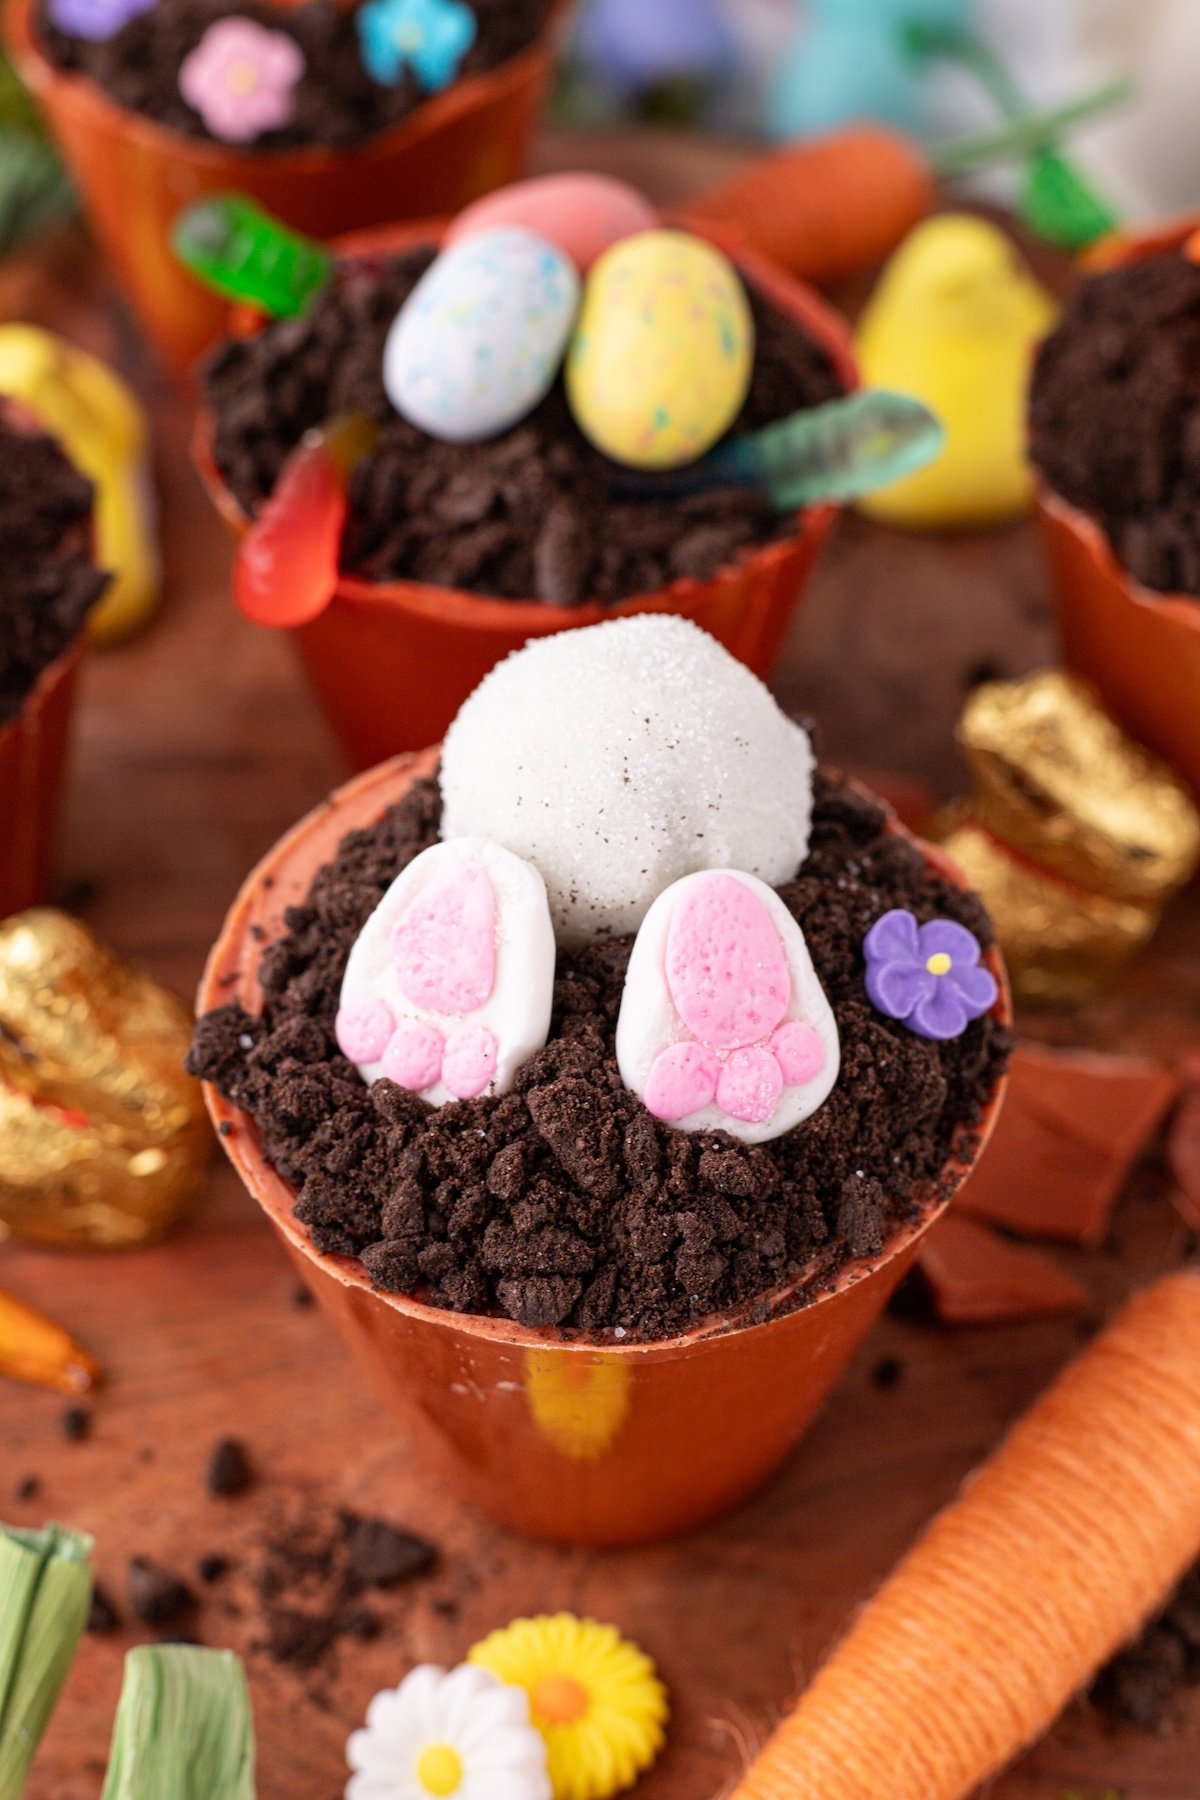
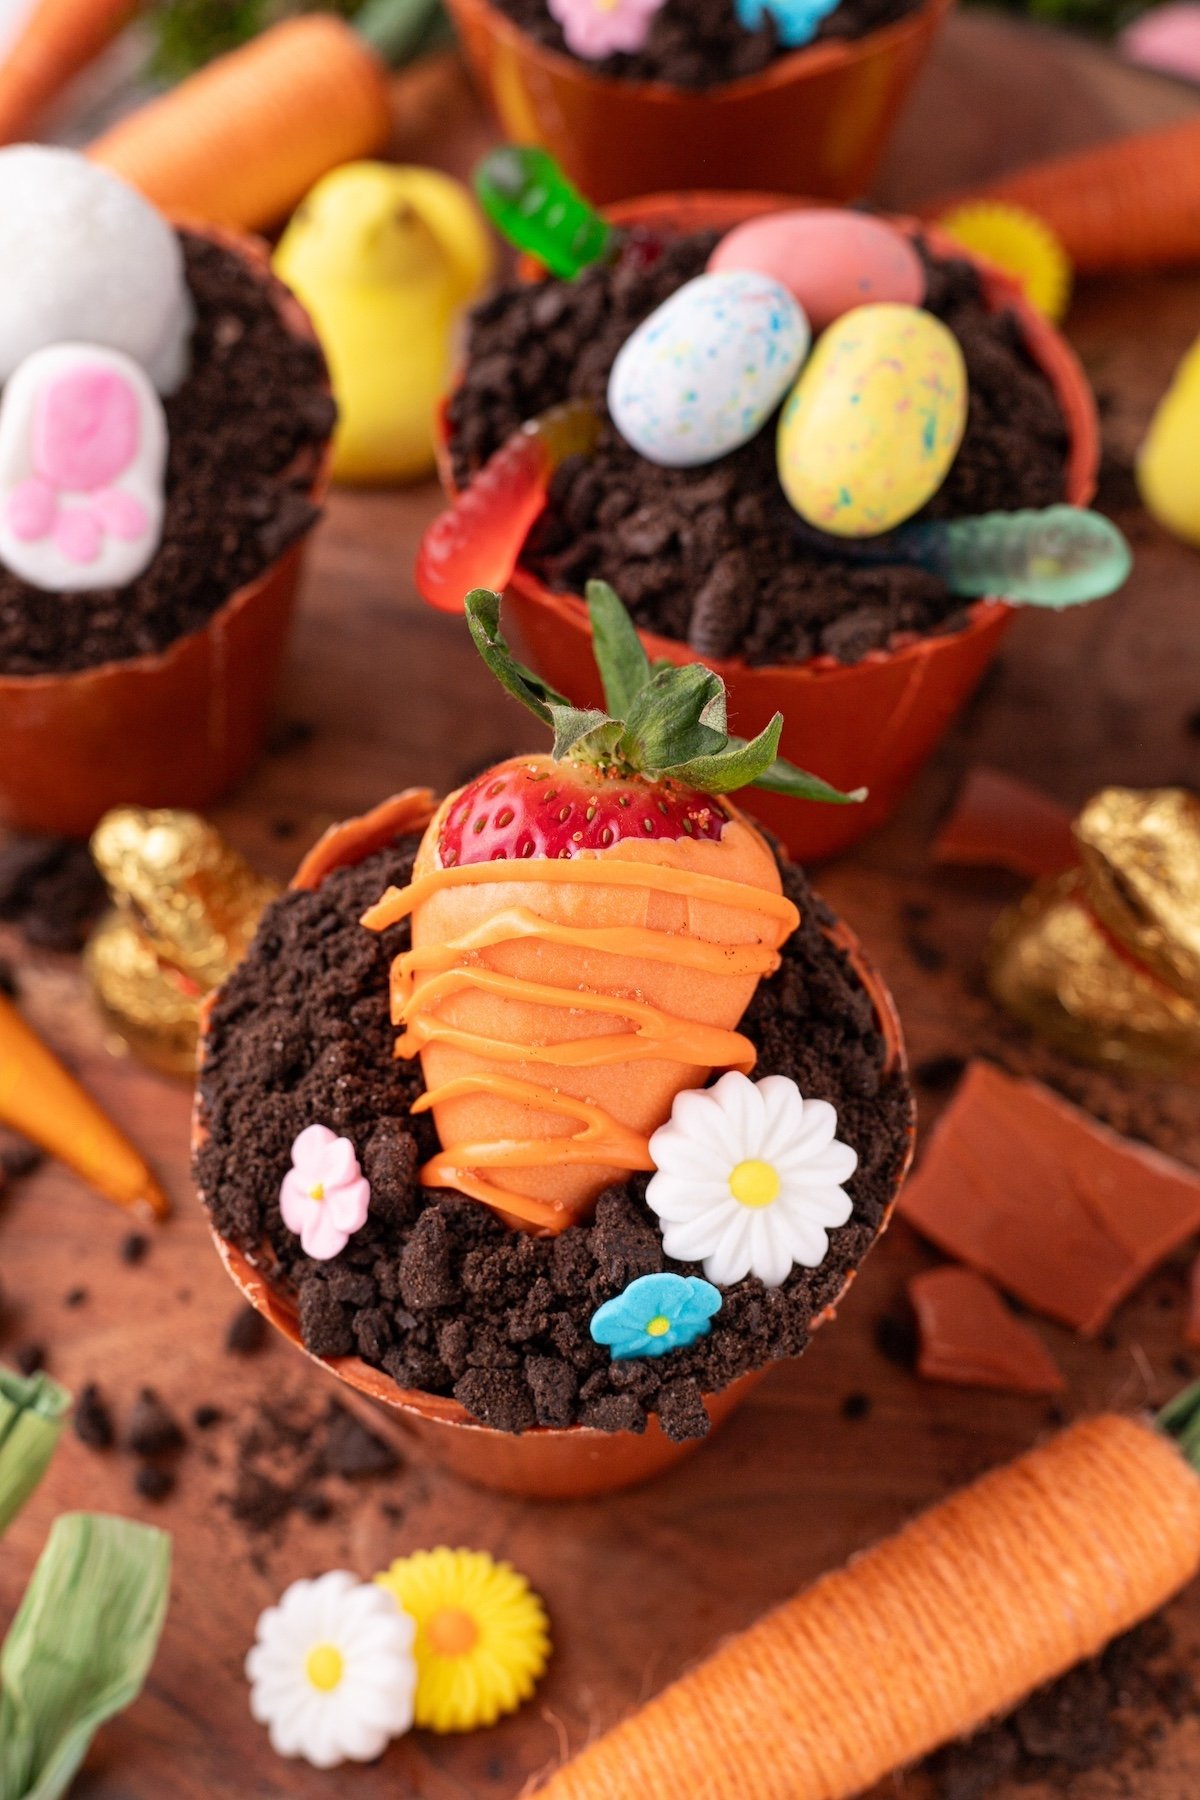
Add enjoyable decorations like gummy worms, edible flowers, chocolate-covered strawberries formed like carrots, and even sweet bunny tails. (Discover the main points for making the bunny butts within the recipe card)
Serve and Retailer
These are greatest served recent, however you may refrigerate them for as much as 2 days earlier than serving.
Take pleasure in your cute and scrumptious flowerpots!

Ideas for Assembling and Adorning Flowerpot Cupcakes
Need your flowerpot cupcakes to look picture-perfect?
- Layer, Layer, Layer: For additional depth, attempt including a second frosting layer earlier than sprinkling on the “soil.” This creates a extra polished look.
- Work with a Palette: Follow earthy tones—browns, greens, and smooth pinks—to maintain the design cohesive and sensible.
- Use Fondant for Ending Touches: Fondant is incredible for shaping detailed decorations, like mini flowers or leaves. You’ll be able to even use it to create a small backyard marker for added allure.
- Hold It Cool: Heat frosting and melting decorations can spoil your masterpiece. Chill your cupcakes for 10 minutes after frosting to set the designs in place.

Variations and Substitutions
Spring-Themed Variations
Is there something extra excellent for spring than pastel hues and fluttering butterflies?
- Pastel Frosting: Swap conventional chocolate pots for pastel-colored buttercream frostings. Use a piping bag to swirl smooth pinks, mild greens, or smooth yellows right into a floral design.
- Edible Extras: Add sweet butterflies or sugar flowers for a whimsical end. You’ll be able to even make tiny edible ladybugs for an additional backyard contact.
- Seasonal Thrives: Improve the spring vibe with mild decorations like these Valentine’s Day Cookie Cupcakes—simply replace the hearts for florals!
Themed For All Seasons
Why cease at spring? Flower Pot Cupcakes can adapt to suit any time of 12 months. With a bit creativity, they’ll be the life of each occasion:
- Halloween Twist: Substitute edible butterflies with sweet eyes or worms for a spooky flowerpot vibe. Use darker, richer tones like black, orange, or deep purple frosting.
- Christmas Cheer: Swap the “grime” for white sugar sprinkles to resemble snow. Add mini fondant poinsettias or a festive inexperienced swirl.
- Valentine’s Day: Use crimson velvet cupcakes as the bottom and embellish with tiny fondant roses or heart-shaped sprinkles.
What if My Chocolate Pots Crack?
This will occur, particularly if the chocolate layer is simply too skinny. Don’t fear—it’s a simple repair! Remelt some leftover chocolate and use it like glue to patch up the cracks. Enable it to harden earlier than dealing with once more.
Extra Spring Time Recipes
Extra Easter Concepts
Substances
- 2 cups Entire Milk
- 3.9oz. Immediate Chocolate Pudding
- 8oz. Cool Whip
- 1 ½ cups Crushed mini-Oreo
- 1 cup Crushed Oreo, with out filling
- Two Chunk Brownies
- 24 oz. Vanilla Almond Bark
- Plastic Wine Stemless Cups
- Tape
- Scissors
- Copper Meals Gel
- Orange Meals Gel
- Pink Meals Gel
- Fondant, for bunny ft
- Strawberries, optionally available for “carrots”
- Sugar Sprinkles
- Gummy Worms
- Candied Flowers
Directions
- Soften the almond bark in a microwave-safe bowl in 30-second intervals, stirring in
between till easy. Add coloring gel 3 drops of copper and 1-2 drops of orange,
and a couple of teaspoons of coconut oil to melted almond bark and stir, this will provide you with the
terracotta search for the flowerpot. - Lower a straight line down the plastic up. Place a bit of tape on the skin to maintain
it collectively and the chocolate from leaking out. This step will assist eradicating the
chocolate simply. - Pour a number of tablespoons of melted chocolate right into a plastic cup, swirling to coat the
inside utterly. Tilt the cup as wanted to evenly cowl the edges. - Place cups the wrong way up on a parchment-lined baking sheet and chill within the fridge
for about quarter-hour, or till agency. Repeat course of to be sure that the chocolate
is a thick layer. - As soon as hardened, gently peel away the plastic cup from the chocolate shell. Take away
tape and simply pull the plastic cup away from the chocolate shell. - Put together the chocolate pudding by whisking collectively pudding combine and milk till
thickened (about 5 minutes). - Fold in Cool Whip and mini crushed Oreo’s for a creamy texture.
- Place pudding in piping bag.
Assemble the Flowerpots
- Place a brownie chunk on the backside of every flowerpot.
- Pipe the pudding combination over the brownie chunk, filling the pot nearly to the highest.
- Sprinkle crushed Oreo cookies over the pudding to create a “grime” look.
- Add gummy worms, edible flowers, carrots “chocolate coated strawberries”, or
even bunny tails for adornment. - Serve and revel in!
- Serve instantly or refrigerate as much as 2 days till able to get pleasure from.
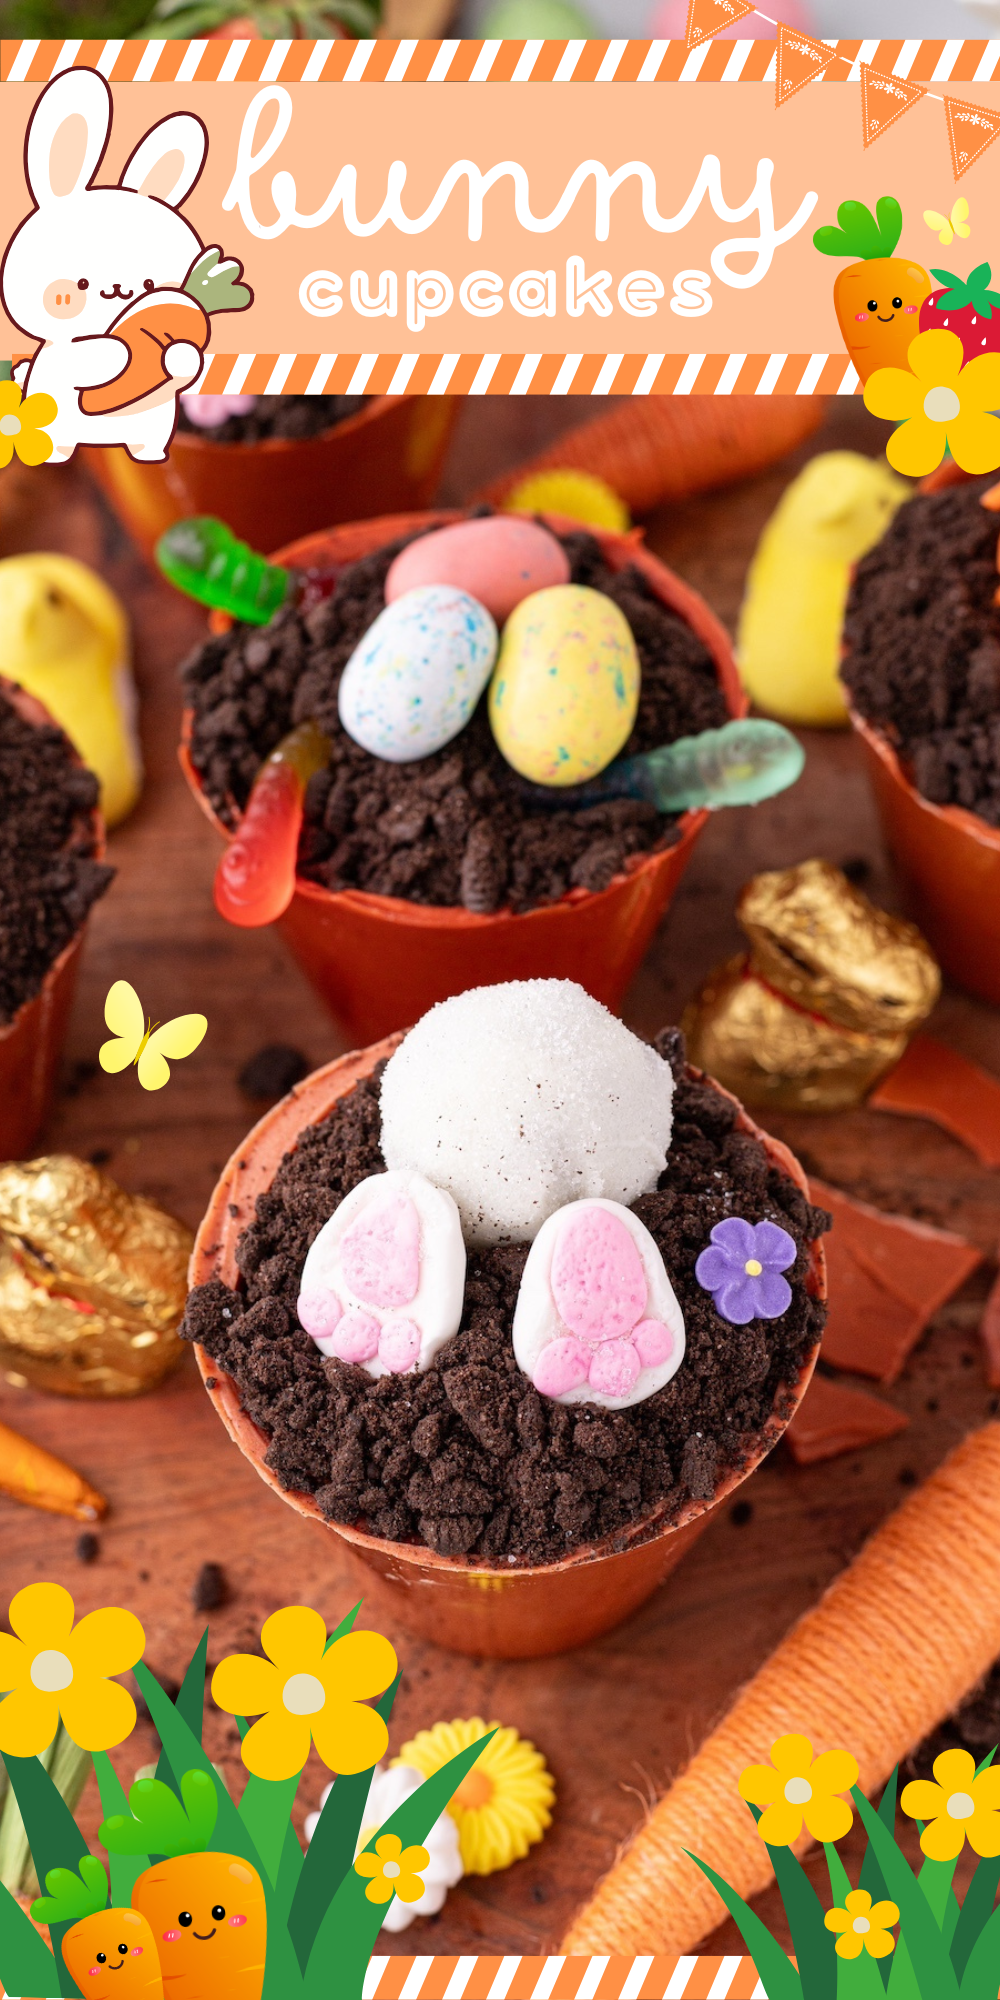
Tips on how to make fondant bunny paws and bunny tail
- Roll out white fondant to about ¼-inch thick. Form by hand two small ovals for the bunny ft.
- Barely flatten and spherical one finish to make them appear to be little paws.
- Roll out pink fondant and minimize out two small ovals for the paw pads. Connect one to
every foot utilizing edible glue or water. Connect three small circles close to the rounded
finish of every foot. - Place the fondant bunny ft on a parchment-lined tray and allow them to dry for about
half-hour in order that they maintain their form. - Roll brownie bites barely between your palms to make them extra rounded like a
bunny tail. - Dip every brownie into the melted almond bark, gently tapping off the surplus.
- Instantly sprinkle with white sprinkles to create a fluffy, fur-like texture.
- Place the dipped brownie bites onto a wax-paper-lined tray and allow them to harden at
room temperature for about quarter-hour (or refrigerate for 10 minutes for sooner
setting). - Place the bunny tail brownie chunk on prime of the “grime” (crushed Oreos).
- Add fondant bunny ft in entrance of the tail to make it appear to be a bunny burrowing into
the flowerpot!
")

")


")
